Description
What is Telegram?
- Telegram is a cloud-based instant messaging platform and communication app.
- It allows users to send and receive messages, make voice and video calls, and share photos, videos, documents, and other files.
- Telegram is available for smartphones running various operating systems, including iOS, Android, and Windows.
Application:
- We can set the ESP32 to send Alterts, Sensor data, notifications etc. directly on the Telegram.
- We can send message via Telegram to ESP32 for certain actions, i.e. Light control, Appliances control,etc.
Now Let’s start.
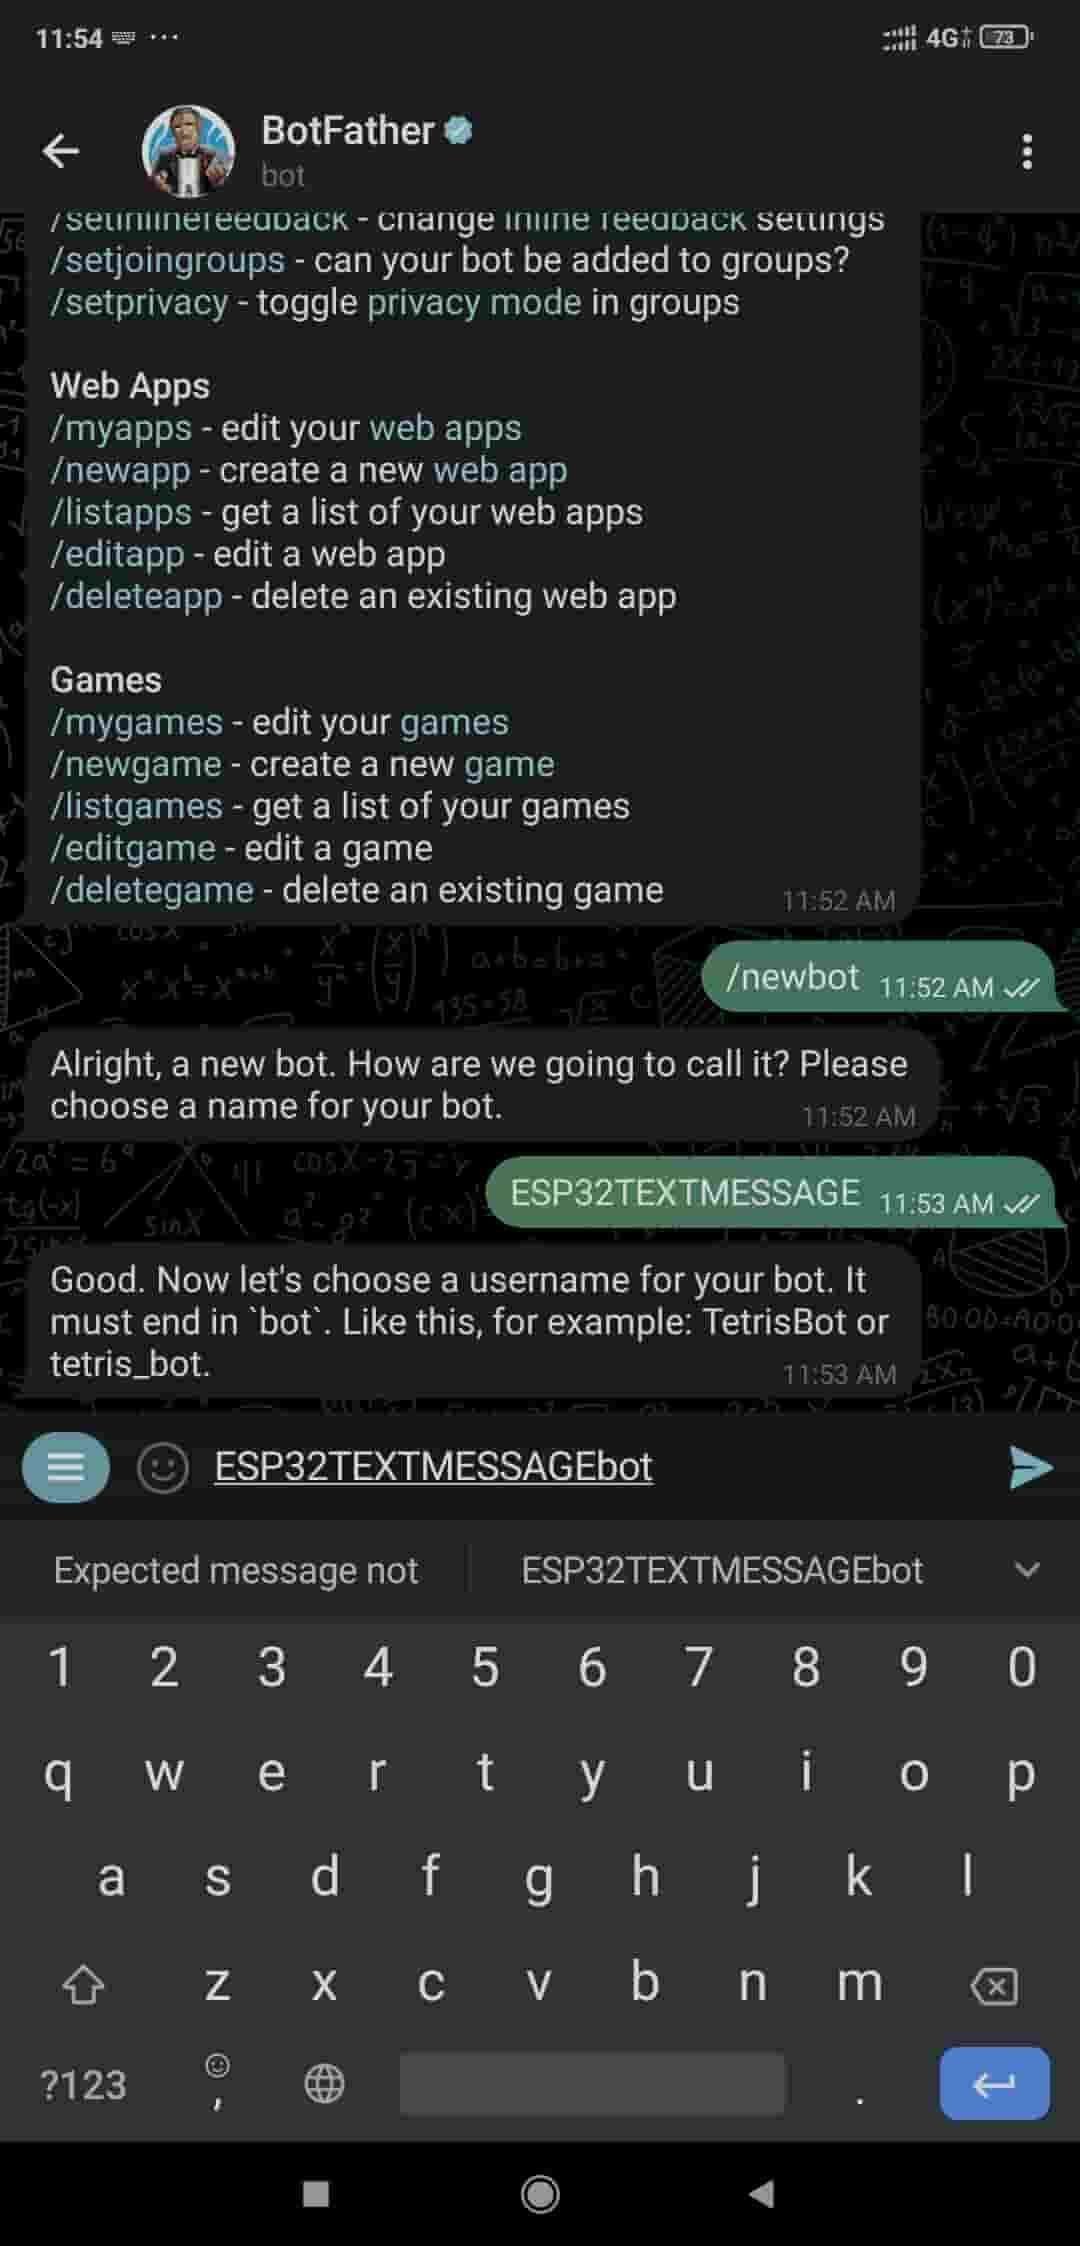
Step 1
Open telegram and find BotFather
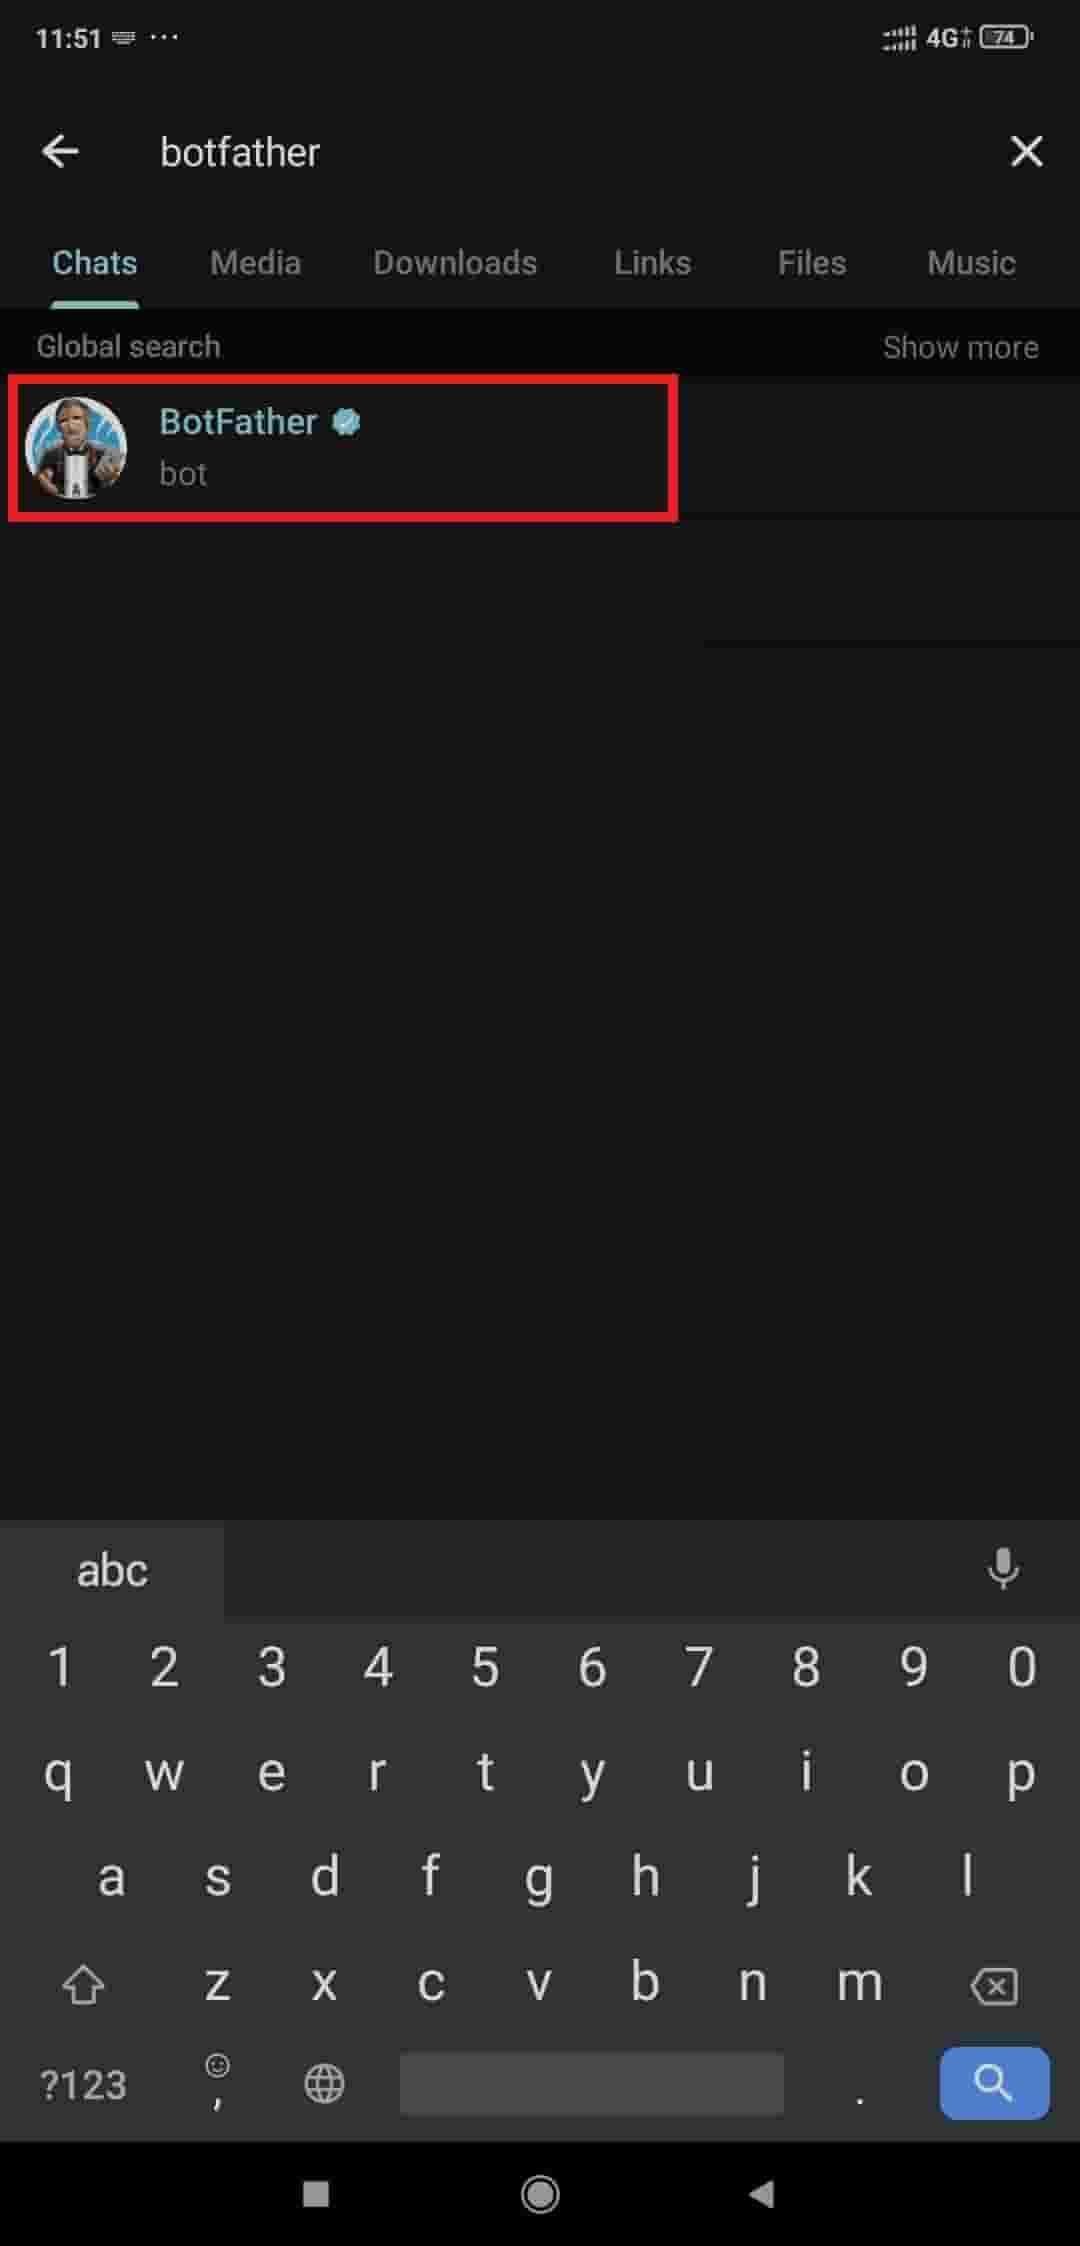
Now find the Botfather in the result and open it and click ok start.

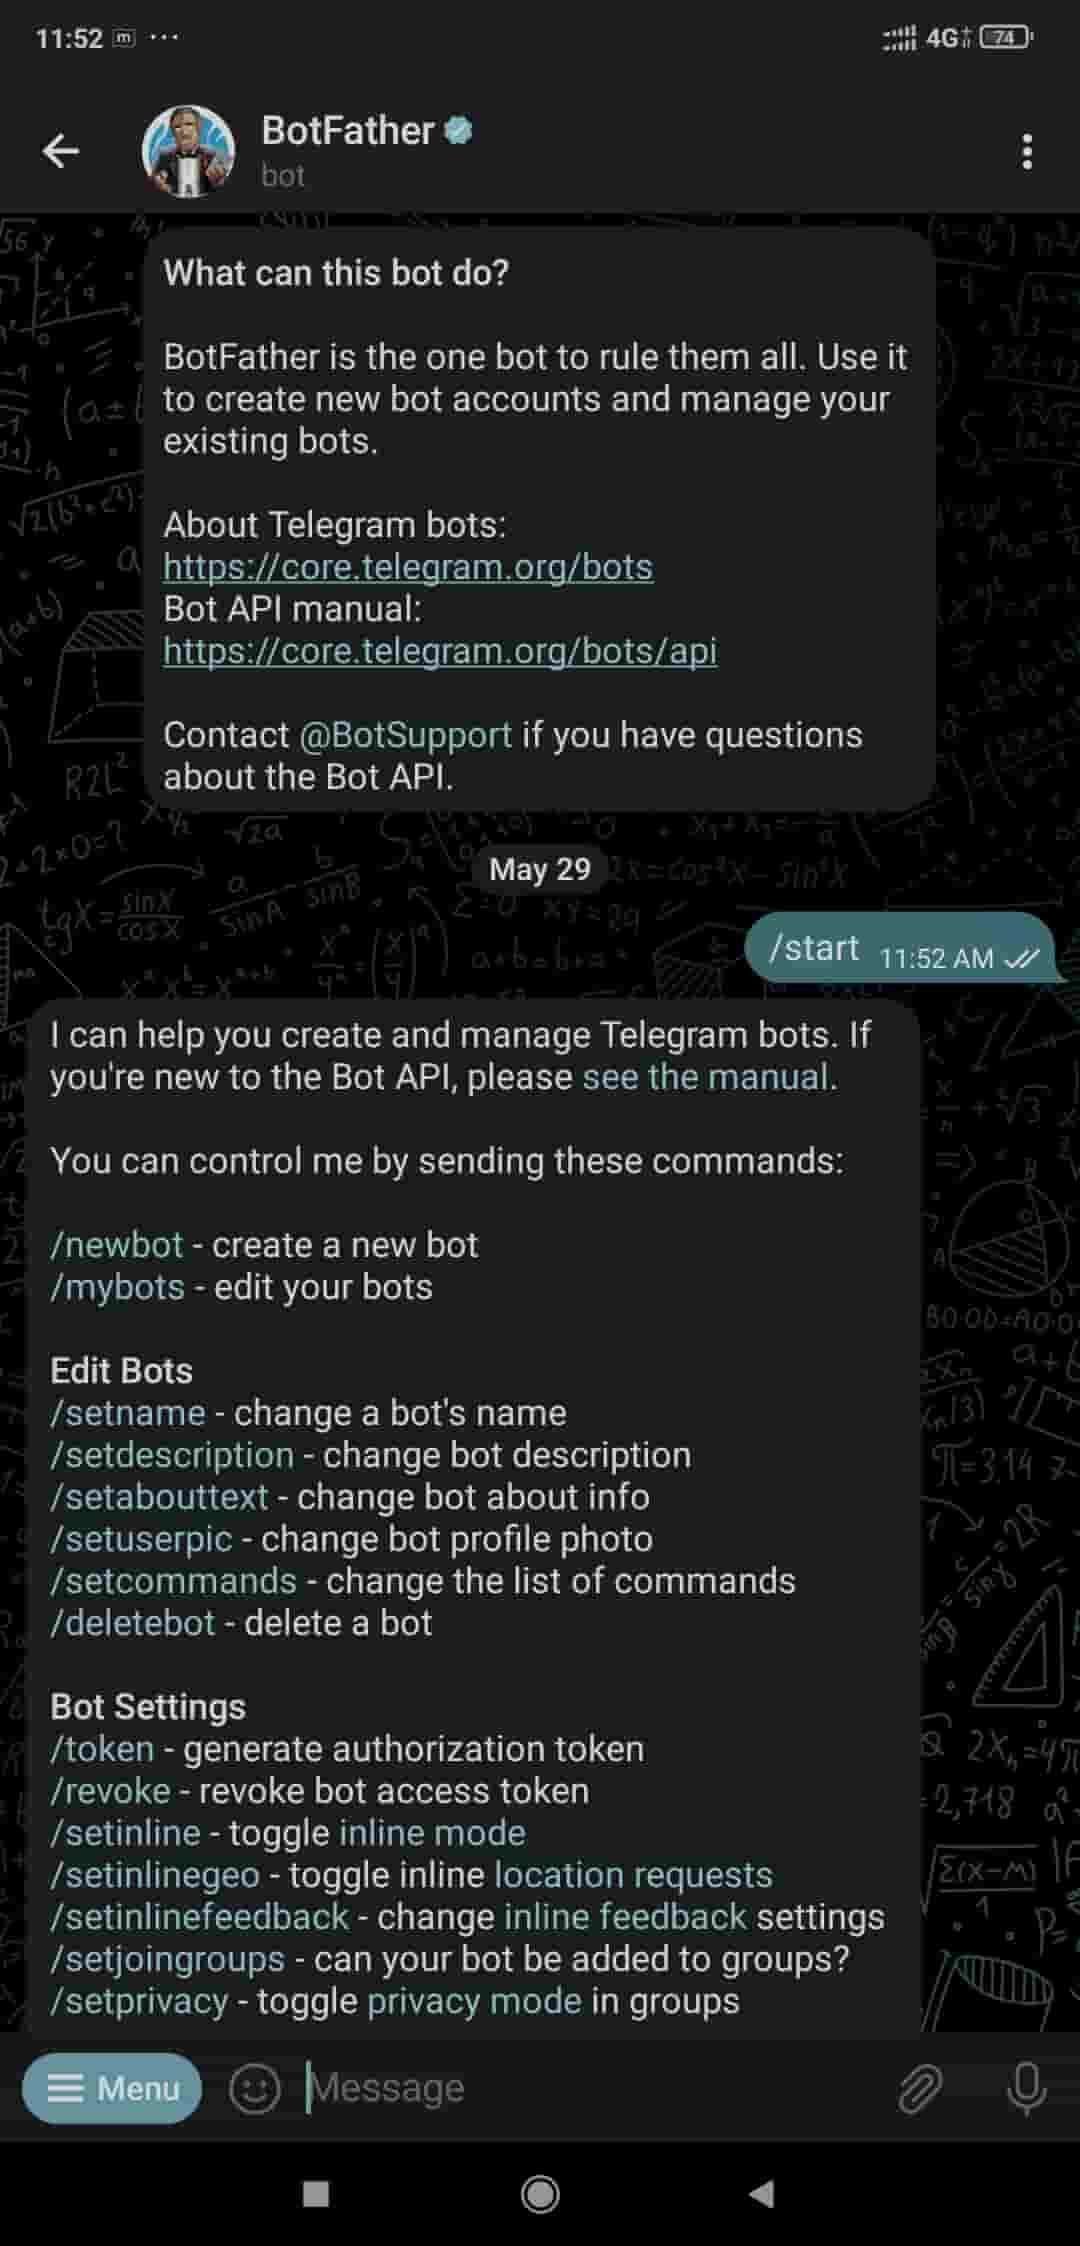
Now type /newbot and press enter.
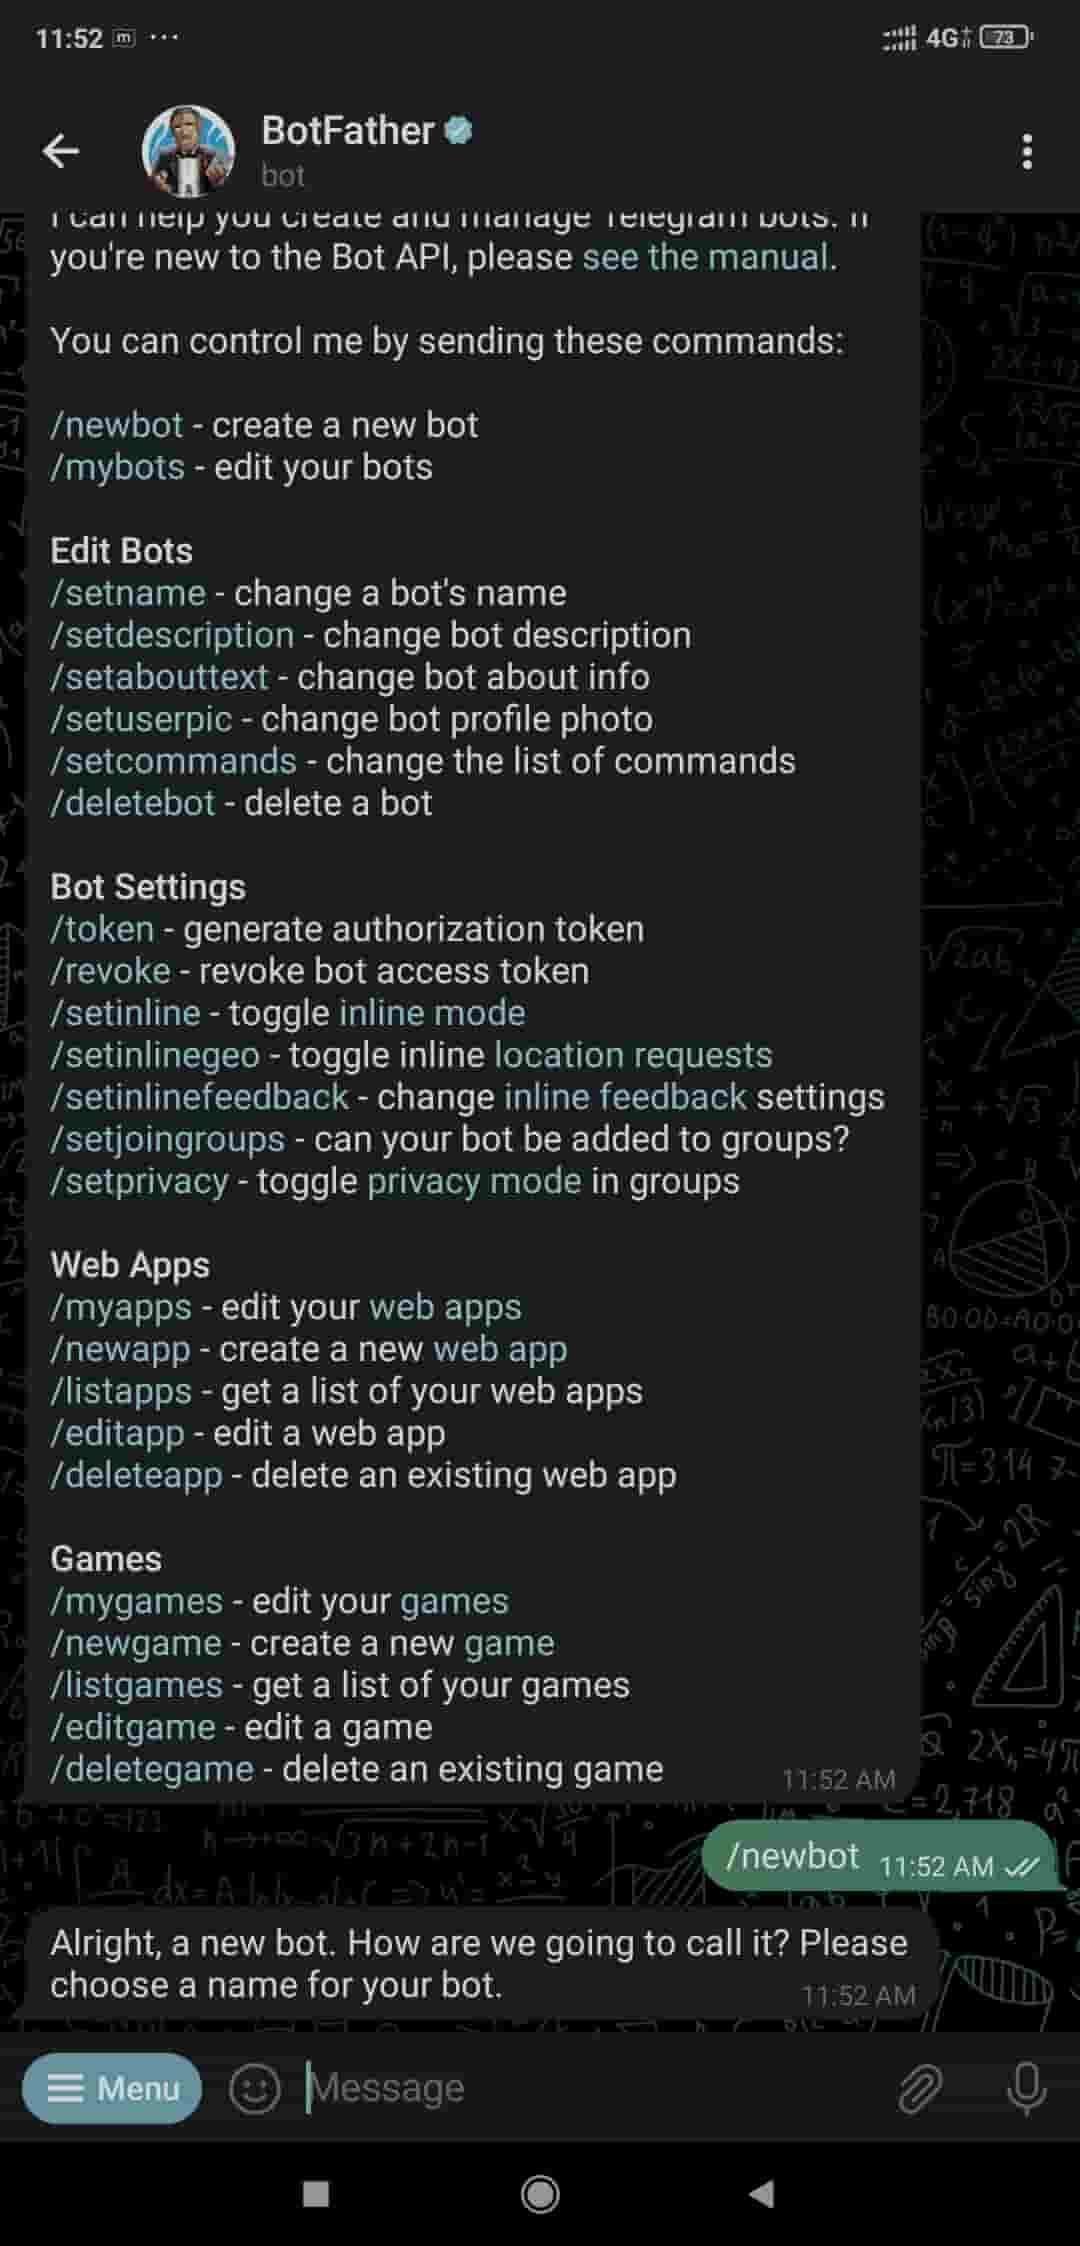
Now set the username for your bot.
Now set the username for your bot (it must me end with bot)
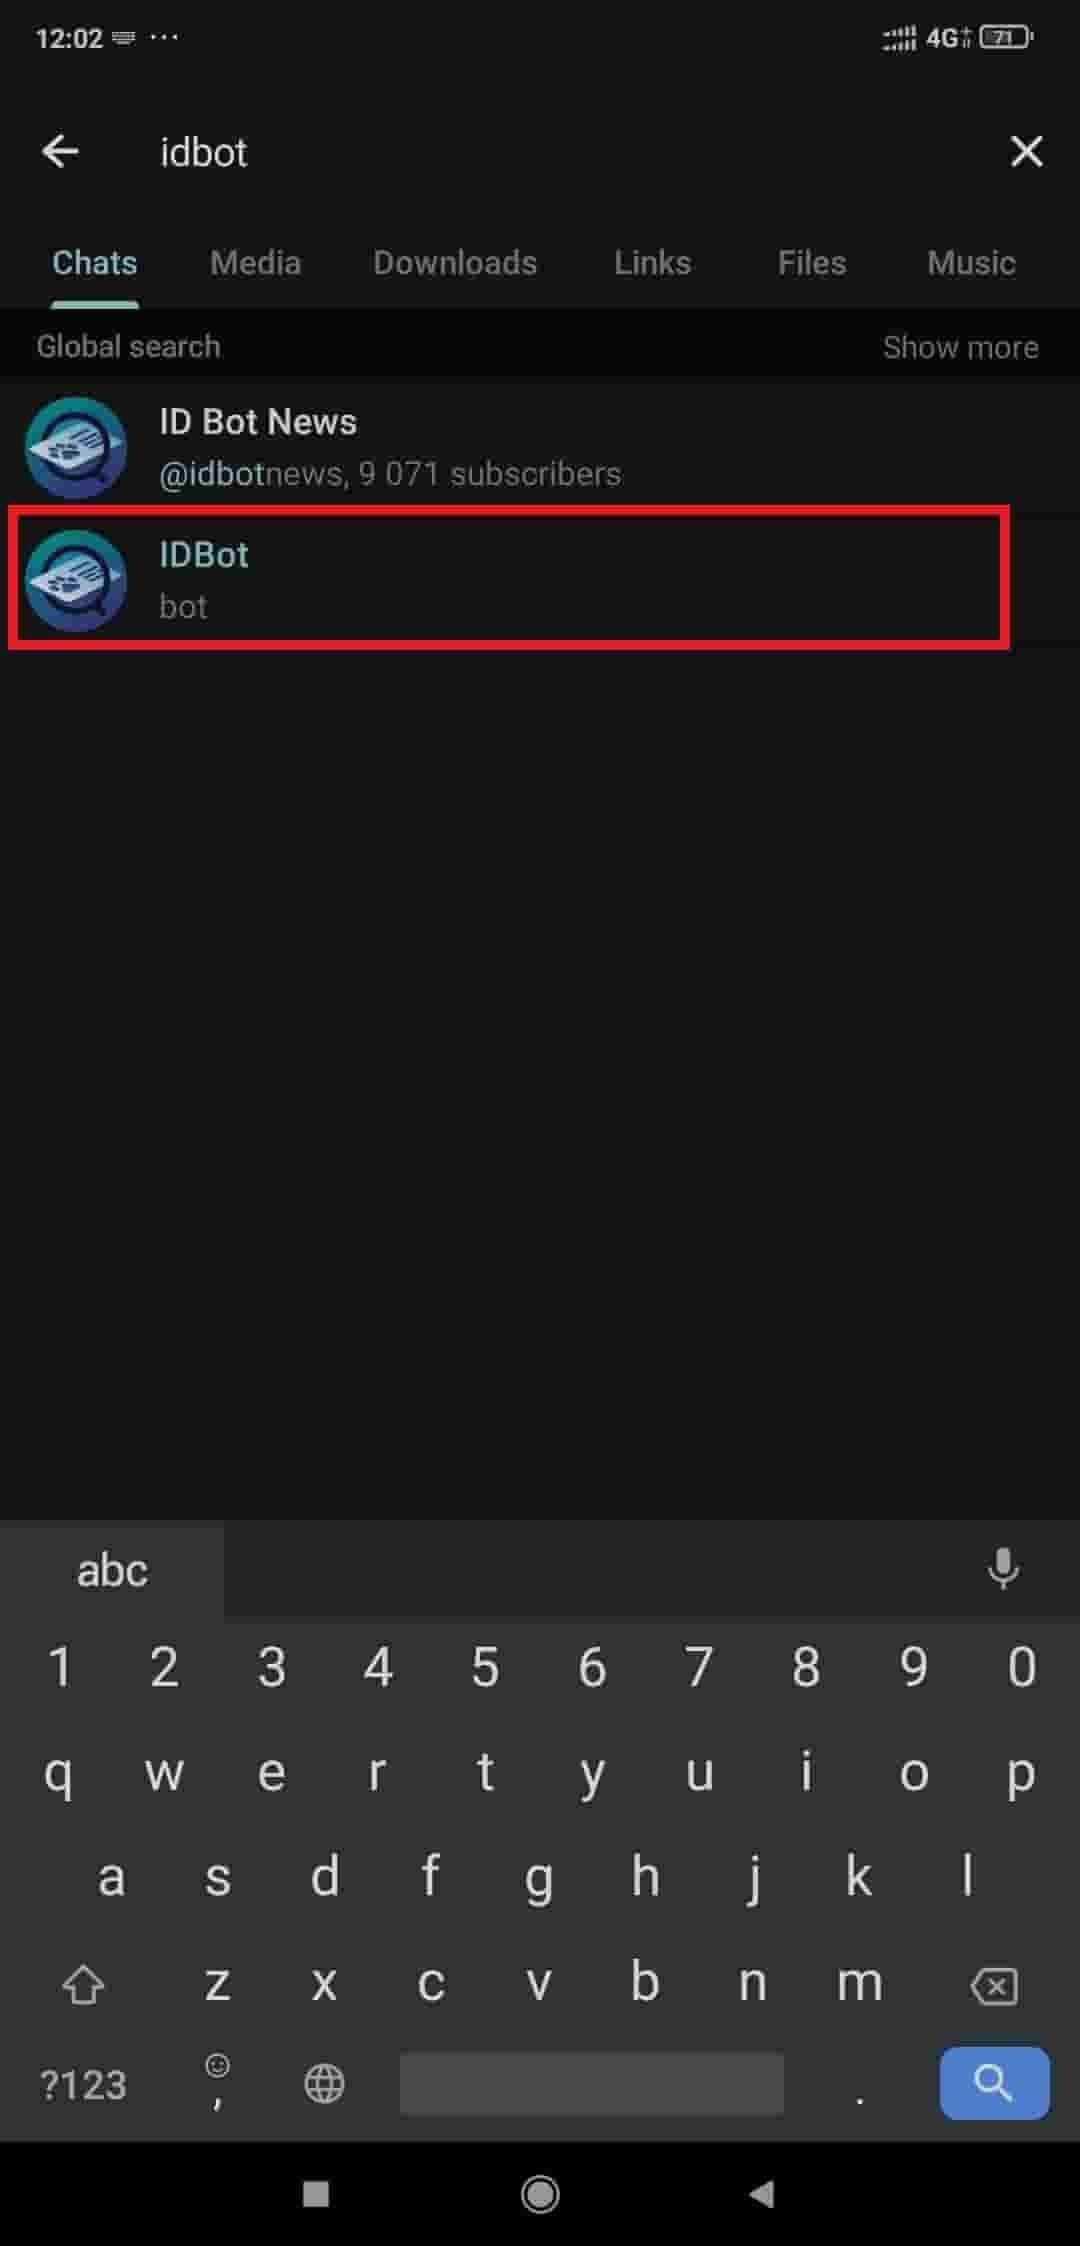
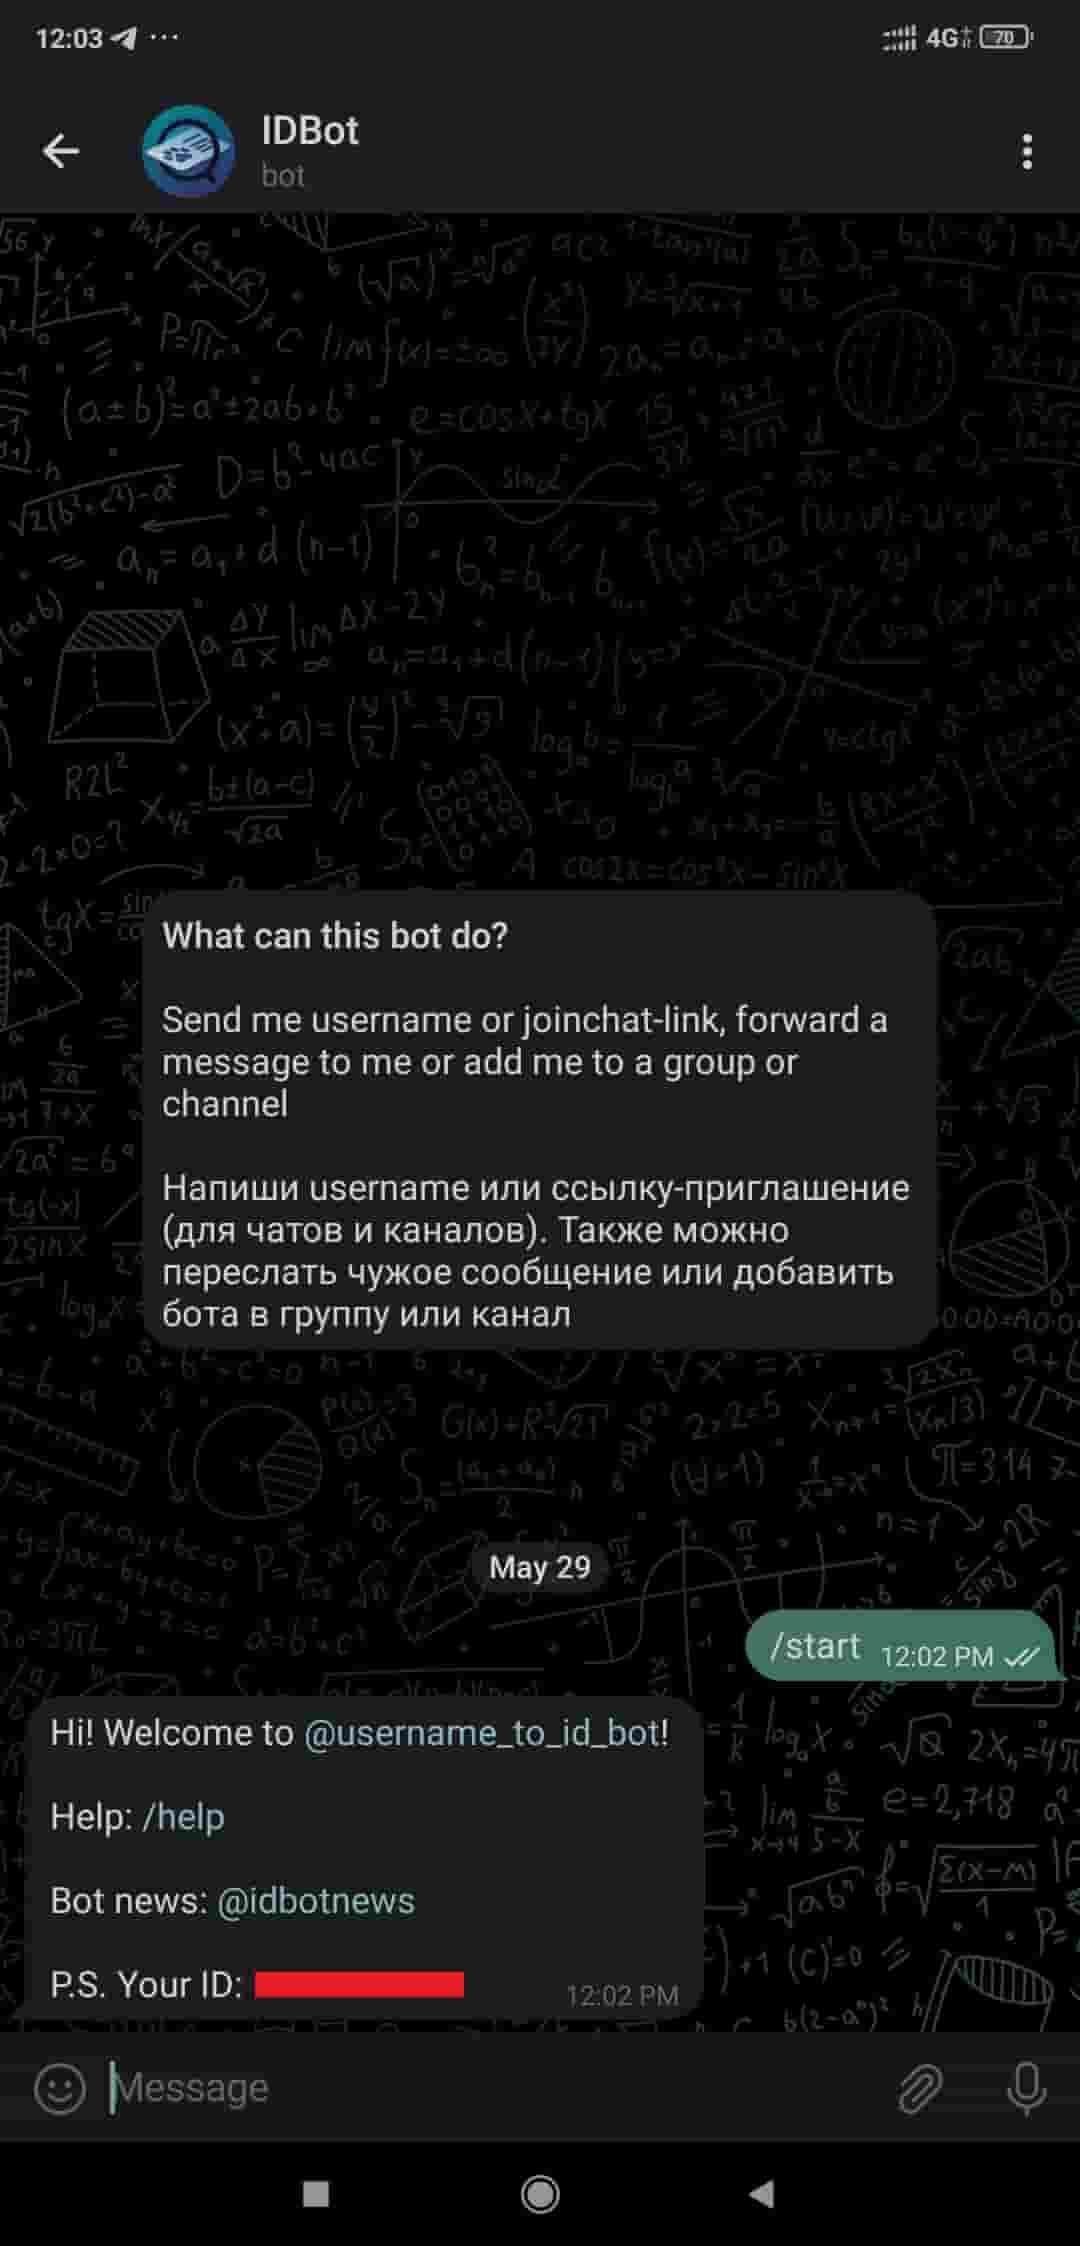
Now search IDBot in search and open it and clic on start.
The bot will return the ID after you click on start as shown in below.
Send the text message to telegram using ESP32
Here, we will be using witnessmenow’s Universal-Arduino-Telegram-Bot library from GitHub.
https://github.com/witnessmenow/Universal-Arduino-Telegram-Bot
Extract the library and add it to the libraries folder path of Arduino IDE.
For information about how to add a custom library to the Arduino IDE and use examples from it, refer Adding Library To Arduino IDE in the Basics section.
Send Telegram message using ESP32
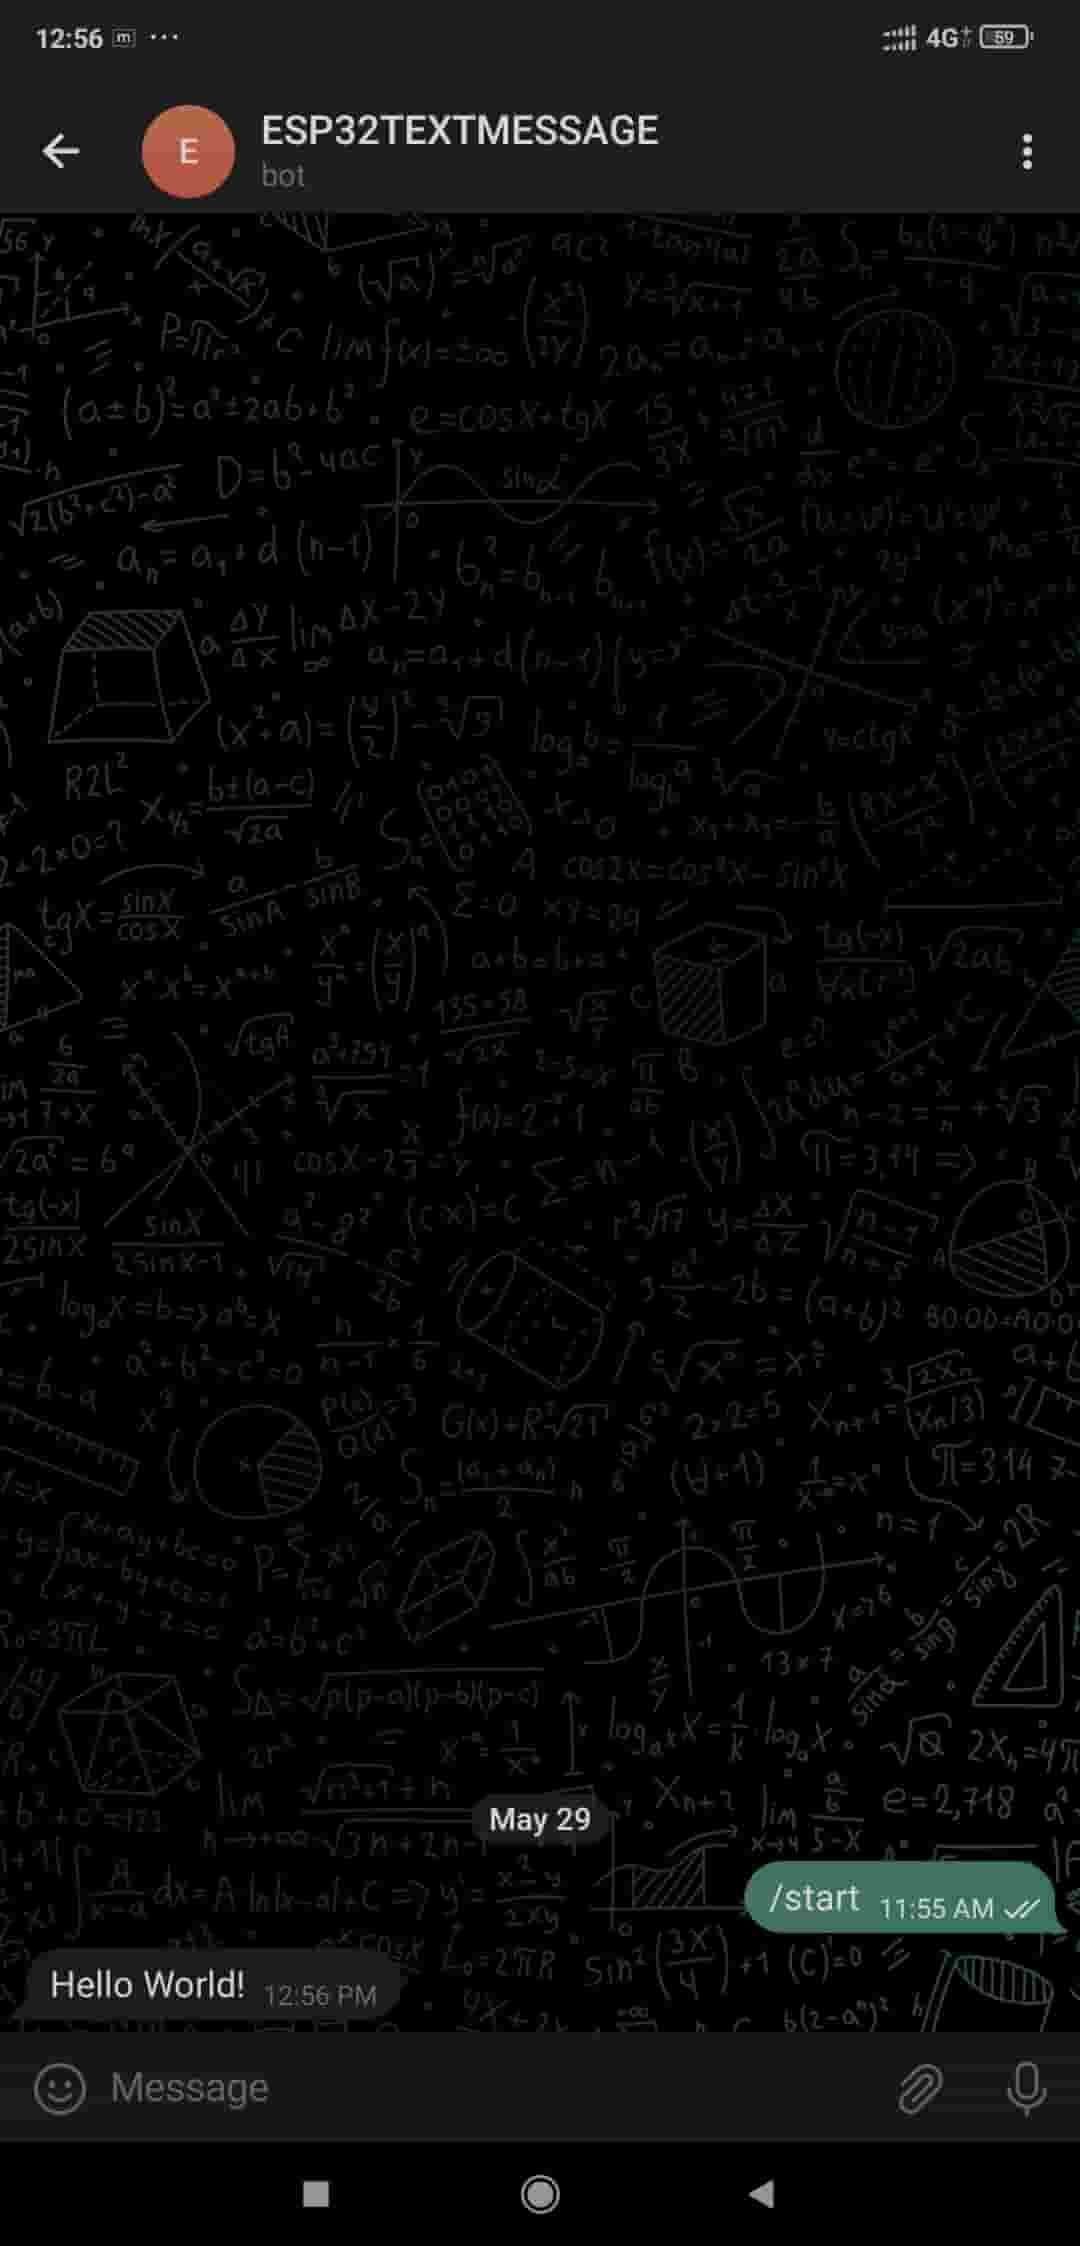
Let’s send the Hello World! Message to the telegram using the ESP32 and Arduino IDE.
Before uploading the code make sure you have added your SSID, Password, Token ID, and Chat ID as follows.
const char* ssid = "ADD_YOUR_SSID";
const char* password = "ADD_YOUR_PASS";
#define BOTtoken " XXXXXXXXXX:XXXXXXXXXXXXXXXXXXXXXXXXXXXXXXXXXXX"
#define CHAT_ID " XXXXXXXXXX"
Telegram Hello World code for ESP32
#include <WiFi.h>
#include <WiFiClientSecure.h>
#include <UniversalTelegramBot.h>

const char* ssid = "Your SSID";
const char* password = "Your PASS";

#define BOTtoken " XXXXXXXXXX:XXXXXXXXXXXXXXXXXXXXXXXXXXXXXXXXXXX"
#define CHAT_ID " XXXXXXXXXX"

WiFiClientSecure client;
UniversalTelegramBot bot(BOTtoken, client);

void setup() {
  Serial.begin(115200);
  WiFi.mode(WIFI_STA);
  WiFi.begin(ssid, password);
  client.setCACert(TELEGRAM_CERTIFICATE_ROOT);
  while (WiFi.status() != WL_CONNECTED) {
    delay(500);
    Serial.print(".");
  }
  Serial.println("");
  Serial.println("WiFi connected");


  bot.sendMessage(CHAT_ID, "Hello World!");
}

void loop() {}
let’s understand the code
Add the required libraries
#include <WiFi.h>
#include <WiFiClientSecure.h>
#include <UniversalTelegramBot.h>
Add your wifi credentials to connect ESP32 to wifi
const char* ssid = "Your SSID";
const char* password = "Your PASS";
set your bot token ID and Chat ID as given in telegram setup
#define BOTtoken " XXXXXXXXXX:XXXXXXXXXXXXXXXXXXXXXXXXXXXXXXXXXXX"
#define CHAT_ID " XXXXXXXXXX"
In the setup function, Set the baud rate to 115200
Serial.begin(115200); Now set the WiFi as an STA mode and connect to the given SSID and password
  WiFi.mode(WIFI_STA);
  WiFi.begin(ssid, password);
  client.setCACert(TELEGRAM_CERTIFICATE_ROOT);
  while (WiFi.status() != WL_CONNECTED) {
    delay(500);
    Serial.print(".");
  }
  Serial.println("");
  Serial.println("WiFi connected");
Set the message which sends to the telegram, here we have set the Hello World!
bot.sendMessage(CHAT_ID, "Hello World!");
Output
Downloads |
||
|---|---|---|
|
|
ESP32_telegram | Download |