Overview of Resistive Touch Screen
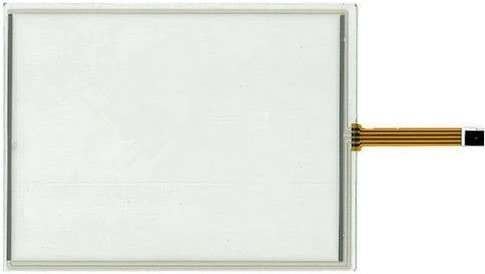
A resistive touchscreen is made up of two electrically resistive layers which face each other with a thin gap between them which is called the top layer and bottom layer.
The touchscreens require pressure as input, when we press the touchscreen, the top layer contacts the bottom layer and gives the changed resistance at the output.
It is Inexpensive, has better immunity to EMI, has good durability, works with any type of pressure, etc.
The resistive touch is used in many informative applications like PDS’a, hospital equipment, gaming equipment, factory automation, control applications, etc.
Resistive Touchscreen Measurement
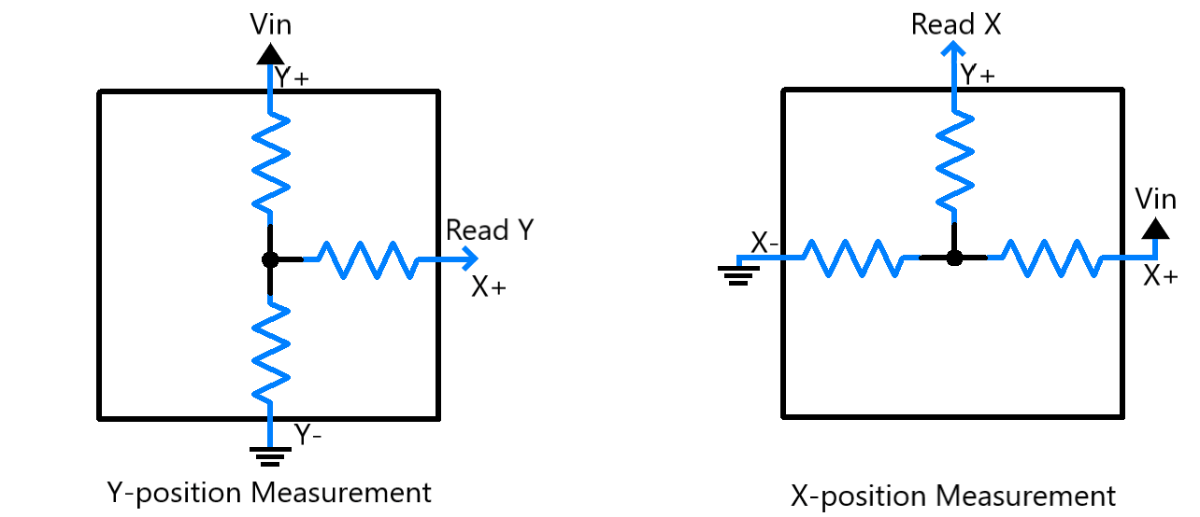
In 4-wire touch screen measurement, to get the Y position, apply the +VCC voltage to a Y+ and GND to Y- pin and set the X- pin in tri-state mode, and measure the Y position on the X+ terminal of the touch sensor as shown below figure.
To get the X position, apply the +VCC voltage to an X+ and GND to X- pins and set Y- in tri-state mode, and measure the X position on the Y+ terminal of the touch sensor as shown below figure.
When the screen is touched, the ADC reading corresponds to the position on one of the axes.
Note: Read the X and Y position readings at the same time for better accuracy, also capture the multiple readings very fast to allow smooth operation so that the user may move his finger rapidly across the touch screen to capture it easily.
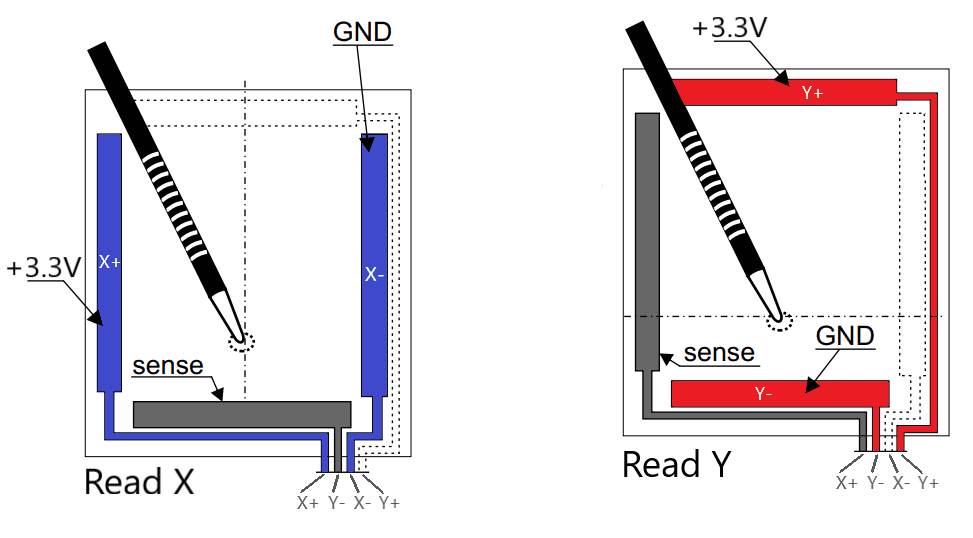
The below diagram is simple and easy to understand, in the first image verticle blue line shows the X axis and the horizontal red lines show the Y axis.
When we read the X position give the +3.3v and GND to X lines and read it from sense i.e. Y+ and keep the open Y- pin.
Also when we read the Y position give the +3.3v and GND to Y lines and read it from sense i.e. X+ and keep the open X- pin.
4-Wire Touch Screen Hardware Connection with ESP32
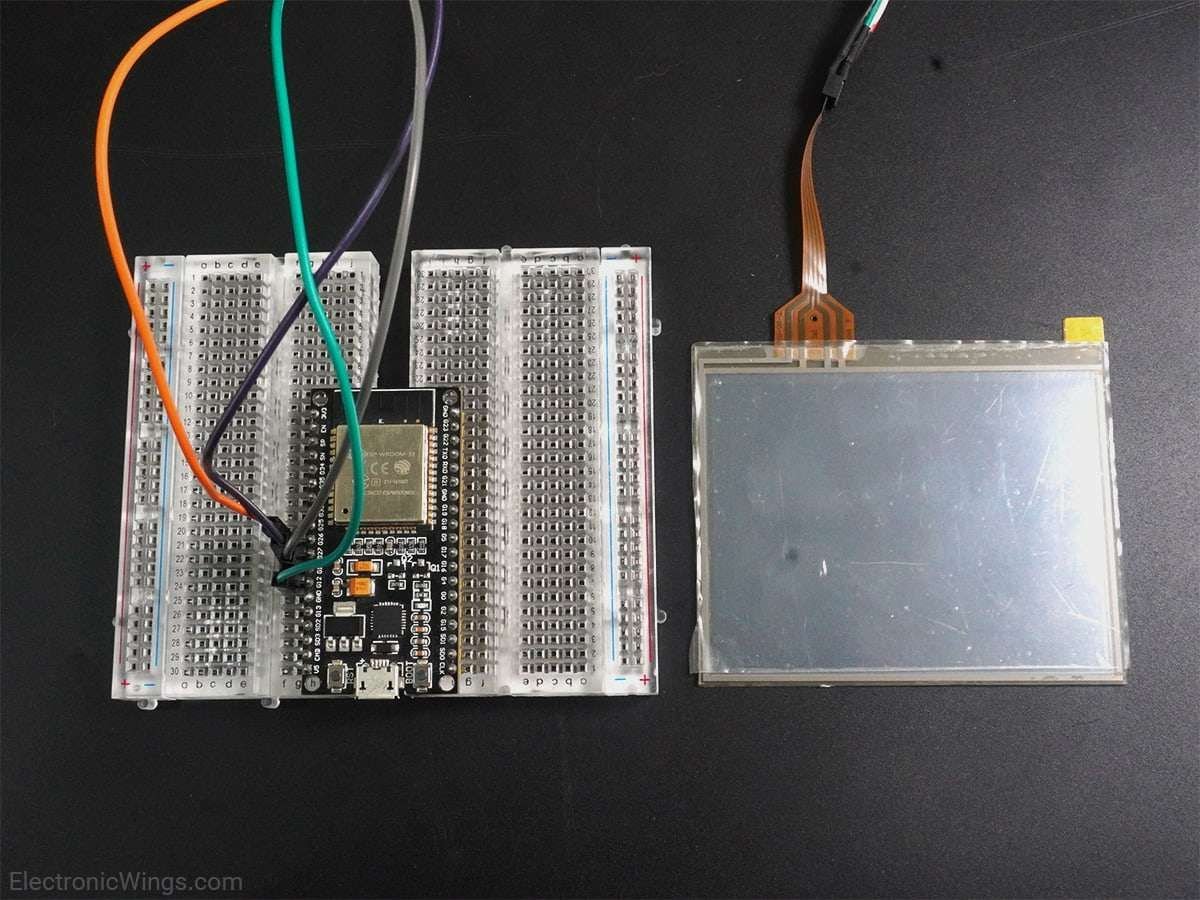
Display the X and Y coordinate on the serial monitor using ESP32
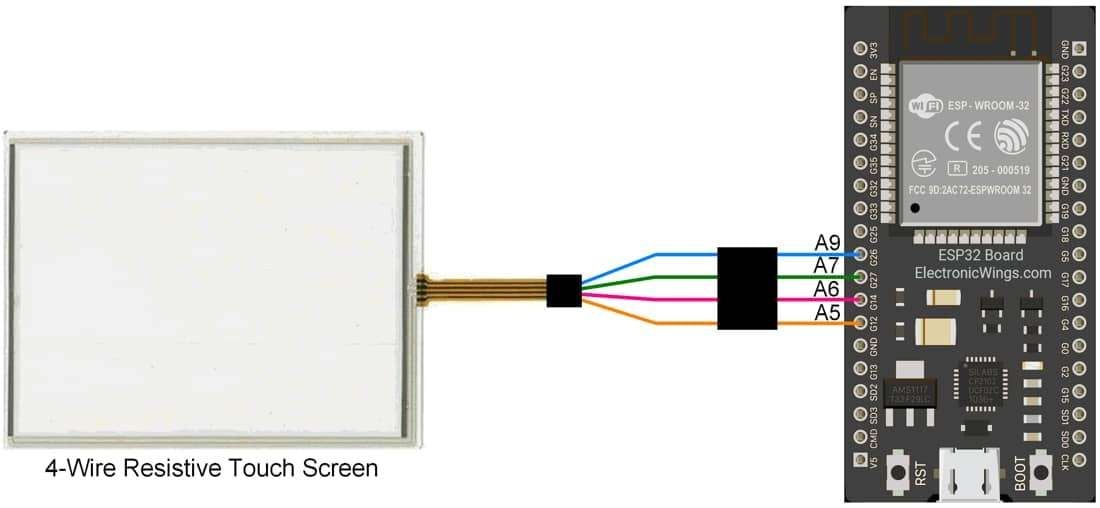
Here, we will be using the analog pins of ESP32 to process and read the analog voltages of the touch screen.
Here, we are using the four-wire resistive touch screen. The connection diagram of ESP32 with a four-wire resistive touch screen is shown in the above diagram
- As we know, While reading Y position, we connect Y+ to Vcc (ESP32 Pin: Output, HIGH) and Y- to GND i.e. (ESP32 pin: Output, LOW).
- Also we have disconnect X-, for that we need to put it's corresponding pin to tristate mode.
How to Put ESP32 GPIO in Tristate Mode (Disconnect mode)
- Simply we can set this pin as input which has high impedance, however if outside circuit has higher resistance, still it will interfere.
- According to the official Documentation from ESP, To put the pin in Tri-State mode, we have to make the pin OutPut_Open_Drain and High.
- Which will completely disconnect the pin i.e. put it in Tri-sate.
Open Drain Output Code Example
pinMode(Y2, OUTPUT_OPEN_DRAIN);
digitalWrite(Y2, HIGH); //Set Y2 in in tri-state mode
// Note if we digitalWrite(Y2, LOW) then it will be connected to GND
Code for 4-Wire touch screen using ESP32
const int X1 = 26;  /* ADC2-9 */
const int X2 = 27;  /* ADC2-7 */
const int Y1 = 14;  /* ADC2-6 */
const int Y2 = 12;  /* ADC2-5 */

#define Xresolution 240
#define Yresolution 288

void setup(){
   Serial.begin(9600);
}

void loop(){
  int X,Y;
   pinMode(Y1,INPUT);
   pinMode(Y2, OUTPUT_OPEN_DRAIN);
   digitalWrite(Y2, HIGH); //Set Y2 in in tri-state mode
   pinMode(X1,OUTPUT); digitalWrite(X1,HIGH);
   pinMode(X2,OUTPUT); digitalWrite(X2,LOW);

   /*Reads X axis of touch screen*/
   X = (analogRead(Y1))/(4096/Xresolution); //Reads Y axis touch position

   pinMode(X1,INPUT);
   pinMode(X2, OUTPUT_OPEN_DRAIN);
   digitalWrite(X2, HIGH); // Set X2 in in tri-state mode
   pinMode(Y1,OUTPUT); digitalWrite(Y1,HIGH);
   pinMode(Y2,OUTPUT); digitalWrite(Y2,LOW);

   /*Reads Y axis of touch screen*/
   Y = (analogRead(X1))/(4096/Yresolution); //Reads X axis touch position

   /*Display X and Y on Serial Monitor*/
   Serial.print("X = ");
   Serial.print(X);
   Serial.print(" Y = ");
   Serial.println(Y);
   delay(100);
}
- Now upload the code. (While uploading the code make sure your ESP32 board is in the boot mode.)
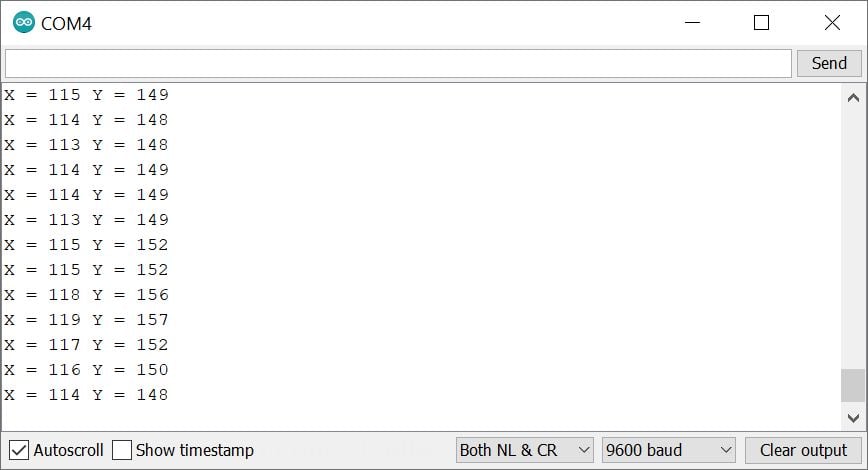
- After uploading the code open the serial monitor and set the baud rate to 9600 to see the output.
Touch screen Output on Serial Monitor
Let’s understand the code
The sketch begins by defining the ESP32 pin to which the 4-wire touchscreen is connected.
const int X1 = 26;  /* ADC2-9 */
const int X2 = 27;  /* ADC2-7 */
const int Y1 = 14;  /* ADC2-6 */
const int Y2 = 12;  /* ADC2-5 */
Define your X and Y resolution of the screen, our touchscreen resolution for X is 240 and Y is 288
#define Xresolution 240
#define Yresolution 288
In setup function
We have initiated the serial communication with a 9600 Baud rate.
void setup(){
   Serial.begin(9600);
}
In loop function
In the loop, calculate the X and Y axis and print on the serial monitor.
To read the X axis, define the Y1 pin as an INPUT mode, Y2 in Tri-state mode, and Set the X1 pin to high voltage and X2 to LOW, according to the Y1 ADC reading calculate the X position.
int X,Y;
pinMode(Y1, INPUT);
pinMode(Y2, OUTPUT_OPEN_DRAIN);
digitalWrite(Y2, HIGH); //Set Y2 in in tri-state mode
pinMode(X1, OUTPUT); digitalWrite(X1,HIGH);
pinMode(X2, OUTPUT); digitalWrite(X2,LOW);

X = (analogRead(Y1))/(4096/Xresolution);  //Reads Y axis touch position
To read the Y axis, define the X1 pin as an INPUT mode, X2 in tri-state mode, and set the Y1 pin to HIGH voltage and Y2 to LOW, according to the X1 ADC reading calculate the Y position.
pinMode(X1, INPUT);
pinMode(X2, OUTPUT_OPEN_DRAIN);
digitalWrite(X2, HIGH); //Set X2 in in tri-state mode
pinMode(Y1, OUTPUT); digitalWrite(Y1,HIGH);
pinMode(Y2, OUTPUT); digitalWrite(Y2,LOW);

Y = (analogRead(X1))/(4096/Yresolution); //Reads X axis touch position
Now print X and Y positions on the Serial Monitor.
Serial.print("X = ");
Serial.print(X);
Serial.print(" Y = ");
Serial.println(Y);
delay(100);
Components Used |
||
|---|---|---|
| Resistive Touch screen Resistive Touch screen |
X 1 | |
| ESP32 WROOM WiFi Development Tools - 802.11 ESP32 General Development Kit, embeds ESP32-WROOM-32E, 4MB flash. |
X 1 | |
Downloads |
||
|---|---|---|
|
|
4_wire_resistive_touch_screen_v1_0 | Download |