Overview of Analog Joystick
.jpg)
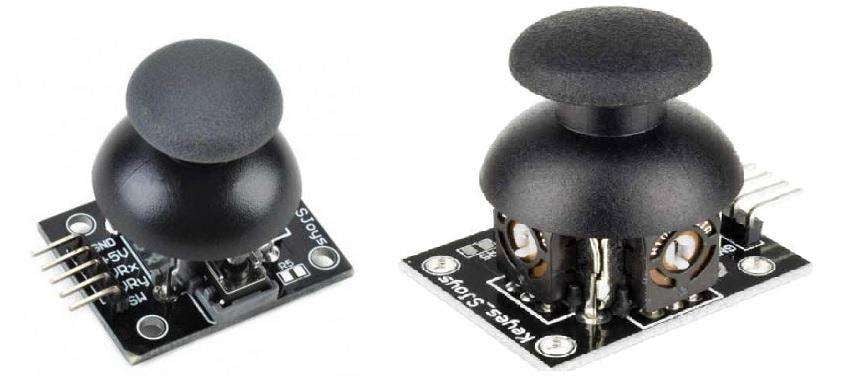
Applications like video games that require a change in cursor position in a 2-D plane make use of analog joysticks as input devices.
Analog joystick produces two voltages; one corresponding to position with respect to X-axis and another corresponding to the position with respect to Y-axis. The voltages produced depend on the position of the joystick.
For more information about Analog Joystick and how to use it, refer the topic Analog Joystick in the sensors and modules section.
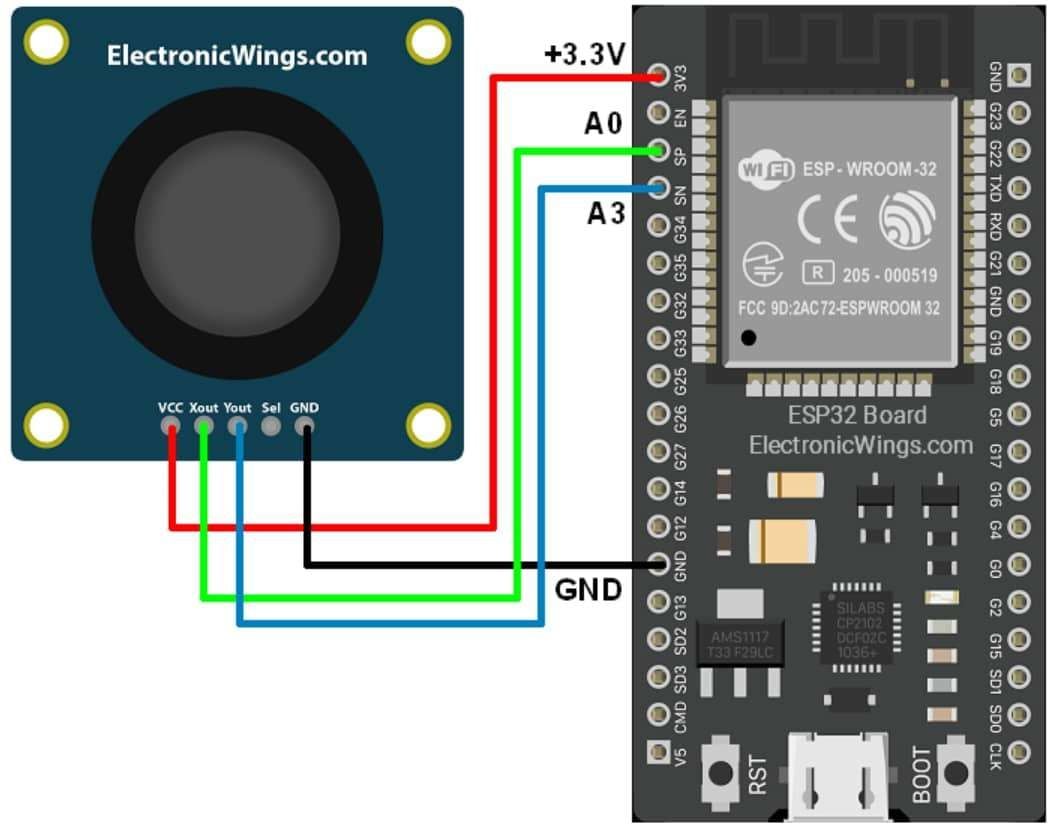
To interface the Analog Joystick with ESP32, we need to use ADC pins of the ESP32 board.
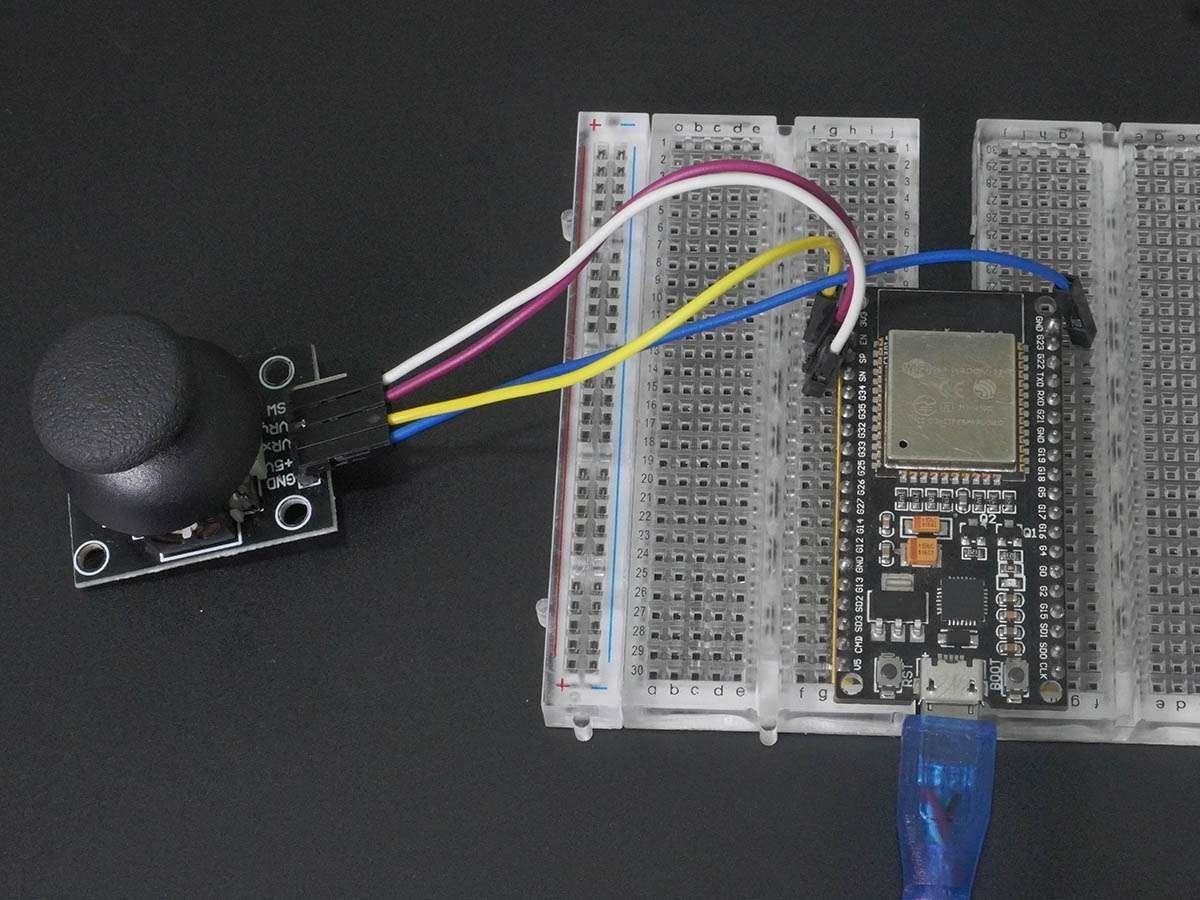
Analog Joystick Hardware Connection with ESP32
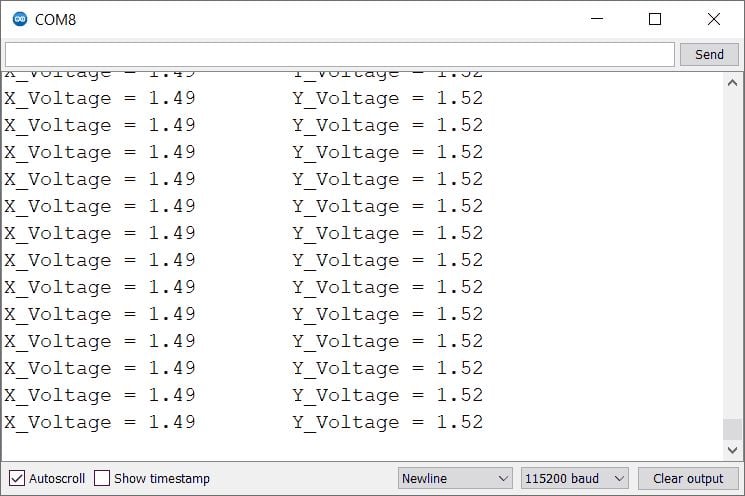
Read Analog Joystick Voltages in X and Y directions using ESP32 and Arduino IDE
Displaying analog joystick voltages in X and Y directions on the serial monitor of Arduino.
Here, we will be using the analog pins of ESP32 to process the analog voltages of the joystick.
Code For Finding Analog Joystick Voltages in X and Y directions using ESP32
const int joystick_x_pin = A0;
const int joystick_y_pin = A3;

void setup() {
  Serial.begin(115200);   /* Define baud rate for serial communication */
}

void loop() {
  int x_adc_val, y_adc_val;
  float x_volt, y_volt;
  x_adc_val = analogRead(joystick_x_pin);
  y_adc_val = analogRead(joystick_y_pin);
  x_volt = ( ( x_adc_val * 3.3 ) / 4095 );  /*Convert digital value to voltage */
  y_volt = ( ( y_adc_val * 3.3 ) / 4095 );  /*Convert digital value to voltage */
  Serial.print("X_Voltage = ");
  Serial.print(x_volt);
  Serial.print("\t");
  Serial.print("Y_Voltage = ");
  Serial.println(y_volt);
  delay(100);
}
- Now upload the code. (While uploading the code make sure your ESP32 board is in the boot mode.)
- After uploading the code open the serial monitor and set the baud rate to 115200 to see the output.
Output on the Serial Window
Let’s understand the code
Set the ADC pin numbers for the analog joystick
const int joystick_x_pin = A0;
const int joystick_y_pin = A3;
In setup function
We have initiated the serial communication with a 115200 Baud rate.
Serial.begin(115200);
In loop function
In the loop function, we will read the ADC values, convert them into voltage and display them on the serial monitor.
Define the variables to store the analog readings
int x_adc_val, y_adc_val;
float x_volt, y_volt;
Read the analog joystick x pin and y pin and store values in x_adc_val and y_adc_val the variables.
x_adc_val = analogRead(joystick_x_pin);
y_adc_val = analogRead(joystick_y_pin);
Convert the ADC readings into voltages
x_volt = ( ( x_adc_val * 3.3 ) / 4095 );  /*Convert digital value to voltage */
y_volt = ( ( y_adc_val * 3.3 ) / 4095 );  /*Convert digital value to voltage */
Now print the X and Y Voltages into the serial monitor
Serial.print("X_Voltage = ");
Serial.print(x_volt);
Serial.print("\t");
Serial.print("Y_Voltage = ");
Serial.println(y_volt);
delay(100);
Components Used |
||
|---|---|---|
| Analog Joystick Joystick is an input device used to control the pointer movement in 2-dimension axis. It is mostly used in Video games. |
X 1 | |
| ESP32 WROOM WiFi Development Tools - 802.11 ESP32 General Development Kit, embeds ESP32-WROOM-32E, 4MB flash. |
X 1 | |
Downloads |
||
|---|---|---|
|
|
ESP32_Analog_Joystick | Download |