Description
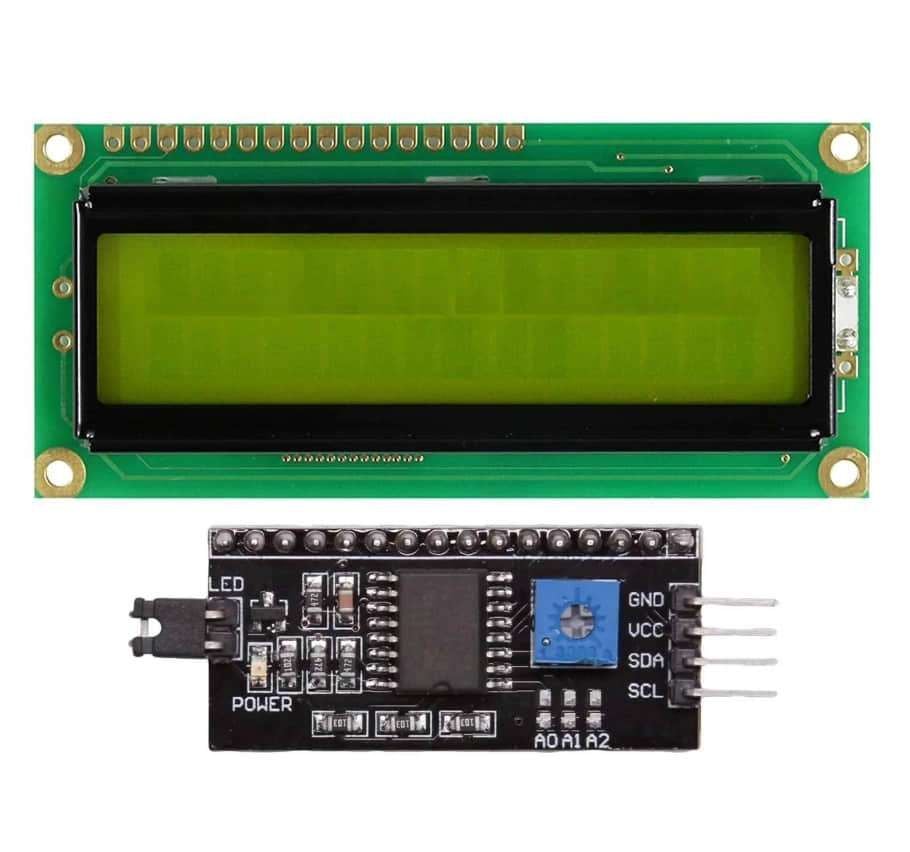
- The PCF8574 IIC/I2C module for the LCD16x2 is an interface module that is used to communicate with the LCD16x2 display using the I2C (Inter-Integrated Circuit) protocol.
- Usually, the LCD16x2 requires a minimum of six GPIO pins (if we use it in 4-Bit mode), i.e. higher numbers of GPIOs get engaged.
- The I2C LCD Driver Module Only requires 2 GPIOs for an LCD16x2 display, which will be helpful as we need to utilize a smaller number of GPIOs.
- It simplifies the wiring and control of the LCD by reducing the number of pins required for communication.
- This module is compatible with both LCD16x2 displays as well as LCD20x4 display
- This LCD Module includes the POT to adjust the contrast of the LCD and pull-up resistors for SDA and SCL lines. So, we don’t need any additional connections.
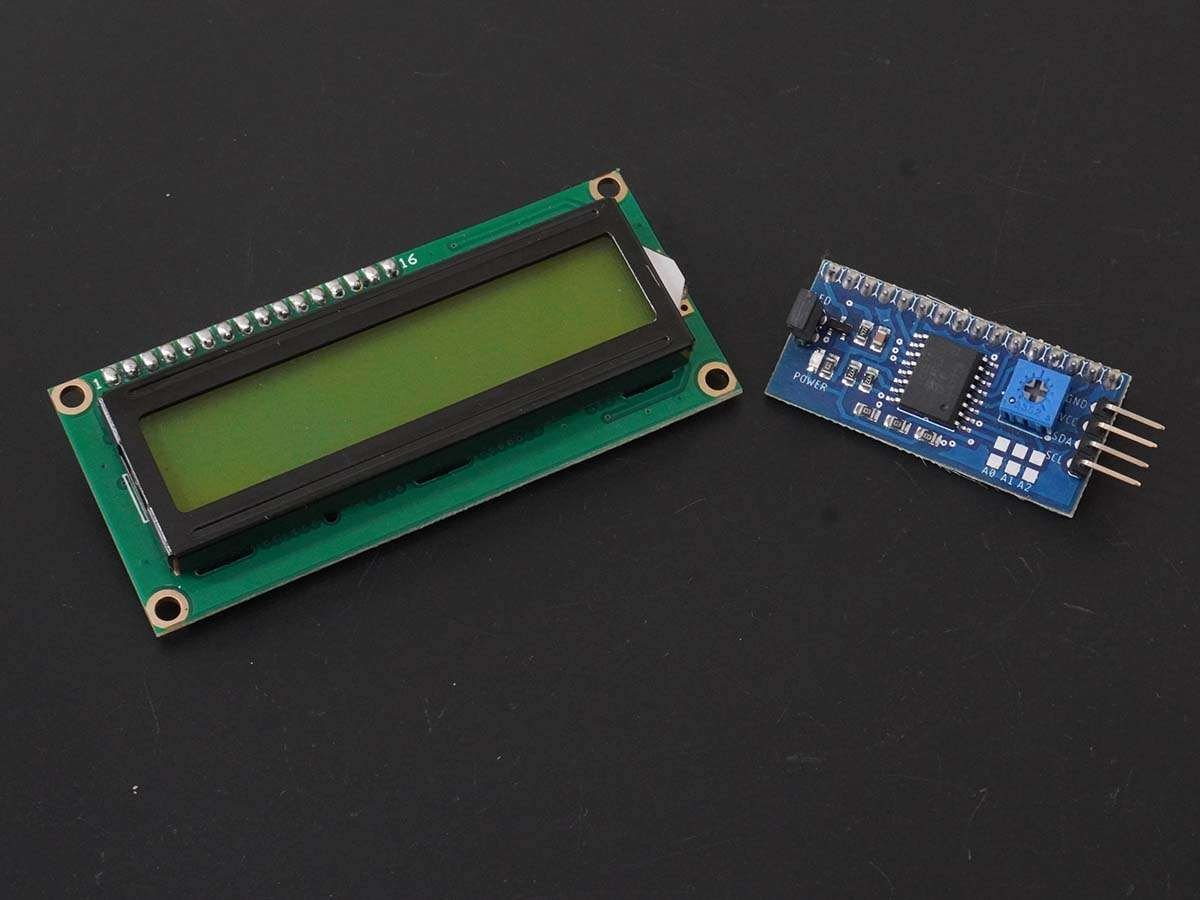
- We just plugin the I2C LCD Module at the back of the 16×2 LCD and make connections between the microcontroller and the I2C LCD Module.
LCD16x2 I2C Module Pin Diagram

- VCC = power supply (5VDC)
- GND = ground
- SDA = serial data line
- SCL = serial clock line
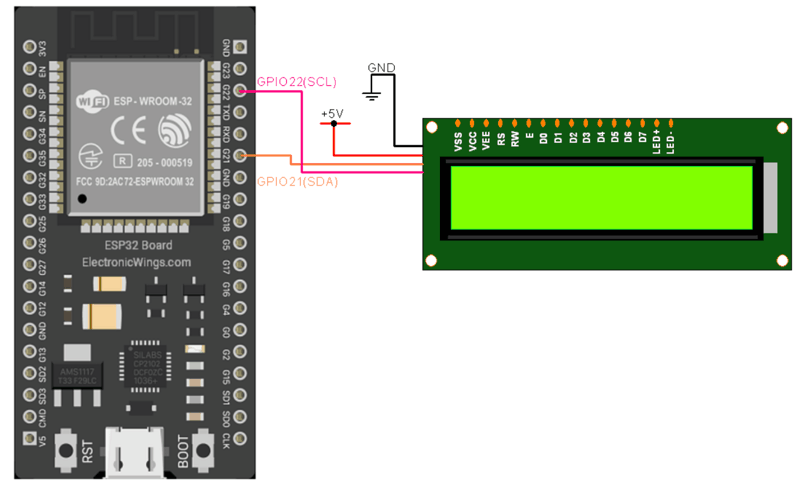
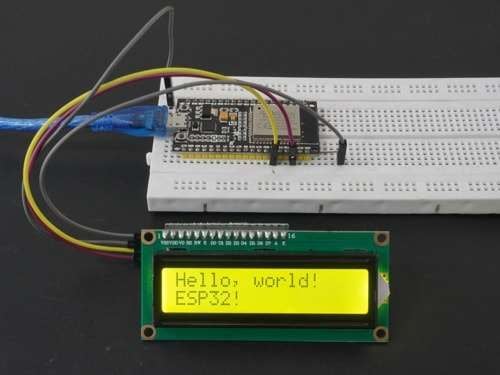
LCD16x2 I2C Module interfacing with ESP32
Install the required library in Arduino IDE
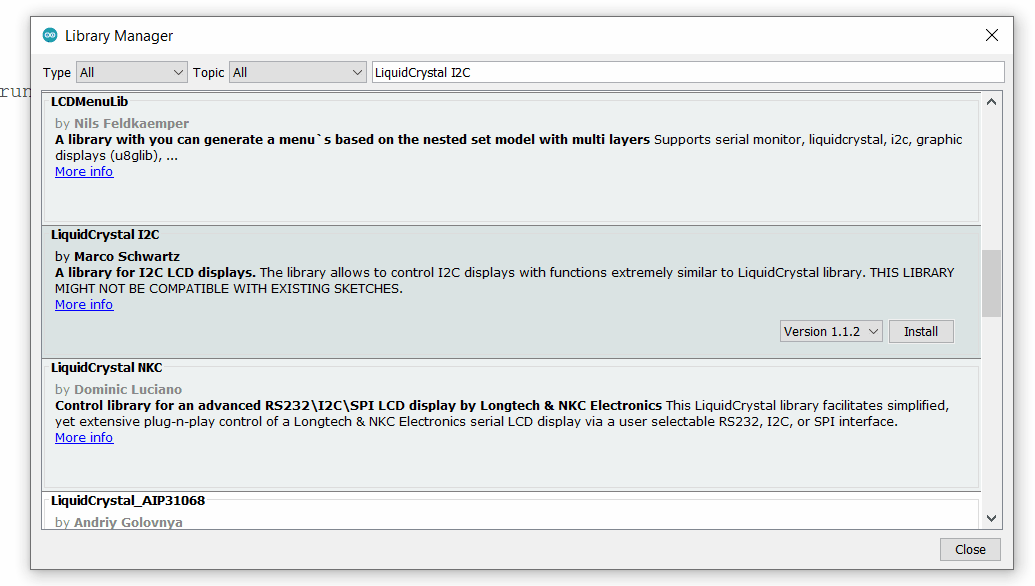
Here we are using the LiquidCrystal I2C library for the above example. We need to install this library using the Arduino Library Manager.
- Open the Arduino IDE
- Navigate to Sketch ► Include Library ► Manage Libraries…
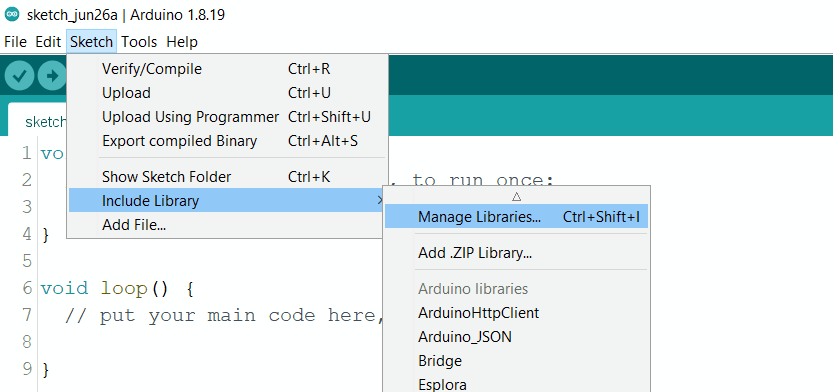
The library Manager window will pop up. Now enter LiquidCrystal I2C into the search box, and click Install on the LiquidCrystal I2C option to install version 1.1.2 or higher. As shown below image.
LCD16x2 I2C Module Code for ESP32
#include <Wire.h>
#include <LiquidCrystal_I2C.h>

LiquidCrystal_I2C lcd(0x27,16,2);  // set the LCD address to 0x27 for a 16 chars and 2 line display

void setup(){
  lcd.init();                 // initialize the lcd
  lcd.backlight();
  lcd.setCursor(0,0);
  lcd.print("Hello, world!");
  lcd.setCursor(0,1);
  lcd.print("ESP32!");
}

void loop(){}
Output
Let’s Understand the code
Add the required library
#include <Wire.h>
#include <LiquidCrystal_I2C.h>
Set the LCD address to 0x27 for a 16 chars and 2-line display
LiquidCrystal_I2C lcd(0x27,16,2); In Setup Function,
set the LCD address to 0x27 for a 16 chars and 2-line display
initialize the LCD
lcd.init(); initialize the backlight of the LCD
lcd.backlight(); Now set the cursor on for the first row and first column to print the hello world
lcd.setCursor(0,0);
lcd.print("Hello, world!");
Now set the cursor on for the second row and first column to print the ESP32
lcd.setCursor(0,1);
lcd.print("ESP32!");
Scrolling Display code
#include <Wire.h>
#include <LiquidCrystal_I2C.h>

LiquidCrystal_I2C lcd(0x27,16,2);

String message = "www.ElectronicWings.com";

void scroll(int row, String message, int delayTime) {
  for (int i=0; i < 16; i++) {
    message = " " + message;
  }
  message = message + " ";
  for (int pos = 0; pos < message.length(); pos++) {
    lcd.setCursor(0, row);
    lcd.print(message.substring(pos, pos + lcdColumns));
    delay(delayTime);
  }
}

void setup(){
  lcd.init();
  lcd.backlight();
}

void loop(){
  scroll(0, message, 200);
}
Let’s Understand the code
Add necessary libraries
#include <Wire.h>
#include <LiquidCrystal_I2C.h>
Initialize the LCD object with the I2C address and dimensions
LiquidCrystal_I2C lcd(0x27,16,2);Define the message to be scrolled
String message = "www.ElectronicWings.com";This is the scrolling function for LCD display.
It takes three parameters the row number where the message should be displayed, the message to be scrolled, and the delay time between each scroll step.
void scroll(int row, String message, int delayTime) {
  for (int i=0; i < 16; i++) {
    message = " " + message;
  }
  message = message + " ";

  for (int pos = 0; pos < message.length(); pos++) {
    lcd.setCursor(0, row);
    lcd.print(message.substring(pos, pos + lcdColumns));
    delay(delayTime);
  }
}
In Setup Function,
set the LCD address to 0x27 for a 16 chars and 2-line display
initialize the LCD
lcd.init(); initialize the backlight of the LCD
lcd.backlight(); In loop Function,
Call the scroll function to scroll the message in the loop
scroll(0, message, 200);
Output
Components Used |
||
|---|---|---|
| ESP32 WROOM WiFi Development Tools - 802.11 ESP32 General Development Kit, embeds ESP32-WROOM-32E, 4MB flash. |
X 1 | |
| LCD 16x2 with I2C Interface LCD 16x2 with I2C Interface |
X 1 | |