Overview of PIR Sensor
.jpg)
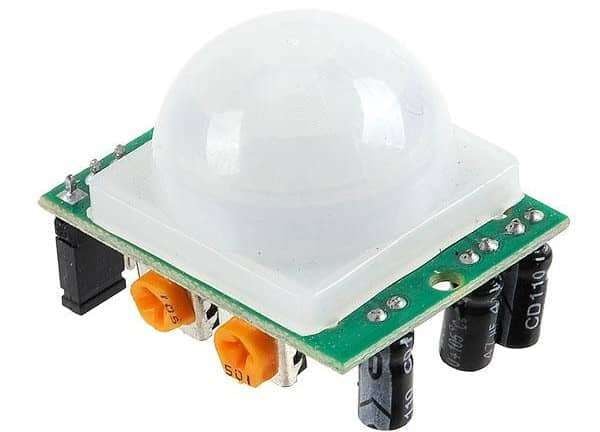
- PIR sensor is used for detecting infrared heat radiations. This makes them useful in applications involving detection of moving living objects that emit infrared heat radiations.
- The output (in terms of voltage) of PIR sensor is high when it senses motion; whereas it is low when there is no motion (stationary object or no object).
- For more information on PIR sensor and how to use it, refer the topic PIR Sensor in the sensors and modules section.
PIR Motion Sensor Hardware Connection with ESP32
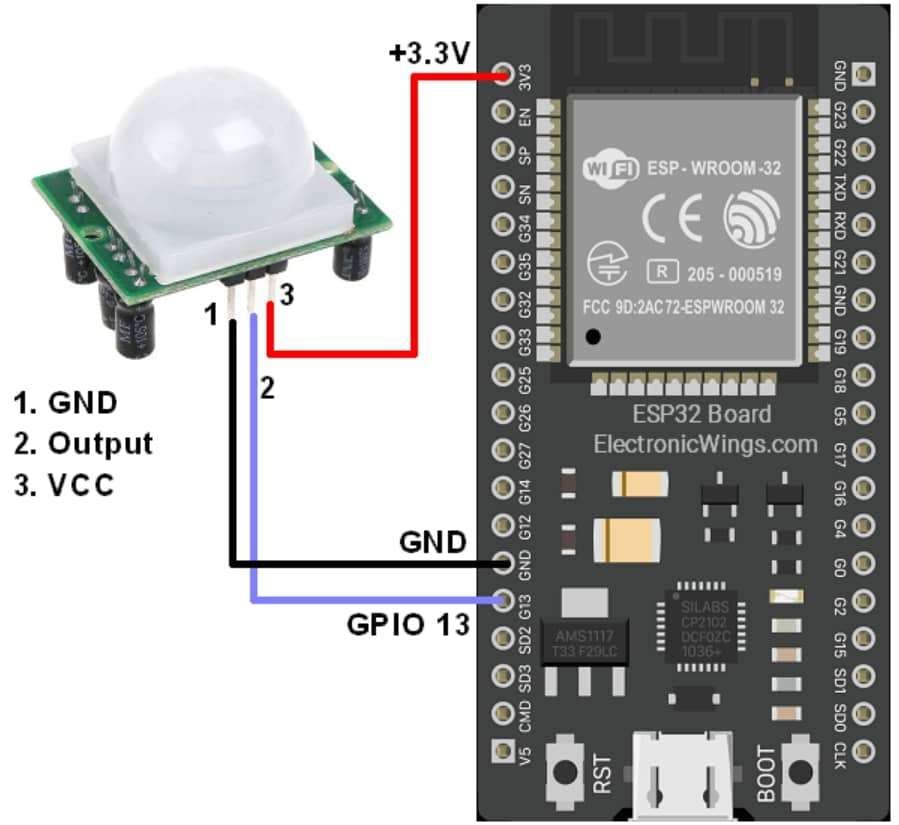
Note:
- PIR sensor: Never keep PIR Sensor close to the Wi-Fi antenna, ESP32, or NodeMCU.
- PIR (Passive Infrared) sensor close to a WiFi antenna impacts the sensor's performance.
- PIR sensors detect changes in infrared radiation for motion detection.
- WiFi signals emit electromagnetic radiation that can interfere with the PIR sensor. Which causes false detection.
- So always keep the PIR sensor and WiFi antenna as far apart as possible.
- Also, you can try to shield the PIR sensor from the WiFi signal. This can be done by using metal shields or Faraday cages around the PIR sensor.
Detect PIR Motion using ESP32 and Arduino IDE
Motion detection of living objects using PIR sensor using Arduino IDE.
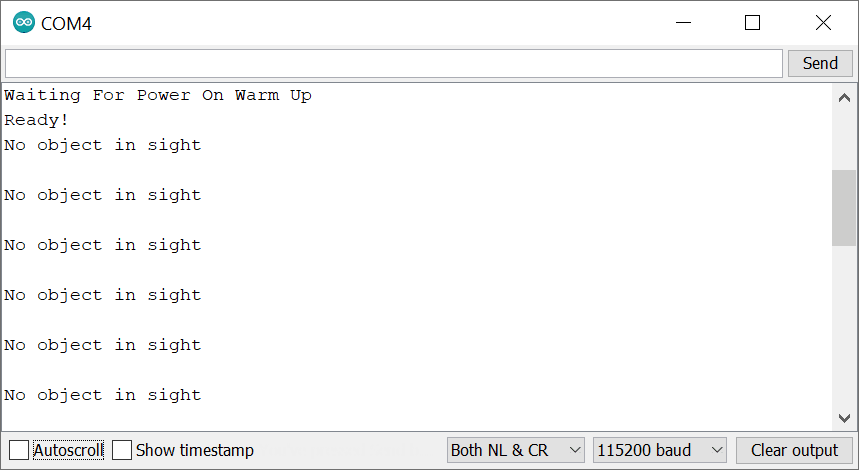
Upon detection of motion, "Object detected" is printed on the serial monitor of Arduino. When there is no motion, "No object in sight" is printed on the serial monitor of Arduino.
Code For PIR Motion Detection of Living Object using ESP32
const int PIR_SENSOR_OUTPUT_PIN = 13;  /* PIR sensor O/P pin */
int warm_up;

void setup() {
  pinMode(PIR_SENSOR_OUTPUT_PIN, INPUT);
  Serial.begin(115200); /* Define baud rate for serial communication */
  Serial.println("Waiting For Power On Warm Up");
  delay(20000); /* Power On Warm Up Delay */
  Serial.println("Ready!");
}

void loop() {
  int sensor_output;
  sensor_output = digitalRead(PIR_SENSOR_OUTPUT_PIN);
  if( sensor_output == LOW )
  {
    if( warm_up == 1 )
     {
      Serial.print("Warming Up\n\n");
      warm_up = 0;
      delay(2000);
    }
    Serial.print("No object in sight\n\n");
    delay(1000);
  }
  else
  {
    Serial.print("Object detected\n\n");
    warm_up = 1;
    delay(1000);
  }
}
- Now upload the code. (While uploading the code make sure your ESP32 board is in boot mode.)
- After uploading the code open the serial monitor and set the baud rate to 115200 to see the output.
Output on the Serial Window
Let’s understand the code
Set the ADC pin number for the PIR sensor
const int PIR_SENSOR_OUTPUT_PIN = 13;  /* PIR sensor O/P pin */
int warm_up;
In setup function
Sen the PIR pin is an INPUT type
pinMode(PIR_SENSOR_OUTPUT_PIN, INPUT);We have initiated the serial communication with a 115200 Baud rate.
Serial.begin(115200); /* Define baud rate for serial communication */Now, wait for 20 sec for warm-up.
Serial.println("Waiting For Power On Warm Up");
delay(20000);       /* Power On Warm Up Delay */
Serial.println("Ready!");
In loop function
Read the PIR sensor output and check it is LOW or HIGH
sensor_output = digitalRead(PIR_SENSOR_OUTPUT_PIN);If the sensor pin is low, then print No object in sight on the serial monitor
if( sensor_output == LOW )
 {
   if( warm_up == 1 )
    {
     Serial.print("Warming Up\n\n");
     warm_up = 0;
     delay(2000);
    }
   Serial.print("No object in sight\n\n");
   delay(1000);
 }
If the sensor pin is high, then print Object detected on the serial monitor
else
 {
   Serial.print("Object detected\n\n");
   warm_up = 1;
   delay(1000);
 }
Sketch For PIR Motion Detection Using Interrupt with ESP32
const int PIR_SENSOR_OUTPUT_PIN = 13;  /* PIR sensor O/P pin */

void setup() {
  pinMode(PIR_SENSOR_OUTPUT_PIN, INPUT_PULLUP);
  attachInterrupt(digitalPinToInterrupt(13), pir, RISING);  /* Interrupt on rising edge on pin 13 */
  Serial.begin(115200); /* Define baud rate for serial communication */
  Serial.println("Waiting For Power On Warm Up");
  delay(20000);       /* Power On Warm Up Delay */
  Serial.println("Ready!");
}

void loop() {
}

void pir(){
  Serial.println("Object Detected");
}
- Now upload the code. (While uploading the code make sure your ESP32 board is in boot mode.)
- After uploading the code open the serial monitor and set the baud rate to 115200 to see the output.
Output on the Serial Window

Let’s understand the code
Set the ADC pin number for the PIR sensor
const int PIR_SENSOR_OUTPUT_PIN = 13; /* PIR sensor O/P pin */
In setup function
Sen the PIR pin is an INPUT type with pulled up
pinMode(PIR_SENSOR_OUTPUT_PIN, INPUT_PULLUP);Now set the PIR pin as an interrupt which triggers when the pin goes from low to high (RISING) for pir function
attachInterrupt(digitalPinToInterrupt(13), pir, RISING); /* Interrupt on rising edge on pin 13 */We have initiated the serial communication with a 115200 Baud rate.
Serial.begin(115200); /* Define baud rate for serial communication */Now, wait for 20 sec for warm-up.
Serial.println("Waiting For Power On Warm Up");
delay(20000);       /* Power On Warm Up Delay */
Serial.println("Ready!");
In loop function
An empty void loop means there is no main code here, to run repeatedly.
void loop() {}
In pir function
This function will call when the PIR pin interrupt is triggered and display Object Detected on the serial monitor
void pir(){
  Serial.println("Object Detected");
}
Components Used |
||
|---|---|---|
| PIR Sensor PIR motion sensors sense the Infrared signal radiated from moving objects including human or animal body. It is generally used to detect the presence of human or animal motions. |
X 1 | |
| ESP32 WROOM WiFi Development Tools - 802.11 ESP32 General Development Kit, embeds ESP32-WROOM-32E, 4MB flash. |
X 1 | |