Overview of Micro SD Card
Secure Digital (SD) is a non-volatile memory card format developed by the SD Card Association (SDA) for use in portable devices like mobile phones, cameras etc. Secure Digital includes four card families as follows-
1. SDSC: Standard Capacity SD. It has a storage capacity of 2GB and uses FAT- 12 and FAT-16 file systems.
2. SDHC: High Capacity SD. It has a storage capacity ranging from 2GB to 32GB and uses a FAT-32 file system.
3. SDXC: eXtended Capacity SD. It has a storage capacity ranging from 32GB to 2TB and uses the exFAT file system.
4. SDIO: It combines INPUT/OUTPUT functions with data storage.
SD cards come in different sizes-
- Regular SD - 1.25 by 0.95 inches
- Mini SD - 0.87 by 0.79 inches
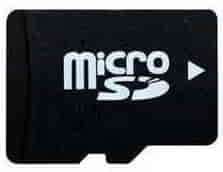
- Micro SD - 0.43 by 0.59 inches
Here we use the micro SD card for interfacing.
File System
SD card is a block-addressable storage device, in which the host device can read or write fixed-size blocks by specifying their block number. Most SD cards are preformatted with one or more MBR (Master Boot Record) partitions in which the first partition contains the file system which enables it to work like hard disks.
1. For SDSC card
- Capacity smaller than 16 MB- FAT 12
- Capacity between 16 MB and 32 MB- FAT 16
- Capacity larger than 32 MB- FAT 16B
2. For SDHC cards
- Capacity smaller than 7.8 GB- FAT 32
- Capacity greater than 7.8 GB- FAT 32
3. For SDXC cards
- exFAT
Notes
1. Arduino library supports only FAT16 and FAT32 file systems. Make sure that your SD card is formatted with these two only otherwise you will get an initialization error.
2. For formatting your SD card you can download the SD formatter on the following link - https://www.sdcard.org/downloads/formatter_4/
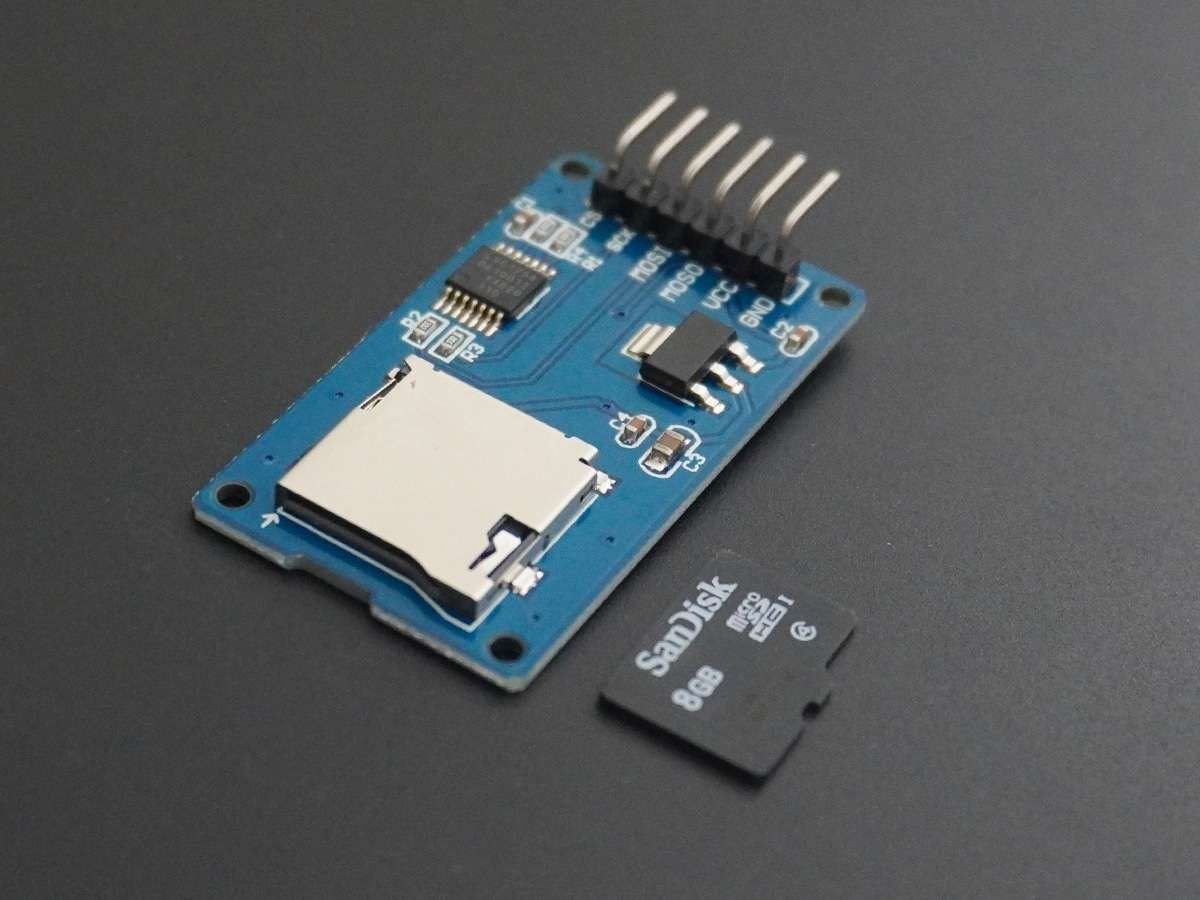
SD Card Module
The micro- SD Card Module is a simple solution for transferring data to and from a standard SD card. This module has SPI interface which is compatible with any SD card and it uses a 5V power supply because it has an internal 3.3V regulator which is compatible with ESP32.
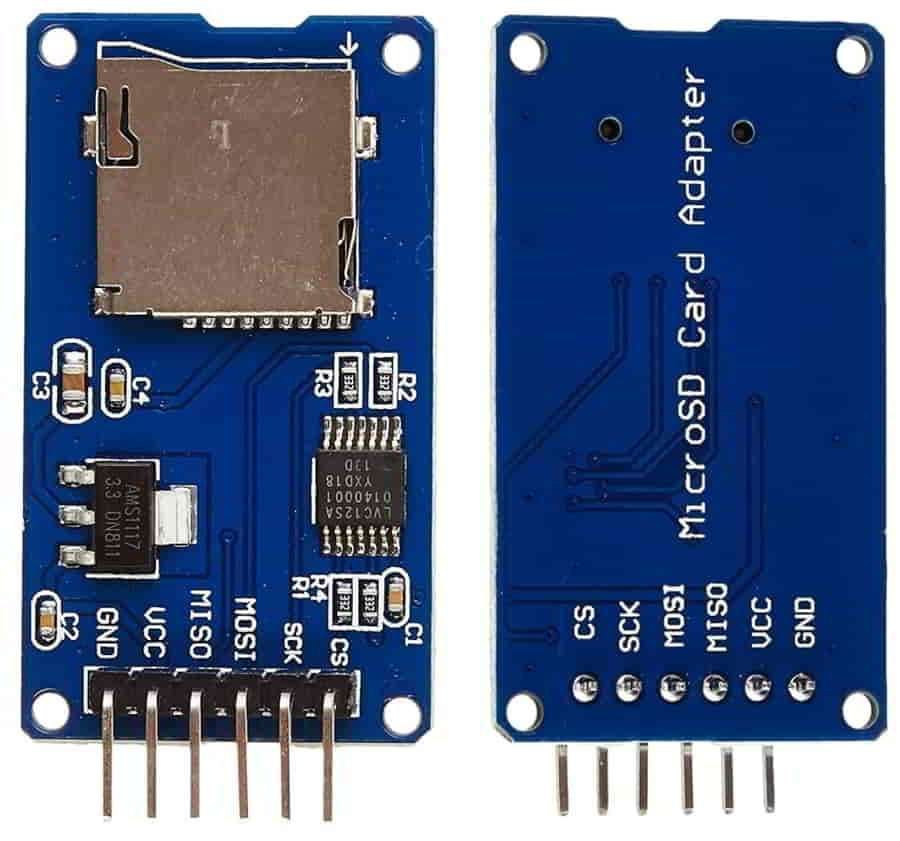
SD Card Module Pinout:
| Pin Name | Description |
| CS | Chip Select |
| SCK | Clock |
| MISO | Master In Slave Out |
| MOSI | Master Out Slave In |
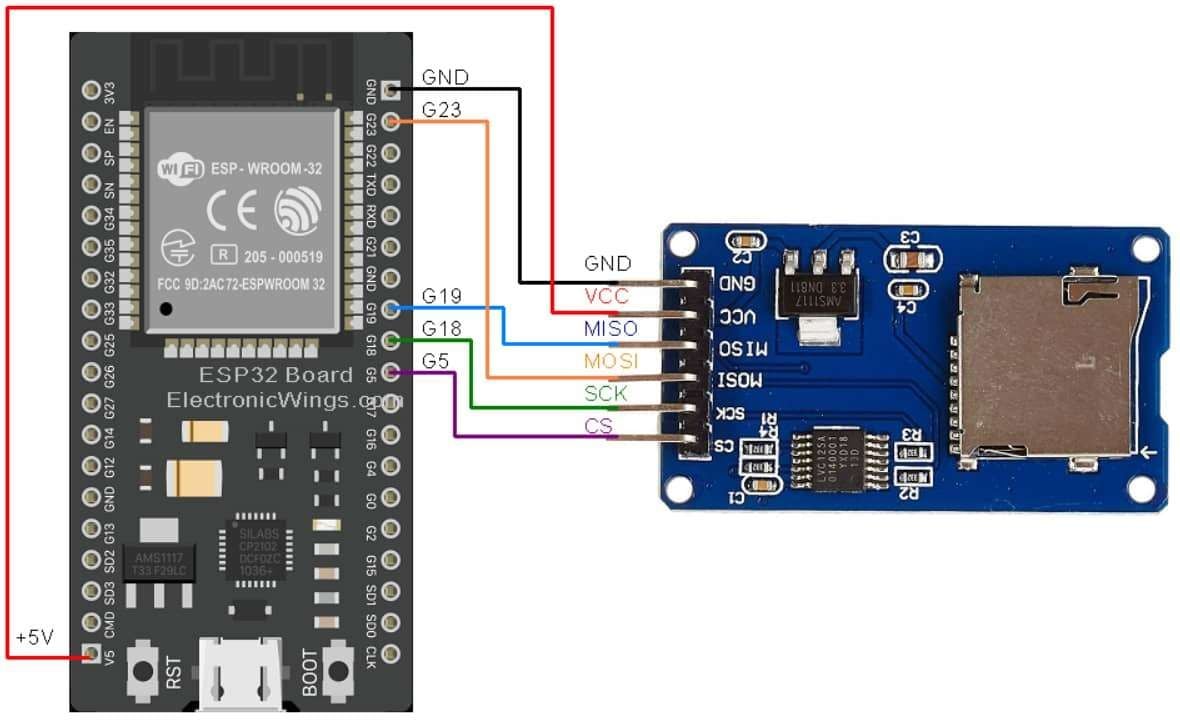
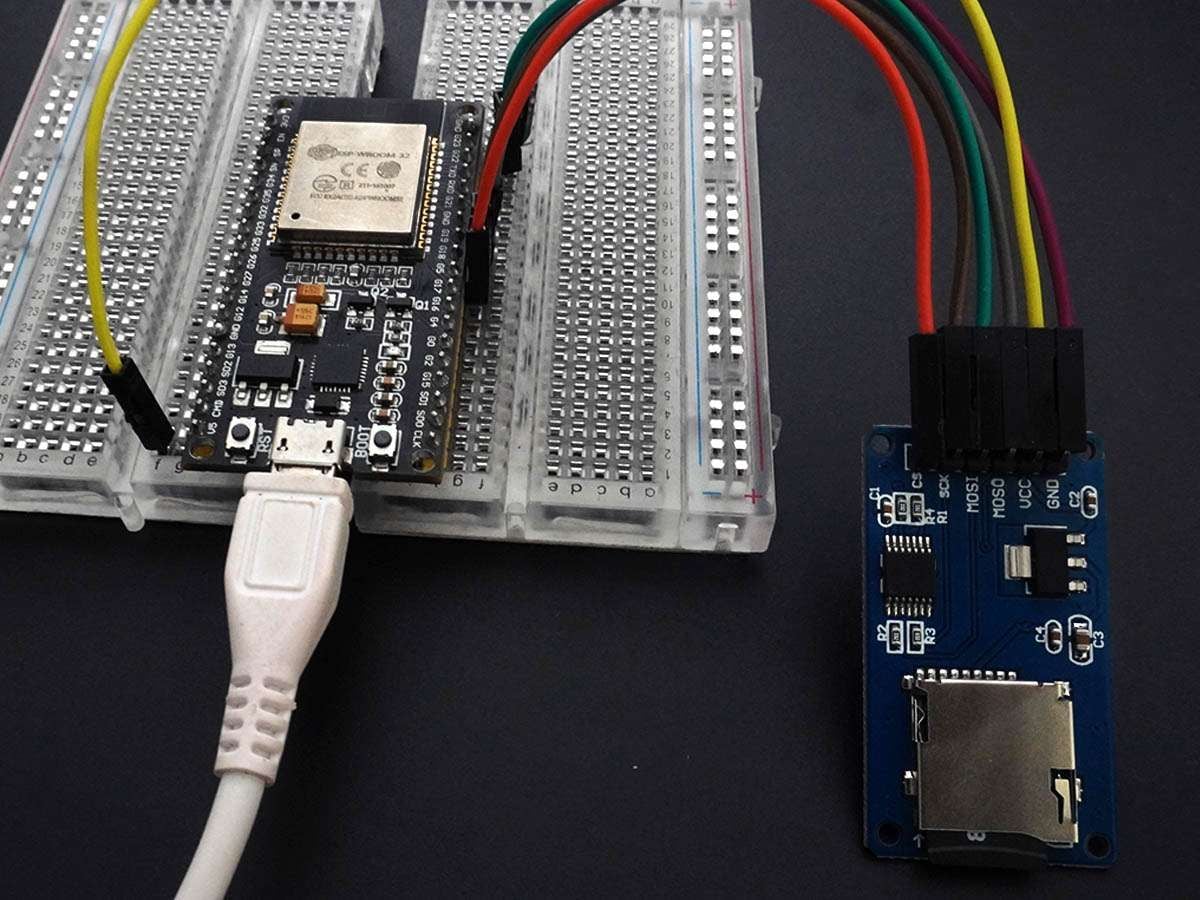
The diagram shows the detailed connections of the SD module with ESP32.
- MOSI - pin 23
- MISO - pin 19
- CLK - pin 18
- CS - pin 5
MicroSD Card Hardware Connection with ESP32
Write and Read MicroSD Card using ESP32
We are going to interface the MicroSD card with ESP32 and perform the read-write operation on it.
Here we will be using the inbuilt code provided by Arduino IDE.
The code in the Arduino IDE uses the two library files –
SPI.h
SD.h
These library files direct contain function definitions that are used for SD card read-write operations.
For accessing code in Arduino IDE you can follow the following mention steps-
Open IDE ► Click on Files ► Click on examples ► Select SD ► Open ReadWrite
For your simplicity, we have provided the same code over here.
Code for Write and Read on MicroSD Card using ESP32
/*
 https://www.electronicwings.com/
  SD Card Interface code for ESP32
  SPI Pins of ESP32 SD card as follows:
  CS    = 5;
  MOSI  = 23;
  MISO  = 19;
  SCK   = 18;
*/

#include <SPI.h>
#include <SD.h>

File myFile;
const int CS = 5;

void WriteFile(const char * path, const char * message){
  // open the file. note that only one file can be open at a time,
  // so you have to close this one before opening another.
  myFile = SD.open(path, FILE_WRITE);
  // if the file opened okay, write to it:
  if (myFile) {
    Serial.printf("Writing to %s ", path);
    myFile.println(message);
    myFile.close(); // close the file:
    Serial.println("completed.");
  }
  // if the file didn't open, print an error:
  else {
    Serial.println("error opening file ");
    Serial.println(path);
  }
}


void ReadFile(const char * path){
  // open the file for reading:
  myFile = SD.open(path);
  if (myFile) {
     Serial.printf("Reading file from %s\n", path);
     // read from the file until there's nothing else in it:
    while (myFile.available()) {
      Serial.write(myFile.read());
    }
    myFile.close(); // close the file:
  }
  else {
    // if the file didn't open, print an error:
    Serial.println("error opening test.txt");
  }
}

void setup() {
  Serial.begin(9600);    // Set serial baud rate to 9600
  delay(500);
  while (!Serial) { ; }  // wait for serial port to connect. Needed for native USB port only
  Serial.println("Initializing SD card...");
  if (!SD.begin(CS)) {
    Serial.println("initialization failed!");
    return;
  }
  Serial.println("initialization done.");

  WriteFile("/test.txt", "ElectronicWings.com");
  ReadFile("/test.txt");
}

void loop() {
  // nothing happens after setup
}
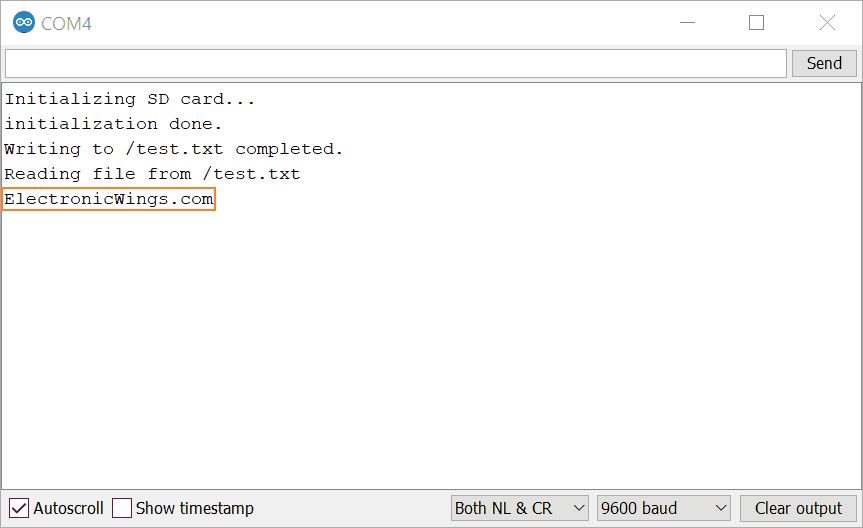
MicroSD Card Output on Serial Window
Let’s understand the code
First, add the supporting files i.e., <SPI.h> and <SD.h>
#include <SPI.h>
#include <SD.h>
Define the myFile object for
File myFile;Set the GOIP pin number for the chip select
const int CS = 5;
Write Content to a File
To write the content on a file, use the WriteFile() function. For writing pass the path and message as an argument.
void WriteFile(const char * path, const char * message){
  // open the file. note that only one file can be open at a time,
  // so you have to close this one before opening another.
  myFile = SD.open(path, FILE_WRITE);
  // if the file opened okay, write to it:
  if (myFile) {
    Serial.printf("Writing to %s ", path);
    myFile.println(message);
    myFile.close(); // close the file:
    Serial.println("completed.");
  }
  // if the file didn't open, print an error:
  else {
    Serial.println("error opening file ");
    Serial.println(path);
  }
}
Example:
WriteFile("/test.txt", "ElectronicWings.com");
Read Content from a File
The ReadFile() function is used to read the content from the file and display it on the serial monitor, in this function pass the path as an argument.
void ReadFile(const char * path){
  // open the file for reading:
  myFile = SD.open(path);
  if (myFile) {
     Serial.printf("Reading file from %s\n", path);
     // read from the file until there's nothing else in it:
    while (myFile.available()) {
      Serial.write(myFile.read());
    }
    myFile.close(); // close the file:
  }
  else {
    // if the file didn't open, print an error:
    Serial.println("error opening test.txt");
  }
}
Example:
ReadFile("/test.txt");
In setup function
We have initiated the serial communication with a 9600 Baud rate.
Serial.begin(9600); // Set serial baud rate to 9600Initialize the SD card and print on the serial monitor
Serial.println("Initializing SD card...");
if (!SD.begin(CS)) {
Serial.println("initialization failed!");
return;
}
Serial.println("initialization done.");
Write the ElectronicWings.com text on the /test.txt path
WriteFile("/test.txt", "ElectronicWings.com");Read the test file from the/test.txt path
ReadFile("/test.txt");
In loop function
There is no code in the loop to run repeatedly.
void loop() {
  // nothing happens after setup
}
Components Used |
||
|---|---|---|
| MicroSD Card Adafruit Accessories 16GB Card with NOOBS 3.1 for Raspberry Pi Computers including 4 |
X 1 | |
| ESP32 WROOM WiFi Development Tools - 802.11 ESP32 General Development Kit, embeds ESP32-WROOM-32E, 4MB flash. |
X 1 | |
Downloads |
||
|---|---|---|
|
|
MicroSD_ESP32 | Download |