Description
- In this guide, we’ll show you how to publish any sensor readings/data on a Google spreadsheet using the Nodemcu board.
- For example, we’ll publish temperature readings using the DS18B20 sensor to a Google spreadsheet every 10 minutes.
- Here we’ll take help using IFTTT.
- The below figure shows the overall overview of this project.

- Connect the nodemcu board to your Wi-Fi network.
- Read the temperature using the DS18B20 temperature sensor;
- Now nodemcu will communicate with the IFTTT Webhooks service to publish those readings on the spreadsheet.
- After publishing the readings, the Nodemcu goes into deep sleep mode for 10 minutes.
- After 10 minutes the nodemcu wakes up.
- After waking up, the nodemcu connects to Wi-Fi, and the process repeats.
Let's start
First, open the below IFTTT link and create your account

Type webhooks in the search bar and click on it.

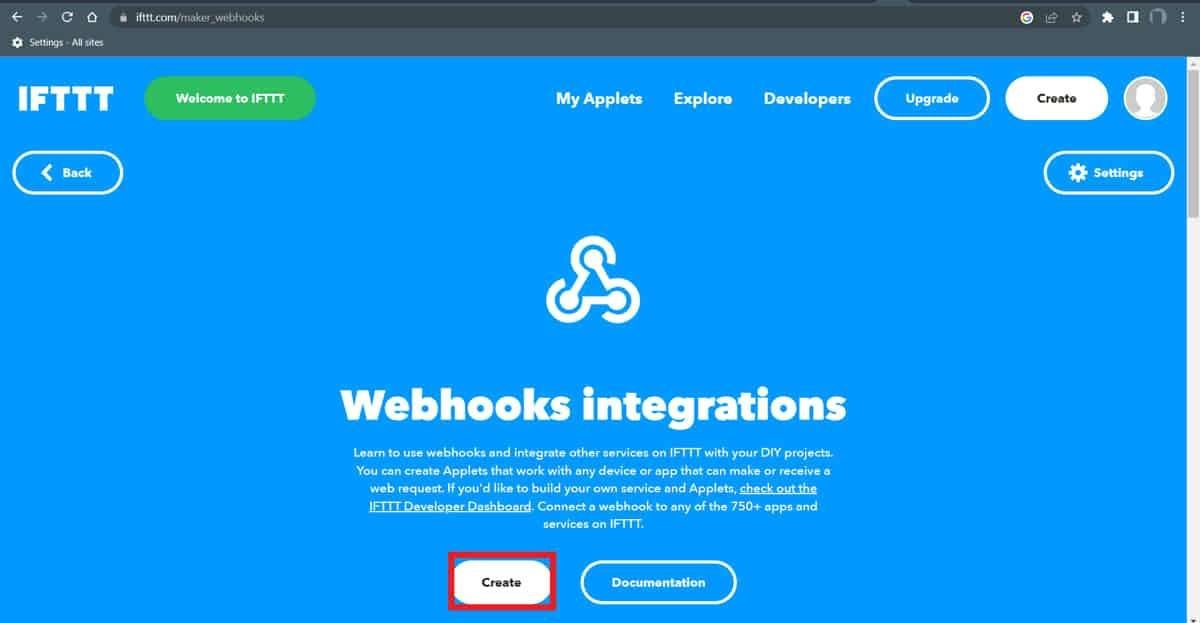
Now in the webhooks click on the connect button.

Now click on create
Now press the Add button

Now type webhooks in the search bar

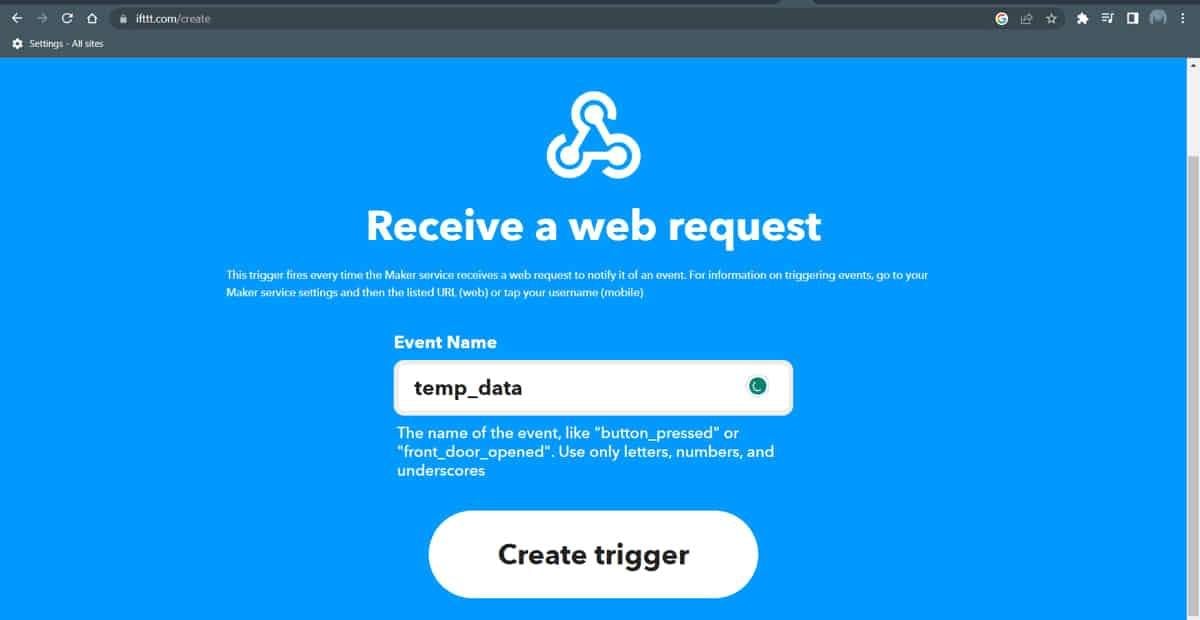
Now click on Receive web request

Give the event name here we are given temp_data
Now click on the add button again

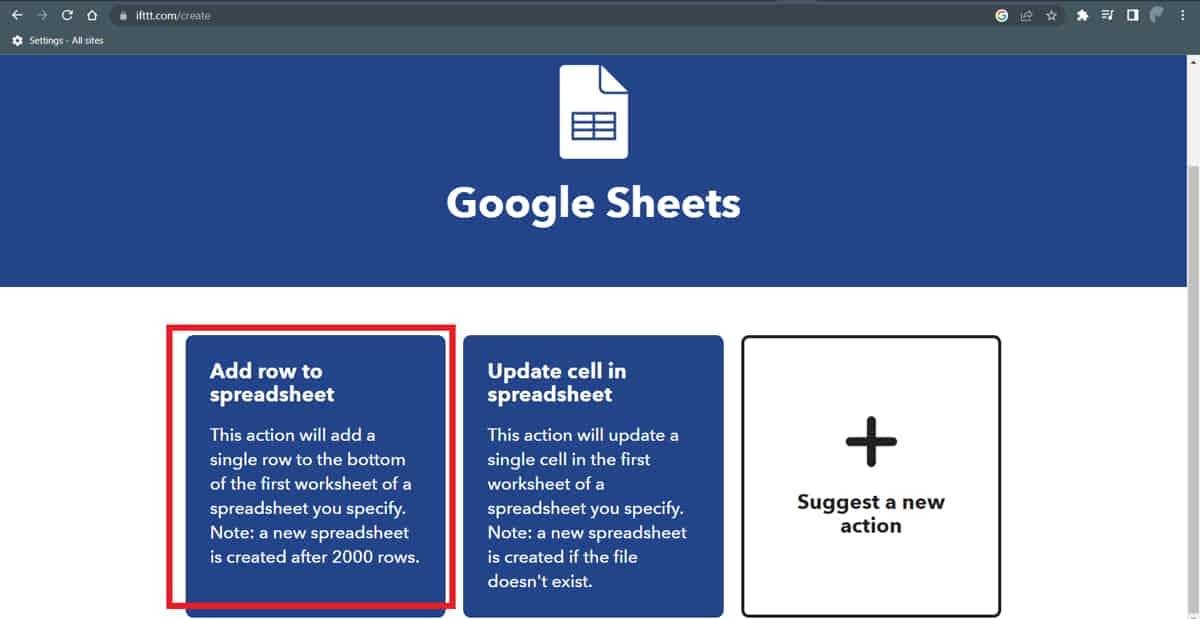
Search the google sheet and click on it

In Google sheet click on the Add row to spreadsheet
In the first column gives the name of the sheet, in second column gives the formatted row names, and in last is the path.

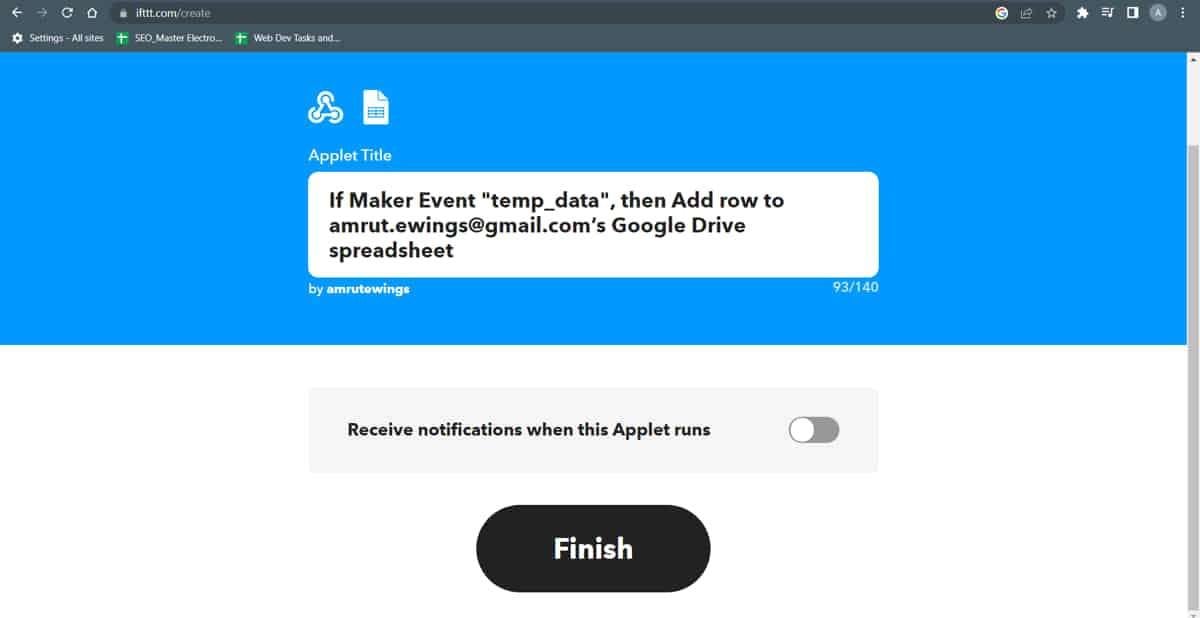
Now click on continue
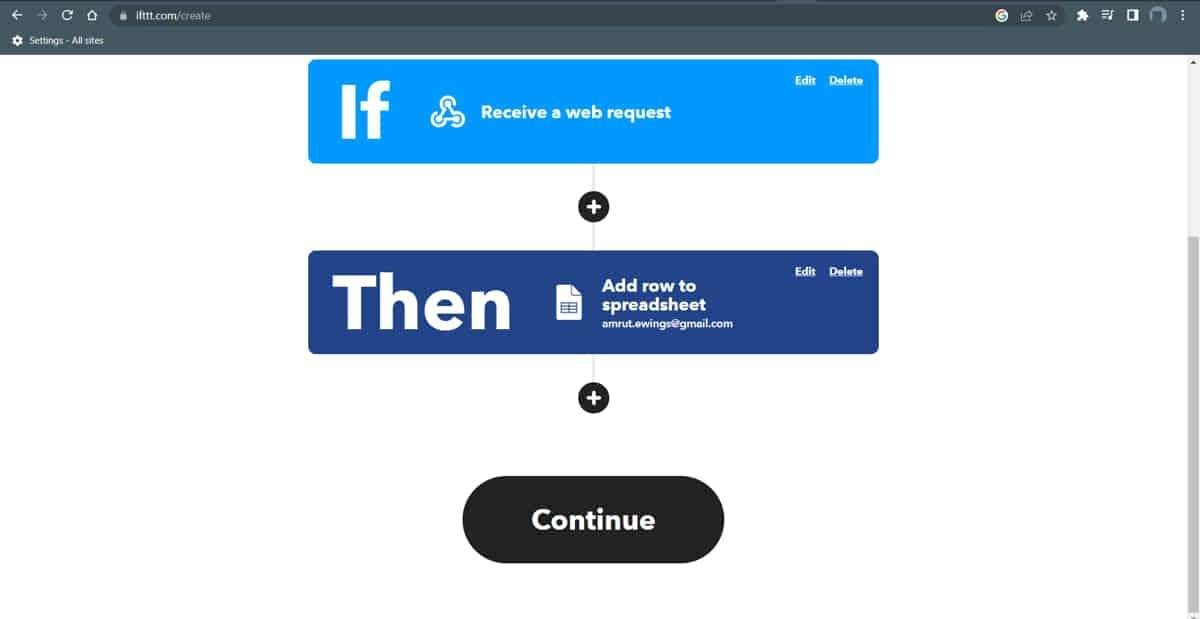
Now finish it.
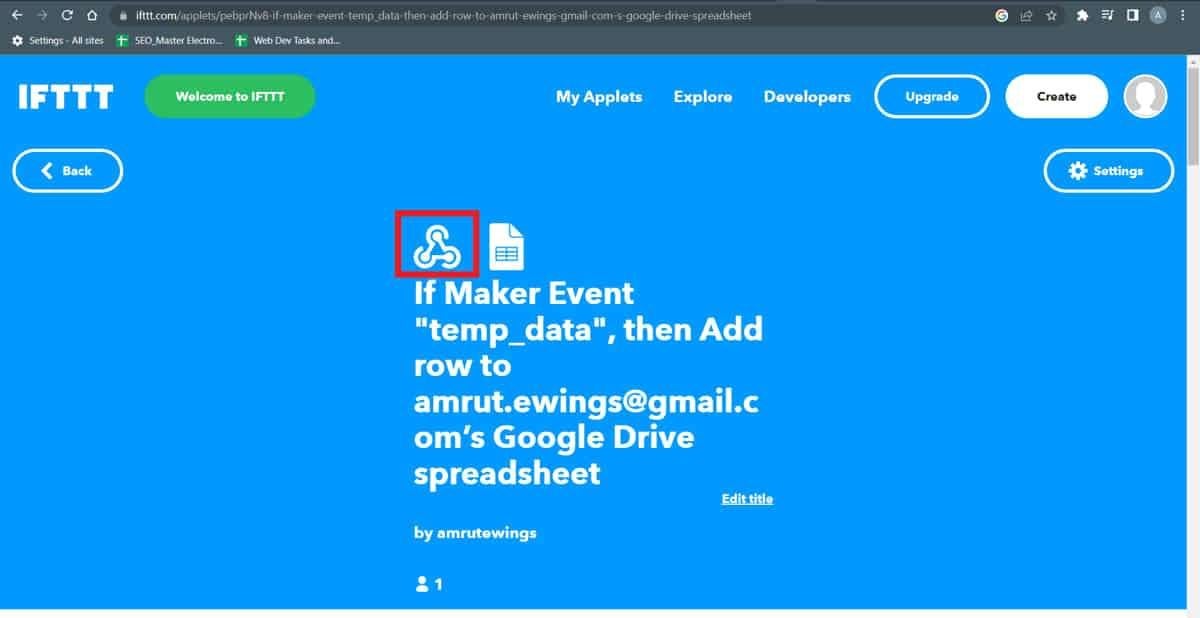
Now click on the webhooks icon and open it.
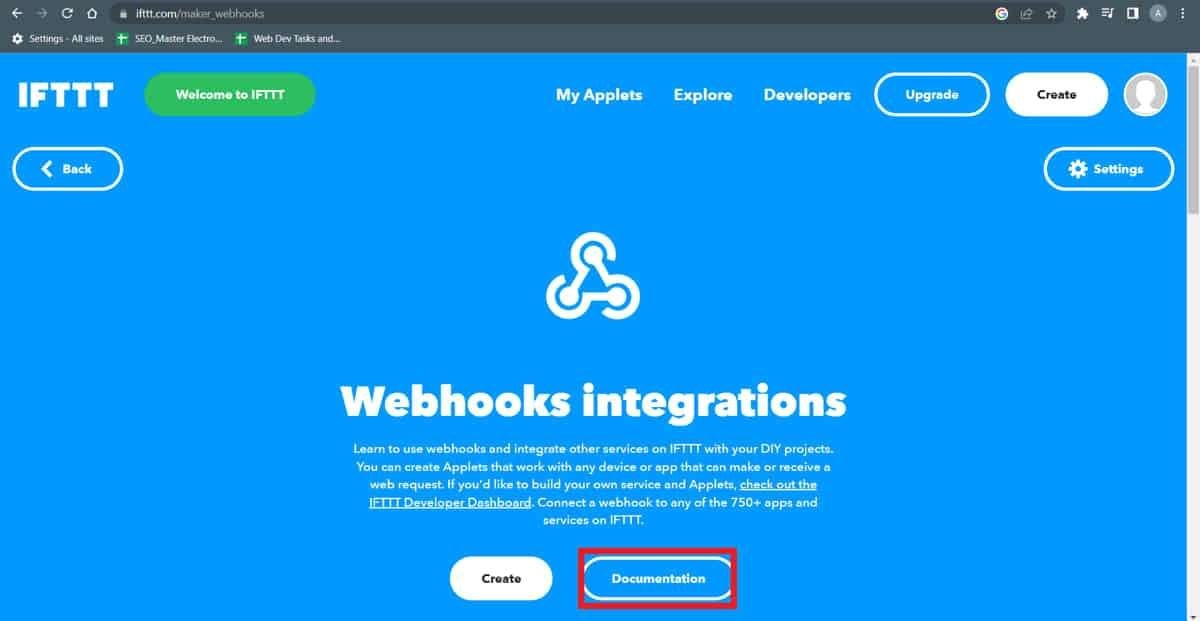
Now go to the documentation
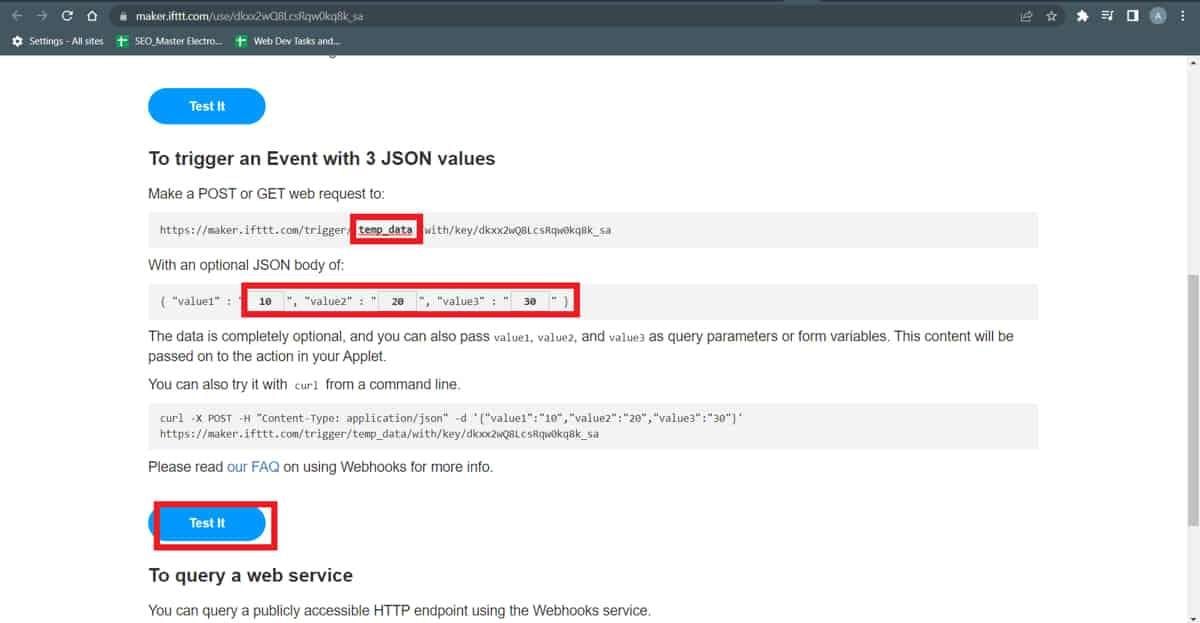
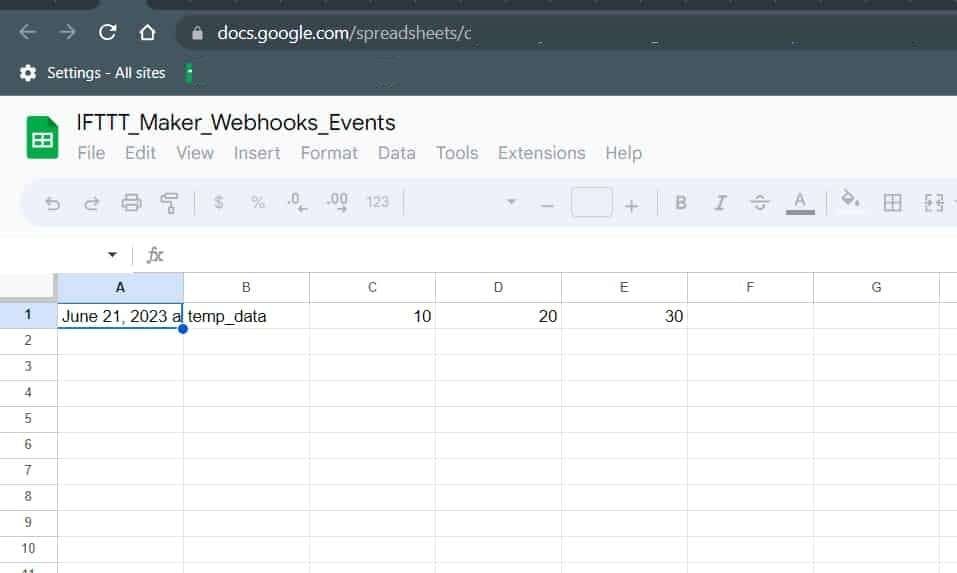
Check with your event name enter the dummy values for values 1,2 and 3 and press the the test button
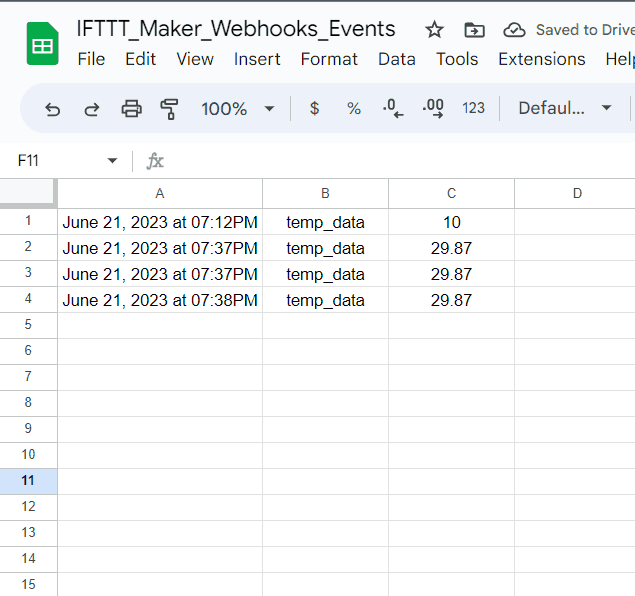
Now open your drive and check with your sheet name and open it and see the data that you have sent using IFTTT
DS18B20 Interfacing with NodeMCU:

Measure Temperature using DS18B20 and Nodemcu
Let’s interface the DS18B20 temperature sensor to Nodemcu and display the surrounding temperature on the web server as well as on the serial monitor.
Here we are using DallasTemperature libraries for the above example. We need to install the DallasTemperature library using the Arduino Library Manager.
- Open the Arduino IDE
- Navigate to Sketch ► Include Library ► Manage Libraries…
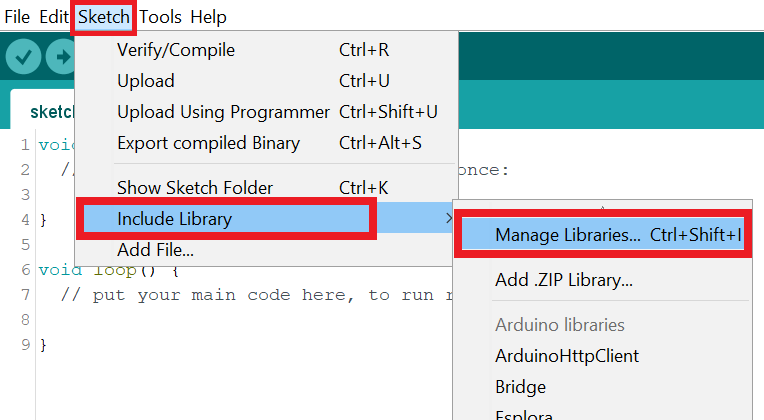
The library Manager window will pop up. Now enter DS18B20 into the search box, and click Install on the DallasTemperature option to install version 3.9.0 or higher. As shown below image.
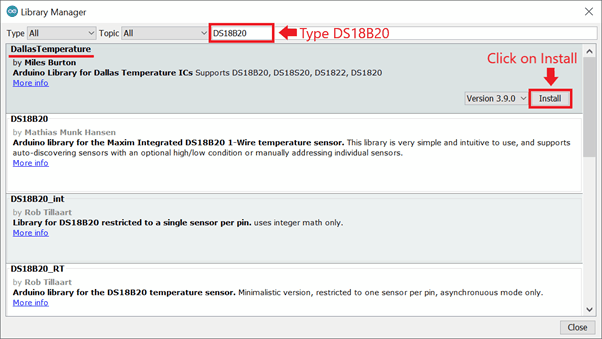
- If you don’t have the OneWire library, then this pop-up will come then click on Install all.

Code for NodeMCU
#include <ESP8266WiFi.h>
#include <OneWire.h>
#include <DallasTemperature.h>

// WiFi credentials
const char* ssid = "Your SSID"; // WiFi SSID
const char* password = "PASSWORD";  // WiFi password

// IFTTT configuration
const char* resource = "https://maker.ifttt.com/trigger/temp_data/with/key/dkxx2wQ8LcsRqw0kq8k_sa"; // IFTTT webhook URL
const char* server = "maker.ifttt.com"; // IFTTT server

// Pin configuration for OneWire
#define ONE_WIRE_BUS D2
OneWire oneWire(ONE_WIRE_BUS);
DallasTemperature sensors(&oneWire);

// Sleep configuration
uint64_t uS_TO_S_FACTOR = 1000000;
uint64_t TIME_TO_SLEEP = 600; // Sleep for 10 minutes

#define SEALEVELPRESSURE_HPA (1013.25)

void setup() {
  Serial.begin(115200);
  delay(2000);
  pinMode(D2, INPUT_PULLUP);

  sensors.begin();
  initWifi();          // Initialize WiFi connection
  makeIFTTTRequest();  // Send data to IFTTT

  Serial.println("Going to sleep now");
  ESP.deepSleep(TIME_TO_SLEEP * uS_TO_S_FACTOR); // Enter deep sleep mode
}

void loop() {}

void initWifi() {
  Serial.print("Connecting to: ");
  Serial.print(ssid);
  WiFi.begin(ssid, password);

  int timeout = 10 * 4; // 10 seconds
  while(WiFi.status() != WL_CONNECTED  && (timeout-- > 0)) {
    delay(250);
    Serial.print(".");
  }
  Serial.println("");

  if(WiFi.status() != WL_CONNECTED) {
     Serial.println("Failed to connect, going back to sleep");
  }

  Serial.print("WiFi connected in: ");
  Serial.print(millis());
  Serial.print(", IP address: ");
  Serial.println(WiFi.localIP());
}

void makeIFTTTRequest() {
  Serial.print("Connecting to ");
  Serial.print(server);

  WiFiClient client;
  int retries = 5;
  while (!client.connect(server, 80) && (retries-- > 0)) {
    Serial.print(".");
  }
  Serial.println();
  if (!client.connected()) {
    Serial.println("Failed to connect...");
  }

  Serial.print("Request resource: ");
  Serial.println(resource);

  sensors.requestTemperatures();
  float tempC = sensors.getTempCByIndex(0);

  // Prepare JSON payload for IFTTT
  String jsonObject = String("{\"value1\":\"") + sensors.getTempCByIndex(0) + "\",\"value2\":\"" + ""
                      + "\",\"value3\":\"" + "" + "\"}";

  // Construct and send HTTP request to IFTTT
  client.println(String("POST ") + resource + " HTTP/1.1");
  client.println(String("Host: ") + server);
  client.println("Connection: close\r\nContent-Type: application/json");
  client.print("Content-Length: ");
  client.println(jsonObject.length());
  client.println();
  client.println(jsonObject);

  int timeout = 5 * 10; // 5 seconds
  while (!client.available() && (timeout-- > 0)) {
    delay(100);
  }
  if (!client.available()) {
    Serial.println("No response...");
  }
  while (client.available()) {
    Serial.write(client.read());
  }

  Serial.println("\nclosing connection");
  client.stop();
}
Output
Let's explain the code
Add the required libraries
#include <ESP8266WiFi.h>
#include <OneWire.h>
#include <DallasTemperature.h>
Add your SSID and Password in below
const char* ssid     = "SSID";
const char* password = "PASSWORD";
Replace with your unique IFTTT URL resource
const char* resource = "REPLACE_WITH_YOUR_IFTTT_URL_RESOURCE";
const char* server = "maker.ifttt.com";
Set the pin number for the DS1307 sensor
#define ONE_WIRE_BUS 2
OneWire oneWire(ONE_WIRE_BUS);
DallasTemperature sensors(&oneWire);
The conversion factor for microseconds to seconds
uint64_t uS_TO_S_FACTOR = 1000000; Sleep for 10 minutes (600 seconds)
uint64_t TIME_TO_SLEEP = 600;
#define SEALEVELPRESSURE_HPA (1013.25)
Set the baud rate to 115200
Serial.begin(115200); Begin the temperature sensor using
sensors.begin();request to DS18B20 sensor to get the temperature reading
sensors.requestTemperatures();
float tempC = sensors.getTempCByIndex(0);
Now publish the temperature on your sheet.
String jsonObject = String("{\"value1\":\"") + sensors.getTempCByIndex(0) + "\",\"value2\":\"" + ""
                      + "\",\"value3\":\"" + "" + "\"}";
Components Used |
||
|---|---|---|
| NodeMCU NodeMCUNodeMCU |
X 1 | |
| DS18B20 Waterproof temperature sensor DS18B20 Waterproof temperature sensor |
X 1 | |
Downloads |
||
|---|---|---|
|
|
ESP8266_Sensor_Readings_On_Google_Sheet | Download |