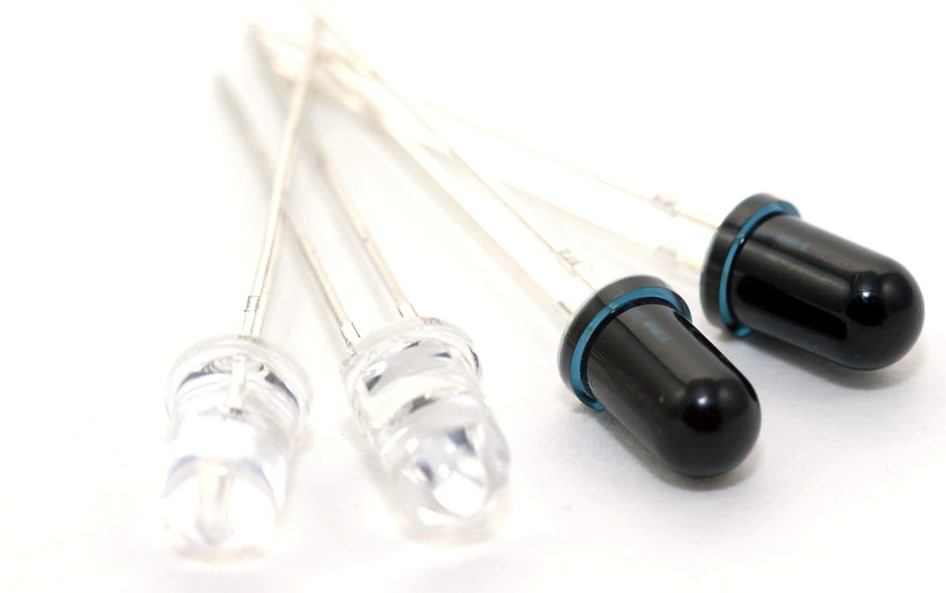
Overview of IR LED and Photodiode

IR communication makes use of IR (Infrared) waves from the electromagnetic spectrum. IR waves are not visible to our eyes which makes it useful for wireless communication.
An IR LED is used to transmit data wirelessly in digital form (0 – LED OFF or 1 – LED ON).
An IR photodiode or IR phototransistor receives this data. The IR receiver (IR photodiode or IR phototransistor) gives different current values according to the intensity of light.
It is possible to modulate the data transmitted and there are special decoder IR receivers like TSOP1738 available that can receive the modulated data.
For more information about IR communication, refer to the topic IR Communication in the sensors and modules section.
NodeMCU can take advantage of IR communication to read commands from IR enabled remotes, send data through IR medium, etc.
Connection Diagram of IR LED with NodeMCU
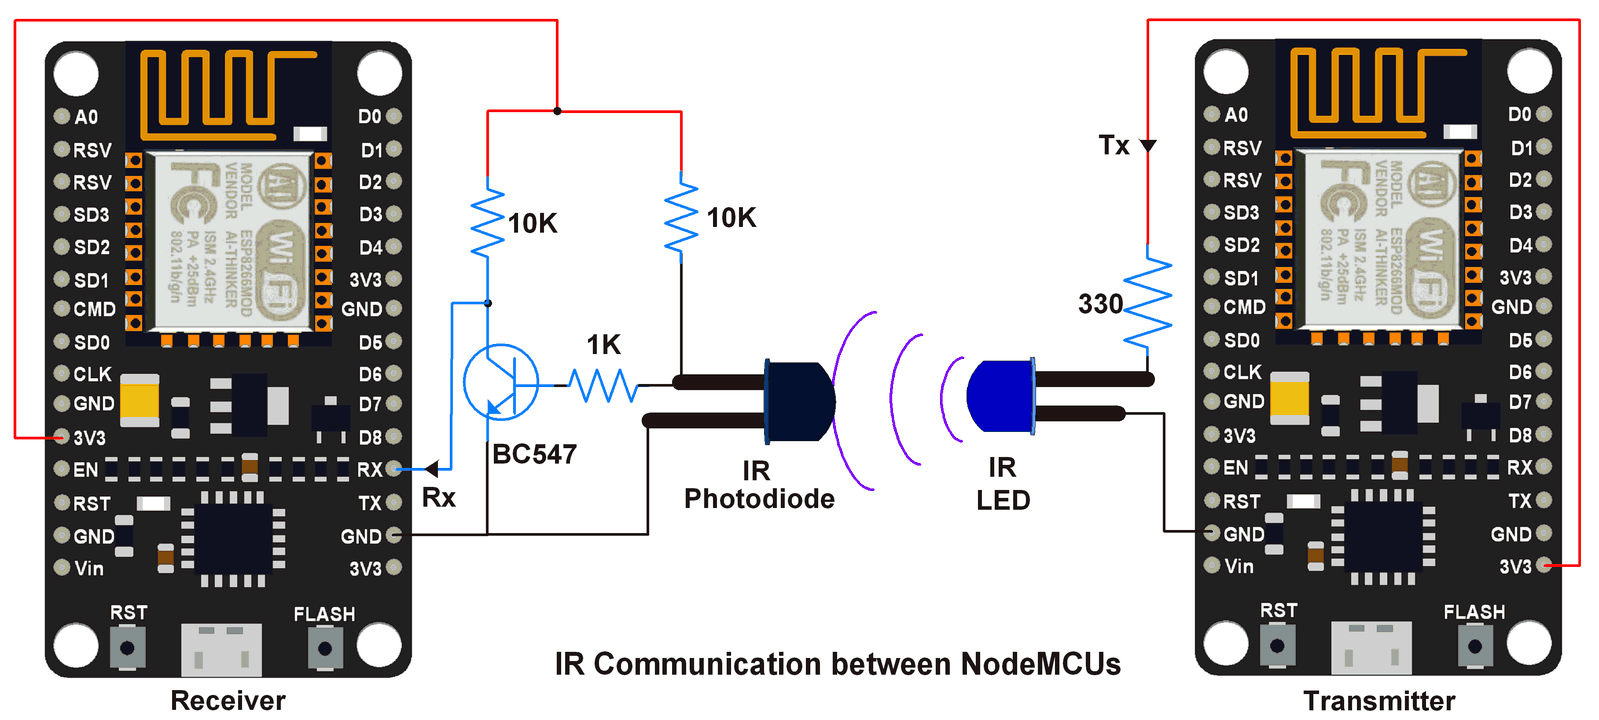
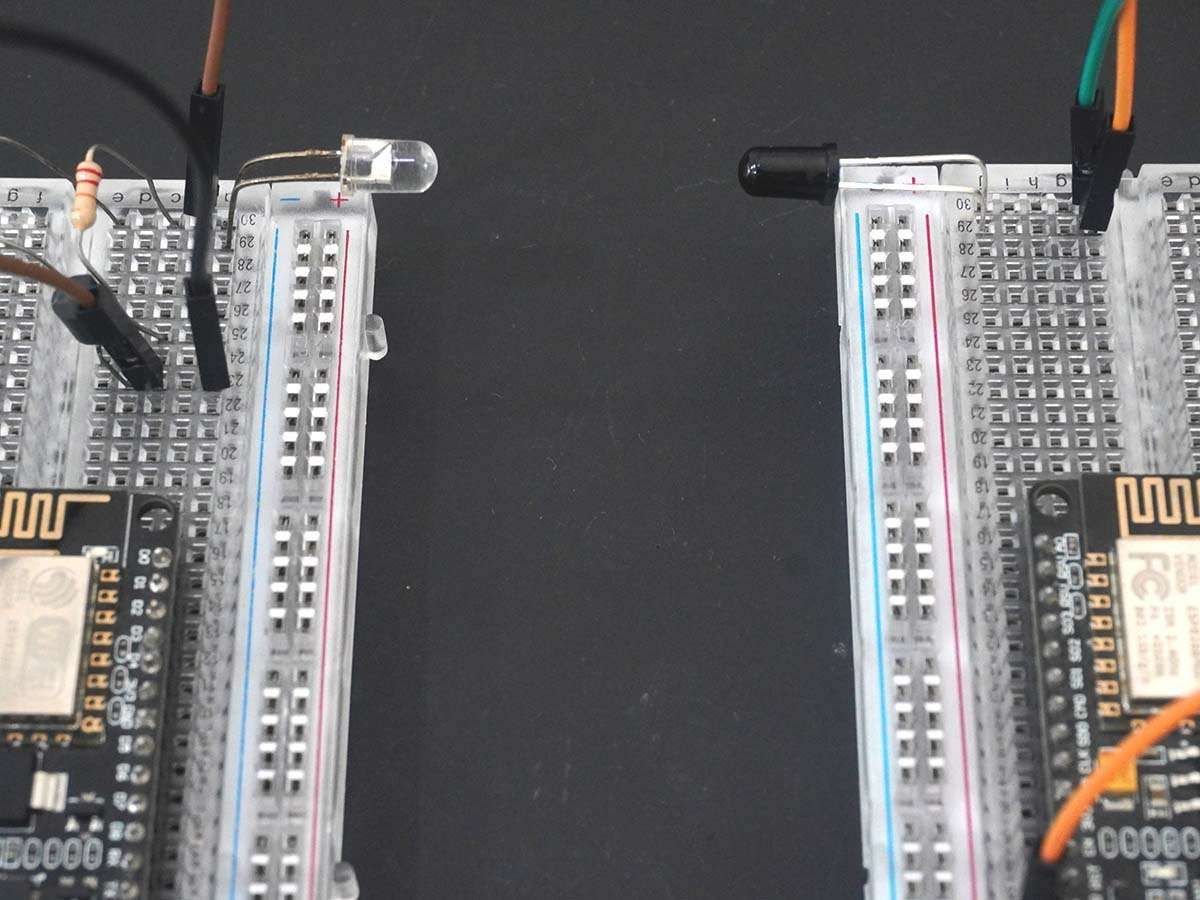
Note: In the diagram shown above, for the IR LED, the longer lead is the Anode and the shorter lead is the Cathode.
Note: Since NodeMCU Tx Rx pins are used to upload the scripts to the board, disconnect Tx Rx from IR circuitry while uploading/saving script to ESP. Connect it after successfully uploading/saving the script to NodeMCU.
IR Communication using NodeMCU
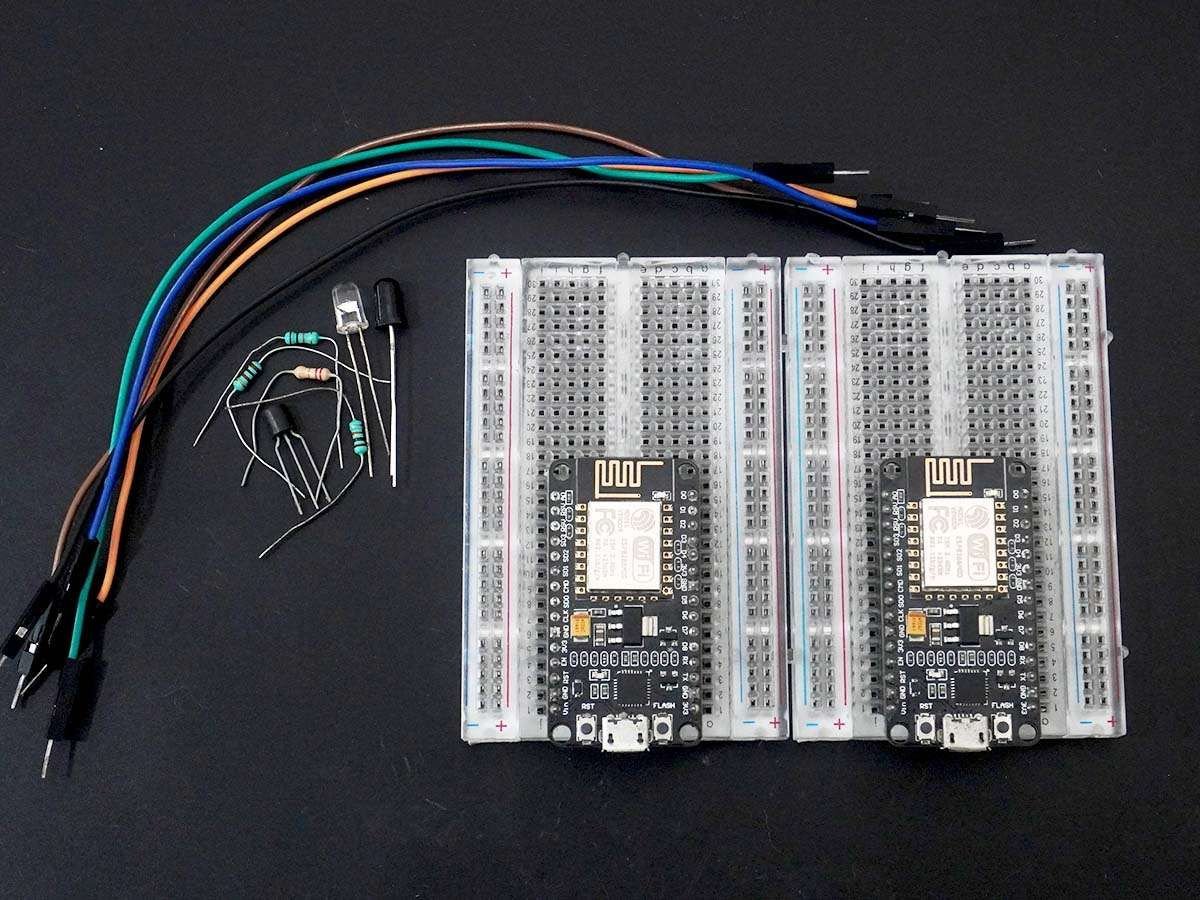
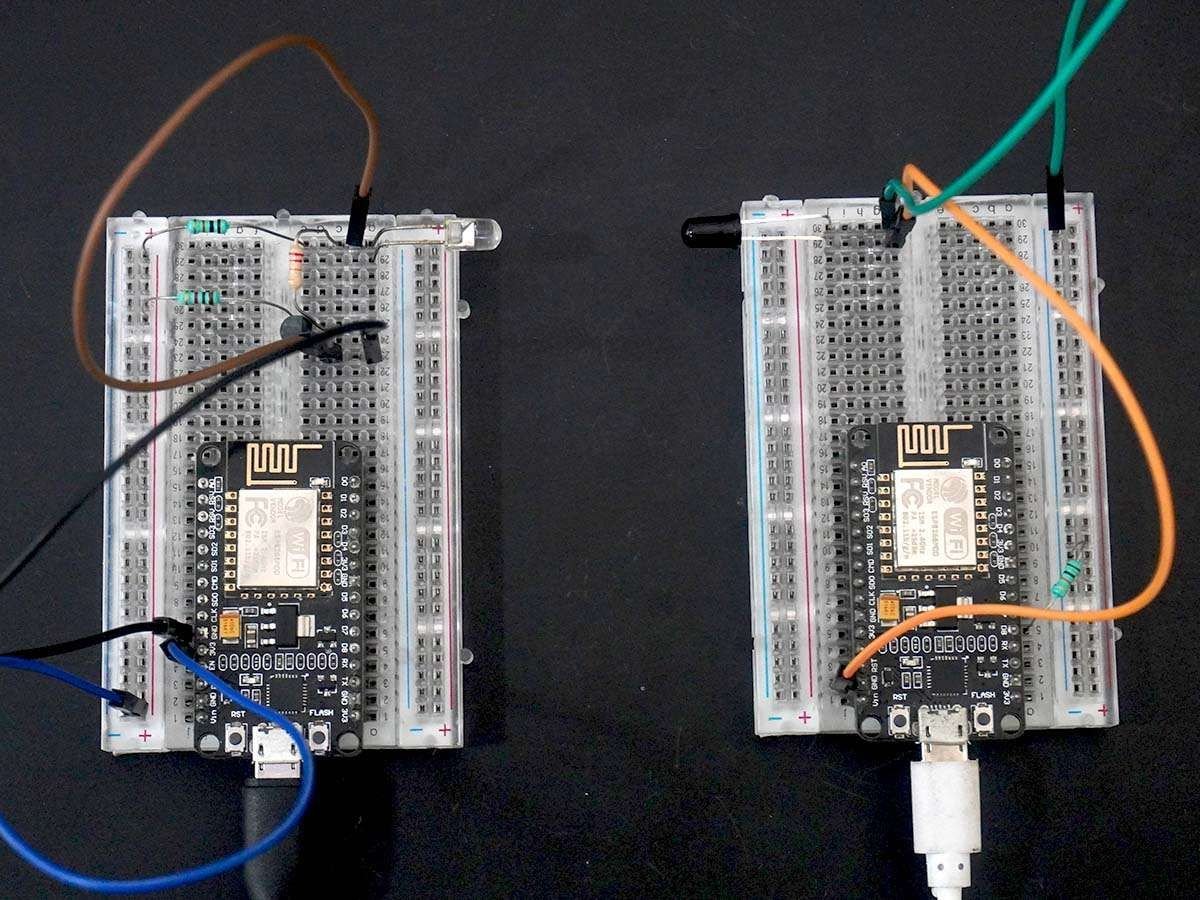
Let’s write Lua Scripts for IR communication in between two NodeMCU’s. One will be configured as a transmitter and the other one as a receiver.
To know about how to get started with Lua script for NodeMCU refer to Getting started with NodeMCU using ESPlorer IDE
Note we are using 1200 baud rate for this communication.
Lua Scripts for IR communication
Lua Script for IR at the Transmitter end
count = 0

-- set uart0 with 1200 baud rate, 8 databits, no pariy, 1 stop bit with echo
uart.setup(0,1200,8,0,1,1)

while true do   -- continuous send count
    print(count)
    count = count + 1
tmr.delay(1000000)
end
Lua Script for IR at the Receiver end
-- set uart0 with 1200 baud rate, 8 databits, no pariy, 1 stop bit with echo
uart.setup(0,1200,8,0,1,1)
--print received data
uart.on("data", "\n", function(data) print("receive from uart:", data) end, 0)
To know about Lua-based NodeMCU UART functions refer to NodeMCU UART with ESPlorer IDE.
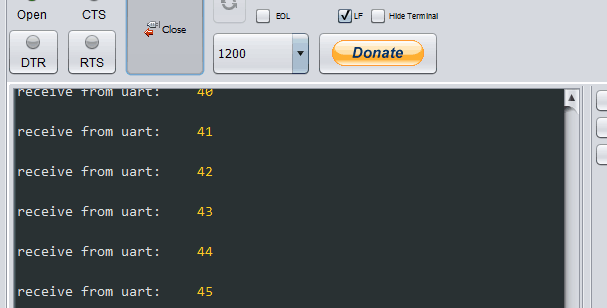
below is ESPlorer Serial Monitor Output Window at the receiver end NodeMCU
Also, we can write an Arduino Sketch of IR communication for NodeMCU. To know about how to get started with Arduino Sketches for NodeMCU refer to Getting started with NodeMCU using Arduino IDE
IR communication Code for NodeMCU using Arduino IDE
Arduino Sketch for IR at the Transmitter end
void setup() {
 Serial.begin(1200);  /* Define baud rate for serial communication */
}

void loop() {
 int count;
 for(count = 0; count<100; count++){
  Serial.println(count);
  delay(1000);
 }
}
Arduino Sketch for IR at the Receiver end
void setup() {
 Serial.begin(1200);  /* Define baud rate for serial communication */
}

void loop() {
 if(Serial.available())  /* If data is available on serial port */
  {
    Serial.print(char(Serial.read()));  /* Print character received on to the serial monitor */
  }
}
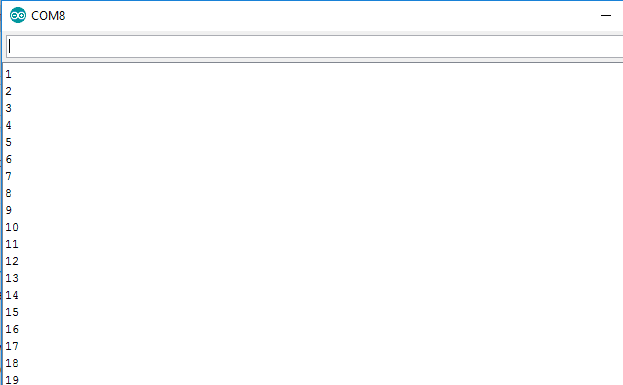
below is Arduino Serial Monitor Output Window at the receiver end NodeMCU
Components Used |
||
|---|---|---|
| NodeMCU NodeMCUNodeMCU |
X 2 | |
| ESP12F ESP12E |
X 1 | |
| TSOP1738 Infrared Receivers Infrared Receivers 38kHz IR Receiver |
X 1 | |
| IR LED Infrared Emitters IR LED Infrared Emitters |
X 1 | |
Downloads |
||
|---|---|---|
|
|
NodeMCU IR communication source code files | Download |