Description
- SD or Secure Digital is a type of memory card that was developed by the SD Card Association for use in portable devices such as mobile phones and cameras.
- There are four different types of SD cards, each with different storage capacities and file systems.
- The first type is SDSC, which stands for Standard Capacity SD. It can hold up to 2GB of data and uses the FAT-12 and FAT-16 file systems.
- The second type is SDHC, which stands for High-Capacity SD. It can hold between 2GB and 32GB of data and uses the FAT-32 file system.
- The third type is SDXC, which stands for eXtended Capacity SD. It can hold between 32GB and 2TB of data and uses the exFAT file system.
- The fourth type is SDIO, which combines input and output functions with data. In other words, it allows you to do things like connect a wireless adapter or a GPS receiver to your device using the SD card slot.
SD cards in different sizes:
- Regular SD – 1.25 by 0.95 inches
- Mini SD – 0.87 by 0.79 inches
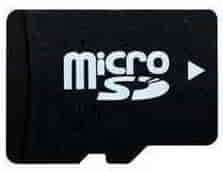
- Micro SD – 0.43 by 0.59 inches
We are using a Micro SD card for interfacing with NodeMCU.
File System
- An SD card is a type of storage device that allows the host device to read or write data in fixed-size blocks by specifying their block number.
- SD card comes with preformatted with one or more MBR (Master Boot Record) partitions.
- These partitions help to organize the data on the card and enable it to work in a way that is similar to a hard disk.
- The first partition on the SD card usually contains the file system, which is what allows the host device to read and write data to the card.
- By using the file system, the host device can easily find and access the files it needs on the SD card, just like it would on a hard disk.
1. For the SDSC card
- Capacity smaller than 16 MB- FAT 12
- Capacity between 16 MB and 32 MB- FAT 16
- Capacity larger than 32 MB- FAT 16B
2. For SDHC cards
- Capacity smaller than 7.8 GB- FAT 32
- Capacity greater than 7.8 GB- FAT 32
3. For SDXC cards
- exFAT
Notes
1. Arduino library supports only FAT16 and FAT32 file systems. Make sure that your SD card is formatted with these two only otherwise you will get an initialization error.
2. For formatting your SD card you can download the SD formatted on the following link - https://www.sdcard.org/downloads/formatter_4/
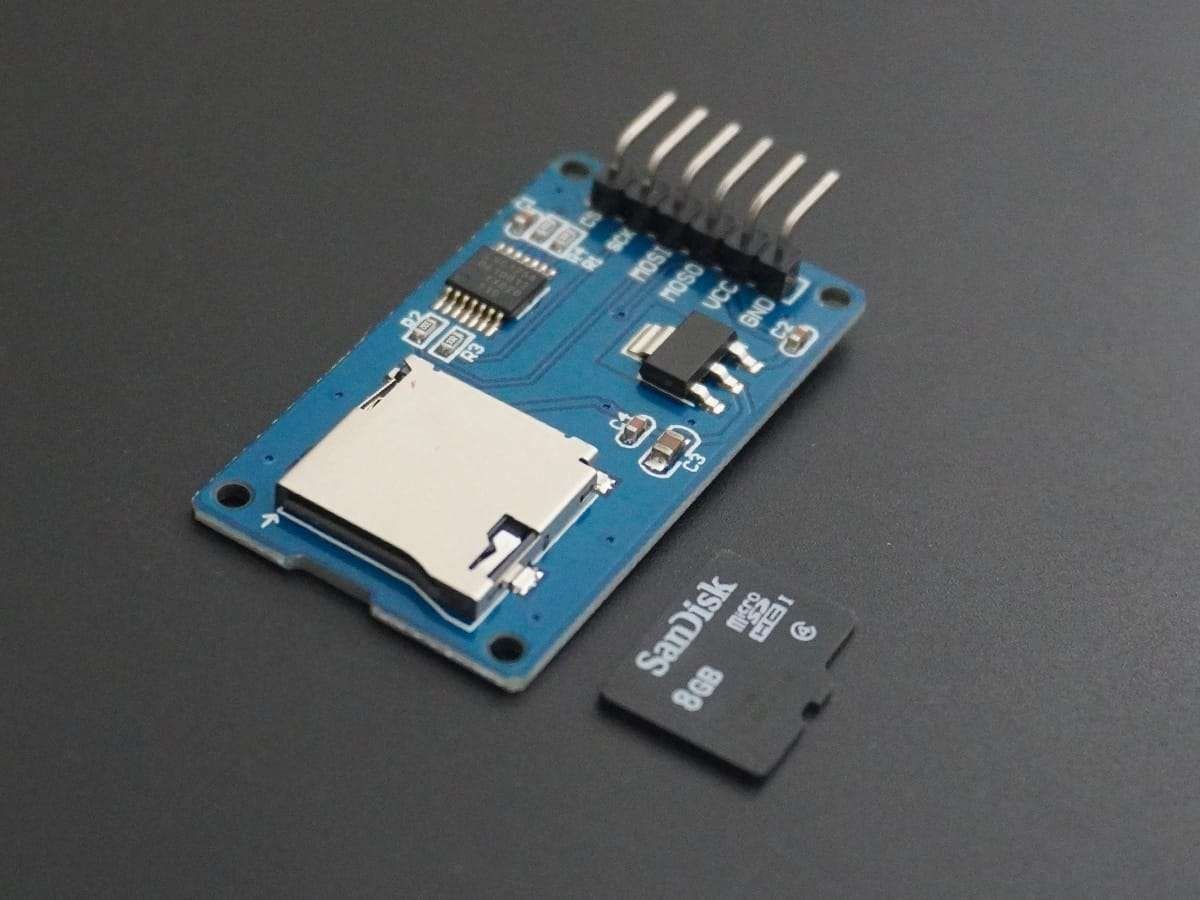
SD Card Module
- The micro-SD Card Module is a straightforward method for moving data between a standard SD card and other devices.
- It uses an SPI interface that can work with any SD card and requires a 5V power supply. Additionally, it has an internal 3.3V regulator that is compatible with NodeMCU.
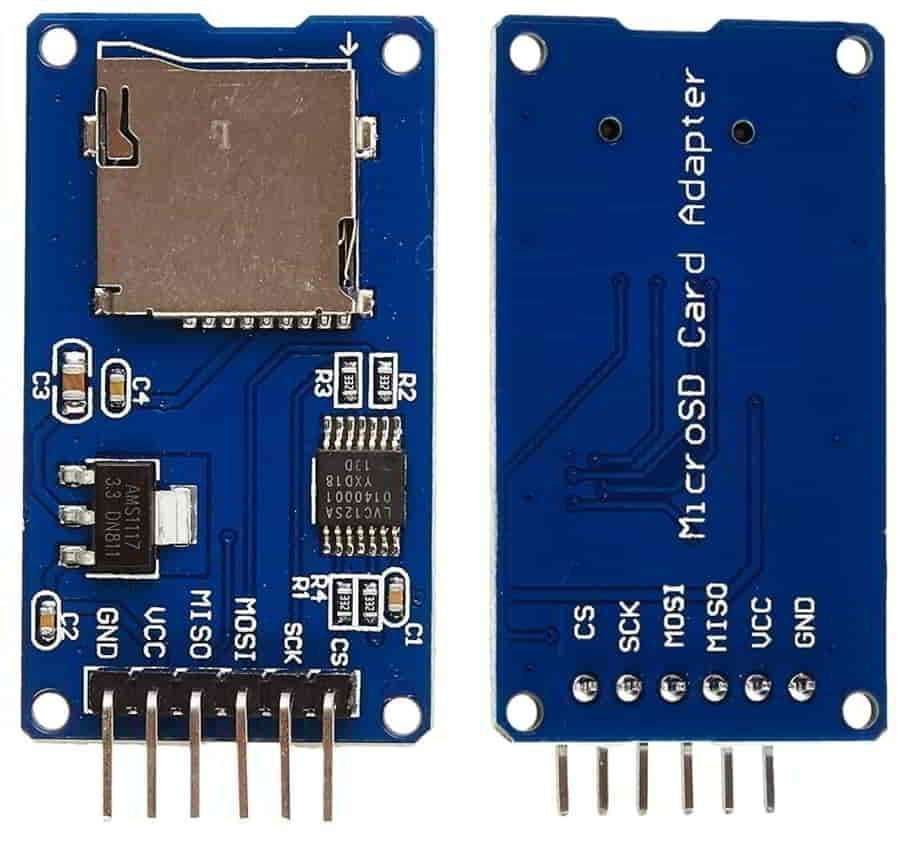
SD Card Module Pin Description:
- CS: Chip Select pin
- SCK: Serial Clock Pulse pin
- MISO: Master In Slave Out
- MOSI: Master Out Slave In
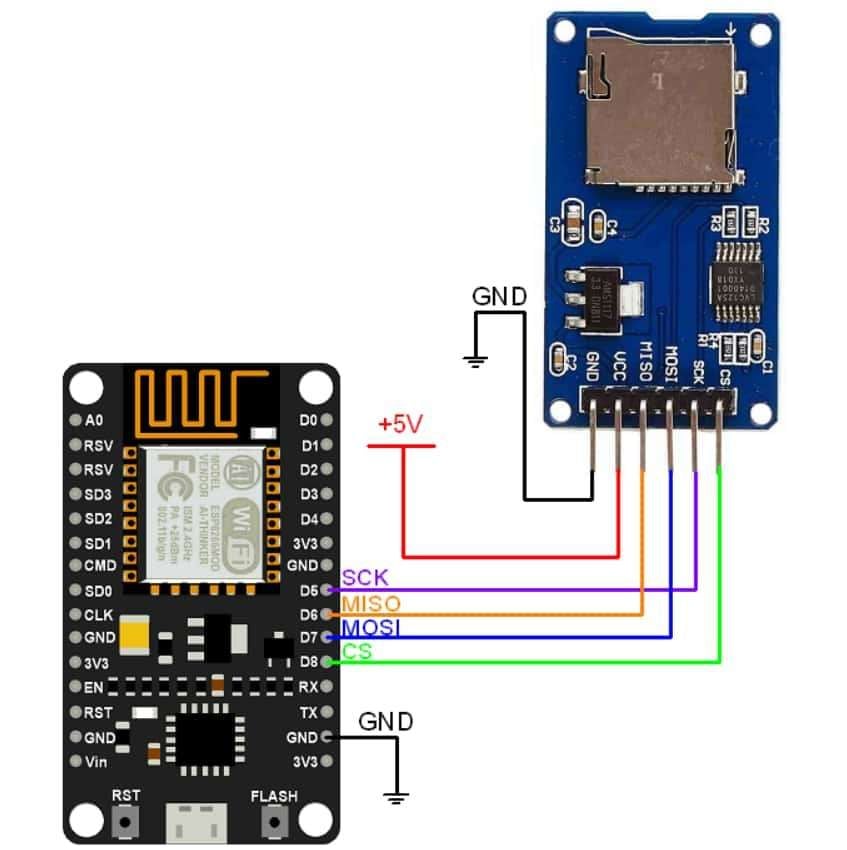
MicroSD Card Hardware Connection with NodeMCU
.jpg)
Write and Read MicroSD Card using NodeMCU
Here we are going to interface the MicroSD card with NodeMCU and perform the read and write operation on it.
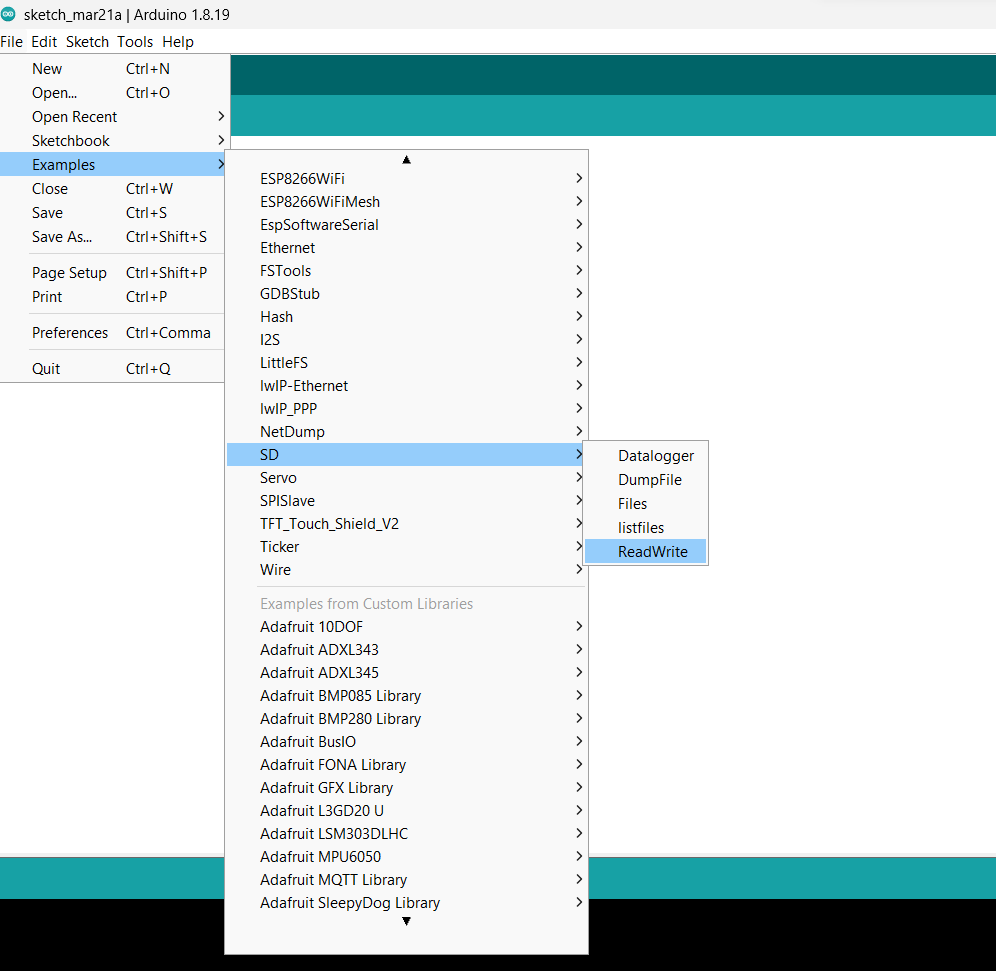
Here we are going to use the code from Examples in Arduino IDE.
Now open the example of the SD. To open it navigate to File ► Examples ► SD ► ReadWrite.
MicroSD Card Code for NodeMCU
/*
  SD card read/write

  This example shows how to read and write data to and from an SD card file
  The circuit:
   SD card attached to SPI bus as follows:
 ** MOSI - pin D7
 ** MISO - pin D6
 ** CLK - pin D5
 ** CS - pin D8

  created  Nov 2010
  by David A. Mellis
  modified 9 Apr 2012
  by Tom Igoe

  This example code is in the public domain.

*/

#include <SPI.h>
#include <SD.h>

File myFile;

void setup() {
  // Open serial communications and wait for port to open:
  Serial.begin(115200);

  Serial.print("Initializing SD card...");

  if (!SD.begin(4)) {
    Serial.println("initialization failed!");
    return;
  }
  Serial.println("initialization done.");

  // open the file. note that only one file can be open at a time,
  // so you have to close this one before opening another.
  myFile = SD.open("test.txt", FILE_WRITE);

  // if the file opened okay, write to it:
  if (myFile) {
    Serial.print("Writing to test.txt...");
    myFile.println("testing 1, 2, 3.");
    // close the file:
    myFile.close();
    Serial.println("done.");
  } else {
    // if the file didn't open, print an error:
    Serial.println("error opening test.txt");
  }

  // re-open the file for reading:
  myFile = SD.open("test.txt");
  if (myFile) {
    Serial.println("test.txt:");

    // read from the file until there's nothing else in it:
    while (myFile.available()) { Serial.write(myFile.read()); }
    // close the file:
    myFile.close();
  } else {
    // if the file didn't open, print an error:
    Serial.println("error opening test.txt");
  }
}

void loop() {
  // nothing happens after setup
}
- Now upload the code in the NodeMCU.
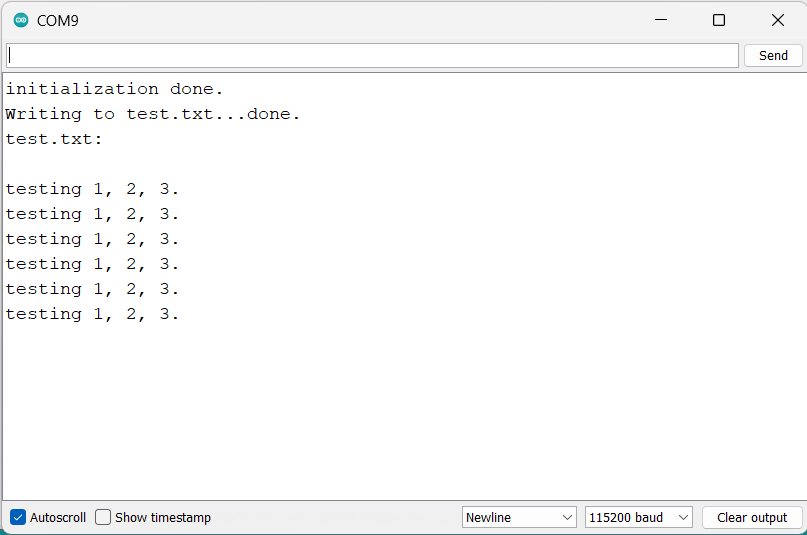
- Once you upload the code open the serial monitor on IDE and set the baud rate to 115200. I necessary reset the NodeMCU to see the output as shown below.
Output on Serial Monitor
Let’s understand the code
At the beginning of the code, we included libraries, the first is SPI.h this library is used for communicating with devices using the Serial Peripheral Interface (SPI) protocol.
And, the second is the SD.h which is used for interfacing with SD (Secure Digital) cards. SD cards are commonly used as a storage medium for data logging, audio recording, and other applications in microcontroller projects.
#include <SPI.h>
#include <SD.h>
In the setup function, use the begin() function to check if the module is detected. If the initialization fails, the program will print an error message and exit the "setup()" function.
  Serial.print("Initializing SD card...");

  if (!SD.begin(4)) {
    Serial.println("initialization failed!");
    return;
  }
  Serial.println("initialization done.");
After the SD card is successfully initialized, the code creates a new file named test.txt using the open() function of the "SD" library.
Next, if the file is opened in "FILE_WRITE" mode, which means that the file is opened for writing.
myFile = SD.open("test.txt", FILE_WRITE);If the file is opened successfully, the program will write the string testing 1, 2, 3. to the file using the println() function of the File object.
After writing to the file, the program will close it using the close() function.
  if (myFile) {
    Serial.print("Writing to test.txt...");
    myFile.println("testing 1, 2, 3.");
    // close the file:
    myFile.close();
    Serial.println("done.");
  } else {
    // if the file didn't open, print an error:
    Serial.println("error opening test.txt");
  }
Next, the program reopens the same file for reading using the "open()" function again. This time, the file is opened in the default "READ" mode.
myFile = SD.open("test.txt");If the file is opened successfully, the program will print the string test.txt: to the serial monitor and then read from the file using the available() and read() functions of the File object.
  if (myFile) {
    Serial.println("test.txt:");

    // read from the file until there's nothing else in it:
    while (myFile.available()) { Serial.write(myFile.read()); }
    // close the file:
    myFile.close();
  } else {
    // if the file didn't open, print an error:
    Serial.println("error opening test.txt");
  }
In the loop function, there is no code to run in the loop repeatedly.
void loop() {
  // nothing happens after setup
}
Components Used |
||
|---|---|---|
| MicroSD Card Adafruit Accessories 16GB Card with NOOBS 3.1 for Raspberry Pi Computers including 4 |
X 1 | |
| NodeMCU NodeMCUNodeMCU |
X 1 | |
Downloads |
||
|---|---|---|
|
|
MicroSD_Card_NodeMCU_Code | Download |