Introduction
NodeMCU is Lua based firmware of ESP8266. Generally, ESPlorer IDE is referred for writing Lua scripts for NodeMCU. It requires to get familiar with ESPlorer IDE and Lua scripting language.
There is another way of developing NodeMCU with a well-known IDE i.e. Arduino IDE. We can also develop NodeMCU applications using the Arduino development environment. This makes things easy for Arduino developers than learning a new language and IDE for NodeMCU.
Let’s see about setting up Arduino IDE with NodeMCU.
First Download Arduino IDE (version 1.6+) https://www.arduino.cc/en/Main/Software
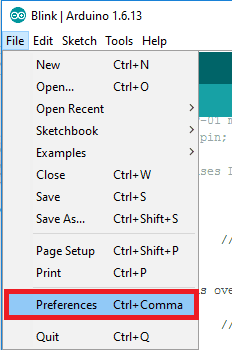
- Open Arduino IDE and Go to File -> Preference.
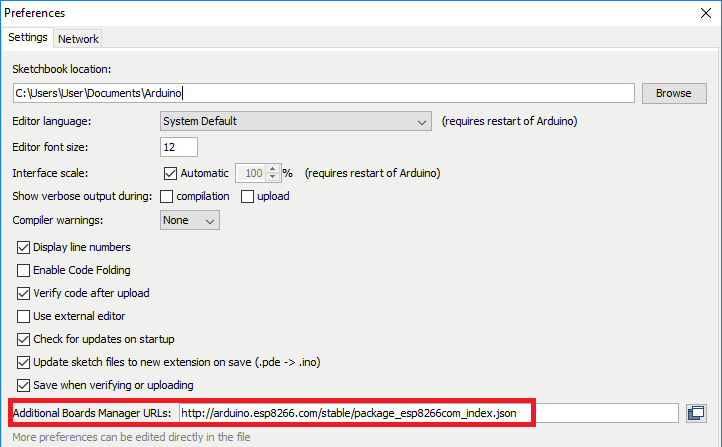
- Now on the Preference window, Enter below link in Additional Boards Manager URLs
http://arduino.esp8266.com/stable/package_esp8266com_index.json
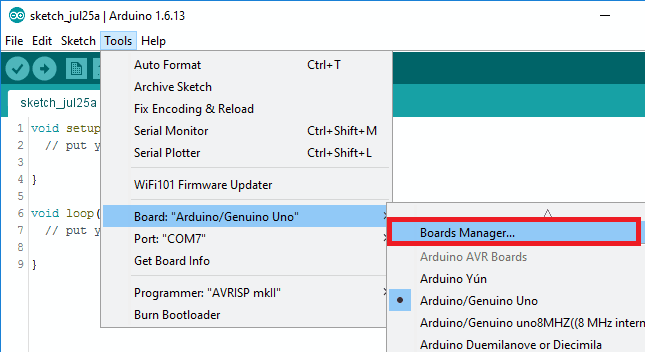
- Now close the Preference window and go to Tools -> Board -> Boards Manager
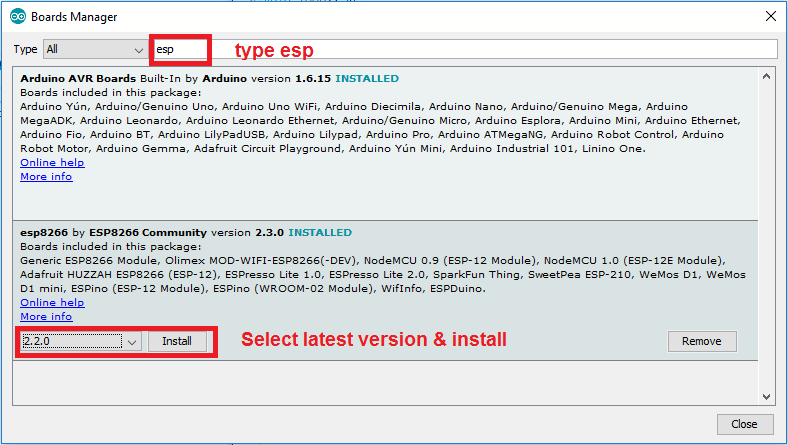
- In the Boards Manager window, Type esp in the search box, esp8266 will be listed there below. Now select the latest version of the board and click on install.
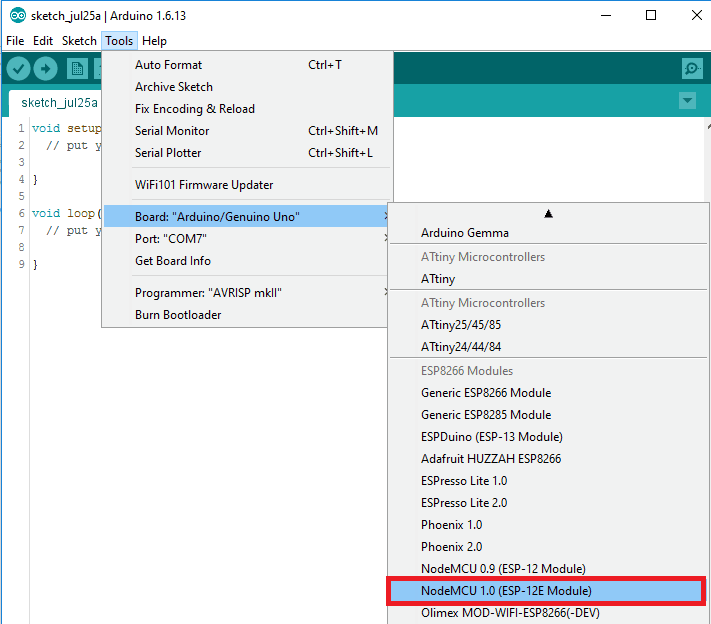
- After installation of the board is complete, open Tools->Board->and select NodeMCU 1.0(ESP-12E Module).
- Now Your Arduino IDE is ready for NodeMCU
Example
Let’s see how to write a simple serial print sketch using Arduino IDE for NodeMCU.
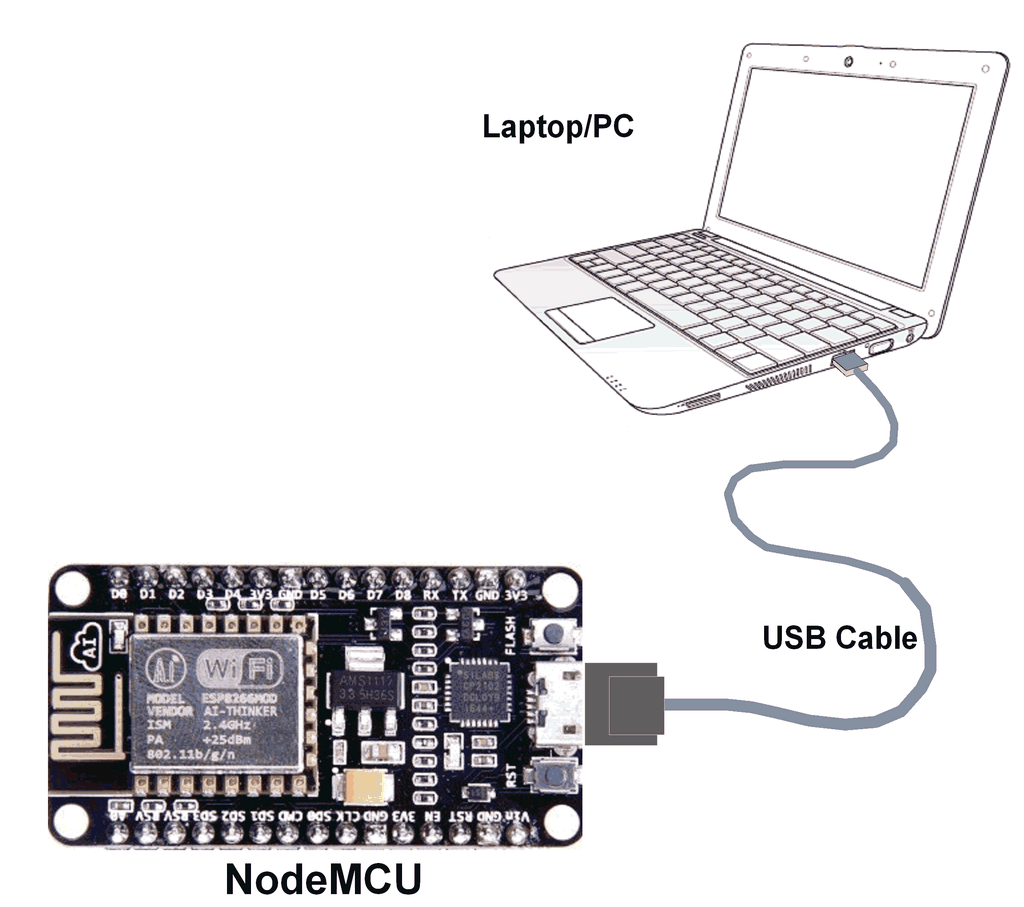
First, connect NodeMCU Development Kit with PC as shown in the below figure.
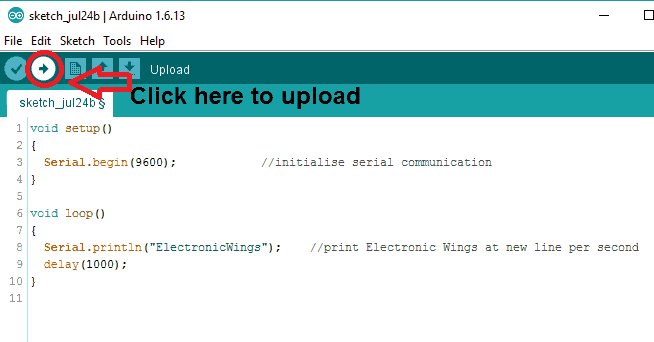
- After setting up Arduino IDE for NodeMCU, open Arduino IDE and write a simple sketch of serial print as shown in the below figure.
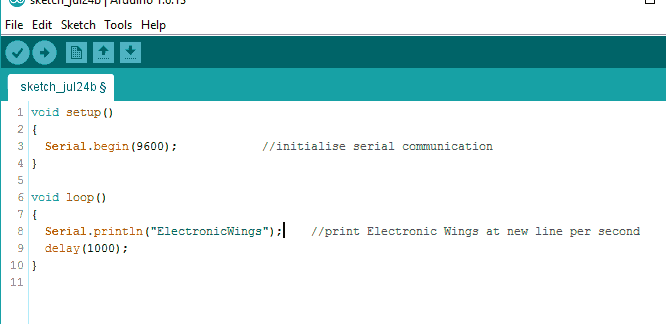
Arduino Sketch
void setup()
{
	Serial.begin(9600);  /* initialise serial communication */
}

void loop()
{
	Serial.println("ElectronicWings"); /* print Electronic Wings at new line per second */
	delay(1000);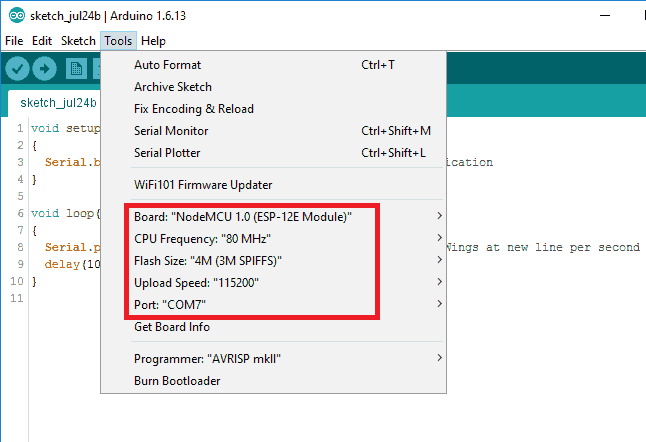
}- Ensure that you have selected the correct board as shown in the below figure. Also, make sure that you have selected the appropriate COM port.
- Now compile & upload the written sketch directly to the NodeMCU DevKit by clicking on the upload button.
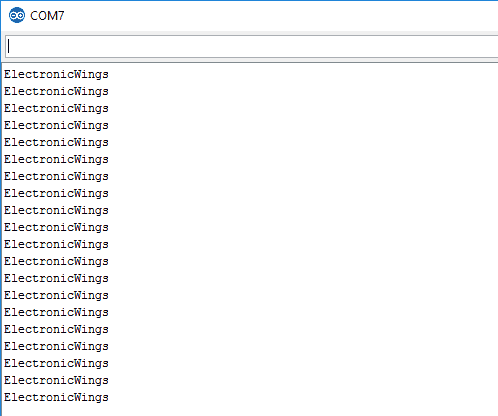
- Now Click on the Serial Monitor (upper right corner) option to check the output on the serial monitor window of Arduino IDE.

- The serial monitor output window will pop up with output as shown in the below figure.
Components Used |
||
|---|---|---|
| NodeMCU NodeMCUNodeMCU |
X 1 | |
| ESP12F ESP12E |
X 1 | |