Introduction
The ESP8266 is a low-cost Wi-Fi chip developed by Espressif Systems with TCP/IP protocol.
For more information about ESP8266, you can refer to ESP8266 WiFi Module.
NodeMCU is an LUA based firmware which we need to download on the ESP8266 chip.
To Download NodeMCU firmware, go to https://nodemcu-build.com/
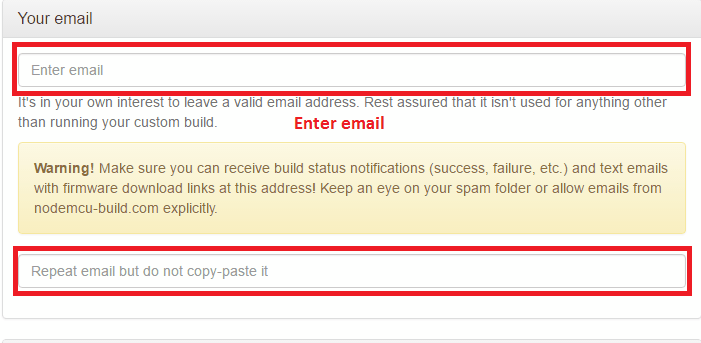
- Enter your email.
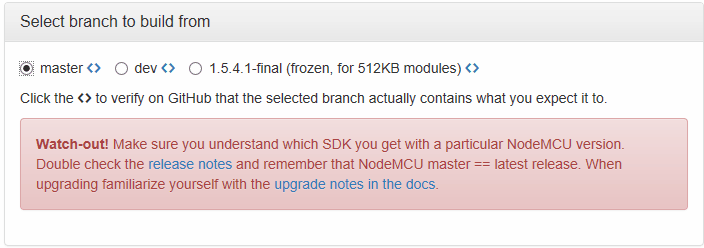
- Select branch to Build
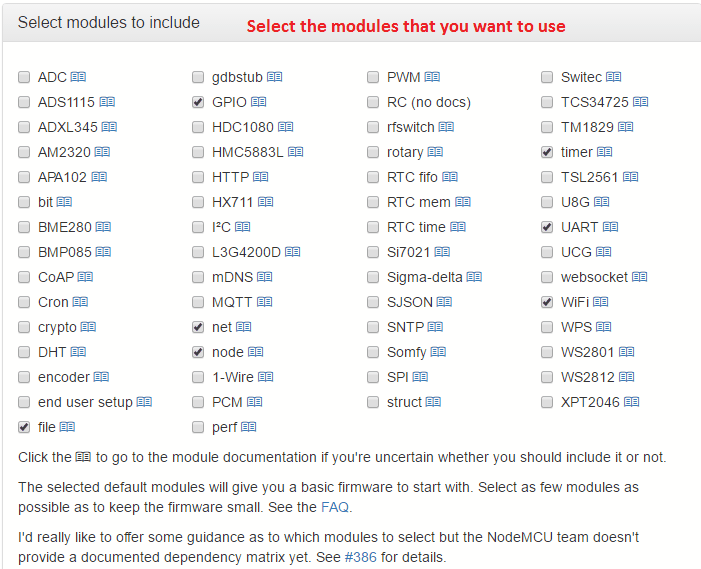
- Select the modules that you want to install.
E.g. If you want to use an analog sensor with NodeMCU then select the ADC model which will provide access to in-built ADC.
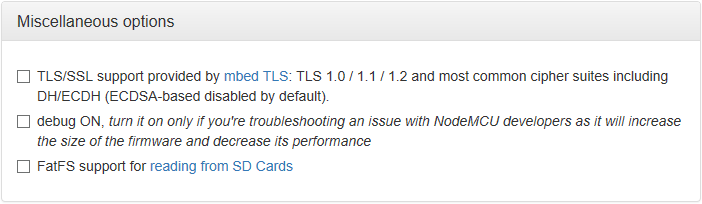
- We can select the miscellaneous option for TLS/SSL support, debug as well as FatFS support as shown below
- Click on Start your Build.

- After the build is completed you will receive an email with a link to download your custom firmware. Click on the link to download it.
- Note that you will get two links of Custom firmware, one is NodeMCU with floating support and the second is NodeMCU without floating support i.e. integer.
- Download the integer support firmware bin file if floating support is not needed, else, download the floating support firmware bin file.
We need to flash the above-downloaded custom firmware on the ESP8266 chip. There is a tool called ESP8266Flasher which is used to flash the ESP8266 chip.
- Download ESP8266Flasher.exe from
32bit : https://github.com/nodemcu/nodemcu-flasher/tree/master/Win32/Release
64bit : https://github.com/nodemcu/nodemcu-flasher/tree/master/Win64/Release
- Open ESP8266Flasher.exe and click on Config.
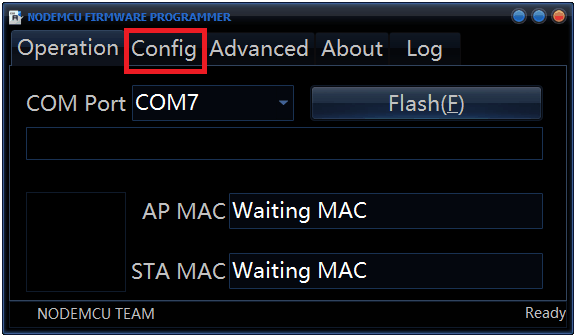
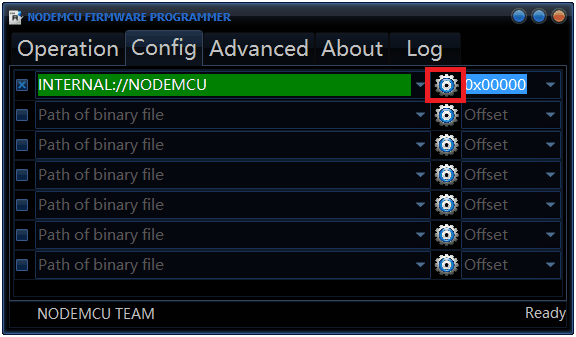
- Click on the Setting icon and then select the firmware which was downloaded in the first step
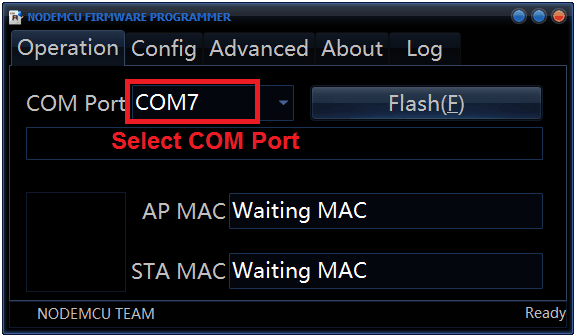
- Select the COM port (In my case it is COM 7)
- Connect the USB cable to the NodeMCU module as shown in below image
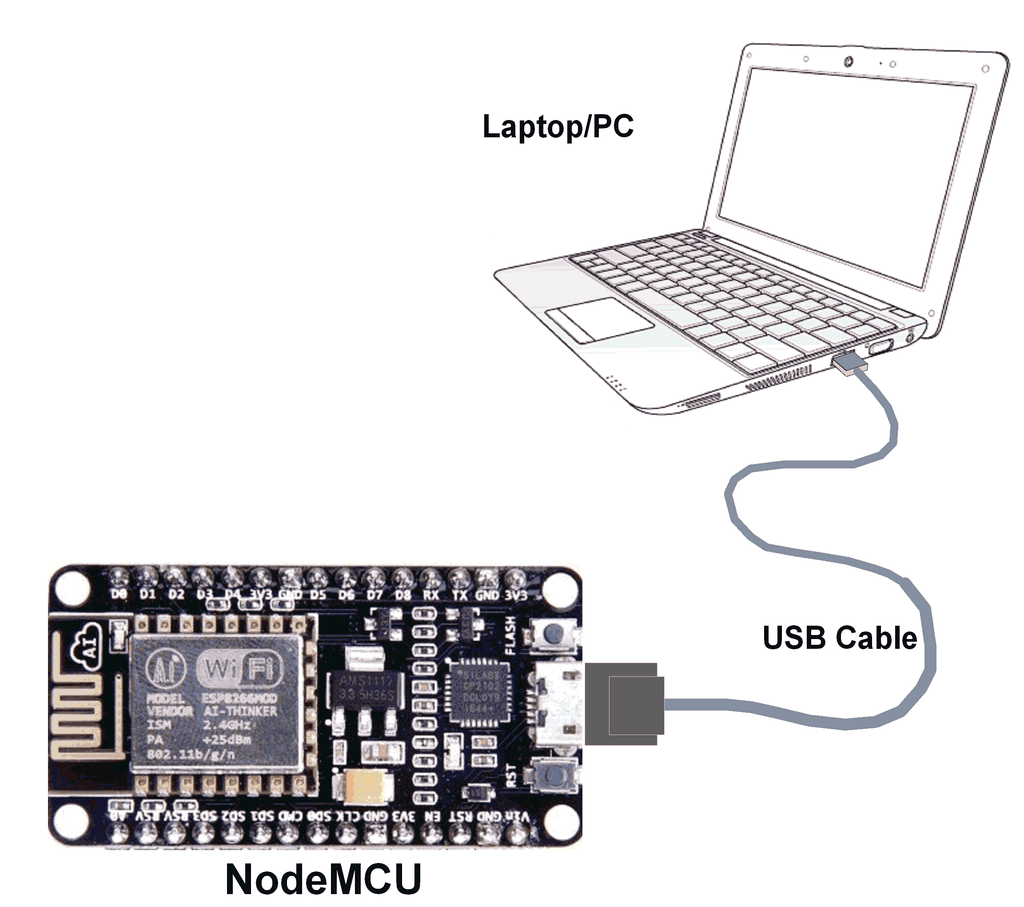
and then click on Flash
- A green tick will appear after the firmware is installed
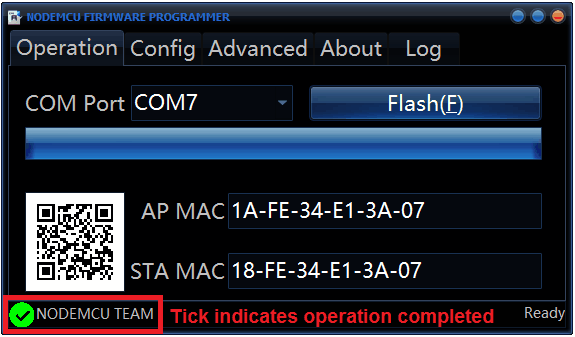
- HOLA! Your setup of ESP8266 with Node-MCU firmware is completed!
After setting up ESP with Node-MCU firmware, let’s see the IDE (Integrated Development Environment) required for the development of NodeMCU.
NodeMCU with ESPlorer
Lua scripts are generally used to code the NodeMCU. Lua is an open-source, lightweight, embeddable scripting language built on top of C programming language.
For more information about how to write Lua script for NodeMCU refer to Getting started with NodeMCU using ESPlorerIDE
NodeMCU with Arduino
Here is another way of developing NodeMCU with a well-known IDE i.e. Arduino IDE. We can also develop applications on NodeMCU using the Arduino development environment. This makes it easy for Arduino developers than learning a new language and IDE for NodeMCU.
For more information about how to write Arduino sketch for NodeMCU refer to Getting started with NodeMCU using ArduinoIDE
Components Used |
||
|---|---|---|
| NodeMCU NodeMCUNodeMCU |
X 1 | |
| ESP12F ESP12E |
X 1 | |