The Arduino IDE is very simple and easy to use.
Let’s see how to use it with the help of Blink example that comes in the Built-In examples with the IDE.
1. Open the Arduino IDE from the folder you installed/unzipped it in.
2. In the File tab, go to the Examples option. Here you will find a list of all the Built-In examples that come along with the IDE. You will also see Examples For Any Board in below the Built-In examples.
Here, we will see the Blink example which blinks the LED on the Arduino board.
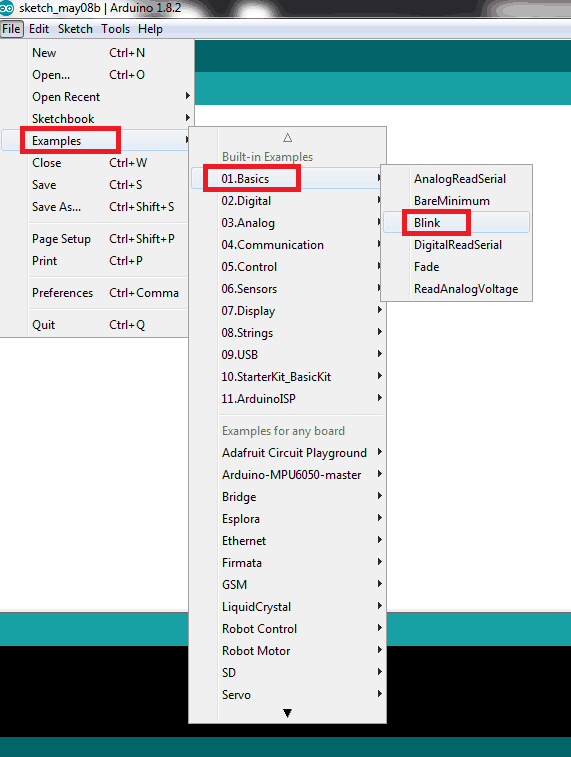
3. Once you click on Blink, a new window will open with the sketch (Arduino refers to codes written in its IDE as sketch) for Blink.
4. Before burning this code into the Arduino board, we need to configure the IDE for the board we need to burn this sketch into. We also need to select the appropriate communication port and the method used for burning the code.
5. Go to the Tools tab and find the Board option in it. It will have a list of all the Arduino Boards in it. Select the board you are using from that list. Here, we have used Arduino/Genuino Uno Board.
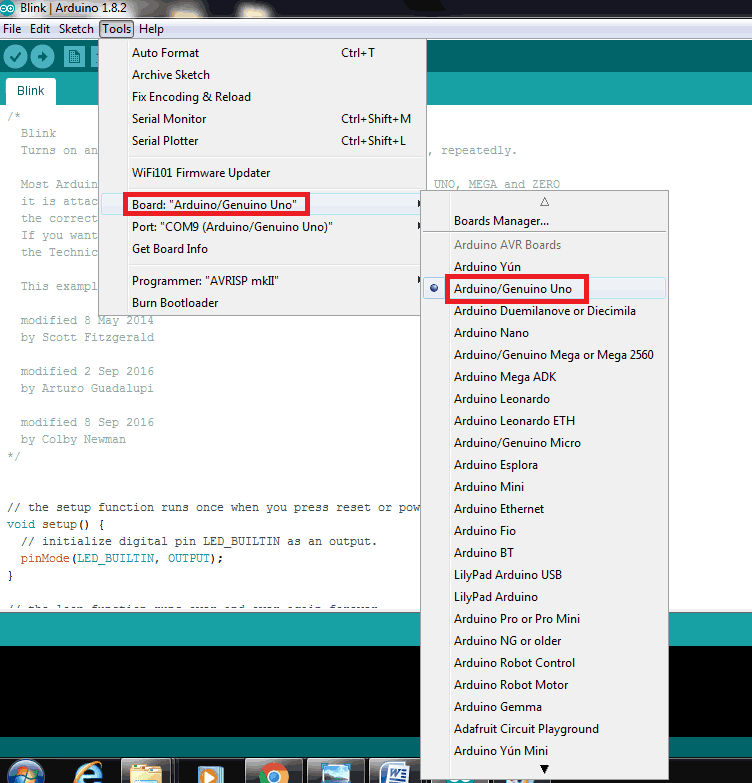
Arduino and Genuino are one and the same thing. Outside the USA, the Arduino boards are called Genuino.
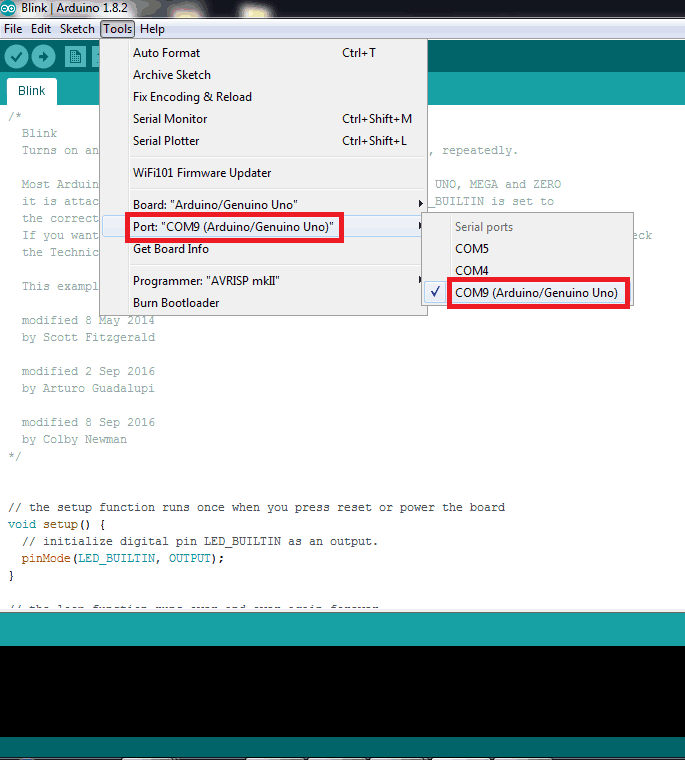
6. Now we need to select the appropriate communication port over which the computer/laptop will communicate with the Arduino board. Under the Tools tab, you will find the Port option. Select the port you have connected the Arduino board to from the Ports available in this list.
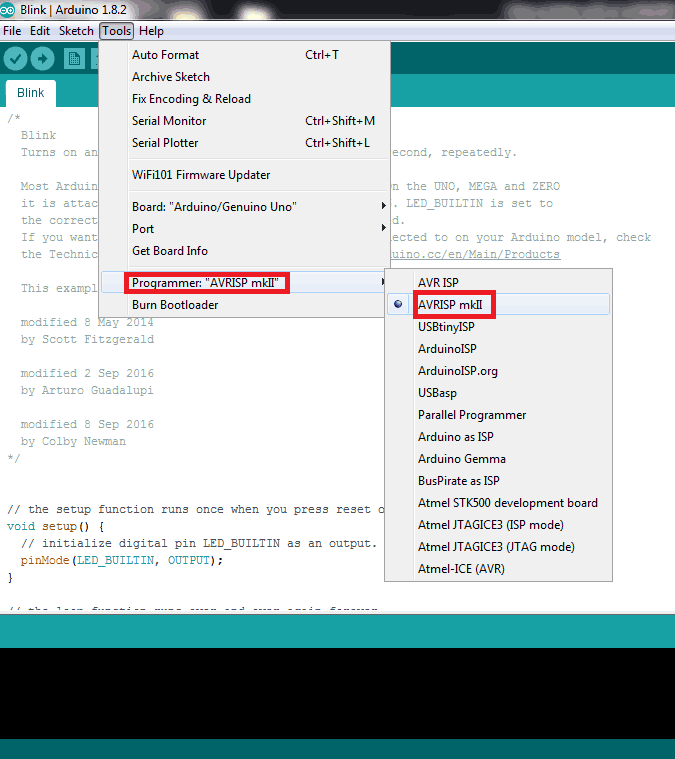
7. Now that we have selected the board and the communication port, we need to select the appropriate programmer.
We will be using the AVR ISP mk2 programmer.
8. On the Arduino IDE, you will find 6 unique buttons. These are described below.
-
 This is used to verify (Arduino refers to compiling as verifying) the sketch.
 -
 This is used to upload (Arduino refers burning a program as uploading) the sketch onto the board.
 -
 This is used to create a new sketch.
 -
 This is used to open an existing sketch or built-in example.
 -
 This is used to save the current sketch.
 -
 This is used to open the serial monitor that comes with the Arduino IDE.
Note : You can use any other serial terminal program if you want instead of the Arduino serial monitor. The serial monitor that comes with Arduino IDE can open only one serial port for communication. If you need to observe multiple ports (multiple Arduino boards connected to the same computer/laptop), you need to use other programs like Putty, RealTerm, TeraTerm, etc.
9. Now that we have selected the appropriate board, communication port, and the programmer, we need to upload the Blink sketch on to the board.
We can either verify the sketch before the upload process or skip the verification process.
The IDE does the part of verifying the sketch before uploading as a part of the upload process.
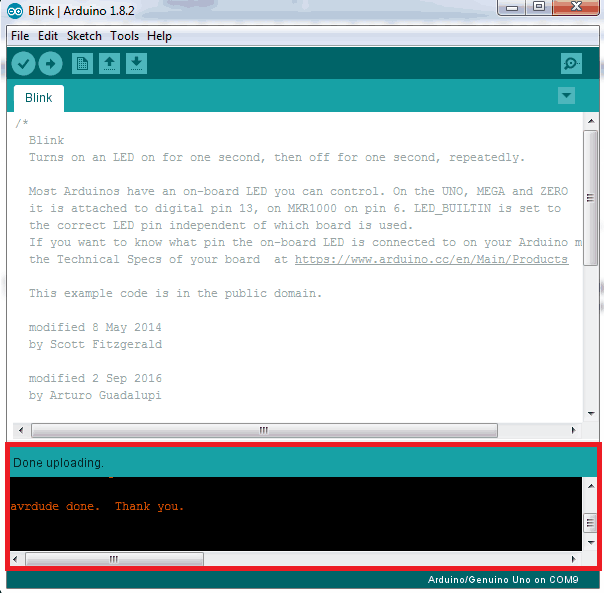
10. Since this is a built-in example sketch, we will not get any warnings or errors upon verifying. If there are any warnings or errors, they are displayed by the IDE in the black coloured area below the area for writing code. This area is shown in the image in the next point, highlighted in red.
11. Now upload the sketch onto the board. When the upload process is done, you will get a done uploading message. You should be able to see the LED on your Arduino board blinking at 1 second intervals.
12. This process needs to be followed for all the sketches that are built-in or created by the user.
Components Used |
||
|---|---|---|
| Arduino UNO Arduino UNO |
X 1 | |
| Arduino Nano Arduino Nano |
X 1 | |