There are various development environments available in the market for ARM processors.
Some of these are mentioned below :
- CrossWorks for Arm
- Keil µVision
- IAR Embedded Workbench
We will see how to install and setup the µVision IDE by Keil.
We will see the steps that need to be followed for installing this software correctly.
When this is done, we will setup the environment for LPC2148 and write a basic code for LED blinking.
Downloading and installation
Follow the steps given below:
1. Download the MDK-lite (Microcontroller Development Kit) by Keil from their website. Here is the link to the page from where you can download this : http://www2.keil.com/mdk5/install
Click on Download MDK-Core.

Install the software by following the simple instructions provided during installation process.
2. The new version µVision5 does not support many of the devices that were supported in the older versions yet. LPC2148 is one of the devices that are not supported. Hence, we need to add this device after successfully installing µVision5.
To do this, go to the following link and download the executable file for Legacy Support for ARM7, ARM9, and Cortex-R: http://www2.keil.com/mdk5/legacy
Download the Legacy support for the version of MDK downloaded and installed.
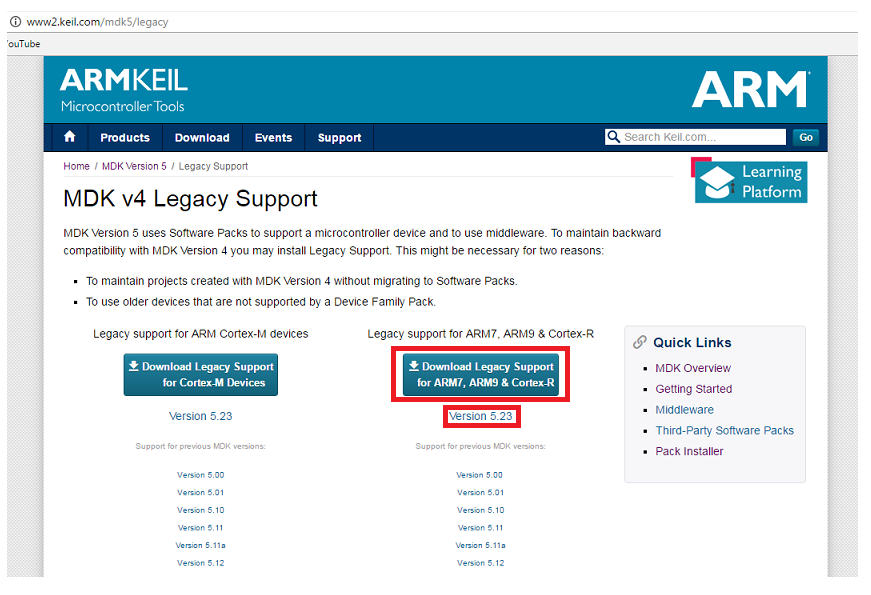
Install the executable file that will be downloaded. Follow the simple instructions provided during the installation process.
When the above described steps are completed, we will have the IDE installed and ready to use with support for the device we intend to use, i.e. LPC2148.
Using µVision IDE
We will create a simple LED blinking project. Following are steps which show how to create and built project using the Keil uVision IDE:
1. Open Keil µVision from the icon created on your desktop.
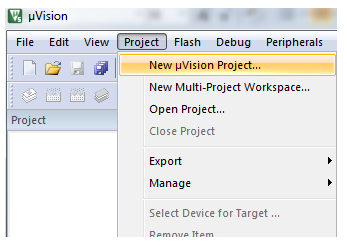
2. Go to the Project tab. Select New µVision Project ...from that menu.
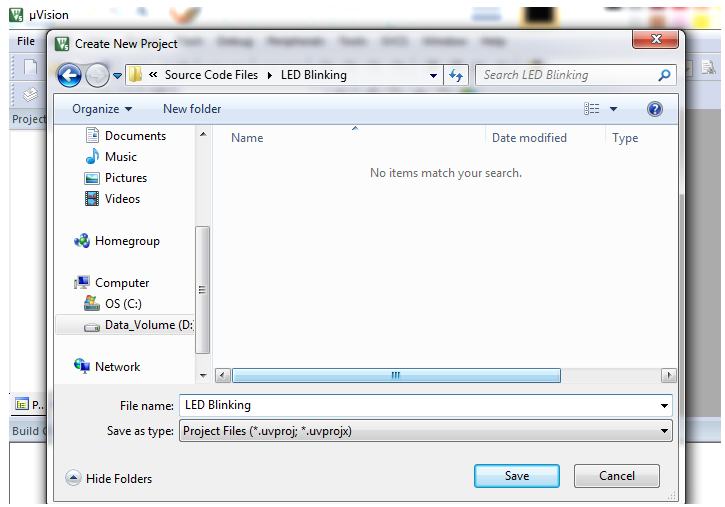
3. Create New Project window will pop up. Select the folder where you want to create project and give a suitable name to the project. Then click on Save.
4. Select Device for Target: ‘Target1’...window will pop up next. It has a select window to choose between Software Packs or Legacy Device Database. As LPC2148 is in Legacy Device Database, choose Legacy Device Database.
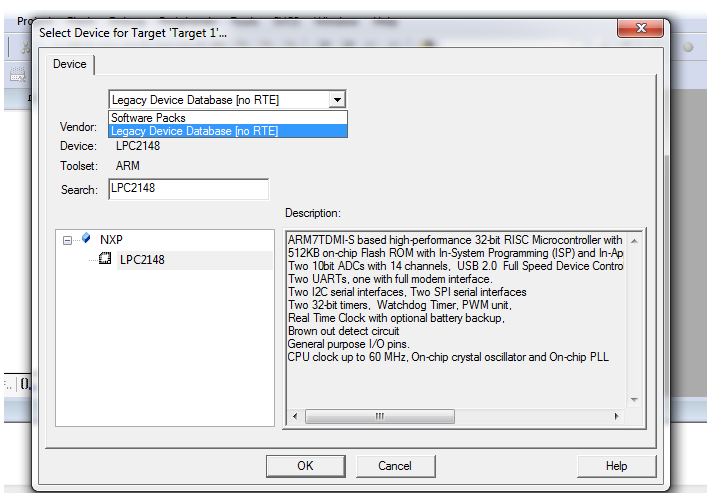
Type in LPC2148 in search and select the device under NXP with the name LPC2148 and click on OK.
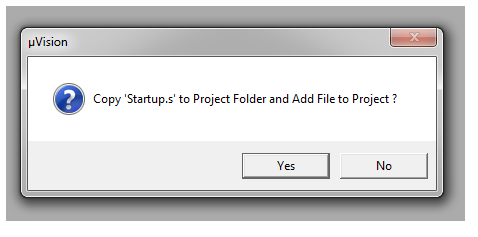
5. A window will pop up asking whether to copy Startup.s to project folder and add file to project. Click on Yes.
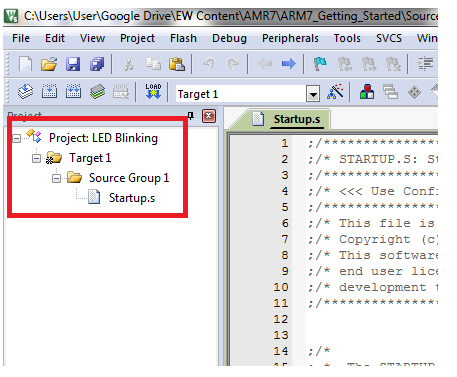
6. The project name and its folders can be seen on the left side in the project window after the previous step is completed as shown below.
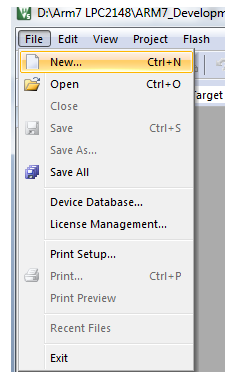
7. Now go to File tab and add New file from the menu.
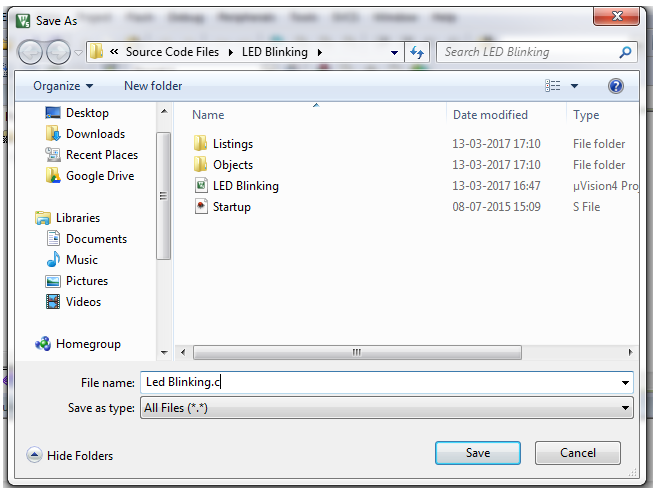
8. Save the file from the previous step with a specific name. Add .c extension to the file name.
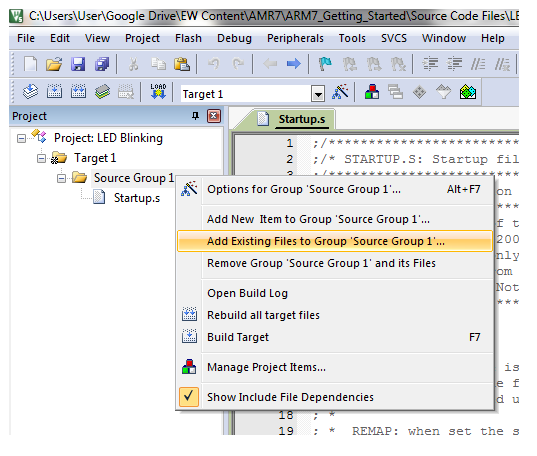
9. Add this file to Source Group folder in the project window by right clicking on Source Group1 folder and selecting Add Existing Files to Group ‘Source Group1’...
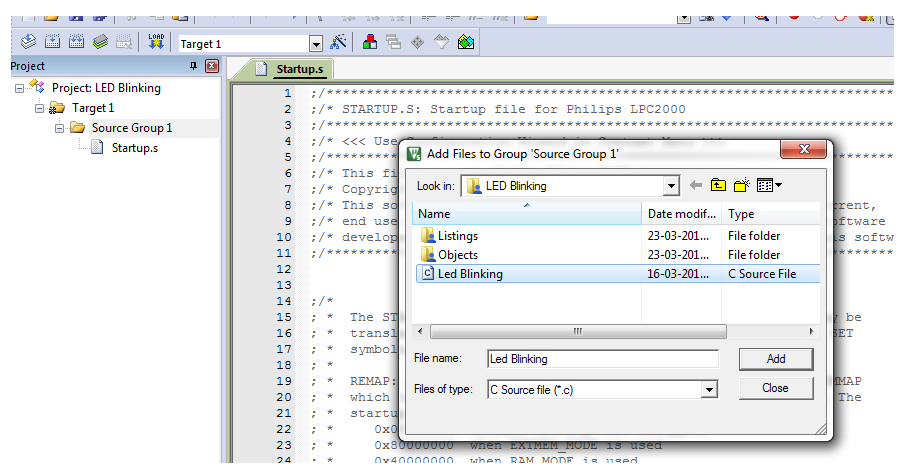
Select the previously saved file from the window that pops up and add it to the Source Group1. In our case, LED Blinking.c
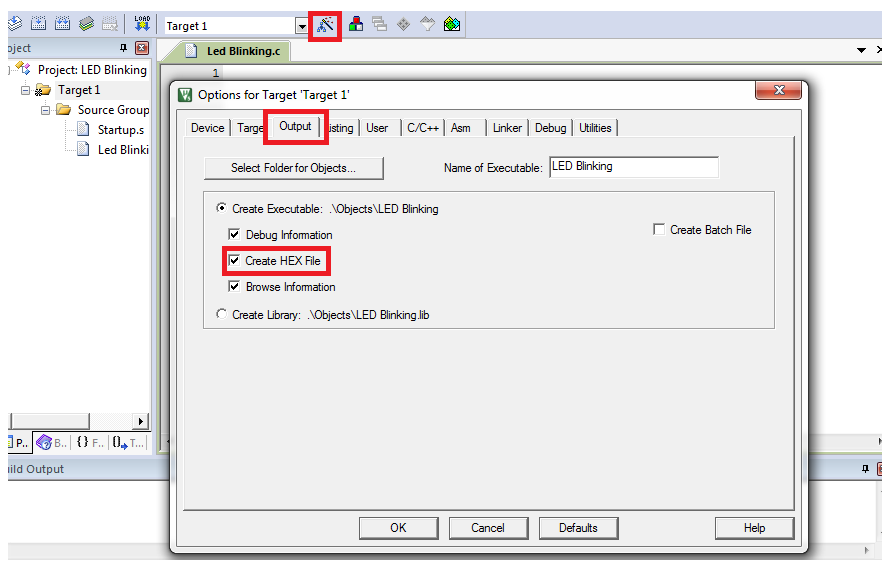
10. Now click on the Options for Target ‘Target1’... symbol shown in red box in the image below or press Alt+F7 or right click on Target1 and click on Options for Target ‘Target1’....
Options for target window will open. Go to the Output tab in that window. Tick ‘√’ Create HEX File option. We need to produce HEX file to burn it into the microcontroller.
In the options for target window, go to the Linker tab. Select the Use Memory Layout from Target Dialogue option.
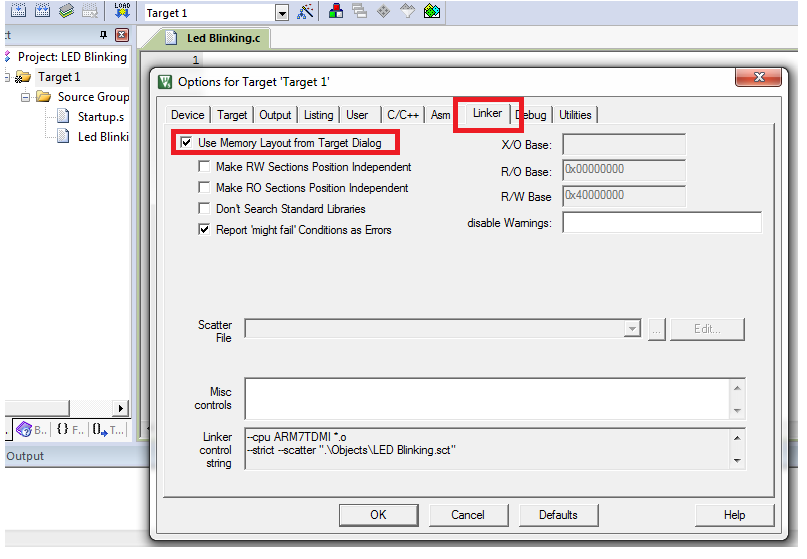
Then click on OK.
11. Now write the code for LED Blinking.
/*
   LED Blinking on LPC2148(ARM7)
   http://www.electronicwings.com/arm7/getting-started-with-arm-lpc2148-using-keil-uvision-ide
*/

#include <lpc214x.h>
#include <stdint.h>

void delay_ms(uint16_t j) /* Function for delay in milliseconds */
{
    uint16_t x,i;
	for(i=0;i<j;i++)
	{
    for(x=0; x<6000; x++);    /* loop to generate 1 millisecond delay with 12MHz Fosc. */
	}
}

int main(void)
{
	IO0DIR = 0x000000FF;	/* Set P0.0 to P0.7 bits as output bits by writing 1 in IO0DIR register corresponding to those bits. */
	while(1)
	{
		IO0PIN =  IO0PIN | 0x000000FF; /* Make P0.0 to P0.7 HIGH while keeping other bits unchanged. */
		delay_ms(300);
		IO0PIN = IO0PIN & 0xFFFFFF00; /* Make P0.0 to P0.7 LOW while keeoing other bits unchanged. */
		delay_ms(300);
	}
}
12. Once the code is written, Build the code by clicking on the button shown in red in the image below. You can also build the project from the Build Target option in the Project tab or by pressing F7 on the keyboard.
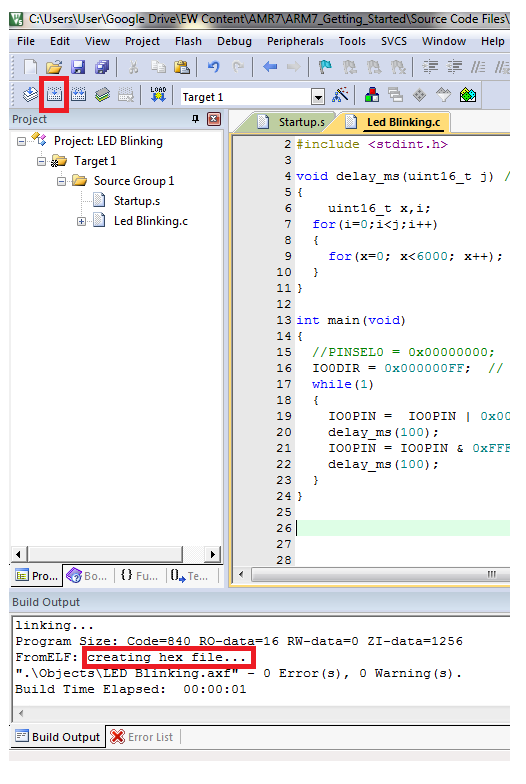
You can see creating hex file ... in the Build Output window as shown in the image.
13. Once the project is built, a hex file is created in the Objects folder inside the folder of your project. Use Flash Magic software to burn this hex file in your microcontroller.
Download Flash Magic from the following Link : http://www.flashmagictool.com
Components Used |
||
|---|---|---|
| ARM7 LPC2148 ARM7 LPC2148 |
X 1 | |
Downloads |
||
|---|---|---|
|
|
LED_Blinking_uVision_Project | Download |