Overview of 7-Segment Display
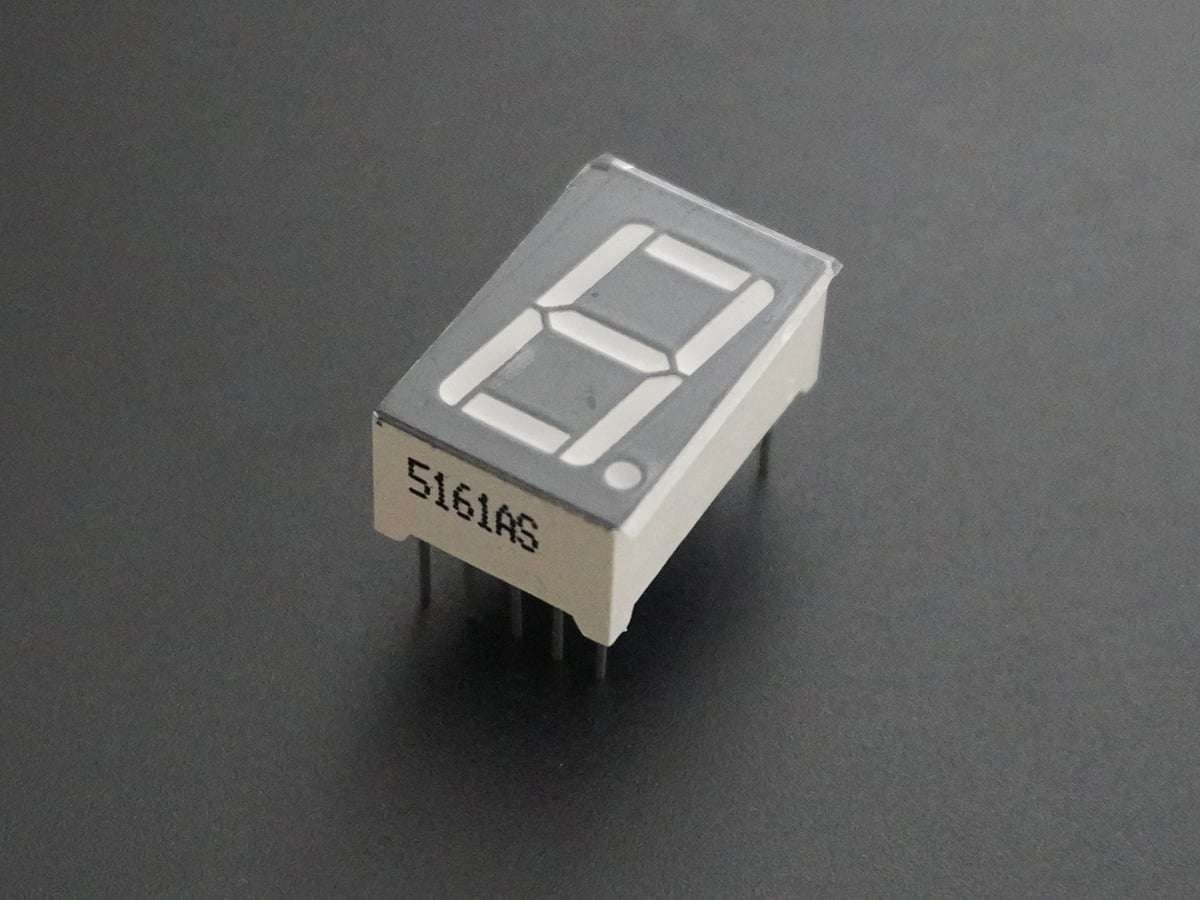
7-segment displays are made up of 8 LED segments. 7 of these LED segments are in the shape of a line, whereas 1 segment is circular.
The 7 line-shaped LED segments are used for displaying numbers 0 to 9 and a few letters like A, c, d, e, F, H, L, O, P, U, etc. The circular segment is used for displaying a decimal point.
Each of the 8 elements has a pin associated with it which can be driven HIGH or LOW according to the type of display and the number or alphabet to be displayed.
The common anode and common cathode types are available in a 7-segment display. Depending on which type is used, the control signal required to light up a segment in the display changes. Common anode requires a LOW signal whereas common cathode requires a HIGH signal to light up a segment.
For more information about 7-segment LED display and how to use it, refer to the topic 7-segment LED Display in the sensors and modules section.
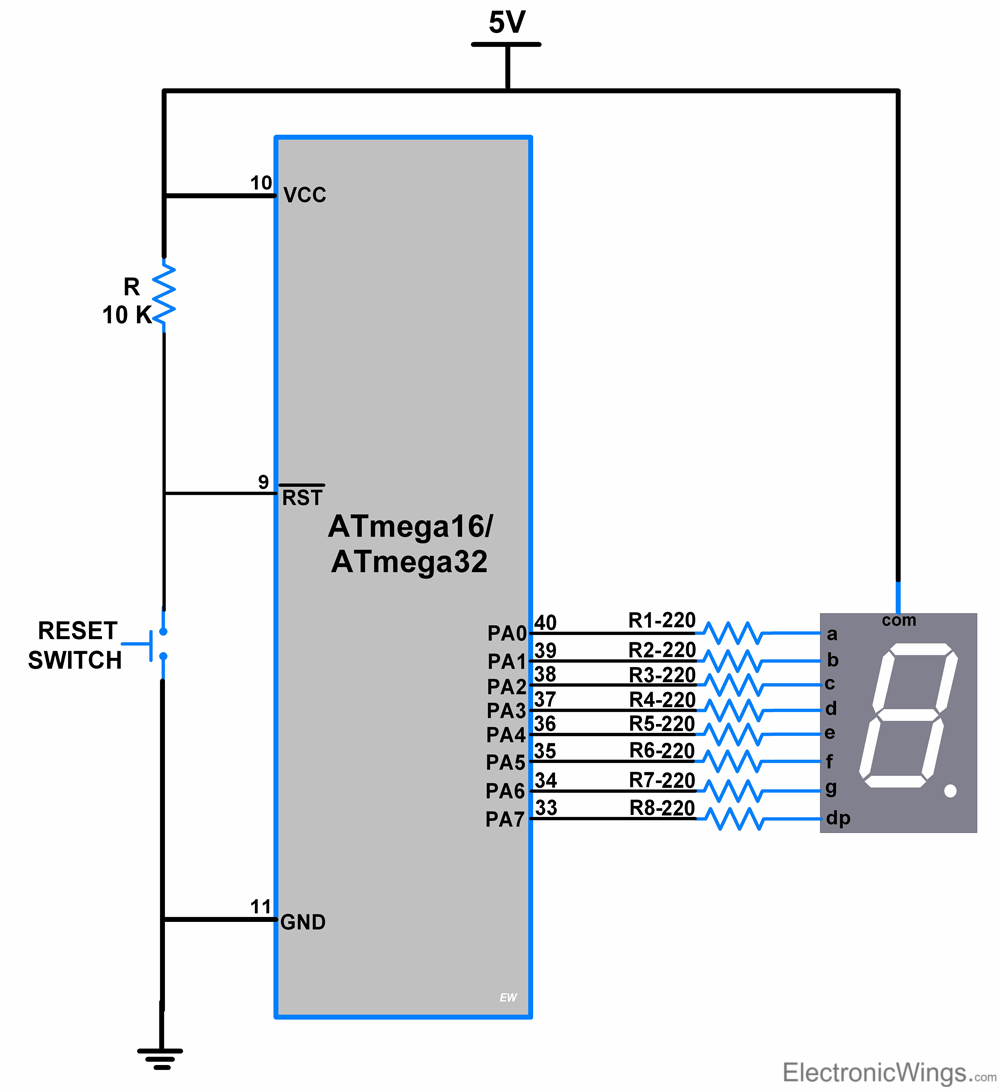
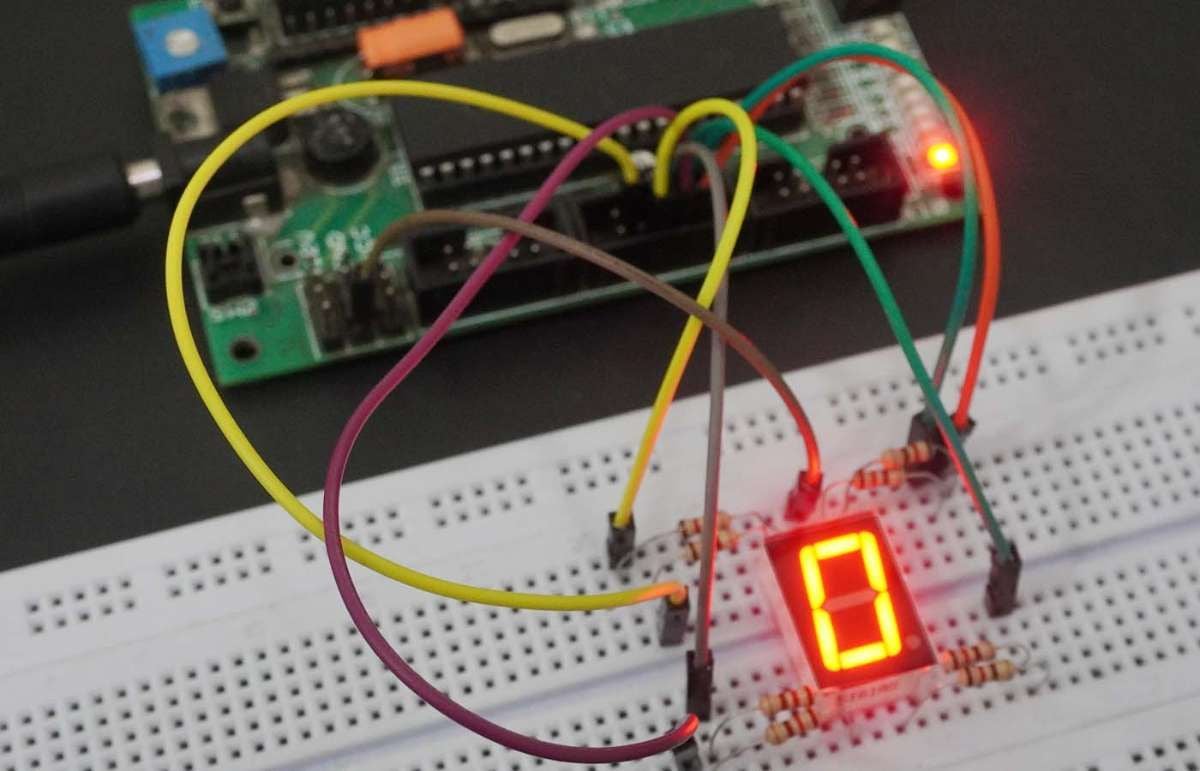
Connection Diagram of 7-segment with ATmega16/32
7-segment Display Code for ATmega16/32
/*
 * ATmega16_7_Segment_Project_File.c
 * http://www.electronicwings.com
 */

#define F_CPU 8000000UL
#include <avr/io.h>
#include <util/delay.h>
#define LED_Direction DDRA		/* define LED Direction */
#define LED_PORT PORTA			/* define LED port */

int main(void)
{
	LED_Direction |= 0xff;		/* define LED port direction is output */
	LED_PORT = 0xff;

	char array[]={0xC0,0xF9,0xA4,0xB0,0x99,0x92,0x82,0xF8,0x80,0x90};
					/* write hex value for CA display from 0 to 9 */

    while(1)
    {
		for(int i=0;i<10;i++)
		{
			LED_PORT = array[i]; /* write data on to the LED port */
			_delay_ms(1000); /* wait for 1 second */
		}
    }
}
Connection Diagram of 7-segment using Driver IC SN7446AN with ATmega16/32
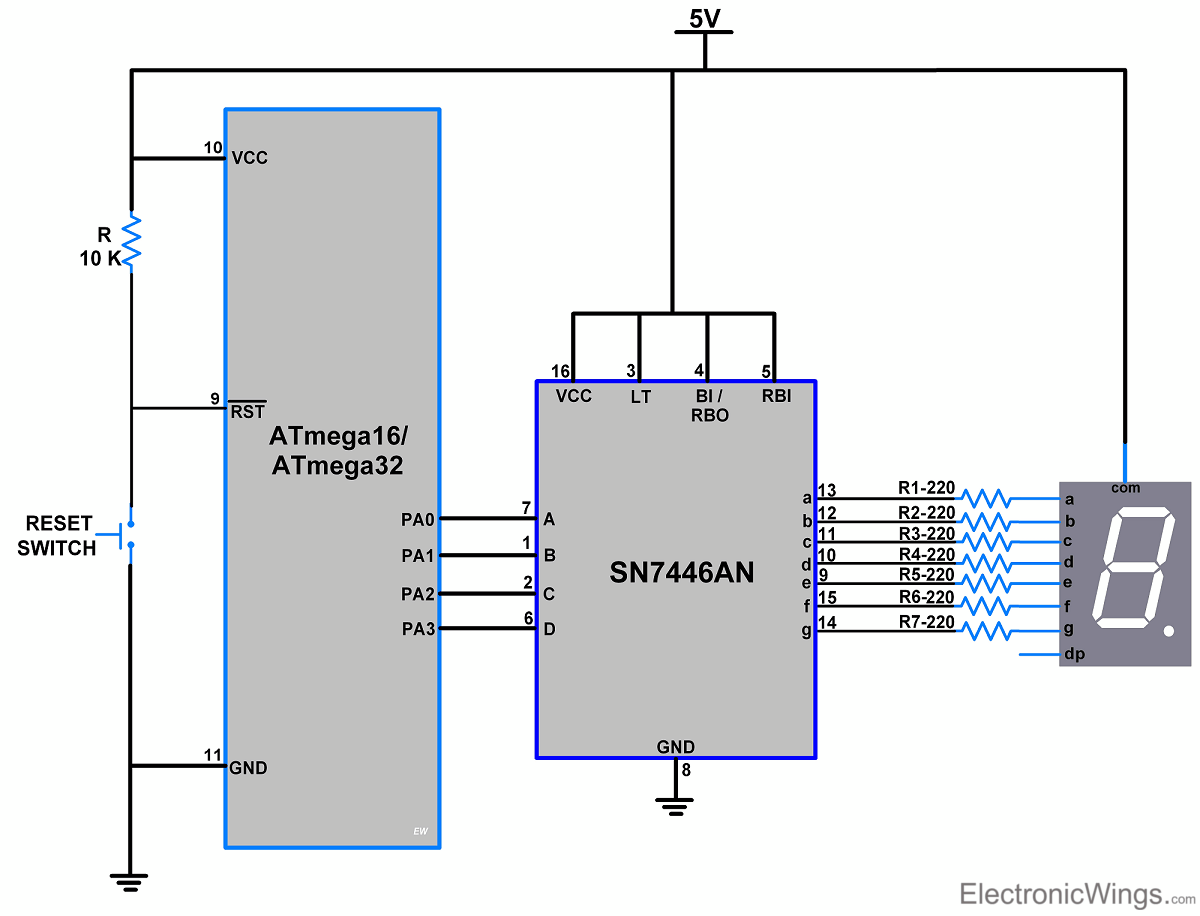
7-segment LED Display Code using driver IC SN7446AN for ATmega16/32
/*
 * ATmega16_BCD_to_7_Segment.c
 *
 * http://www.electronicwings.com
 */

#define F_CPU 8000000UL
#include <avr/io.h>
#include <util/delay.h>
#define LED_direction DDRA		/* define LED Direction */
#define LED_PORT PORTA			/* define LED PORT */

int main(void)
{
	LED_direction |= 0xff;		/* define LED port direction is output */
	LED_PORT = 0xff;
	char array[]={0,1,2,3,4,5,6,7,8,9};
					/* write BCD value for CA display from 0 to 9 */
	while(1)
	{
		for(int i=0;i<10;i++)
		{
			LED_PORT = array[i];/* write data on to the LED port */
			_delay_ms(1000); /* wait for 1 second */
		}
	}
}
7-segment Display Multiplexing Connection With ATmega16/32

- We can connect more than one display by using the Multiplexing method. In this method, at a time one display is driven by the controller and the rest are OFF. It keeps switching the displays using transistors. Due to the persistence of vision, it appears as a normal display.
7-segment Display Multiplexing Code for ATmega16/32
/*
 * ATmega16_7seg_multiple.c
 *
 * http://www.electronicwings.com
 */


#define F_CPU 8000000UL
#include <avr/io.h>
#include <util/delay.h>
#include <avr/interrupt.h>
#include <stdio.h>

#define LED_Directions DDRA			/* define LED Direction */
#define LED_Direction DDRB			/* define LED Direction */
#define LED_PORT1 PORTA				/* define LED port */
#define LED_PORT2 PORTB				/* define LED port */

char array[]={0,1,2,3,4,5,6,7,8,9};
int k,j,i,factor;
int brightvalue=0;


void set_brightness()
{
	int brightness = brightvalue;
	while (0 < brightness)
	{
		_delay_us(1);
		--brightness;
	}
}

ISR(TIMER0_OVF_vect)
{
	LED_PORT2 = 0x01;
	LED_PORT1 = array[k];
	set_brightness();

	LED_PORT2 = 0x02;
	LED_PORT1 = array[j];
	set_brightness();

	LED_PORT2 = 0x04;
	LED_PORT1 = array[i];
	set_brightness();
}

void SevenSeg_SetNumber(int num)
{
	k=num%10;
	num = num/10;

	j=num%10;
	num = num/10;

	i=num%10;
	num = num/10;
}

void sevseg_refreshDisplay(char refvalue)
{
	TIMSK=(1<<TOIE0);		/* Enable Timer0 overflow interrupts */
	TCNT0 = refvalue;		/* load TCNT0, count for 10ms*/
	TCCR0 = (1<<CS02) | (1<<CS00);  /* start timer0 with /1024 prescaler*/
}


int main(void)
{
	sei();
	LED_Directions = 0xff;		/* define port direction is output */
	LED_Direction = 0xff;		/* define port direction is output */
	LED_PORT1 = 0xff;
	LED_PORT2 = 0xff;
	sevseg_refreshDisplay(0xC2);	/* set refresh rate of display (for 10ms set 0xC2) */
	brightvalue=1000;		/* set brightness level of 7 segment display */

	while(1)
	{
		SevenSeg_SetNumber(456);/* set value to display */
		_delay_ms(1000);	/* wait for 1 second */
		SevenSeg_SetNumber(789);
 		_delay_ms(1000);
	}
}
Components Used |
||
|---|---|---|
| ATmega 16 ATmega 16 |
X 1 | |
| Atmega32 Atmega32 |
X 1 | |
| Seven 7 Segment Display Seven 7 Segment Display |
X 1 | |
| BC547 TRANSISTORS BC547 TRANSISTORS |
X 1 | |
| SN7447AN BCD-To-Seven-Segment Driver SN7447AN BCD-To-Seven-Segment Decoder/Driver |
X 1 | |