Description
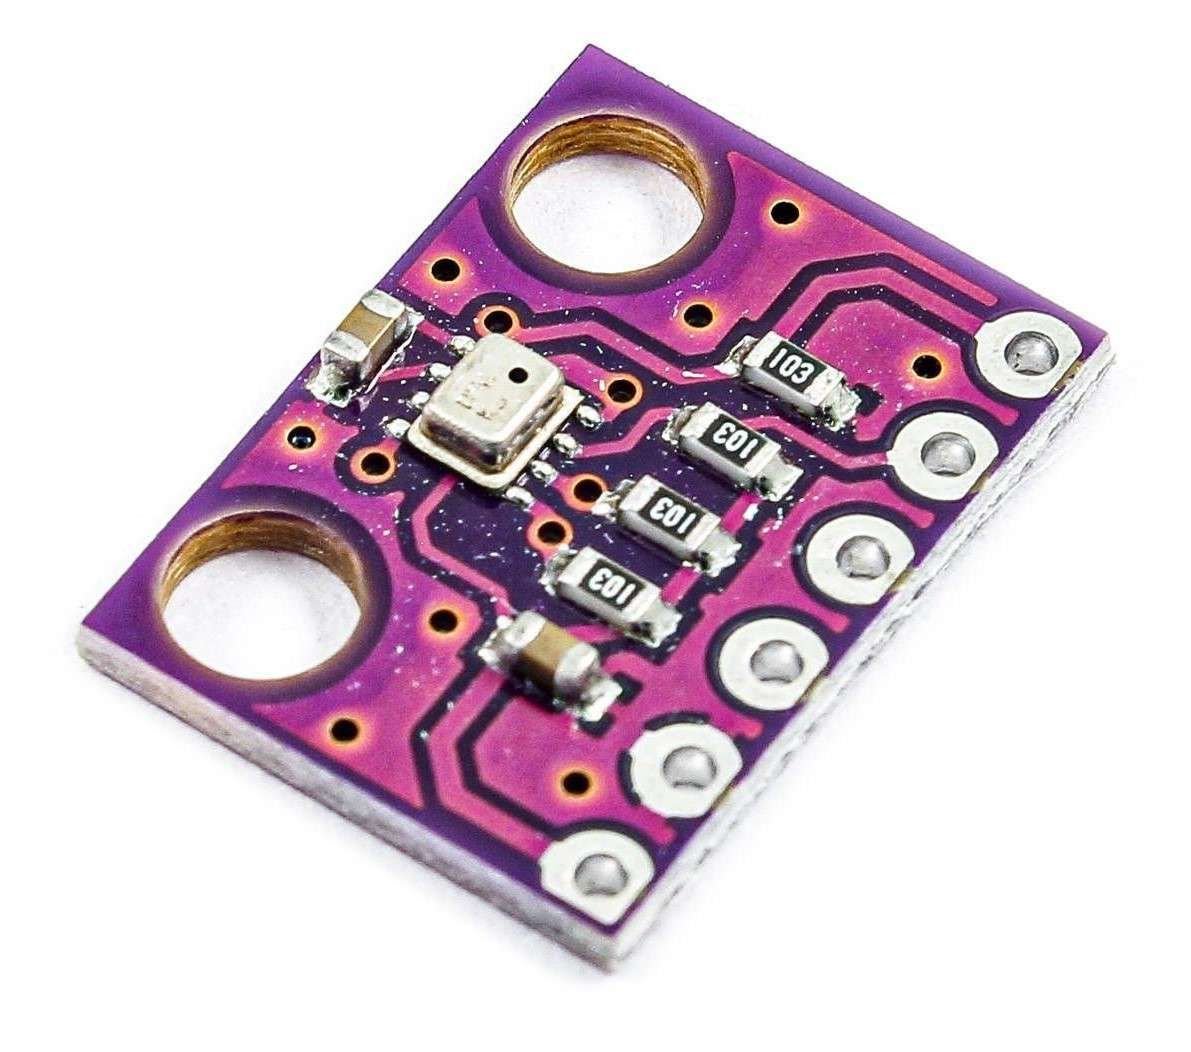
- The BMP280 is a popular digital barometric pressure and temperature sensor developed by Bosch Sensortec.
- It is designed to measure atmospheric pressure and temperature accurately and can be used in a variety of applications such as altitude tracking, and health monitoring.
- The BMP280 uses advanced MEMS technology to measure pressure and temperature.
- It has a built-in temperature sensor that compensates for temperature changes, resulting in high accuracy and stability over a wide temperature range.
- The module uses I2C and SPI communication protocols for interfacing with the microcontroller.
BMP280 Module Specification
- Pressure range: 300 hPa to 1100 hPa
- Altitude range: -500 m to 9000 m
- Accuracy: ±1 hPa (0.01 bar) at 25°C
- Temperature range: -40°C to +85°C
- Accuracy: ±1°C at 25°C
- Resolution: 0.01 hPa (pressure), 0.01°C (temperature)
- Interface: I2C and SPI (both up to 3.4 MHz)
- Supply voltage: 1.8 V to 5.5 V
BMP280 Pinouts
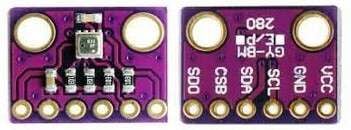
- VCC: Connected to the positive supply of 3.3V
- GND: Common Ground pin.
- SCL: Serial Clock Line pin for I2C communication.
- SDA: Serial Data pin for I2C communication.
- CSB: Chip Select pin for SPI communication.
- SDO: Serial Data Out pin for SPI communication.
BMP280 Hardware Connection with Arduino

Extracting Data from BMP280 using Arduino
Reading the values from BMP280 and displaying them on the Arduino IDE’s serial monitor.
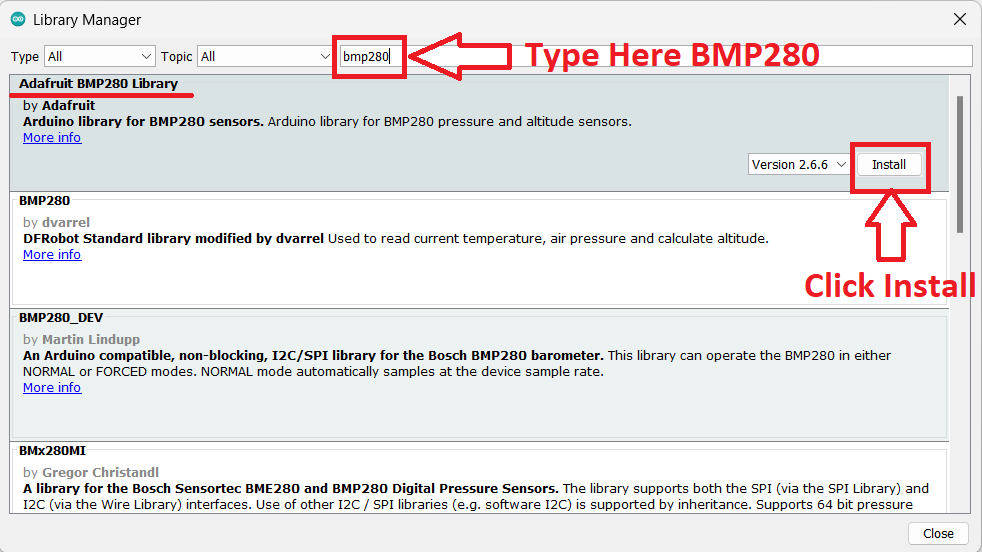
Here, we'll make use of Adafruit’s BMP280 library named Adafruit_BMP280.h
We will download it from the library manager of Arduino IDE.
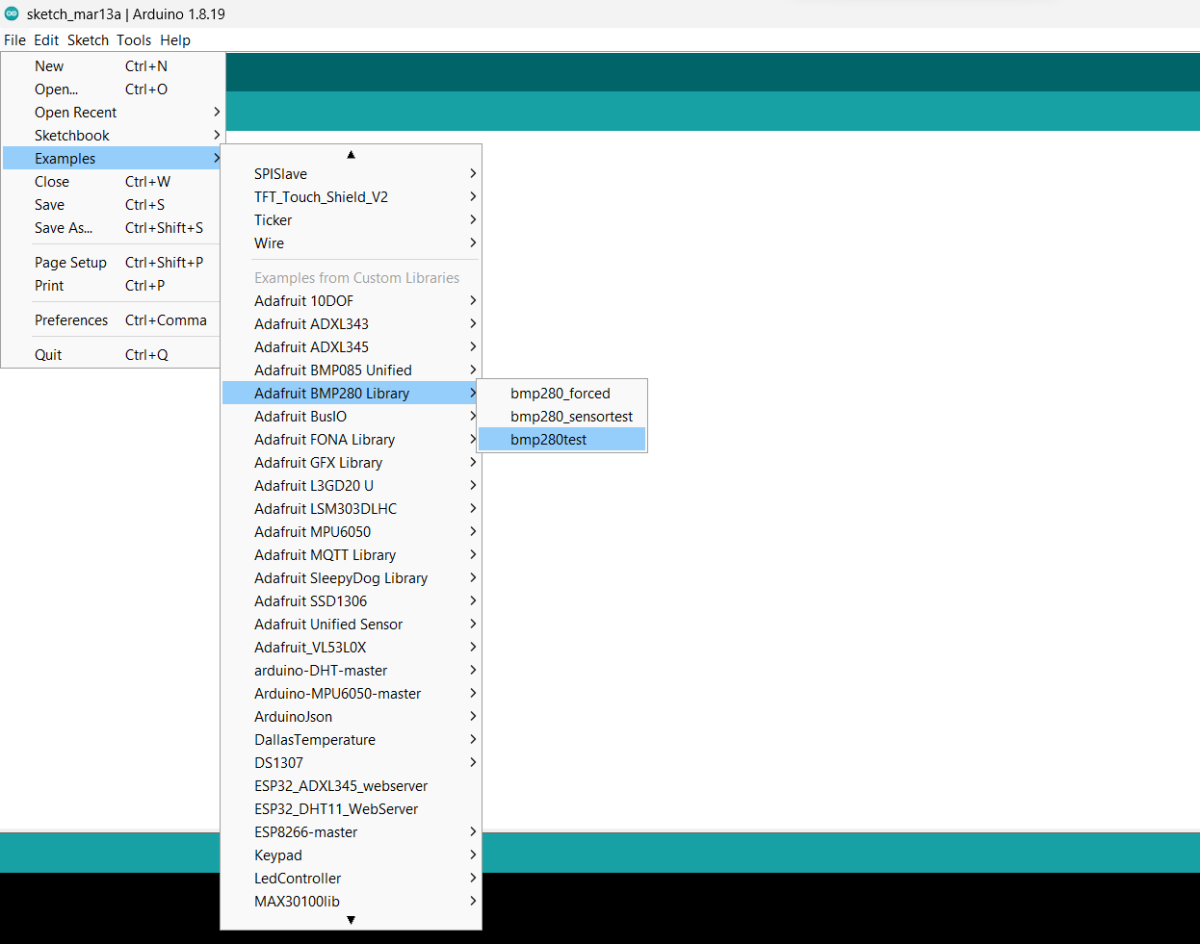
Now open an example of Adafruit ADXL345 io dashboard. To open it navigate to File -> Examples -> Adafruit BMP280 Library-> bmp280test
Here we have used the same example below, before uploading the code edit it and write the address of the module in the setup function while initializing the bmp280
status = bmp.begin(0x76);Code for reading values and display it on the Serial Monitor
/***************************************************************************
This is a library for the BMP280 humidity, temperature & pressure sensor
Designed specifically to work with the Adafruit BMP280 Breakout
----> http://www.adafruit.com/products/2651
These sensors use I2C or SPI to communicate, 2 or 4 pins are required
to interface.
Adafruit invests time and resources providing this open source code,
please support Adafruit andopen-source hardware by purchasing products
from Adafruit!
Written by Limor Fried & Kevin Townsend for Adafruit Industries.
BSD license, all text above must be included in any redistribution
***************************************************************************/
#include <Wire.h>
#include <SPI.h>
#include <Adafruit_BMP280.h>
#define BMP_SCK (13)
#define BMP_MISO (12)
#define BMP_MOSI (11)
#define BMP_CS (10)
Adafruit_BMP280 bmp; // I2C
//Adafruit_BMP280 bmp(BMP_CS); // hardware SPI
//Adafruit_BMP280 bmp(BMP_CS, BMP_MOSI, BMP_MISO, BMP_SCK);
void setup() {
Serial.begin(9600);
while ( !Serial ) delay(100); // wait for native usb
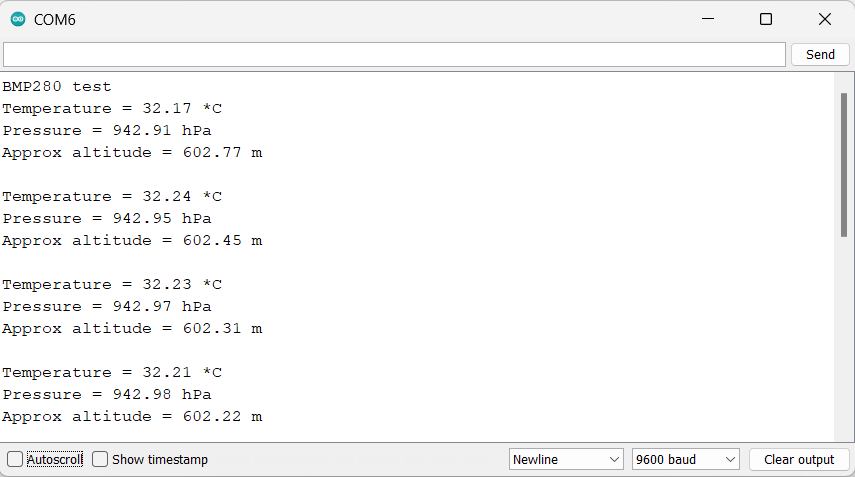
Serial.println(F("BMP280 test"));
unsigned status;
// status = bmp.begin(BMP280_ADDRESS_ALT, BMP280_CHIPID);
status = bmp.begin(0x76);
if (!status) {
Serial.println(F("Could not find a valid BMP280 sensor, check wiring or "
"try a different address!"));
Serial.print("SensorID was: 0x"); Serial.println(bmp.sensorID(),16);
Serial.print(" ID of 0xFF probably means a bad address, a BMP 180 or BMP 085\n");
Serial.print(" ID of 0x56-0x58 represents a BMP 280,\n");
Serial.print(" ID of 0x60 represents a BME 280.\n");
Serial.print(" ID of 0x61 represents a BME 680.\n");
while (1) delay(10);
}
/* Default settings from datasheet. */
bmp.setSampling(Adafruit_BMP280::MODE_NORMAL, /* Operating Mode. */
Adafruit_BMP280::SAMPLING_X2, /* Temp. oversampling */
Adafruit_BMP280::SAMPLING_X16, /* Pressure oversampling */
Adafruit_BMP280::FILTER_X16, /* Filtering. */
Adafruit_BMP280::STANDBY_MS_500); /* Standby time. */
}
void loop() {
Serial.print(F("Temperature = "));
Serial.print(bmp.readTemperature());
Serial.println(" *C");
Serial.print(F("Pressure = "));
Serial.print(bmp.readPressure()/100.0F);
Serial.println(" Pa");
Serial.print(F("Approx altitude = "));
Serial.print(bmp.readAltitude(1013.25)); /* Adjusted to local forecast! */
Serial.println(" m");
Serial.println();
delay(2000);
}
- Now upload the code.
- After uploading the code open the serial monitor and set the baud rate to 9600 to see the output.
Output on the serial monitor
Let’s understand the code
First, initialize the required library. Wire.h library is used for I2C communication in the microcontroller.
Adafruit_BMP280.h library has all the functions and classes for extracting the data from the module.
#include <Wire.h>
#include <SPI.h>
#include <Adafruit_BMP280.h>
Now we created an object for Adafruit_BMP280 class as bmp
Adafruit_BMP280 bmp; // I2C
Setup Function
- In the setup function, we have defined the baud rate to 9600.
- Now, we have initialized the BMP280 sensor object with the I2C address 0x76. If the sensor is not found, the code enters a while loop and indefinitely waits by delaying for 10 milliseconds.
- The if statement checks if the BMP280 sensor was successfully initialized. If the initialization was unsuccessful, the code prints an error message to the Serial Monitor.
while ( !Serial ) delay(100);   // wait for native usb
  Serial.println(F("BMP280 test"));
  unsigned status;
//  status = bmp.begin(BMP280_ADDRESS_ALT, BMP280_CHIPID);
  status = bmp.begin(0x76);
  if (!status) {
    Serial.println(F("Could not find a valid BMP280 sensor, check wiring or
                      try a different address!"));
Loop Function
- In the loop function, we have used
bmp.readTemperature()function is used to read the temperature data from the BMP280 sensor. - And using
Serial.println()function we have displayed on the serial monitor. - Similarly, using readPressure() and
readAltitude()functions, we received the pressure and altitude data and displayed it on the serial monitor.
    Serial.print(F("Temperature = "));
    Serial.print(bmp.readTemperature());
    Serial.println(" *C");

    Serial.print(F("Pressure = "));
    Serial.print(bmp.readPressure());
    Serial.println(" Pa");

    Serial.print(F("Approx altitude = "));
    Serial.print(bmp.readAltitude(1013.25));
Components Used |
||
|---|---|---|
| Arduino UNO Arduino UNO |
X 1 | |
| bmp280 Digital Pressure Sensor BMP280 is digital pressure sensor used for measuring pressure and temperature with I2C/ SPI. |
X 1 | |
Downloads |
||
|---|---|---|
|
|
BMP280_Arduino_SerialMonitor | Download |