Introduction
In this guide, we will learn "How to start with 8051 Microcontroller" using μvision keil in detail.
8051 microcontroller can be programmed in two languages
- Assembly language
- C language
8051 microcontroller popular development IDE is MCU 8051 IDE and µVision to develop code.
Keil µVision IDE consists,
- C Compiler - C51.Exe
- Assembler - A51.Exe
- Linker/Locator - BL51.Exe
- Librarian - LIB51.Exe
- Hex Converter - OH51.Exe
Programming IDE for 8051 Microcontroller
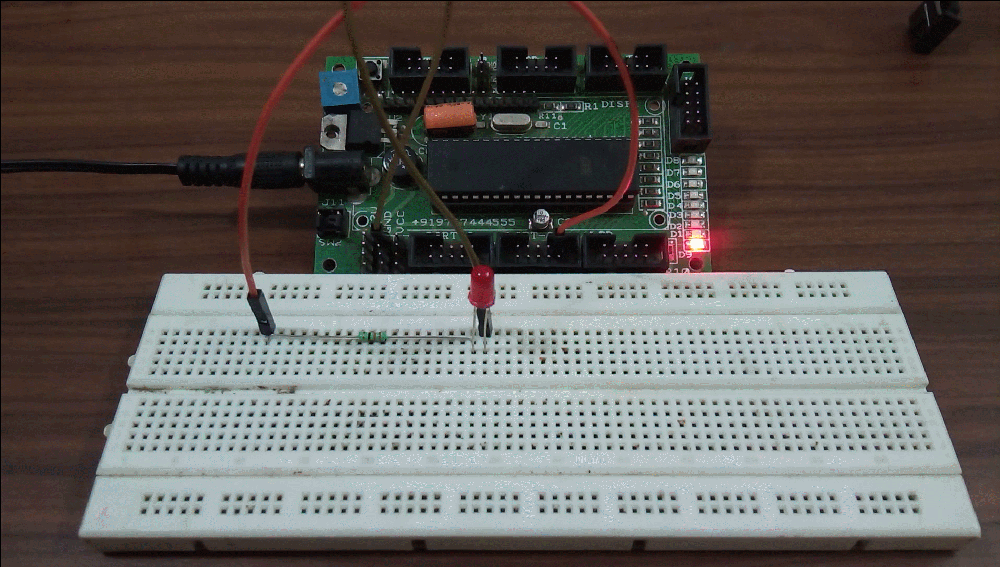
Let’s develop a simple LED blinking program using Keil µVision IDE with the C51 compiler. here we are using the AT89S52 microcontroller from 8051 families.
- Download Keil µVision and install it.
Now open Keil µVision

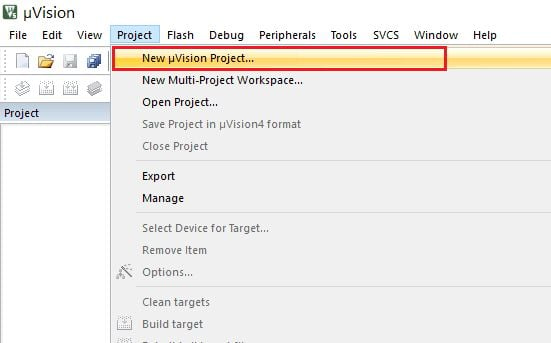
Click on the Project menu and select the New µVision Project…
“Create New Project” window will pop up, type a project name and location for the project and save.
.png)
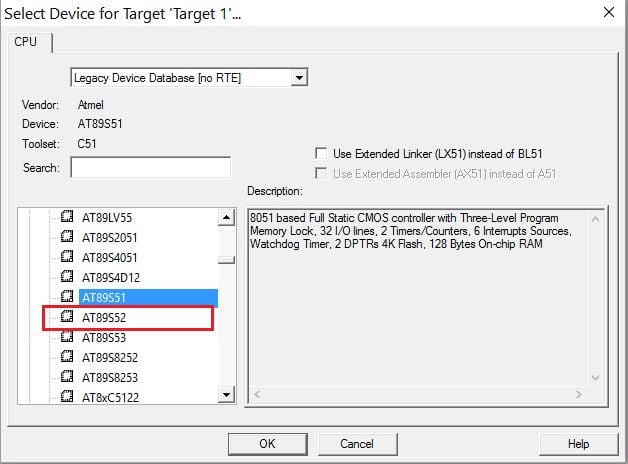
“Select Device for Target” window will pop up, select your device (here we selecting AT89S52)
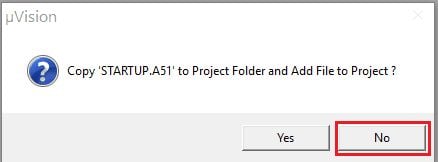
“µVision” window will ask for copy STARTUP.A51 to the project folder and add a file to the project (here is not necessary so we have selected No)
Now select New file from the File menu and type your program code (here we have typed LED blinking program)
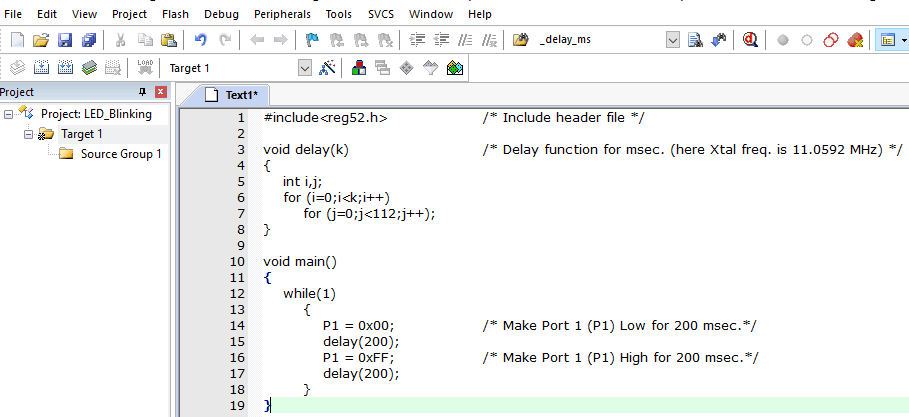
LED Blinking Codefor AT89S52 Microcontroller
#include<reg52.h> /* Include header file */

void delay(k)  /* Delay for msec. (here Xtal freq. is 11.0592 MHz) */
{
	int i,j;
	for (i=0;i<k;i++)
		for (j=0;j<112;j++);
}

void main()
{
	while(1)
		{
			P1 = 0x00;  /* Make Port 1 (P1) Low for 200 msec.*/
			delay(200);
			P1 = 0xFF;  /* Make Port 1 (P1) High for 200 msec.*/
			delay(200);
		}
}
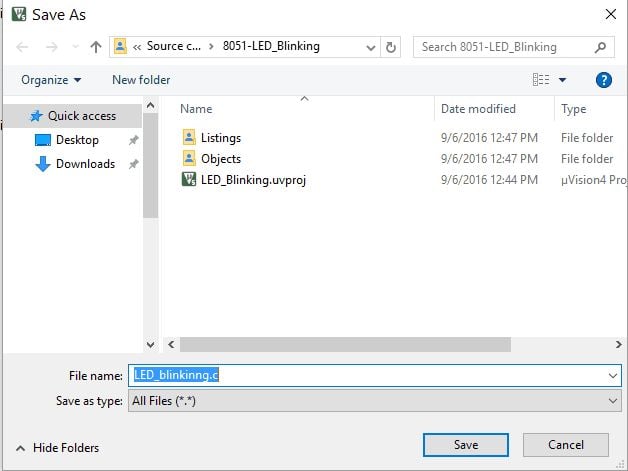
Save program code with “.c“ extension (In case if you are using assembly language then save program code with “.asm“ extension)
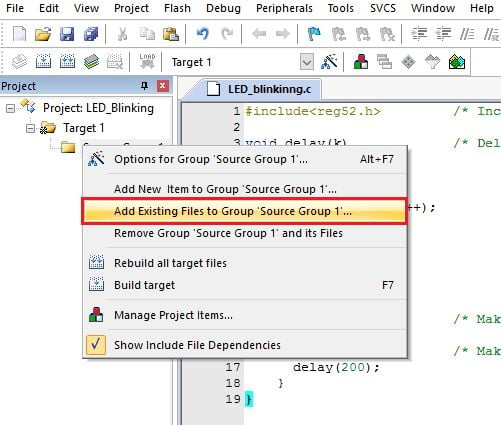
Right-click on Source Group 1 folder from Target 1 and select “Add existing files to Group ‘Source Group 1’”
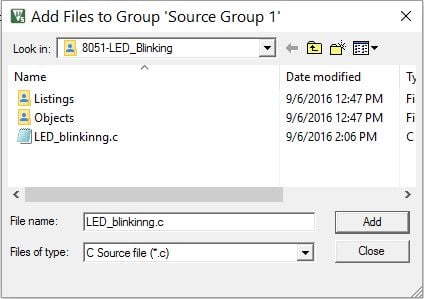
Select the program file saved with “.c “or “.asm” (in case of assembly language) and add it. Then close that window. You can see the added file in the “Source Group 1” folder in the left project window
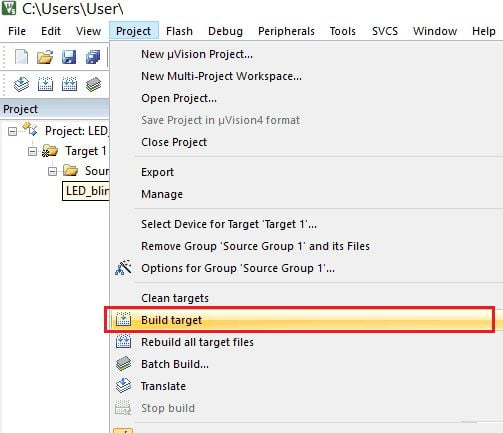
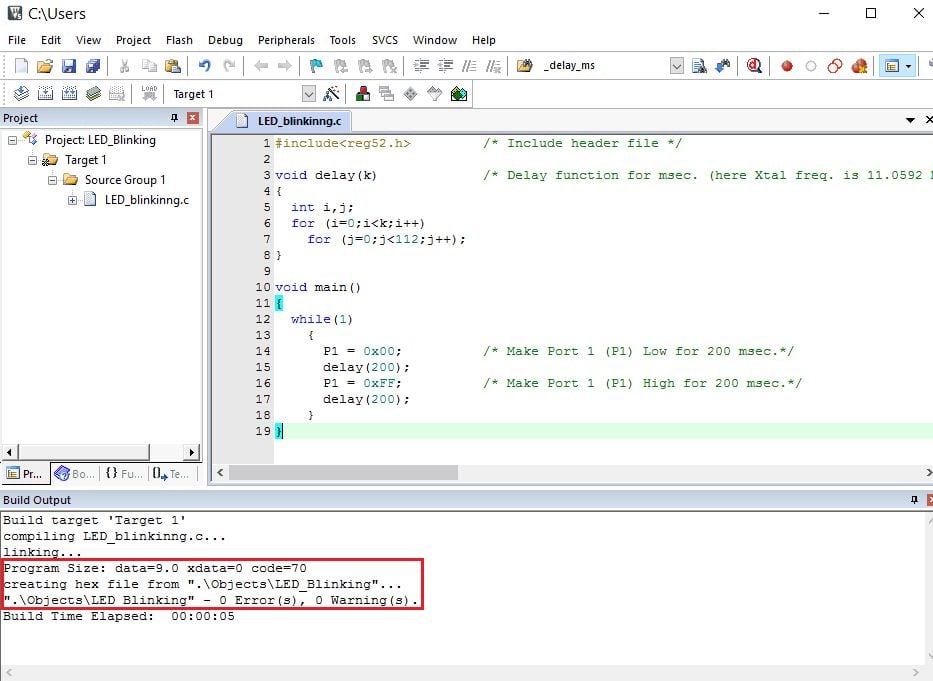
Now select the Project menu and click on “Build target”, it will build a project and give status in the Build output window with Error and Warning count if any.
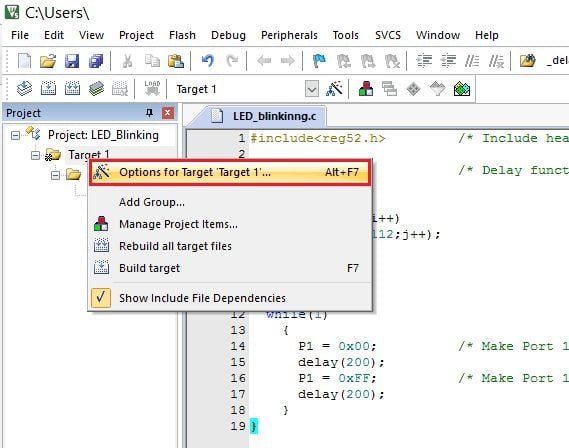
To create a Hex file right click on Target 1 and select Option for Target ‘Target 1’
The target window will pop up, enter Xtal (MHz) frequency (here we used 11.0592 MHz), and tick mark in front of the “Use On-chip ROM” tag.
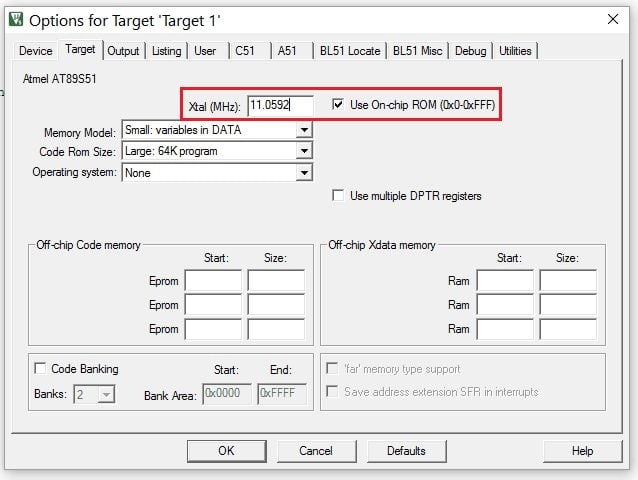
Within the same window select the “Output” option and tick mark in front of the “Create Hex File” tag and click on OK.

Now again select build target from the Project menu or simply hit the F7 shortcut key for the same, it will build target and also create a Hex file. You can see creating a Hex file in the Build output window
The created Hex file is burned into a microcontroller flash memory using various programming methods based on the programmer or programmer developed by the manufacturer itself.
For example, Flash magic is used for NXP Philips microcontrollers only and is developed by NXP itself. Other manufacturers use serial programmer like an ISP programmer to flash their controllers.
Now load the generated Hex file in one of any programmers available and flash it in your 8051 Microcontroller.
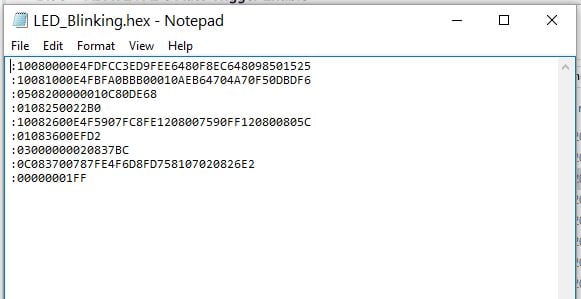
Find below hex file snap.
LED Blinking using AT89S52 Microcontroller Output
Components Used |
||
|---|---|---|
| 8051 AT89c51 8051 AT89c51 |
X 1 | |
| LED 5mm LED 5mm |
X 1 | |
| Breadboard Breadboard |
X 1 | |
Downloads |
||
|---|---|---|
|
|
8051-LED_Blinking | Download |