Introduction to I2C
- I2C (Inter Integrated Circuit) is a synchronous serial protocol that communicates data between two devices.
- It is a master-slave protocol which may have one master or many master and many slaves whereas SPI has only one master.
- It is generally used for communication over short distance.
- The I2C device has 7-bit or 10-bit unique address. So, to access these devices, master should address them by the 7-bit or 10-bit unique address.
- I2C is used in many applications like reading RTC (Real time clock), accessing external EEPROM memory. It is also used in sensor modules like gyro, magnetometer etc.
- It is also called as Two Wire Interface (TWI) protocol.
Raspberry Pi I2C
- Raspberry Pi has Broadcom processor having Broadcom Serial Controller (BSC) which is a master, fast-mode (400Kb/s) BSC controller. The BSC bus is compliant with the Philips I2C bus.
- It supports both 7-bit and 10-bit addressing.
- It also has BSC2 master which is dedicatedly used with HDMI interface and should not be accessed by user.
- I2C bus/interface is used to communicate with the external devices like RTC, MPU6050, Magnetometer, etc with only 2 lines. We can connect more devices using I2C interface if their addresses are different.
To access I2C bus in Raspberry Pi, we should make some extra configuration. Raspberry Pi has I2C pins which are given as follows.
Raspberry Pi I2C Pins
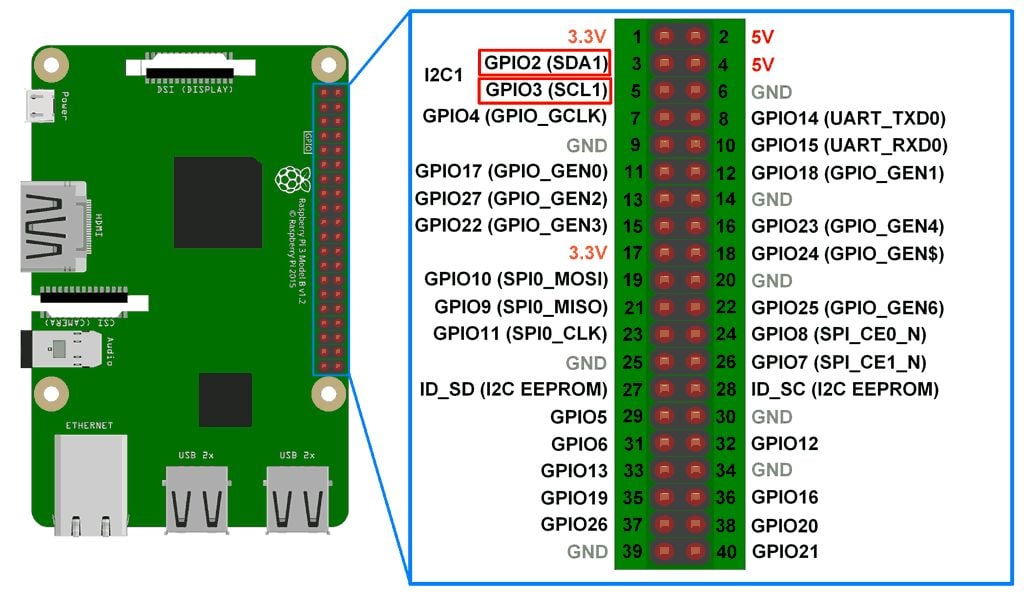
Raspberry Pi I2C Configurations
Before start interfacing I2C devices with Raspberry some prior configurations need to be done. These configurations are given as follows:
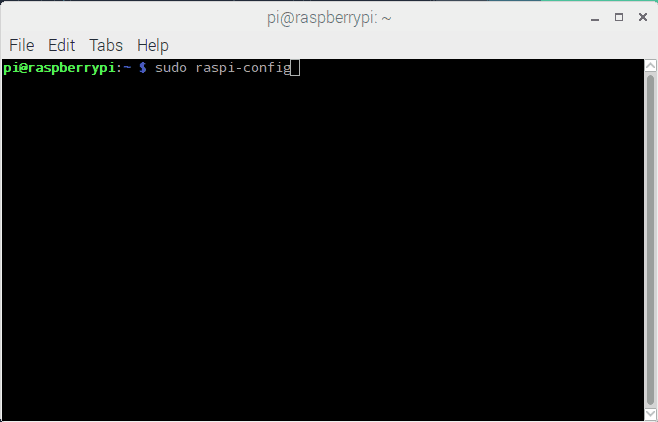
First, we should enable I2C in Raspberry Pi. We can enable it through terminal which is given below:
sudo raspi-config
Select Interfacing Configurations
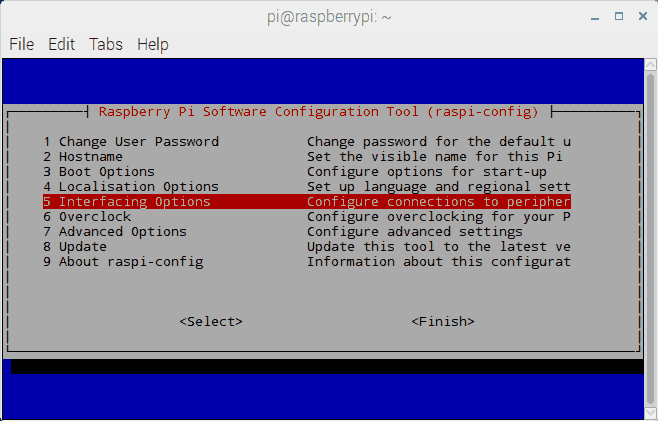
- In Interfacing option, Select -> I2C
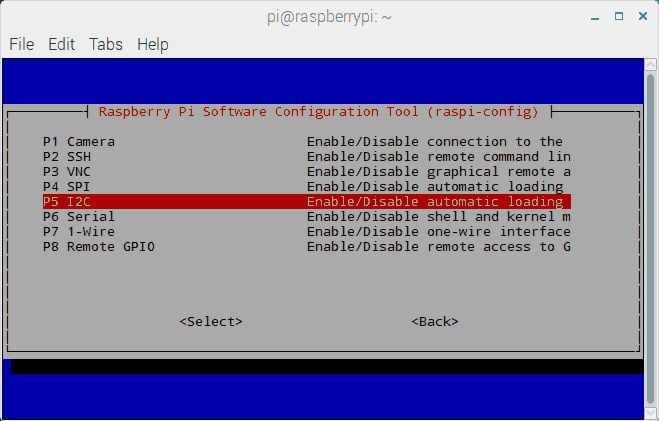
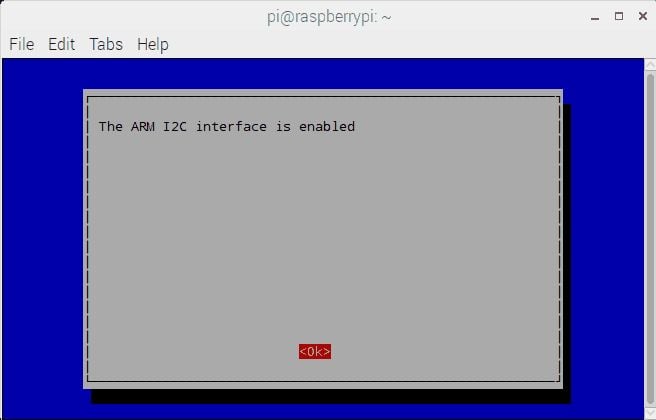
- Enable I2C configuration
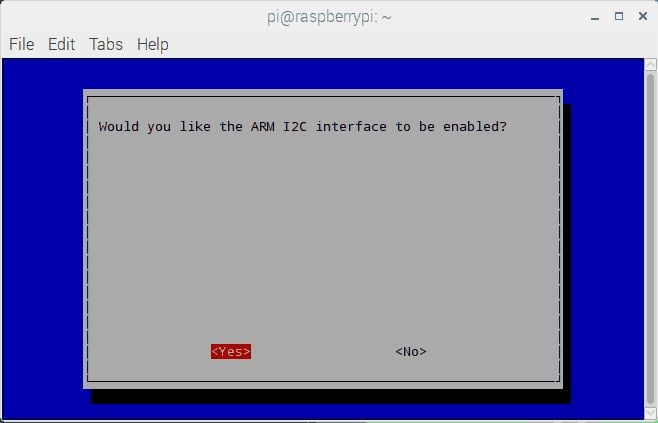
Select Yes when it asks to Reboot.
Now, after booting raspberry Pi, we can check user-mode I2C port by entering following command.
ls /dev/*i2c*then Pi will respond with name of i2c port.
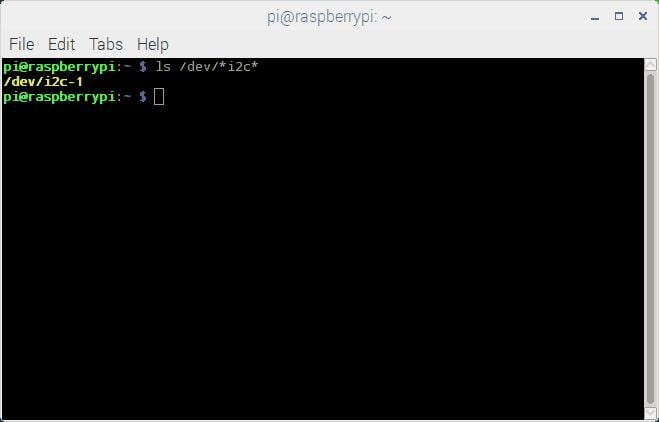
Above response represents the user-mode of I2C interface. Older versions of Raspberry pi may respond with i2c-0 user-mode port.
Scan or Test I2C device on Raspberry Pi
Now, we can test/scan for any I2C device connected to our Raspberry Pi board by installing i2c tools. We can get i2c tools by using apt package manager. Use following command in Raspberry Pi terminal.
sudo apt-get install -y i2c-toolsNow connect any I2C based device to the user-mode port and scan that port using following command,
sudo i2cdetect -y 1Then it will respond with device address.
e.g.
Here, we connected MPU6050 I2C based device to the Raspberry Pi and try to detect that device which is shown in below image,
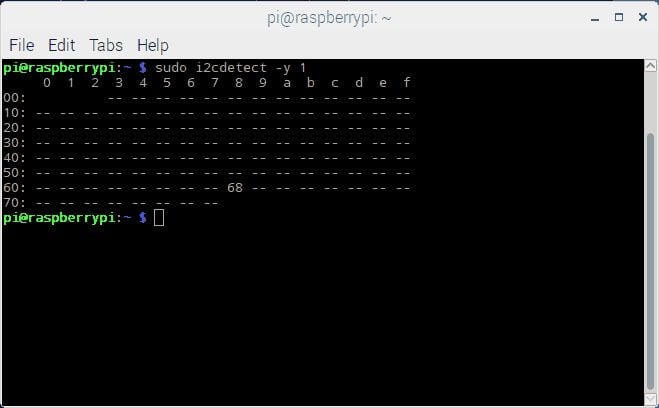
i2cdetect command will scan the I2C port to get the address of device if connected.
If no device is connected to I2C port then it will return field with (- -).
We can also get or set data of I2C device using following command
i2cget, i2cset, etc
e.g.
sudo i2cget -y I2C_user_mode_Port address_of_device Register_addresssudo i2cget 1 0x68 0x01 sudo i2cget 1 0x68 0x01 and it will respond with data present in the register having address 0x01.
Access I2C devices using SMBus
We can access I2C bus on Raspberry Pi using SMBus. SMBus is a subset of I2C bus/interface. SMBus provides support for I2C based devices. While writing program to access I2C based device, make use of SMBus commands.
While developing program for Raspberry Pi I2C communication in python, use SMBus library package which has great support to access I2C devices. So, we should add SMBus support for Python by using apt packet manager,
sudo apt-get install python-smbus
Components Used |
||
|---|---|---|
| Raspberry Pi 4B Raspberry Pi 4BRaspberry Pi 4B |
X 1 | |
| Raspberry Pi Zero Raspberry Pi Zero |
X 1 | |