


IoT-Based-Smart-Irrigation-System
Here we have to build an IoT based Irrigation System using the ESP8266 NodeMCU Module and DHT11 Sensor. It will not only automatically irrigate the water based on the moisture level in the soil but also send the data to a dedicated server to keep track of the land condition.
The goals of the project are:
- Control the drip irrigation system in an automated fashion, but still, turn on individual zones manually when needed.
- No reliance on the cloud should work over the local network.
- Be extendable to any number of zones relatively easy.
- Should work Autonomously by sensing soil moisture levels.
- Should be Inexpensive to build, but must be reliable.
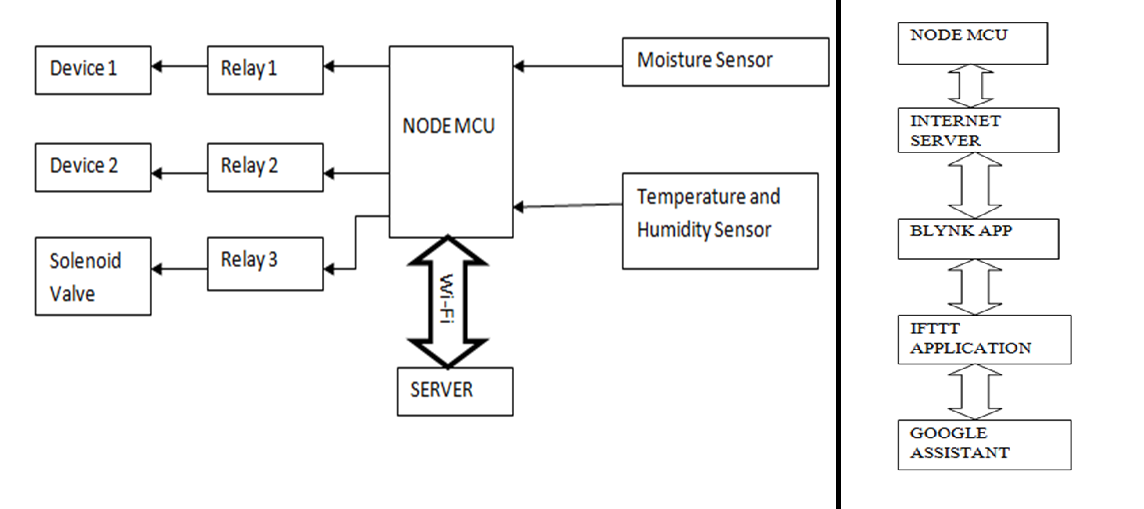
BLOCK DIAGRAM DESCRIPTION:
The whole project is based on ESP32 as the main brain of the system. All the sensors relays are interfaced with the ESP32 controller. The ESP32 is designed for low power IoT applications in mind. It’s high processing power with in-built Wi-Fi / Bluetooth and Deep Sleep Operating capabilities makes it ideal for most Portable IoT devices.
This soil moisture sensor module is used to detect the moisture of the soil. It measures the volumetric content of water inside the soil and gives us the moisture level as output. The module has both digital and analog outputs and a potentiometer to adjust the threshold level.
The DHT22 is a commonly used temperature and humidity sensor. The sensor comes with a dedicated NTC to measure temperature and an 8-bit microcontroller to output the values of temperature and humidity as serial data. The sensor is also factory calibrated and hence easy to interface with other microcontrollers. The sensor can measure temperature from -40°C to 80°C and humidity from 0% to 100% with an accuracy of ±1°C and ±1%. So if you are looking to measure in this range then this sensor might be the right choice for you.
The relay module is an electrically operated switch that allows you to turn on or off a circuit using voltage and/or current much higher than a microcontroller could handle. There is no connection between the low voltage circuit operated by the microcontroller and the high power circuit. The relay protects each circuit from each other.
DC-DC Buck Converter Step Down Module LM2596 Power Supply is a step-down(buck) switching regulator, capable of driving a 3-A load with excellent line and load regulation. These devices are available in fixed output voltages of 3.3 V, 5 V, 12 V, and an adjustable output version. The LM2596 series operates at a switching frequency of 150kHz, thus allowing smaller sized filter components than what would be required with lower frequency switching regulators.
Water Solenoid Valve 12V.This is a Normally closed 12 Volt Solenoid Valve perfect for controlling water flow. This is an ON-OFF type solenoid valve. This is normally used in Solar water heaters. It is made of plastic and copper and can be detached to clean its filter.
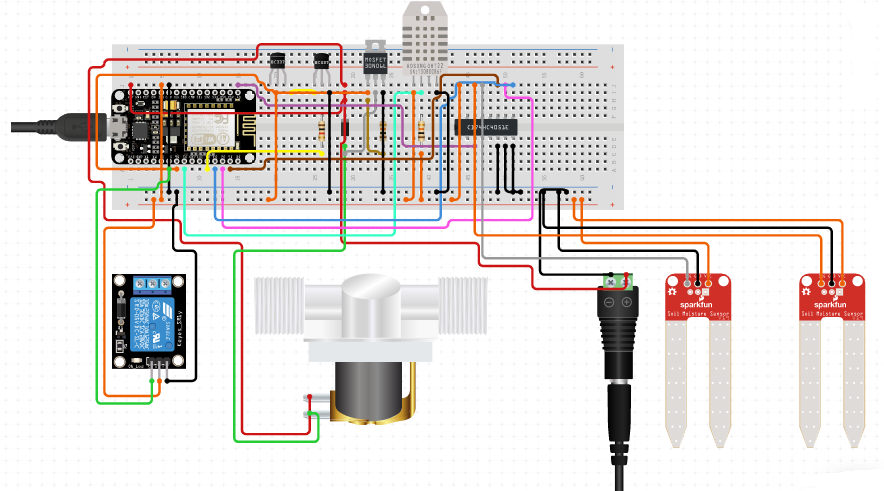
STEP 1:
The first step is to connect all the components as per the connection diagram. start with connecting basic components like powering up the ESP32 module, sensors, and solenoid valve.
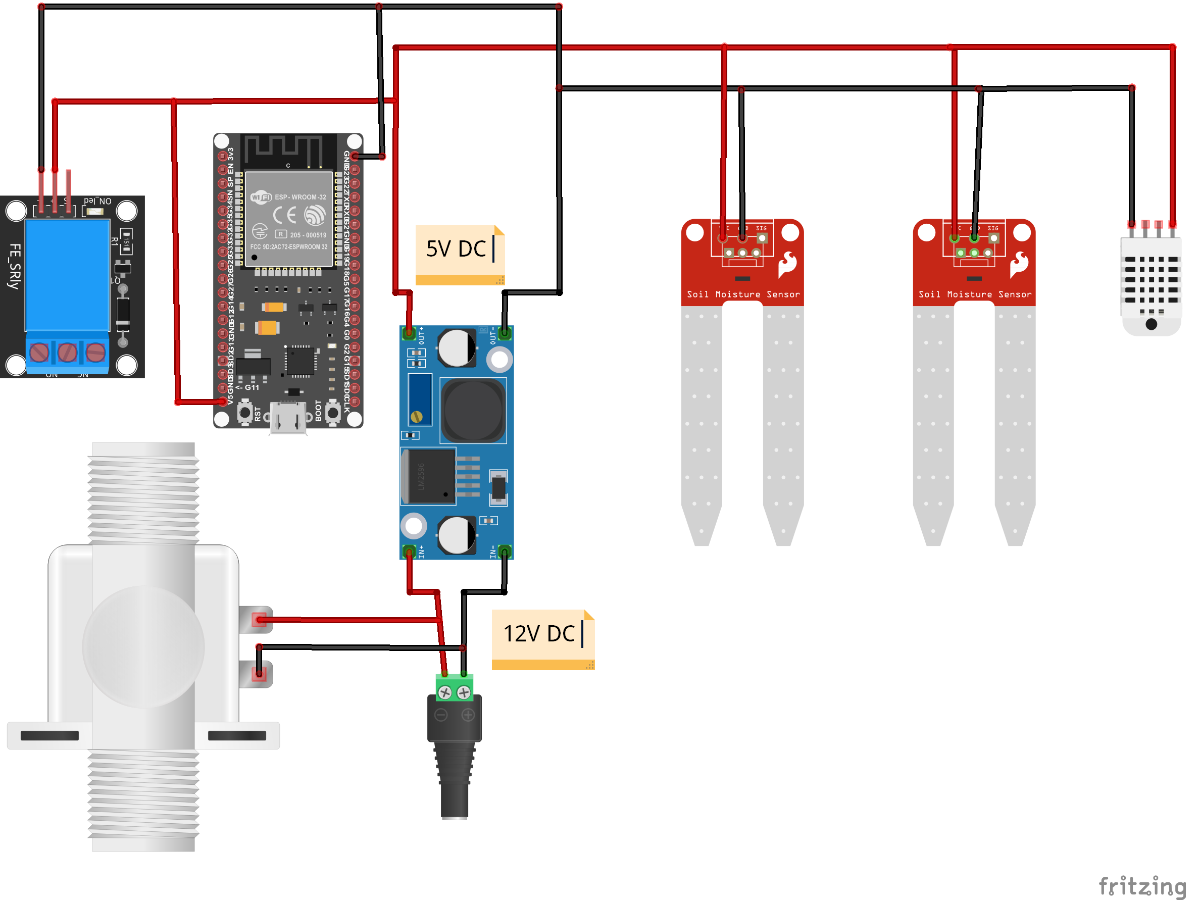
STEP 2:
Connect Sensors and relay board to gpios.
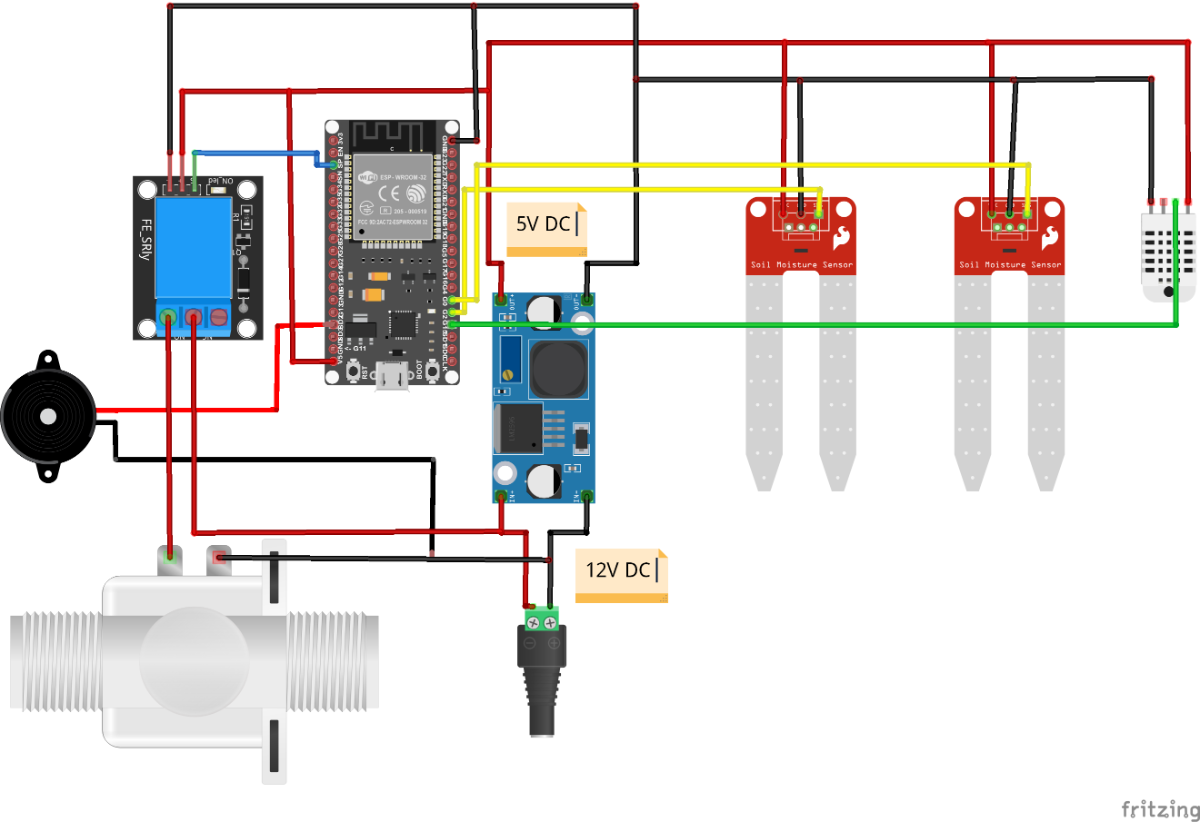
STEP 3:
Now after connecting peripheral to the ESP32. Connect the USB cable to the ESP32 and upload the given code.
WORKING:
. The 2 probes of the moisture sensor measure the electrical resistance of soil between the two conductors.
2. That electrical resistance is converted proportionally to its moisture content. 3. As the ESP8266 module has only one analog pin (A0), it is necessary to use a multiplexer so as to give appropriate sensor value to the module. The select pins select the proper sensor input and connect it to the analog pin of the module.
4. The value of this analog pin is given as input to the ESP8266 module through the multiplexer, where it is further processed.
5. If the moisture content is very low, the ESP8266 controls the Solenoid valve and the sprinkler is turned on in order to water the plants.
6. When the moisture content is enough for the plants, the solenoid valve turns the sprinkler off.
7. When the sprinkler is turned on, the buzzer attached to the ESP8266 module beeps twice. Similarly, the buzzer beeps for a longer period only once which indicates that the sprinkler is turned off.
8. If the moisture level is too low, the analog value shown is 1023. 9. All the real-time values provided by the sensors are monitored on mobile through an application.
10. The application is named ‘BLYNK’, and it is used as a user interface for monitoring the system. It displays the sensor values which are sent by ESP8266 through WiFi. Also, the working of the solenoid can be controlled manually through the BLYNK app.
11. Simultaneously, the surrounding temperature and humidity are measured using a DHT-22 sensor. It uses a Negative Temperature coefficient thermistor.12. According to the study, higher humidity better is the plant’s growth rate, so to keep track of the growth of plants DHT sensor is needed.
13. All the values like moisture content, humidity, and temperature are uploaded automatically on the Google Sheets with the help of Google Script after every one minute, which further is used for data collection and also for maintaining the record.
Arduino-ESP8266 and Blynk Integration
- Follow instructions on http://www.blynk.cc/getting-started/
- DOWNLOAD BLYNK APP FOR ANDROID OR IOS
- GET THE AUTH TOKEN
- INSTALL BLYNK LIBRARY
- And put the code from Blynk App Example to Arduino and flash it with standard Arduino IDE. Make sure to fill in your home wifi SSID and Password and Authkey from Blynk app.
- Comment out following line because we won't use ESP8266 hardware serials
//#define EspSerial Serial1
- and uncomment these lines because we will use software serial
#include <SoftwareSerial.h>
- Make sure your esp baud rate is correct on this line: #define ESP8266_BAUD 115200 (for me it was 9600)
- Install the Blynk app on your smartphone and add a button to it and make it turn on/off a digital pin. In my case, it was a D7 pin. Which harbored the LED.
- Once your Arduino is powered it will connect to your home wifi with esp thus to the internet. And when you press the button from the Blynk app it will turn it on and off.
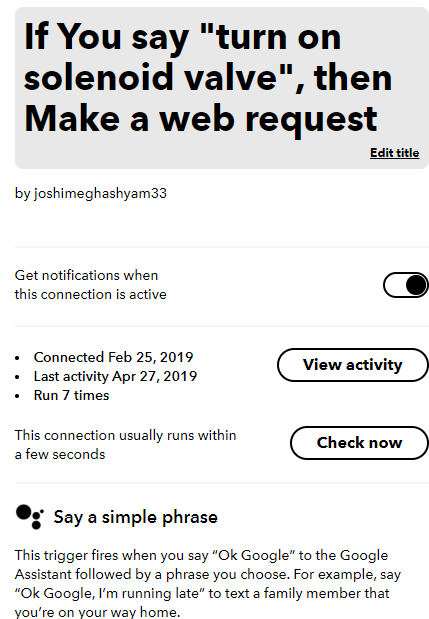
IFTTT - Google Assistant Integration
First, you need to get the latest version of google assistant on your phone. I believe you need to have at least Marshmallow to make it work. It didn't work on my friend's Android KitKat Version. I had a Nougat ROM on my Samsung J7 Phone. To get it for your Android 6+ phone, You can follow official https://support.google.com/assistant/answer/7172657?co=GENIE.Platform%3DAndroid&hl=en
IFTTT-1
IFTTT-2

Video of working Project
What you need To use the Google Assistant, you’ll need a phone with
- Android 6.0 or higher Google app 6.13 or higher Google Play services 1.5 GB of memory and 720p screen resolution Phone's language set to English. On Pixel phones, you can use English or German. Turn on
- Open the Google app Google Search. At the top left of the Home screen, tap Menu Menu and then Settings and then Enable Google Assistant. If these don't work for you, you can try the unofficial way from https://www.googleplayservicesapk.com/download-google-assistant-apk- for-marshmallow-nougat-lollipop/ (I got mine from there) We added it as an IF(trigger) in IFTTT instead of Widget Button we previously tested.
- Possibilities are endless, you can put any trigger you like from IFTTT to turn on or off.
- https://ifttt.com/google_assistant Also you can make google assistants do anything you want with your custom voice commands.