HealthBuddy – Intelligent Desktop Health Monitor
1. Project Overview & System Block Diagram
Before starting, understand the data flow:
Finger → MAX30102 Sensor → ESP32 (I2C) → OLED Display (I2C)
↓ ↓
No Finger Buzzer (GPIO)
↓
Robot face
Decision Logic:
- BPM < 60 or BPM > 100 → Unhealthy → Buzzer ON + Sad face 😞
- 60 ≤ BPM ≤ 100 → Healthy → Buzzer OFF + Happy face 😊
- No Finger = Robot Face (Desktop Companion)
2. Component List with Estimated Cost (India)
Component Quantity Approx. Cost (₹) ESP32 Dev Board 1 400 MAX30102 (Heart rate sensor) 1 350 OLED Display (0.96", I2C, 128x64) 1 250 USB B Type Cable 1 200 Breadboard + Jumper wires 1 set 100 Buzzer 1 100 Total 1400 You can reduce cost by using ESP8266 (but ESP32 is recommended for stability).
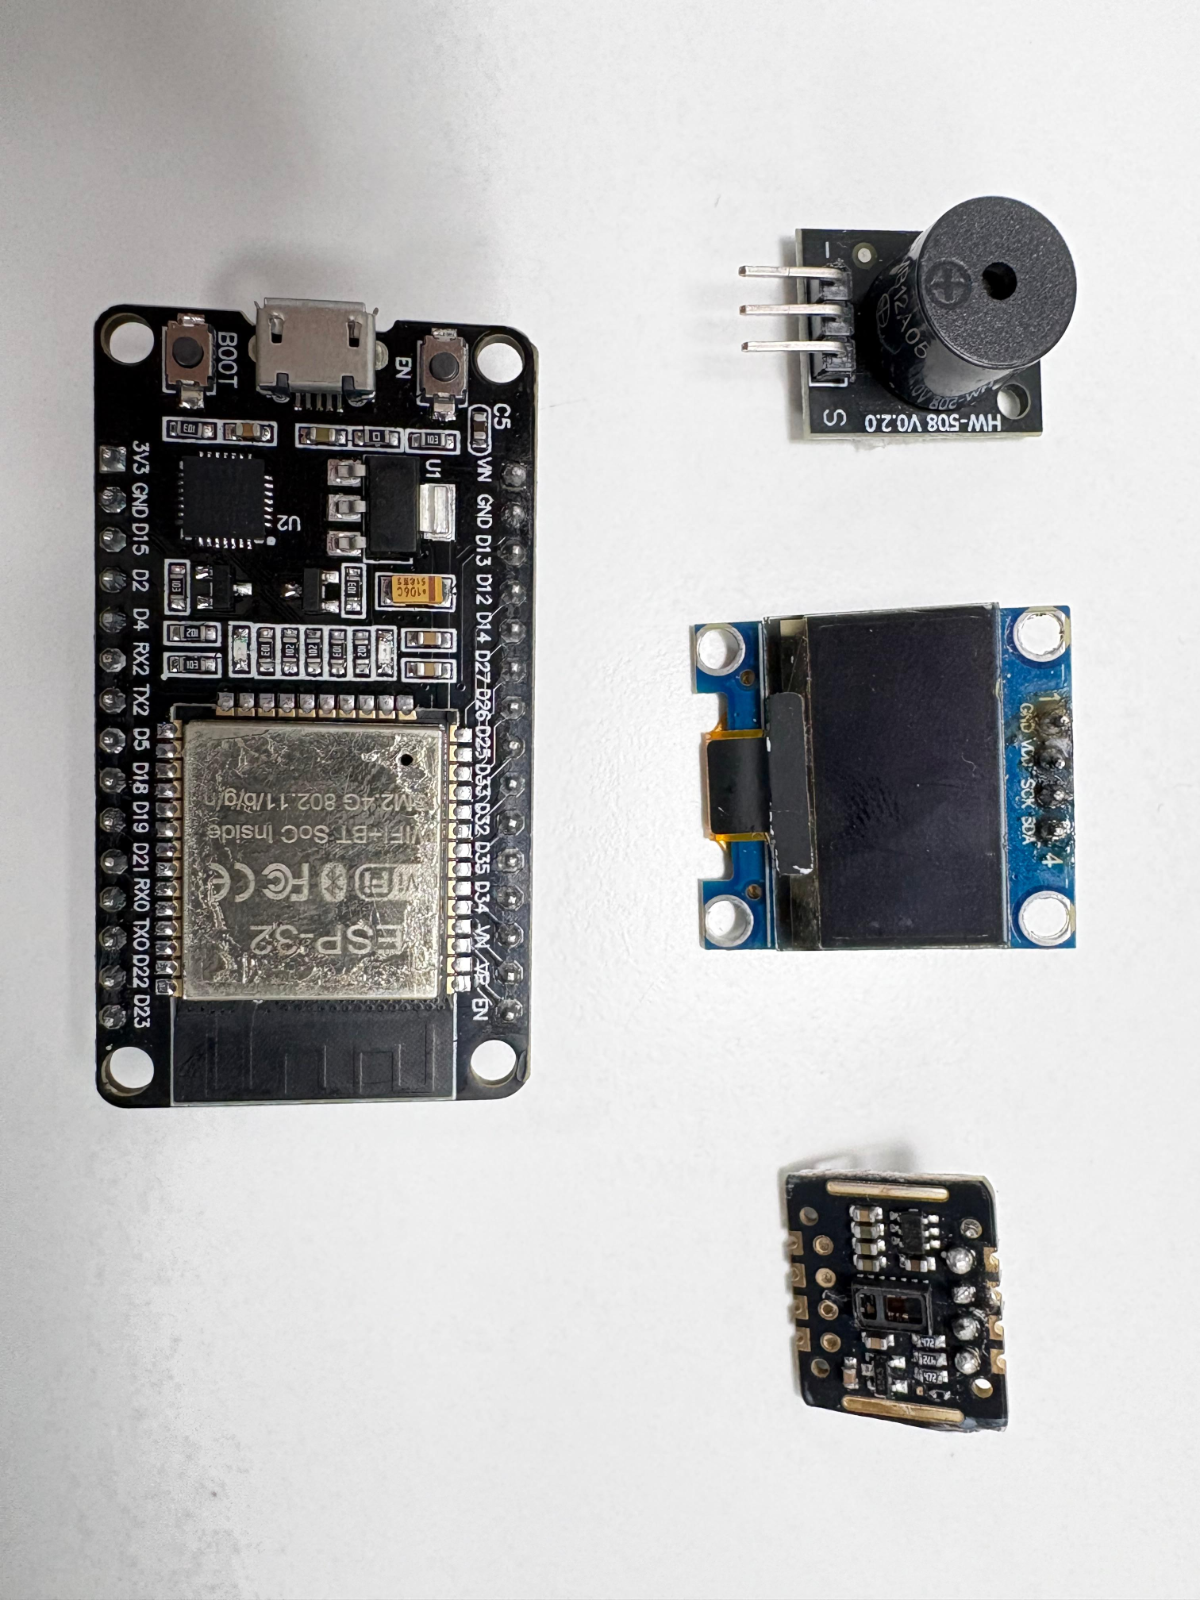
3. Circuit Connections (Step by Step)
MAX30102 ↔ ESP32 (I2C)
| MAX30102 | ESP32 |
| VIN | 3.3V |
| GND | GND |
| SCL | GPIO22 |
| SDA | GPIO21 |
OLED Display ↔ ESP32 (I2C – same bus)
| OLED | ESP32 |
| VCC | VCC |
| GND | GND |
| SCL | GPIO22 |
| SDA | GPIO21 |
Buzzer ↔ ESP32
| Buzzer (+) | ESP32 GPIO 25 |
| Buzzer (-) | GND |
Important: Use same I2C pins (SCL=22, SDA=21) for both sensor and display.
4. Software Setup (Arduino IDE)
Step 4.1 – Install ESP32 Board
- Open Arduino IDE → File → Preferences
- Add URL:
https://raw.githubusercontent.com/espressif/arduino-esp32/gh-pages/package_esp32_index.json - Tools → Board → Boards Manager → Search "ESP32" → Install
Step 4.2 – Install Required Libraries
Go to Sketch → Include Library → Manage Libraries and install:
- MAX30105 by SparkFun
- Adafruit SSD1306
- Adafruit GFX Library
- Wire (built-in)
5. Complete ESP32 Code (with Explanation)
#include <Wire.h>
#include <Adafruit_GFX.h>
#include <Adafruit_SSD1306.h>
#include <MAX30105.h>
#include "spo2_algorithm.h"

// OLED settings
#define SCREEN_WIDTH 128
#define SCREEN_HEIGHT 64
#define OLED_RESET -1
Adafruit_SSD1306 display(SCREEN_WIDTH, SCREEN_HEIGHT, &Wire, OLED_RESET);

// Sensor object
MAX30105 particleSensor;

// Buzzer pin
#define BUZZER_PIN 25

// Variables for heart rate & SpO2
uint32_t irBuffer[100];
uint32_t redBuffer[100];
int32_t heartRate;
int8_t validHeartRate;
int8_t spo2;
int8_t validSpO2;

// Timing variables
unsigned long lastSensorRead = 0;
const unsigned long sensorInterval = 2000; // Read every 2 seconds

// ========== ROBOT FACE DRAWING FUNCTION ==========
void drawRobotFace() {
  display.clearDisplay();

  // Draw robot head (rounded rectangle)
  display.drawRoundRect(34, 10, 60, 50, 10, SSD1306_WHITE);

  // Draw antenna
  display.drawLine(64, 10, 64, 2, SSD1306_WHITE);
  display.fillCircle(64, 2, 2, SSD1306_WHITE);

  // Draw left eye (with glow effect)
  display.fillCircle(50, 28, 5, SSD1306_WHITE);
  display.fillCircle(50, 28, 2, SSD1306_BLACK);  // Pupil

  // Draw right eye
  display.fillCircle(78, 28, 5, SSD1306_WHITE);
  display.fillCircle(78, 28, 2, SSD1306_BLACK);  // Pupil

  // Draw blinking effect (alternating eyes for cuteness)
  static bool blinkState = false;
  if(millis() % 2000 < 100) {  // Blink every 2 seconds for 100ms
    // Eyes closed
    display.drawLine(45, 28, 55, 28, SSD1306_WHITE);
    display.drawLine(73, 28, 83, 28, SSD1306_WHITE);
  }

  // Draw mouth (neutral/flat expression)
  display.drawLine(54, 45, 74, 45, SSD1306_WHITE);

  // Draw ears (bolts on sides)
  display.fillRect(30, 25, 4, 8, SSD1306_WHITE);
  display.fillRect(94, 25, 4, 8, SSD1306_WHITE);

  // Display message
  display.setTextSize(1);
  display.setCursor(20, 58);
  display.println("NO FINGER!");

  display.display();
}

// ========== SIMPLE ROBOT FACE (ALTERNATIVE - SMALLER) ==========
void drawSimpleRobotFace() {
  display.clearDisplay();

  // Head
  display.drawRect(44, 15, 40, 35, SSD1306_WHITE);

  // Eyes
  display.fillCircle(56, 28, 3, SSD1306_WHITE);
  display.fillCircle(72, 28, 3, SSD1306_WHITE);
  display.fillCircle(56, 28, 1, SSD1306_BLACK);
  display.fillCircle(72, 28, 1, SSD1306_BLACK);

  // Mouth (sad/neutral for no finger)
  display.drawLine(54, 40, 74, 40, SSD1306_WHITE);

  // Antenna
  display.drawLine(64, 15, 64, 8, SSD1306_WHITE);
  display.fillCircle(64, 8, 2, SSD1306_WHITE);

  // Message
  display.setTextSize(1);
  display.setCursor(25, 55);
  display.println("Place Finger");

  display.display();
}

void setup() {
  Serial.begin(115200);
  pinMode(BUZZER_PIN, OUTPUT);
  digitalWrite(BUZZER_PIN, LOW);

  // Initialize OLED
  if(!display.begin(SSD1306_SWITCHCAPVCC, 0x3C)) {
    Serial.println("OLED not found");
    while(1);
  }

  display.clearDisplay();
  display.setTextSize(1);
  display.setTextColor(SSD1306_WHITE);
  display.setCursor(0,0);
  display.println("HealthBuddy Ready");
  display.display();
  delay(2000);

  // Initialize MAX30102
  if (!particleSensor.begin(Wire, I2C_SPEED_FAST)) {
    Serial.println("MAX30102 not found");
    while(1);
  }

  // Configure sensor
  byte ledBrightness = 0x1F;  // 100% brightness
  byte sampleAverage = 4;      // 4 samples average
  byte ledMode = 2;            // Red + IR
  int sampleRate = 400;        // 400Hz
  int pulseWidth = 411;        // 411μs
  int adcRange = 4096;         // 13-bit ADC

  particleSensor.setup(ledBrightness, sampleAverage, ledMode, sampleRate, pulseWidth, adcRange);

  // Show startup robot face
  drawRobotFace();
  delay(2000);
}

void loop() {
  // Read 100 samples for calculation
  for (byte i = 0 ; i < 100 ; i++) {
    while (particleSensor.available() == false)
      particleSensor.check();
    redBuffer[i] = particleSensor.getFIFOIR();
    irBuffer[i] = particleSensor.getFIFORed();
    particleSensor.nextSample();
  }

  // Calculate heart rate
  maxim_heart_rate_and_oxygen_saturation(irBuffer, 100, redBuffer, &spo2, &validSpO2, &heartRate, &validHeartRate);

  // Check if finger is present
  bool fingerPresent = false;

  // Check if we have valid data AND signal strength is good
  if(validHeartRate == 1 && heartRate > 30 && heartRate < 250) {
    // Additional check: look for AC component in signal (indicates pulse)
    uint32_t signalMin = 0xFFFFFFFF;
    uint32_t signalMax = 0;
    for(int i = 0; i < 100; i++) {
      if(irBuffer[i] < signalMin) signalMin = irBuffer[i];
      if(irBuffer[i] > signalMax) signalMax = irBuffer[i];
    }
    uint32_t signalRange = signalMax - signalMin;

    // If there's variation in signal, finger is present
    if(signalRange > 5000 && heartRate > 0) {
      fingerPresent = true;
    }
  }

  // Display logic with Robot Face
  display.clearDisplay();

  if(fingerPresent && validHeartRate && heartRate > 30 && heartRate < 250) {
    // ========== FINGER DETECTED - SHOW HEALTH DATA ==========
    display.setTextSize(1);
    display.setCursor(0, 0);
    display.println("HealthBuddy");
    display.setTextSize(2);
    display.setCursor(0, 20);
    display.print("BPM:");
    display.println(heartRate);

    display.setTextSize(1);

    // Healthy or Unhealthy?
    if(heartRate >= 60 && heartRate <= 100) {
      // Healthy
      display.setCursor(0, 50);
      display.println("Status: HEALTHY");
      display.setCursor(90, 45);
      display.print(":)");
      digitalWrite(BUZZER_PIN, LOW);  // Buzzer OFF
    } else {
      // Unhealthy
      display.setCursor(0, 50);
      display.println("Status: UNHEALTHY");
      display.setCursor(90, 45);
      display.print(":(");

      // Buzzer pattern for alert
      digitalWrite(BUZZER_PIN, HIGH);
      delay(200);
      digitalWrite(BUZZER_PIN, LOW);
      delay(100);
      digitalWrite(BUZZER_PIN, HIGH);
      delay(200);
      digitalWrite(BUZZER_PIN, LOW);
    }
  }
  else {
    // ========== NO FINGER - SHOW ROBOT FACE ==========
    drawRobotFace();  // Show cute robot face
    digitalWrite(BUZZER_PIN, LOW);  // Ensure buzzer is OFF

    // Optional: Add blinking LED effect for robot eyes (if you have an LED)
    // digitalWrite(LED_PIN, millis() % 1000 < 500 ? HIGH : LOW);
  }

  display.display();
  delay(500);  // Small delay for stability
}

// ========== BONUS: FUNCTION FOR DIFFERENT ROBOT EXPRESSIONS ==========
void drawRobotFaceWithExpression(String expression) {
  display.clearDisplay();

  // Head
  display.drawRoundRect(34, 10, 60, 50, 10, SSD1306_WHITE);

  // Antenna
  display.drawLine(64, 10, 64, 2, SSD1306_WHITE);
  display.fillCircle(64, 2, 2, SSD1306_WHITE);

  // Eyes (always big and cute)
  display.fillCircle(50, 28, 5, SSD1306_WHITE);
  display.fillCircle(78, 28, 5, SSD1306_WHITE);
  display.fillCircle(50, 28, 2, SSD1306_BLACK);
  display.fillCircle(78, 28, 2, SSD1306_BLACK);

  // Ears
  display.fillRect(30, 25, 4, 8, SSD1306_WHITE);
  display.fillRect(94, 25, 4, 8, SSD1306_WHITE);

  // Mouth based on expression
  if(expression == "happy") {
    display.drawArc(64, 45, 12, 0, 180, SSD1306_WHITE);  // Smile
  }
  else if(expression == "sad") {
    display.drawArc(64, 48, 12, 180, 360, SSD1306_WHITE);  // Frown
  }
  else {
    display.drawLine(54, 45, 74, 45, SSD1306_WHITE);  // Neutral
  }

  display.setTextSize(1);
  display.setCursor(20, 58);

  if(expression == "sad") {
    display.println("No Finger!");
  } else {
    display.println("Place Finger");
  }

  display.display();
}
Explanation:
- The code collects 100 samples from MAX30102.
- Uses standard algorithm (
spo2_algorithm.h) to calculate BPM.- Compares BPM with healthy range (60–100).
- Controls buzzer and updates OLED with emojis + text.
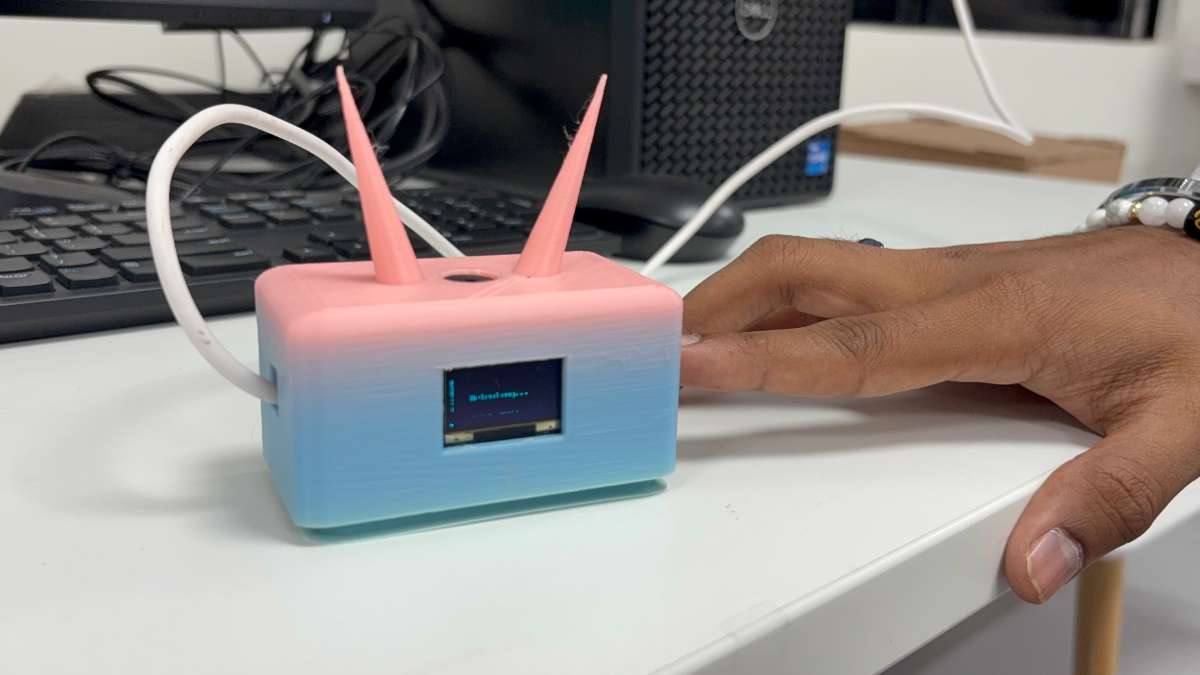
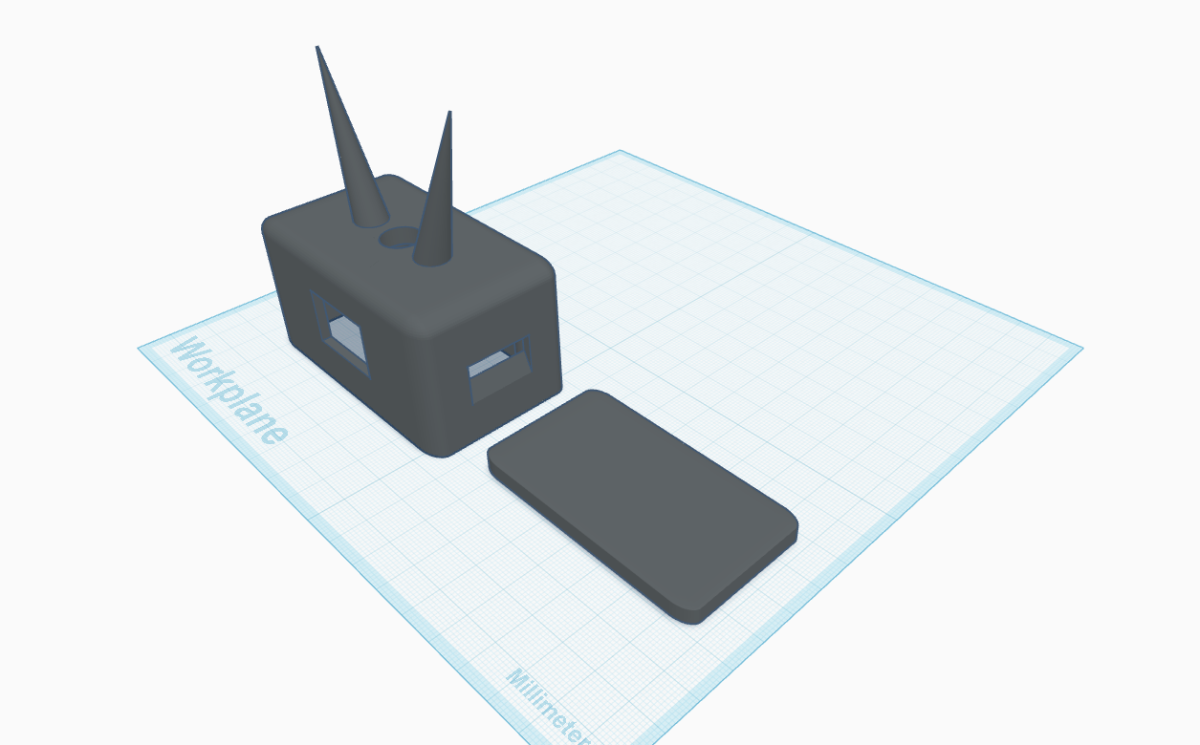
6. Assembly & Physical Build (Professional Look)
To make it look like a finished product (not a breadboard prototype):
- Use a small enclosure (ABS plastic box ~ 8x6x3 cm).
- Cut holes for:
- OLED screen (front)
- MAX30102 sensor (top surface for finger placement)
- Buzzer (side)
- USB port (back)
- Fix components using hot glue or 3D-printed mounts.
- Add a small label – "HealthBuddy" + heart icon.
Pro tip: Use double-sided tape to attach sensor on top so finger rests naturally.
7. Testing & Calibration
Test Case Action Expected Result 1 Power on without finger "Place finger on sensor" 2 Place finger lightly on MAX30102 BPM appears in 5–10 sec 3 Normal BPM (e.g., 75) Happy face, no buzzer 4 Simulate low BPM (tap slowly) Sad face + buzzer beeps 5 Remove finger Returns to Robot Face Calibration tip: Compare with a commercial pulse oximeter for accuracy. Adjust
setup(0x1F)parameter for sensitivity.
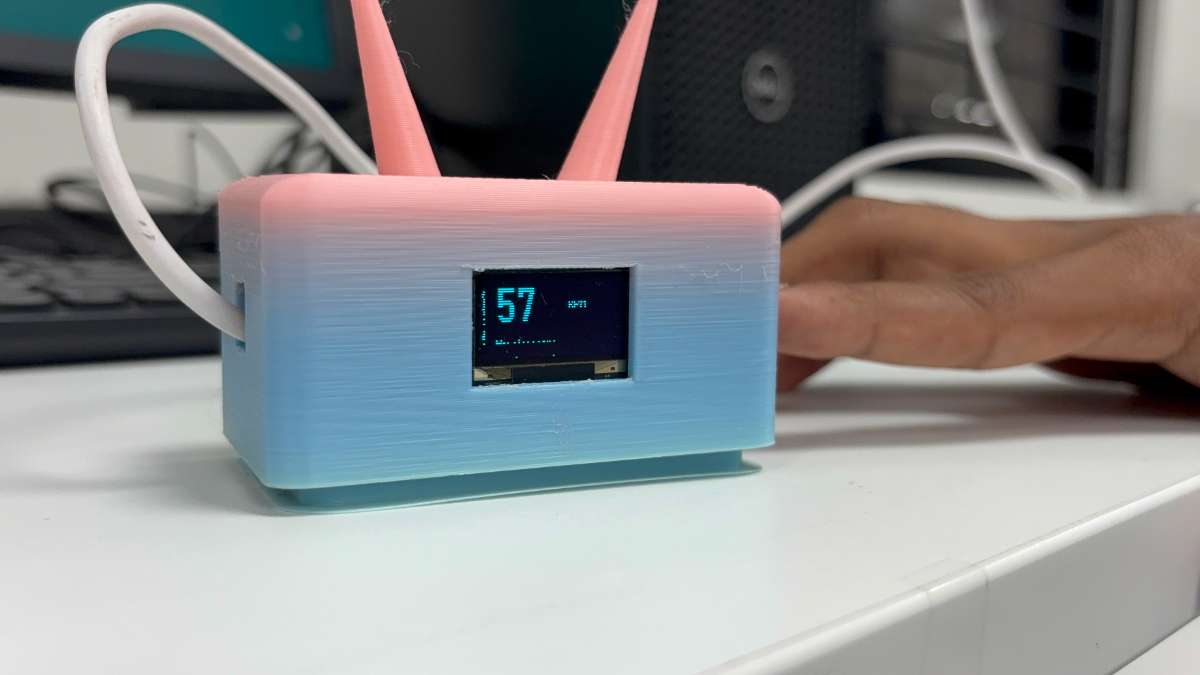
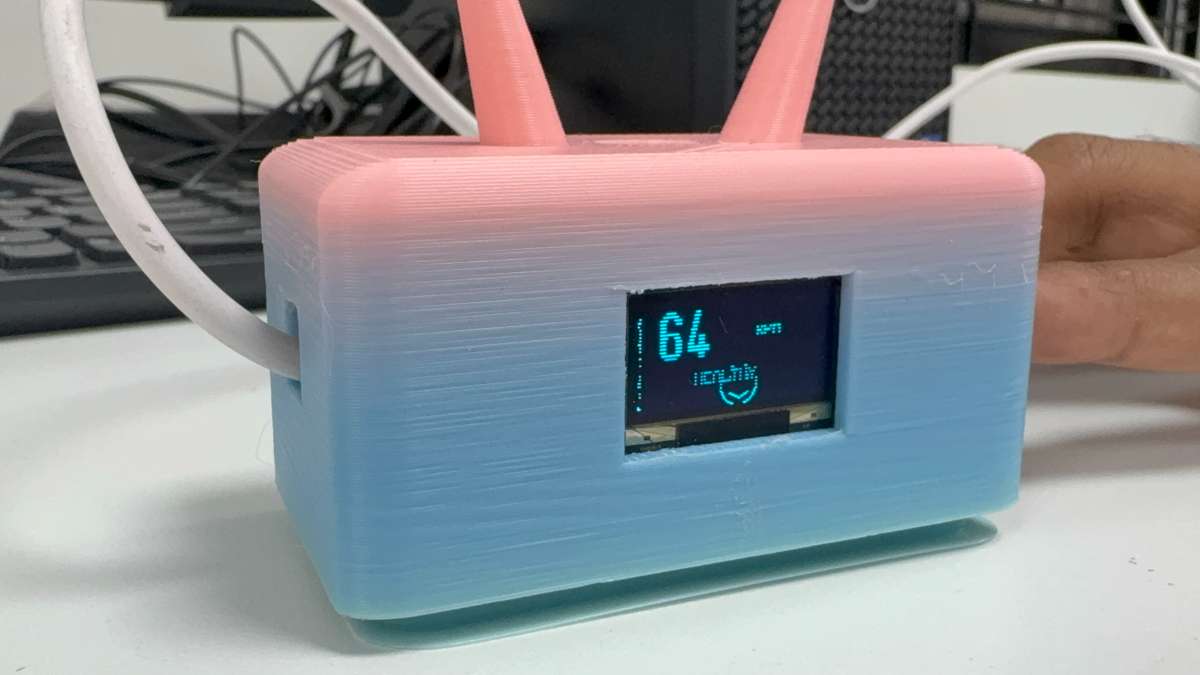
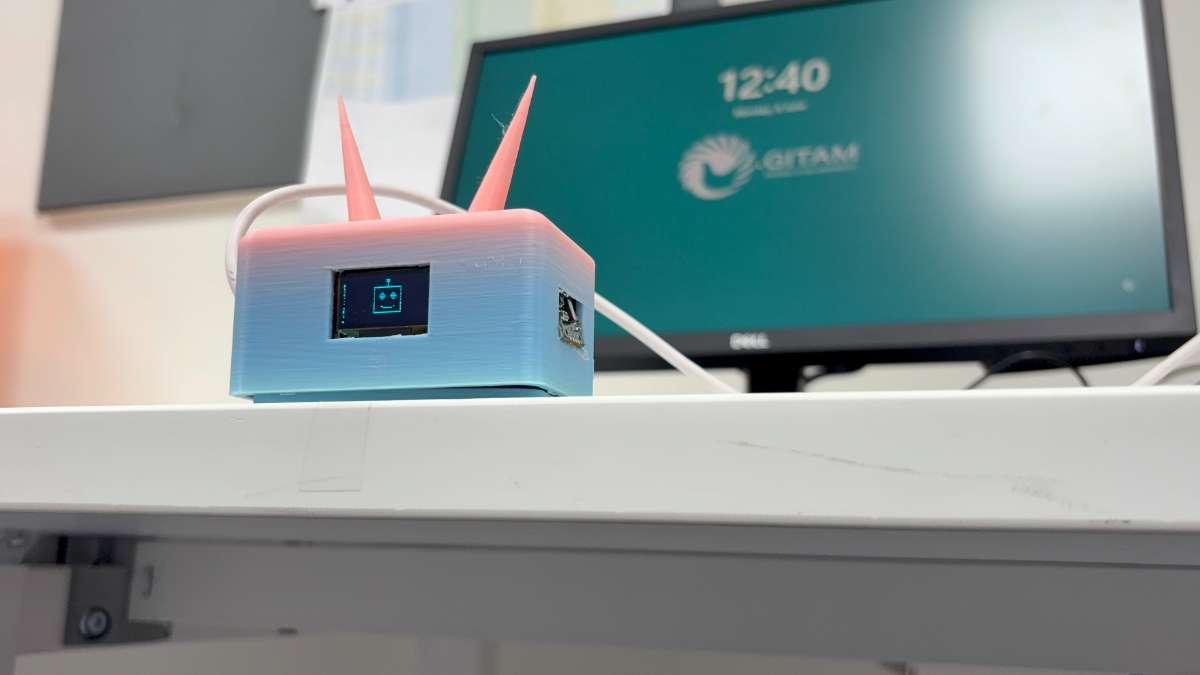
8. Final Output – What the User Sees/Hears
Healthy scenario (BPM 72):
- OLED: 😊 + "BPM: 72" + "Status: HEALTHY"
- Buzzer: Silent
Unhealthy scenario (BPM 120):
- OLED: 😞 + "BPM: 120" + "Status: UNHEALTHY"
- Buzzer: Beep – pause – beep
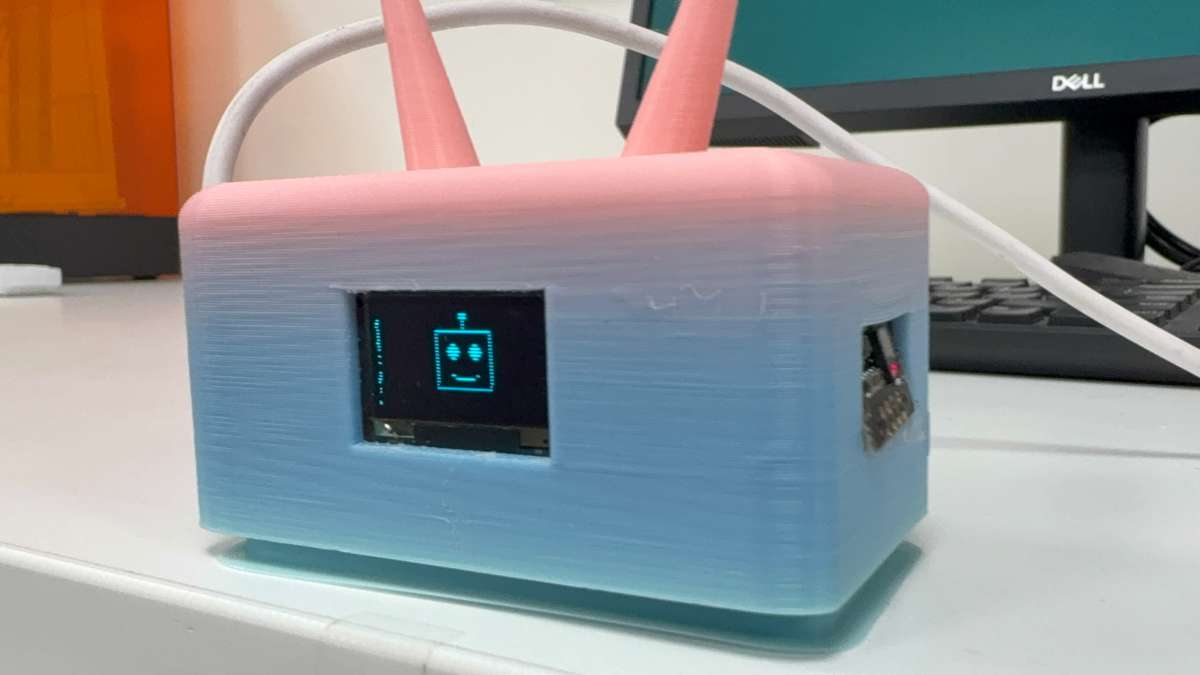
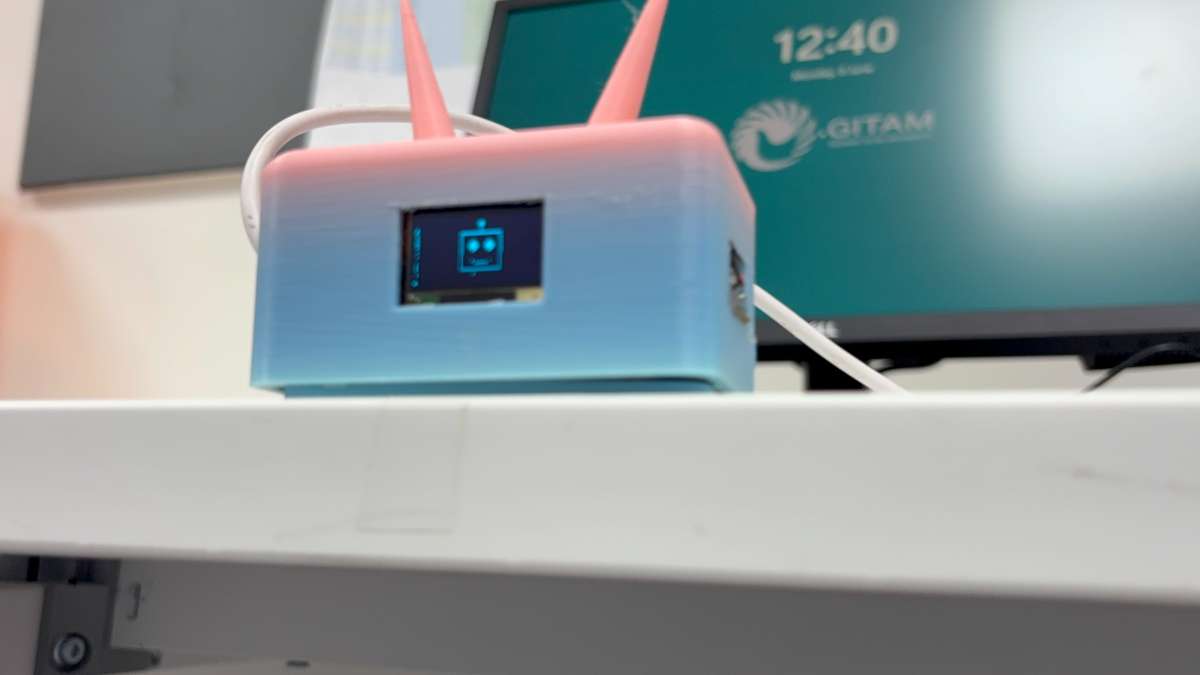
If There is No Finger
- Look like robot
- Desktop Companion
.png)
9. Cost vs. Benefit Analysis
| Parameter | Value |
| Development cost | ~₹1500 |
| Alternative (smartwatch) | ₹3000+ |
| Internet required? | No |
| Mobile app required? | No |
| Time per test | 10 seconds |
| Target users | Students, elderly, desk workers |
| Use Places | Office Desktop, School Desktop, Home Desktop |
10. YouTube Videos:
11. Product Images