
Basically in this project, we send the temperature data on Local WebServer, and also serve the images using SPI flash file System.
Step 1: Setting up the SPIFFS with NodeMCU
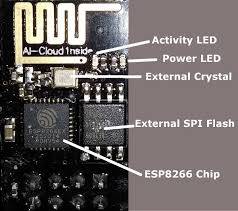
- ESP8266 has one more features, this is the SPI based flash memory system we can store and retrieve data from that.
- Now you can easily find download the ESP8266FS tool from the GitHub, You can download from here: https://github.com/esp8266/arduino-esp8266fs-plugin/releases/download/0.1.3/ESP8266FS-0.1.3.zip.
- Now this zip the copy the Arduino tool folder.
- Then restart the Arduino IDE. if Successfully install then you can show this type.
Step:2 Hardware
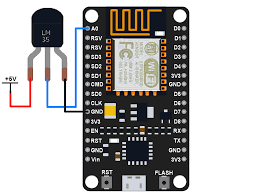
- Connect the LM35 with NodeMCU, A0 is the analogpin then OUT pin of the LM35 with connect to the A0 pin.
- LM35 operate on 4-20V , here NodeMCU have 3.3V so give the external +5V to the sensor.
Step:3 setup Arduino IDE
- Now our main work start from here, we use the Aysncwebserver so we have to install the AsyncWebserver library.
- Now you already know how to add the zip file to the Arduino IDE.
- You can download AsyncWebserver zip file from here: https://github.com/me-no-dev/ESPAsyncWebServer
- Also you can download the AsyncTCP zip file.
- Now add the zip file to the arduino IDE.
- Go to the Sketch -> Include library -> Manage library and that way you can add the the library
- Now our goal to the server the image on webserver using SPIFFS.
- For that Arduino IDE and go to the sketch -> show sketch folder.
- Click on the sketch folder you can see this type.
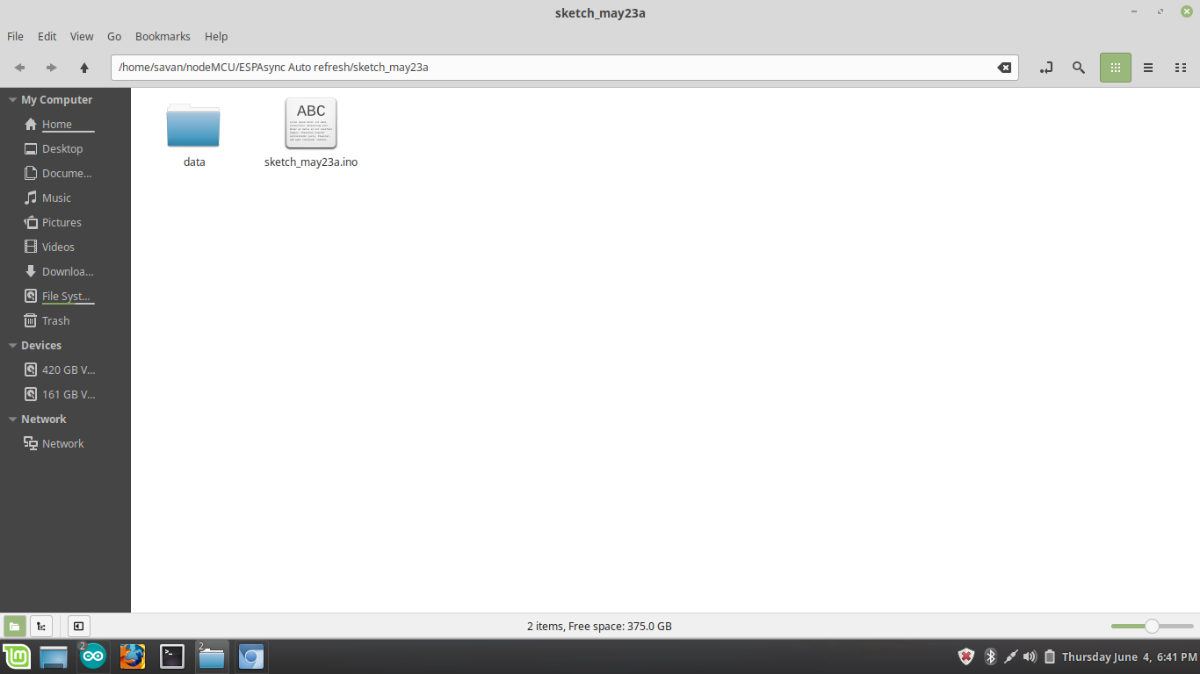
- Here is two things first is the .ino file and second is the data folder.
- if data folder is not shown then create the new folder and rename with data folder.
Step:4 Code explanation
- Now start the programming.
- first we have to the include the library which we already downloaded.
#include<FS.h>
#include<ESP8266WiFi.h>
#include <ESPAsyncTCP.h>
#include<ESPAsyncWebServer.h>
- FS.h is library is for the SPIFFS which we use for the store the images and anything to the external flash memory.
- ESP8266WiFi.h library is for the connect the nodeMCU with WiFi .(Mobile hotspot)
- Here nodeMCU connect the wifi unsing station mode.
- you also know nodemcu work as a client and server here we use as client.
- Here we use the AsyncWebServer so include the ESP async library.
const char* ssid="shravan";
const char* password="8905552134";
int val=0;
AsyncWebServer server(80);    // object the asyncwebserver where we listing the port no 80
- Now set the ssid and password where you connect with the nodeMCU. this is diffrent in your case.
- now make the object of the AsyncWerbserver, where client request with port 80, if get more knowledge then search the randomnerdtutorials.com
void setup()
{
 Serial.begin(115200);
   pinMode(A0,INPUT);
 if(!SPIFFS.begin()){
   Serial.print("Mount is not successfull");
 }
 Serial.println("Mount is successfully!!!!");
- Serial.begin(115200) is the for the UART protocol and 115200 is the standard baudrate.
- SPIFFS.begin() --> check the your flash file is mounted or not, if mount successfully then print on the serial port.
WiFi.begin(ssid,password);    // connect to the wifi
 while(WiFi.status()!=WL_CONNECTED)
 {
   delay(500);
   Serial.print(".");
 }
 Serial.print("WiFi is connnected successfully!!");
 Serial.println(WiFi.localIP());   // print the local IP on serial port
- WiFi.begin() method connect the nodeMCU with WiFi, after successfully connected print the localIP on the Serial port.
server.on("/",HTTP_GET,[](AsyncWebServerRequest *request){
   val=analogRead(A0);
   float temp=(0.322*val);
   request-> send(200,"text/html",SendHTML(temp));
 });

 server.on("/cloud.jpeg",HTTP_GET,[](AsyncWebServerRequest *request){
   request-> send(SPIFFS,"/cloud.jpeg","image/jpeg");
 });

 server.begin();   // start the server

}
- There are many method for the HTTP protocol but here we use the server.on() method, it take the first argument is URL when client request on this URL then server give the response on the WebBrowser.
- Here also HTTP GET method to send the data on webserver, Using GET and POST method you can also send the data.
- Now read the temperature data from the A0 pin and store the value in temp val variable Here temp=(0.322*val) , LM35 use the 1C with 10mv so.
- send method send the data, first 200 means ok response and second argument is "text/html" because serve the HTML code for sending data from the server and third argument take the String not Function here we write function but it return the string.
- using this type you can also upload the images .
- but here we use the SPIFFS so in send method's first argument the SPIFFS and and seconds argumemt is the "/cloud.jpeg" this URL show the HTML code and last argument is the type of the image we use the jpeg file so write the "image/jpeg" format.
- Now start the server using server.begin() method.
STEP:5 HTML
String SendHTML(float val){
String ptr="<!DOCTYPE HTML>\n";
ptr+="<html>\n";
ptr+="<h1> Wheater Station</h1>\n";
ptr +="<meta http-equiv=\"refresh\" content=\"1\" >";
ptr+="<img src=\"cloud.jpeg\" alt=\"image \" width=\"400\" height=\"200\">";
ptr+="<h2> Temperature: ";
ptr+=val;
ptr+=" C";
ptr+="</h2>\n";

ptr+="</html>\n";
 return ptr;
}
One of the interesting thing is that We have to make the Auto refreshing page because changes the Temperature value often so we use <meta http-equiv=\"refresh\" content=\"1\" > Here content take the time so here 1 is that Webpage after every one second refreshing automatically.
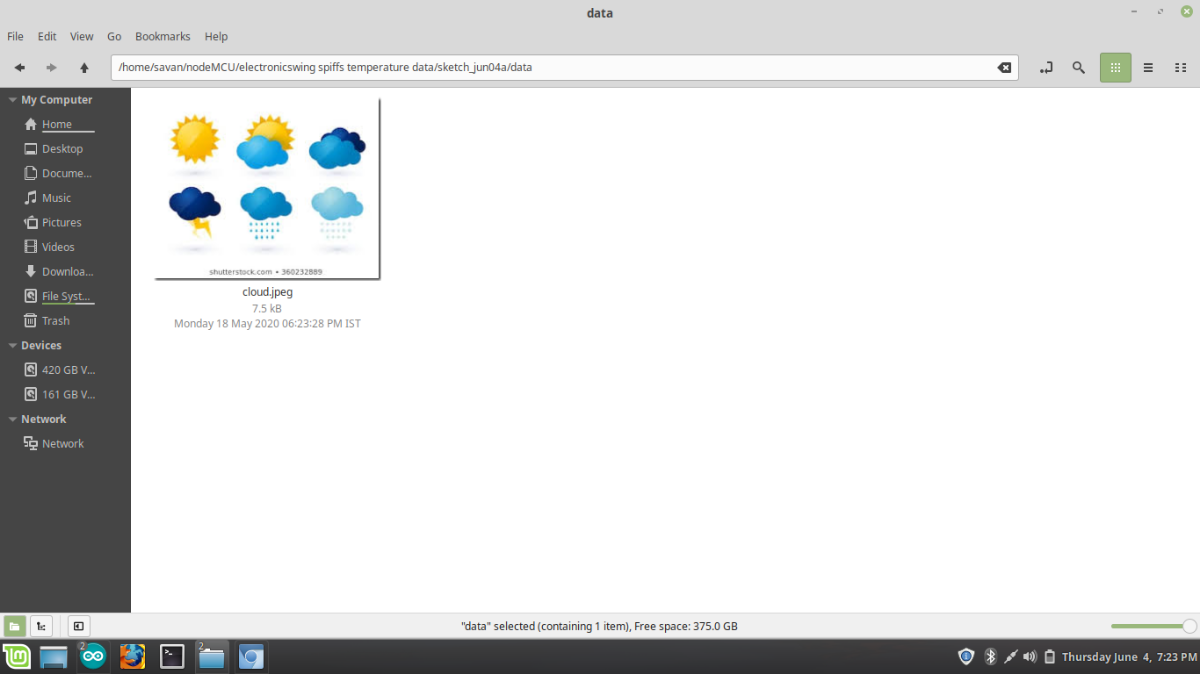
- Now open the sketch folder the copy the image file into the data folder.
- Finally code is ready now upload the image on the SPI flash memory.
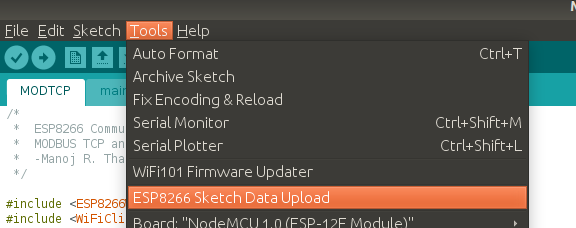
- click on the tool -> ESP8266 sketch data upload .
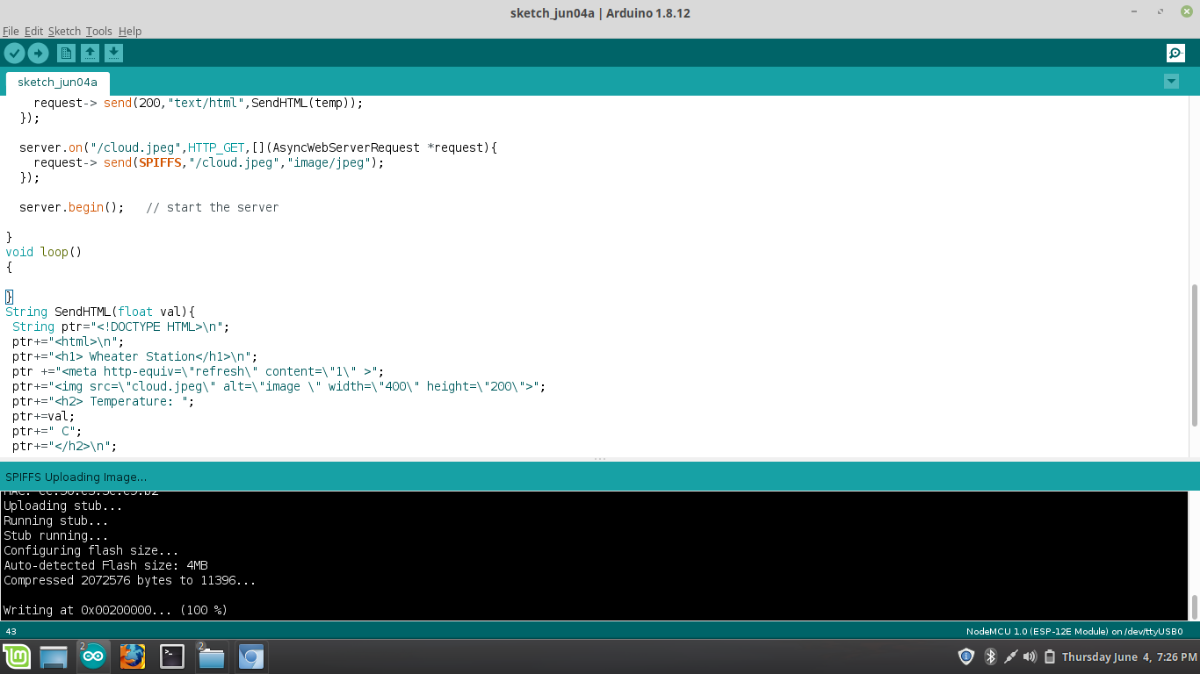
- Using this you can upload the sketch file and finally upload the program.
- and copy the Local IP and paste the WebBrowser.
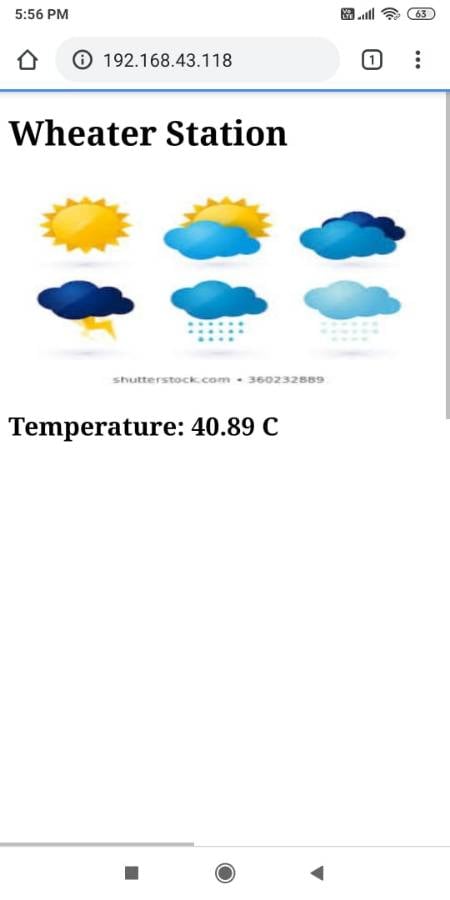
- Using This type you can show the Real Temperature data with Auto refreshing WebServer.