
Step1: Setting ThingsSpeak
- First login to the Thingspeak server. https://thingspeak.com/login
- If you are new user then create the new account.
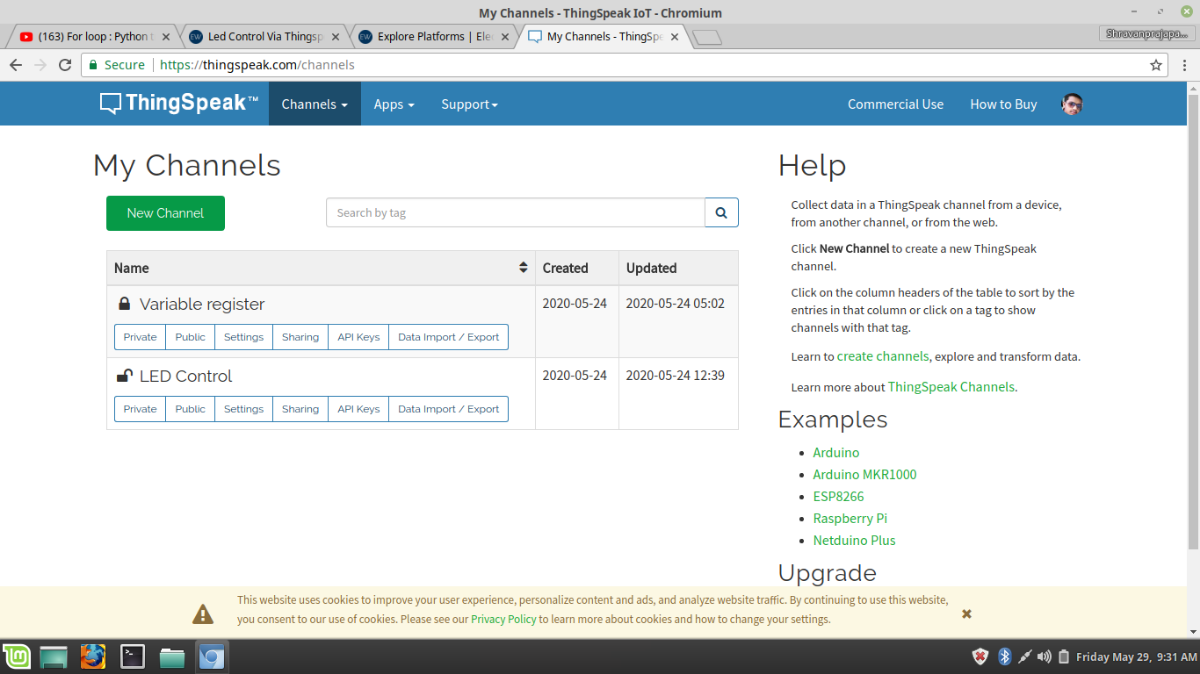
- after login you show this type of webpage, i have already created two project . but if you are new user then click on the New Channel.
- After click the new channel and first write the name of the new channel .
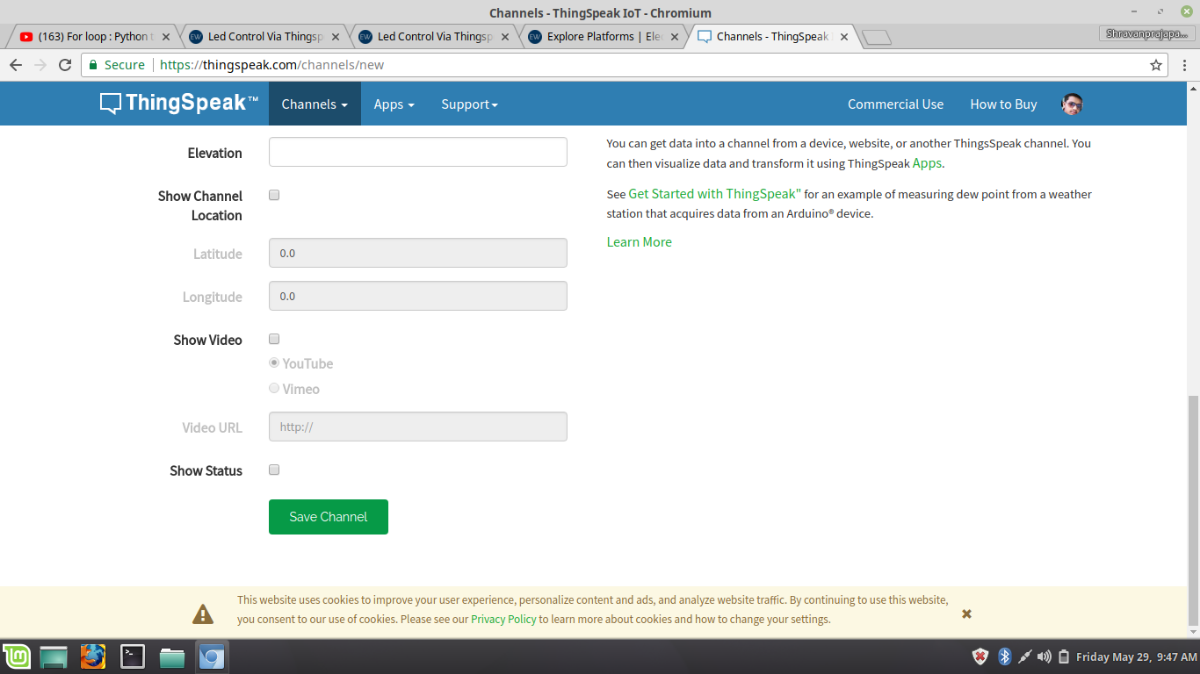
- if you want give the description then write the description. and select the Field 1 and don't forget the click on checkbox, after click on the check box scroll the page and click on the save button.
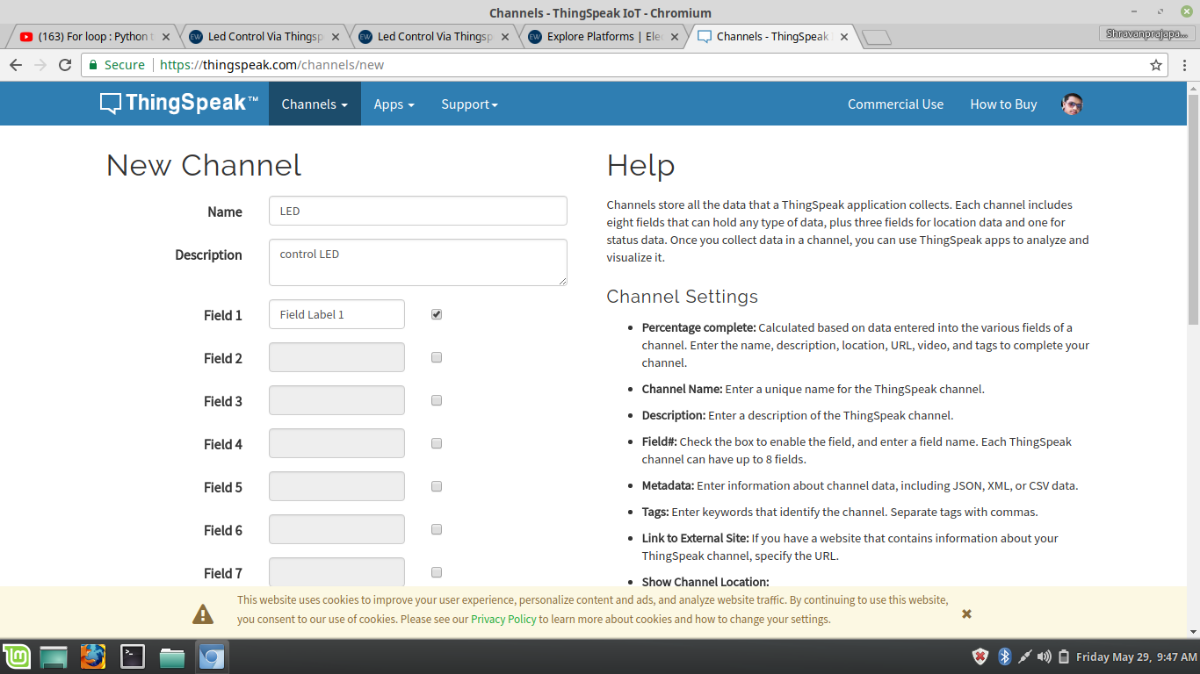
- I give the new channel name is LED then select the Field 1 and scroll the page and click on the save channel button.
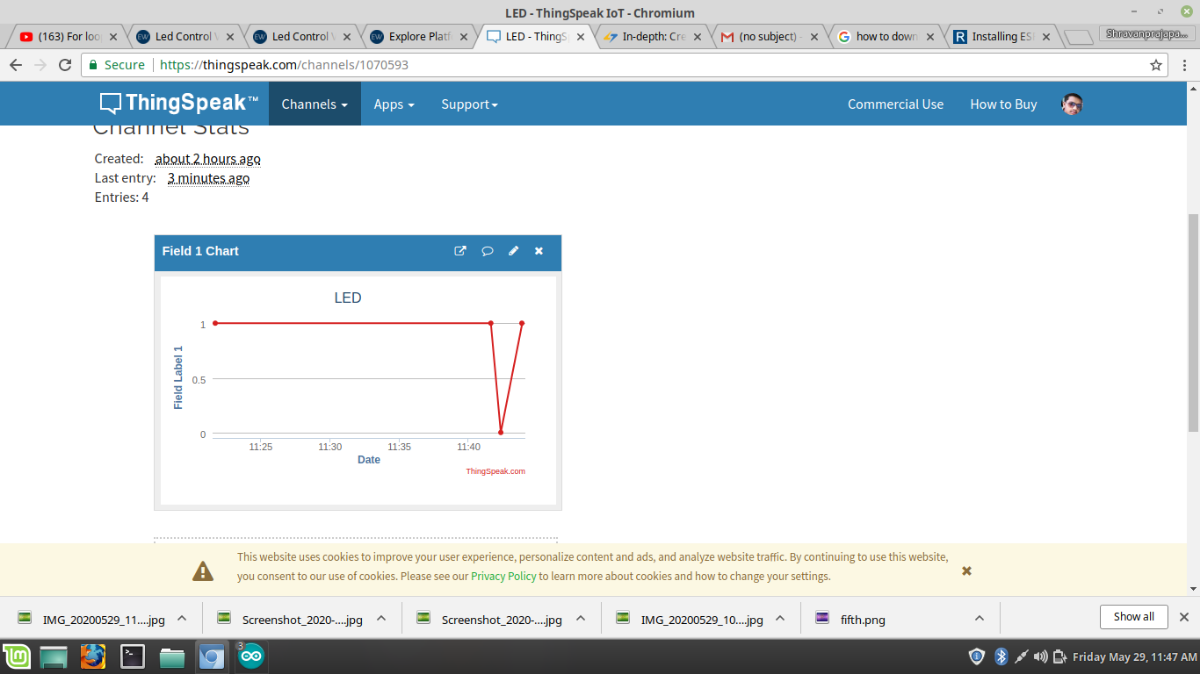
- Now show your field 1 as a charts.
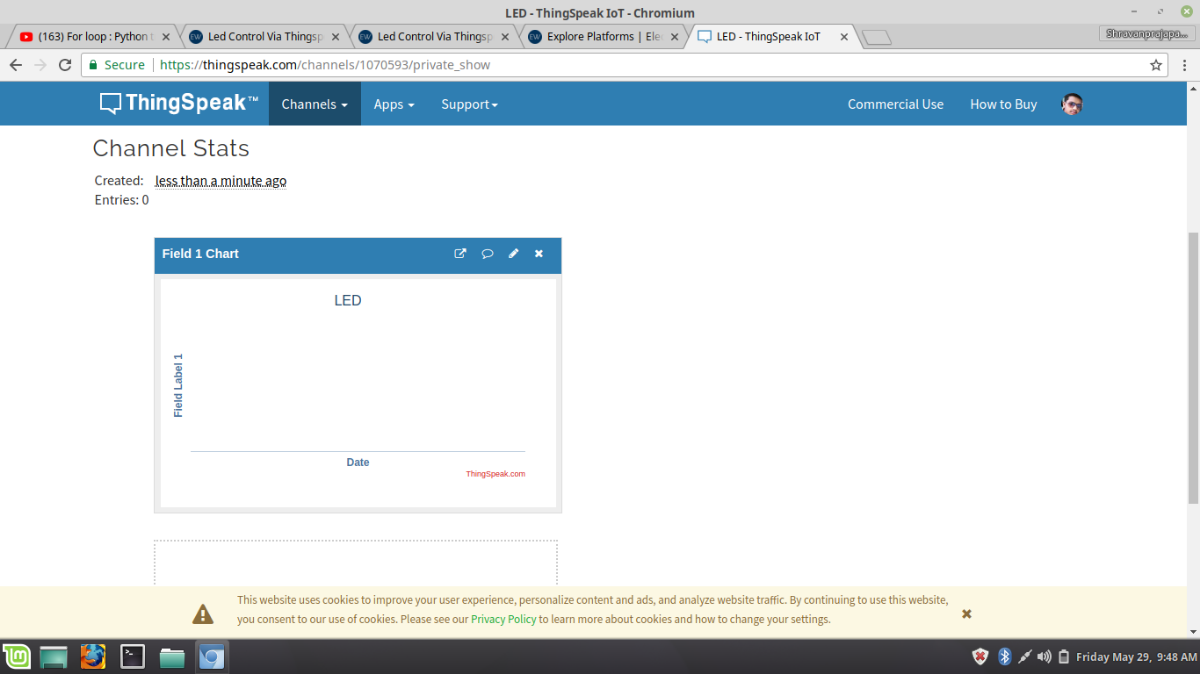
- Here your filed is empty because you do not upload any data on the channel. Now our goal to blink the led via webserver.
- Before controlling the led via webpage you should some knowledge about the HTTP protocol if you don't have knowledge then don't worry read the block from here https://lastminuteengineers.com/creating-esp8266-web-server-arduino-ide/
- This link give the most of the knowledge about the how to connect the Wi-Fi with esp8266 and also basic knowledge about the STA mode and Access point.
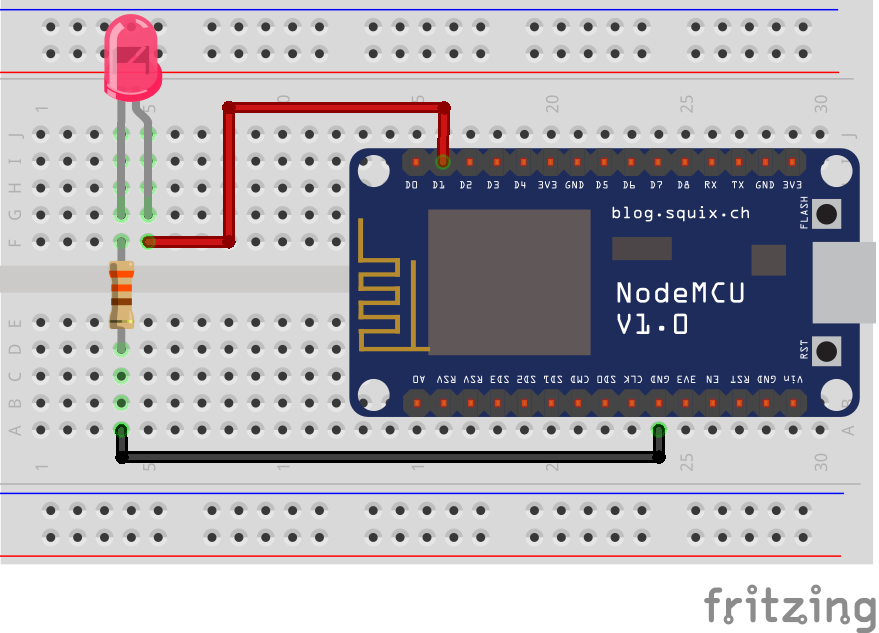
Hardware
- Now we have to go to the hardware side , connect the LED with D1 pin with NodeMCU.
Firmware
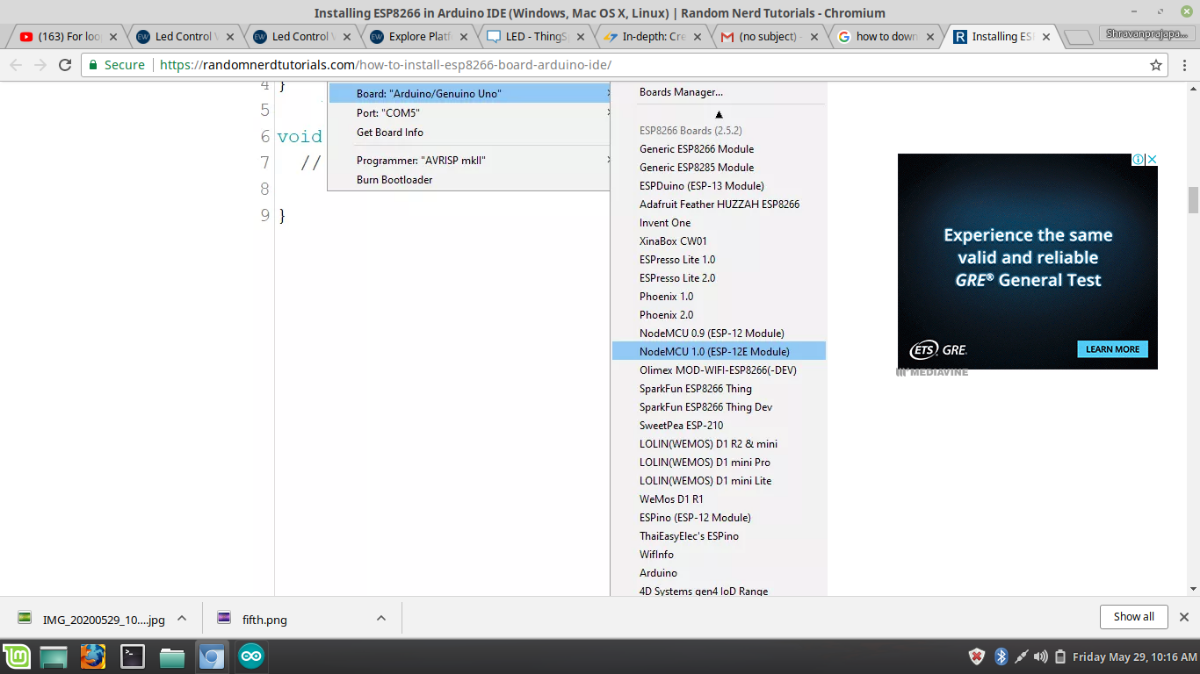
- Now write the code in Arduino IDE. open the Arduino IDE and select the NodeMCU 12E board if you do not show this borad then refer to the link how to download this board.https://randomnerdtutorials.com/how-to-install-esp8266-board-arduino-ide/
After installing click on the NodeMCU 1.0 borad.
- Now start the coding but before writing code we have to install one more library. go to the sketch -> Include library and click on manage library.
- Include the thingspeak library.
- Now start to writing the code.
#include<ThingSpeak.h>
#include<ESP8266WiFi.h>
#include<ESP8266WebServer.h>- Show the Thingspeak server where we create the our new channel. and copy the channel id and pate to the our Arduino IDE.
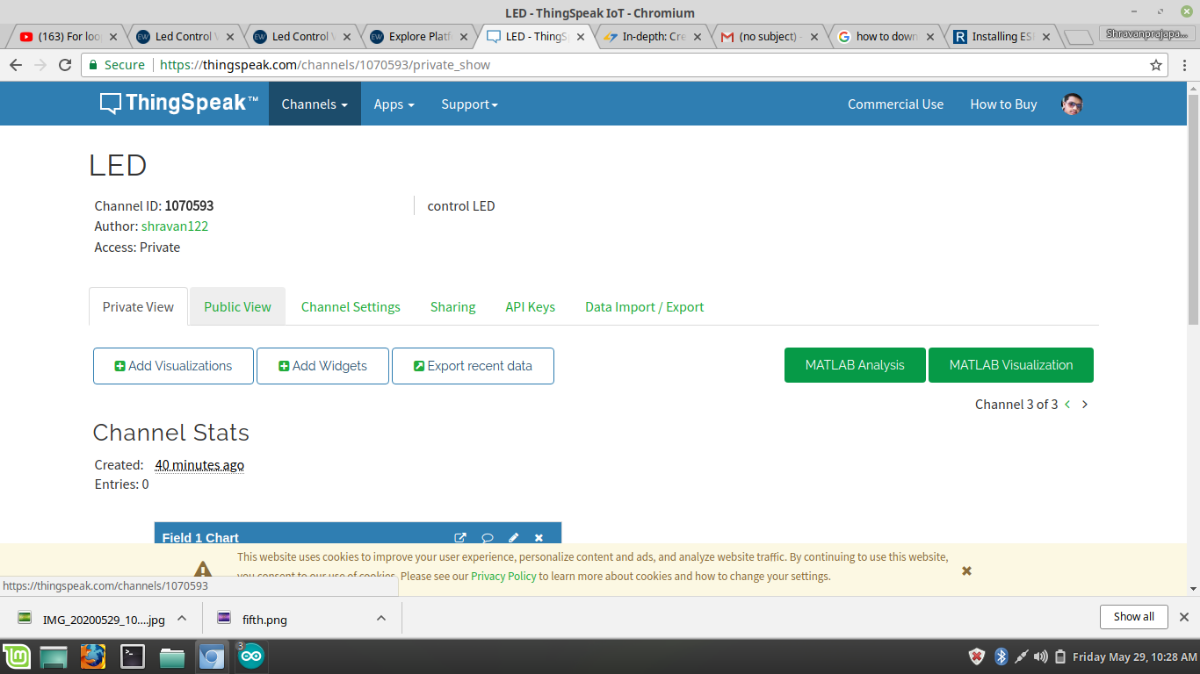
- in this page Channel ID: 1070593
unsigned long channel_num=1070593;
const char* ssid="shravan";
const char* password="8905552134";
int led;
unsigned int value;
WiFiClient client;   // make the client of the WiFi which connect to the ThingSpeak webServer
ESP8266WebServer server(80);    // make the naother server
- To create the WiFi connection make the ssid, password.
- In your side ssid and password are different. Then create the object of the WiFiClient class is client. this object is used to connect the device to the Thingspeak sever.
- Then make the another server where we create out HTML page, using this HTML page we can send the data to Thingspeak server.
void setup()
{
 pinMode(D1,OUTPUT);
 digitalWrite(D1,0);
 Serial.begin(115200);
 WiFi.begin(ssid,password);    // connect to the wifi STA connection
 while(WiFi.status()!=WL_CONNECTED)
 {
   delay(500);
   Serial.print(".");
 }
 Serial.println(WiFi.localIP());    // print the wifi local ip
 server.on("/",handleonconnect);    // in urt type the "/" then call the handle on connect function
 ThingSpeak.begin(client);      // connect the client to the thingSpeak server
 server.begin();   // start the server
}
- Make the D1 as an OUTPUT pin and initially LOW the LED. then select the baudrate 115200 and and connect the ESP8266 with wifi to the station mode. and print the local ip on the serial port. using WiFi.localIP() .
- There are many method to connect the esp8266 with server here we use the server.on(url,function) method. here '/ ' means root path when we hit on the web browser. then client send the request. on server.
- Now connect the client to the thingSpeak server using ThingSpeak.begin(client).
- start the server where we show the HTML page.
void loop()
{
 server.handleClient();    // it realy handle the Client
 led=ThingSpeak.readFloatField(channel_num,1);    // rad the last data of the field 1
 if(led==1)
 {
   digitalWrite(D1,1);
 }
 else if(led==0)
 {
   digitalWrite(D1,0);
 }
}
- In void loop() function, server.handleclient(); it is actually handle the client.
- ThingSpeak.readFloatField ( channel_id , 1); this function return the int value where we pass on the HTML page link. here 1 mean Field number. upper we create the only field1.
- if this function return the 1 then we on the led other wise low.
void handleonconnect()
{
 server.send(200,"text/html",SendHTML());
}
- Here handleonconnect function where we pass the server.on("/",handleonconnect).
- Here we use the server.send(200,"text/html",SendHTML()) , 200 means ok response, content type is html and SendHTML() is function but we put the argument string so this function return the string this show you next quotes.
HTML
String SendHTML(void){
 String ptr = "<!DOCTYPE html> <html>\n";
 ptr +="<head><meta name=\"viewport\" content=\"width=device-width, initial-scale=1.0, user-scalable=no\">\n";
 ptr +="<title>LED Control</title>\n";
 ptr +="<style>html { font-family: Helvetica; display: inline-block; margin: 0px auto; text-align: center;}\n";
 ptr +="body{margin-top: 50px;} h1 {color: #444444;margin: 50px auto 30px;} h3 {color: #444444;margin-bottom: 50px;}\n";
 ptr +=".button {display: block;width: 80px;background-color: #1abc9c;border: none;color: white;padding: 13px 30px;text-decoration: none;font-size: 25px;margin: 0px auto 35px;cursor: pointer;border-radius: 4px;}\n";
 ptr +=".button-on {background-color: #1abc9c;}\n";
 ptr +=".button-on:active {background-color: #16a085;}\n";
 ptr +=".button-off {background-color: #34495e;}\n";
 ptr +=".button-off:active {background-color: #2c3e50;}\n";
 ptr +="p {font-size: 14px;color: #888;margin-bottom: 10px;}\n";
 ptr +="</style>\n";
 ptr +="</head>\n";
 ptr +="<body>\n";
 ptr +="<h1>ESP8266 with ThingSpeak Server</h1>\n";
 ptr +="<h3>Using Station(STA) Mode</h3>\n";
 ptr +="<h4>Control status For D1</h4>\n";
 ptr +="<a class=\"button button-on\" href=\"https://api.thingspeak.com/update?api_key=MOHD33LYGVXTG5UF&field1=1\">ON</a>\n";
 ptr +="<a class=\"button button-off\" href=\"https://api.thingspeak.com/update?api_key=MOHD33LYGVXTG5UF&field1=0\">OFF</a>\n";
 ptr +="</body>\n";
 ptr +="</html>\n";
 return ptr;
}- That is my HTML code if you are an embedded engineer then do not learn the HTML and CSS, but knowledge abut the how it work we press the any url.
- Here we highlighted on the HTML string so this is the main thing.
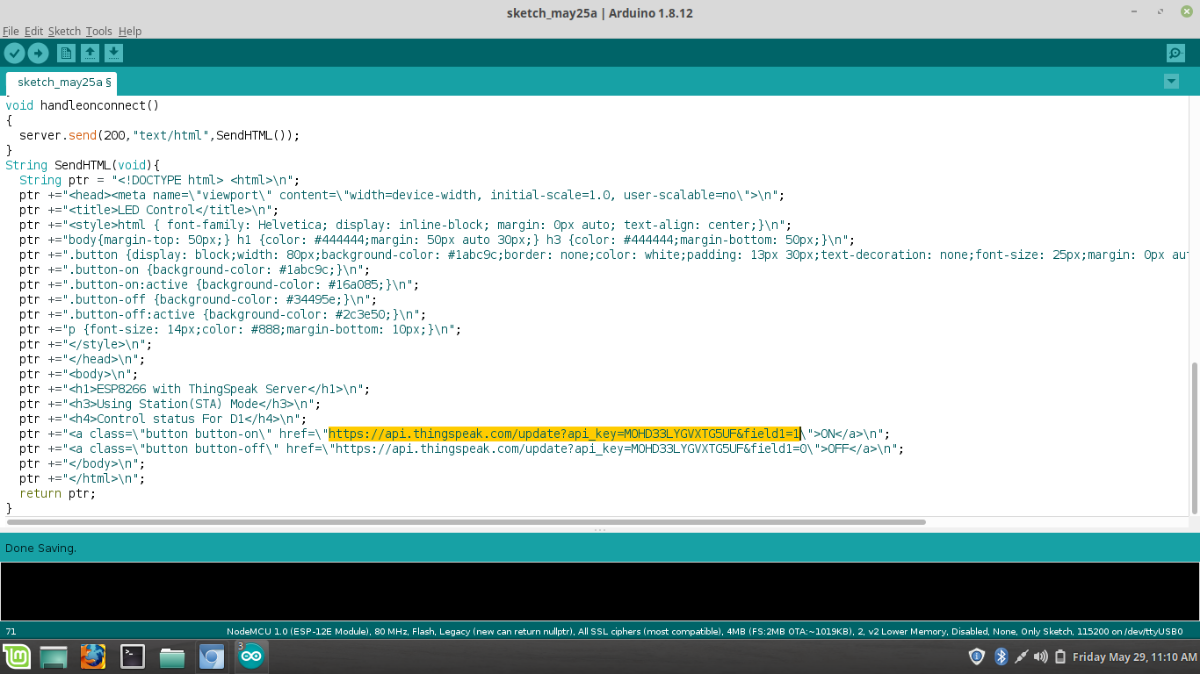
- https://api.thingspeak.com/update?api_key=MOHD33LYGVXTG5UF&field1=0 this url is copy from the thingserver here api_key is different in your case last one &field1=0 mean we we press this url then send the 0 on your thingspeak server to the field1 and &field1=1 mean when we press this url then send the 1 on your thingspeak server to the field1. but we don't press the url using HTML code we only clink on the ON button to turn on the led and OFF button for turn off the led.
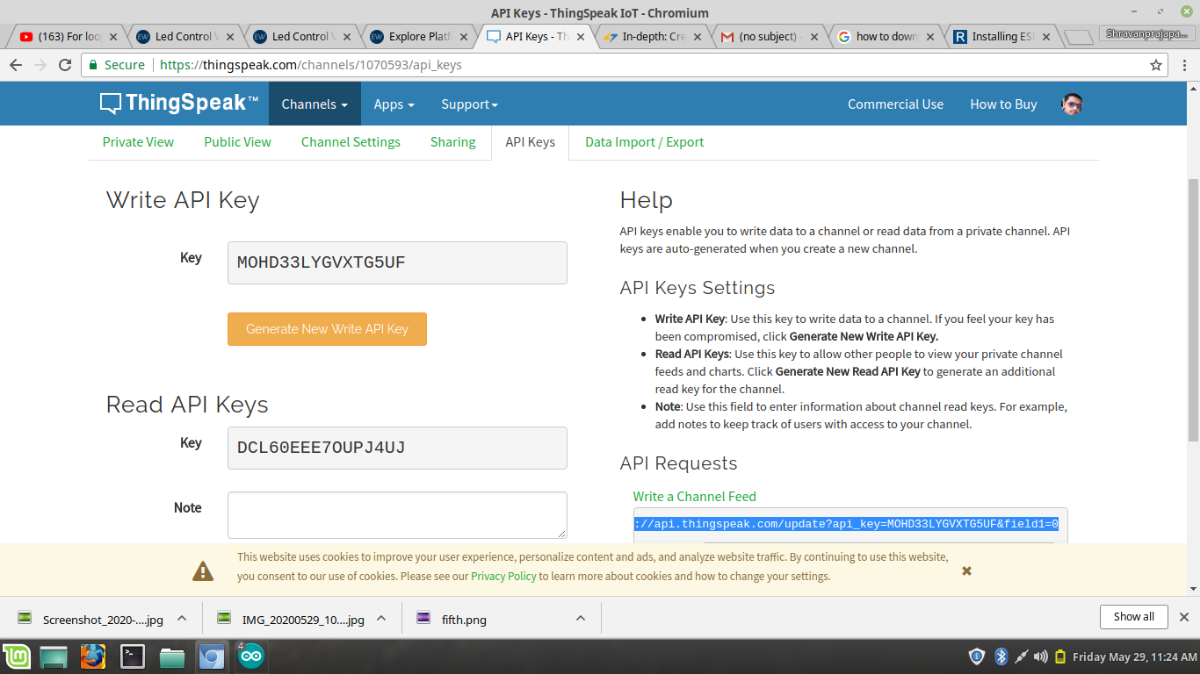
- Now go to the thingspeak server click on the API KEYS and copy the Write API KEY and paste the HTML code code which highlighted on the upper HTML code pic.
- I again says that api write key is the different in your case.
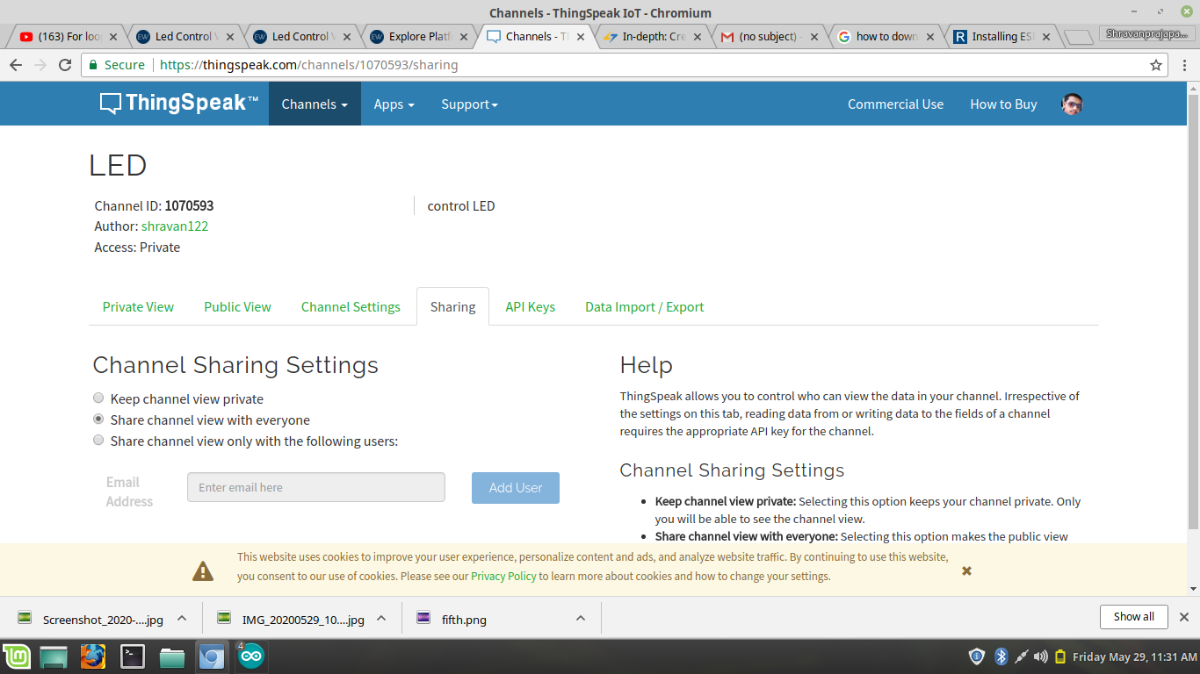
- one more thing we have to sharing in public otherwise we can not send the data from the server.
- so for that click on sharing button and click the Share channel view with everyone.
- Finally upload the code on the NodeMCU. show the serial port wifi is connect or not if connect then give the local ip where we print on serial.
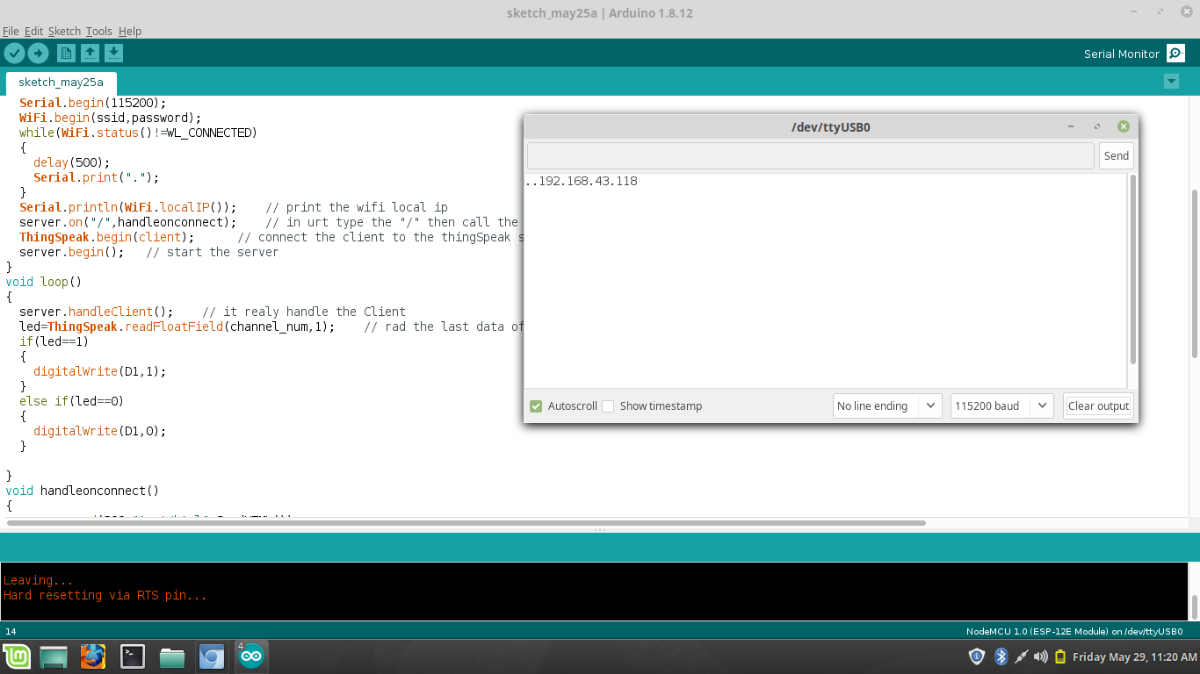
- Finally this IP copy on the Chrome browser. then show the this type.
.jpg)
- Now click on the ON button LED is ON .
- Now click on the OFF button LED is OFF.
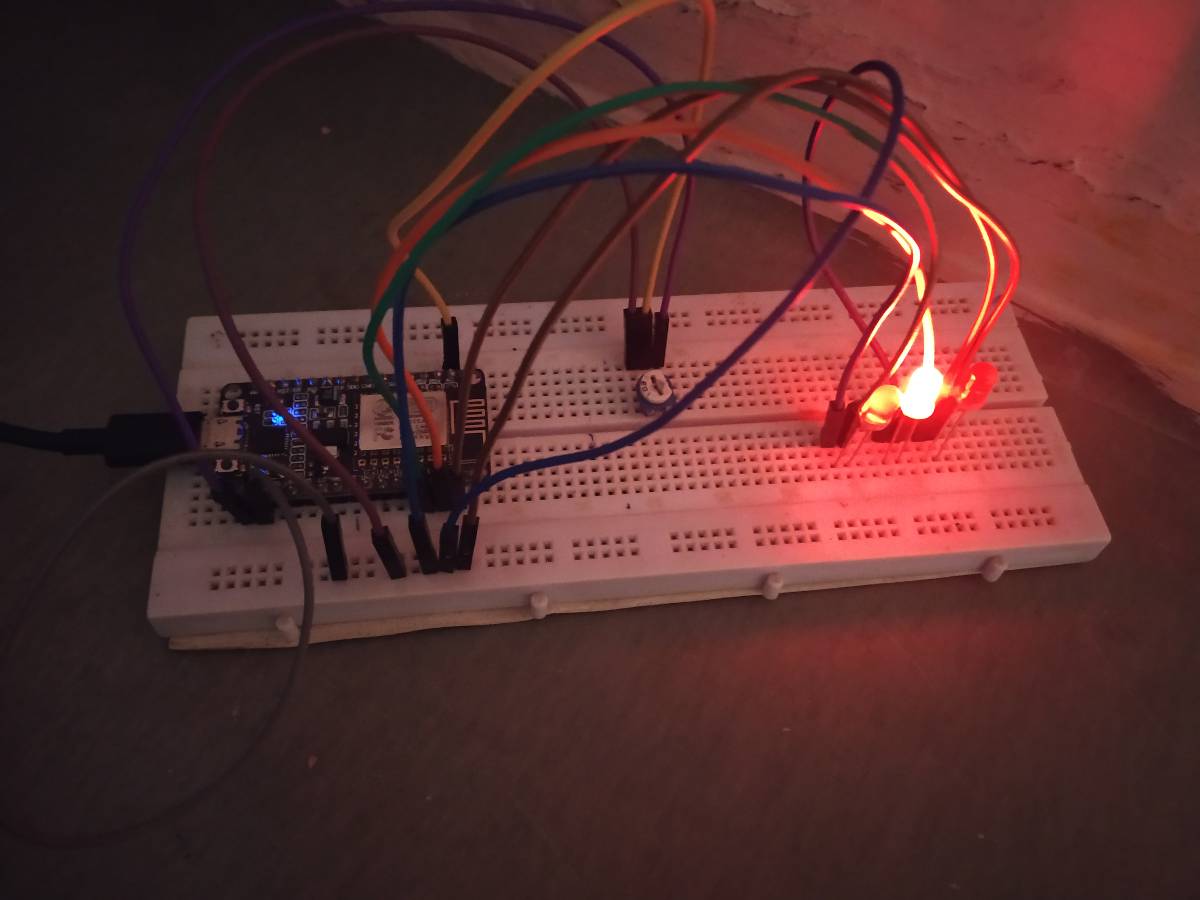
- So finally LED is ON.
- Now show the status of the thingSpeak server.
- using this you can control anything from anywhere in the world using this WebServer.
- If you query about this project then contact me using this mail- [email protected]