


Introduction:
Recently India along with almost all big and small countries stated emergency conditions for the novel coronavirus (COVID-19). Practically, the whole population of the world is under lockdown and people are maintaining social distances as suggested by the World Health Organization (WHO). This deadly virus has infected tens of lakhs individuals and continues to spread globally. According to recent reports, the next few months are life-threatening in the current efforts to hold COVID-19 spread among communities. Across India, persons are losing jobs, working from home, being hospitalized, and even vanishing life as a result of COVID-19 infections. The epidemic placed great stress on medico professionals. Hospitals are experiencing higher than normal patient loads and treating all patients quickly and effectively now becomes a very challenging task. Due to fear, country-wise lockdown, and suspended OPDs in Hospitals regular patients are also not able to approach doctors.
Precaution is always better than cure. But since there isn't any cure yet available, the only option we are left with is to follow the precautions. And failing to do so may has severe consequences.
Since there is no vaccine yet available in the market, the only way to be safe is by taking precautions. It is suggested to wear a face mask and maintain social distancing to avoid coming in contact with novel coronavirus. Studies have proven that masks help in slowing down the spread of infection as the virus mainly gets transmitted with the aerosols which come out of an infected person's nose or mouth while coughing or sneezing.
Therefore, we are going to build a Raspberry Pi-based face mask detector which detects whether the person is wearing a mask or not.
Setting up the Raspberry Pi and camera interface:
To get started, we will need a Raspberry Pi board already loaded with Raspbian OS and a Raspberry Pi camera board module.
Step 1. Connect the camera module with the Raspberry Pi.
Step 2. Enable the camera module.
a. Open the terminal and run “sudo raspi-config”.
pi@raspberry:~$ sudo raspi-config This will open a window as shown below.
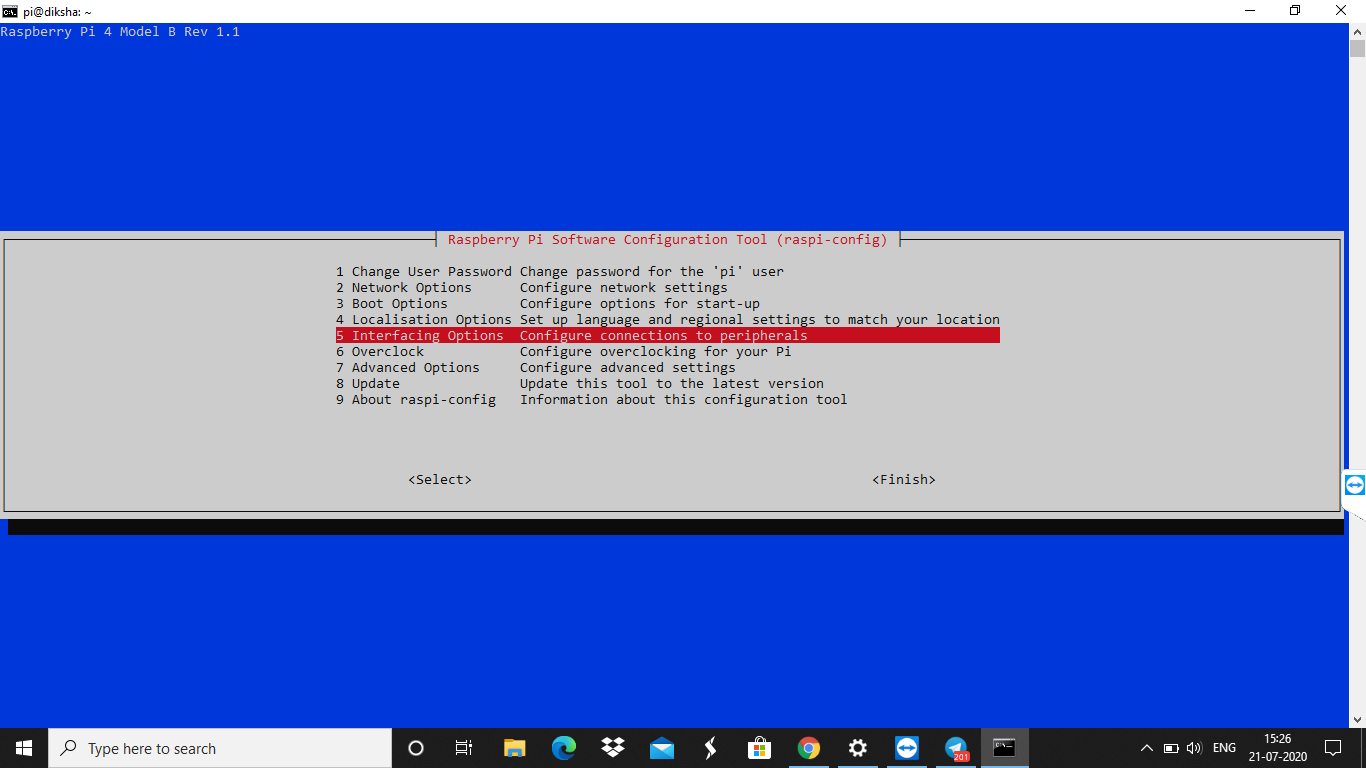
b. Go to the “Interfacing Options” and select “Camera”.
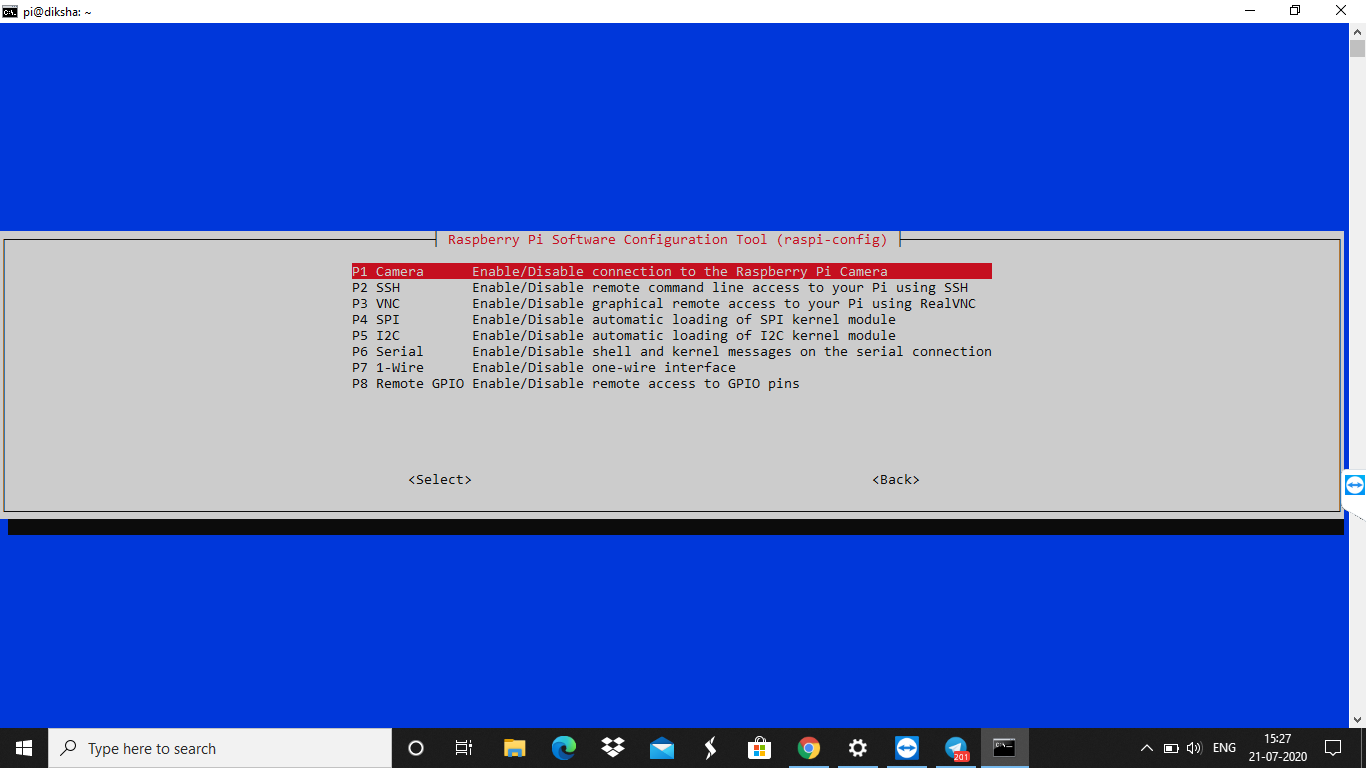
c. Enable the camera module.

Bingo, now the camera interface is enabled. To test this, open the terminal and execute “raspistill -o image.jpg”. This will activate the camera module, displays a preview of the image, and then it captures the image and saves it in the current working directory as “image.jpg”.
pi@raspberry:~$ mkdir test
pi@raspberry:~$ cd test/
pi@raspberry:~/test$ raspistill -o image.jpg
pi@raspberry:~/test$ ls
image.jpg
Installing the dependencies:
Now, we will be installing opencv for image processing and tflite_runtime to load our face_mask_detection model. The remaining dependencies can be installed directly via pip or pip3.
Step 1. Installing tflite_runtime.
a. Go to https://www.tensorflow.org/lite/guide/python.

b. Select the appropriate package for installed python version on your Raspberry Pi ( In case you don’t know then open the terminal and execute “python3 --version”).
c. Copy the URL and install the package using pip3. For example, if you have Raspberry Pi that's running Raspbian Buster (which has Python 3.7), install the Python wheel by executing:
pip3 install https://dl.google.com/coral/python/tflite_runtime-2.1.0.post1-cp37-cp37m-linux_armv7l.whl
This will install the tflite_runtime on your Raspberry Pi. You can always check the installed packages by running “pip3 list” in the terminal.
Step 2. Installing OpenCV.
a. Install OpenCV 4 dependencies
sudo apt-get update && sudo apt-get upgrade
sudo apt-get install build-essential cmake unzip pkg-config
sudo apt-get install libjpeg-dev libpng-dev libtiff-dev
sudo apt-get install libavcodec-dev libavformat-dev libswscale-dev libv4l-dev
sudo apt-get install libxvidcore-dev libx264-dev
sudo apt-get install libgtk-3-dev


sudo apt-get install libcanberra-gtk*
sudo apt-get install libatlas-base-dev gfortran
sudo apt-get install python3-dev
b. Download OpenCV 4
cd ~
wget -O opencv.zip https://github.com/opencv/opencv/archive/4.3.0.zip
wget -O opencv_contrib.zip https://github.com/opencv/opencv_contrib/archive/4.3.0.zip
unzip opencv.zip
unzip opencv_contrib.zip
mv opencv-4.0.0 opencv
mv opencv_contrib-4.0.0 opencv_contrib
c. Install Numpy
pip3 install numpy
d. CMake and compile OpenCV 4
cd ~/opencv
mkdir build
cd build
cmake -D CMAKE_BUILD_TYPE=RELEASE \
   -D CMAKE_INSTALL_PREFIX=/usr/local \
   -D OPENCV_EXTRA_MODULES_PATH=~/opencv_contrib/modules \
   -D ENABLE_NEON=ON \
   -D ENABLE_VFPV3=ON \
   -D BUILD_TESTS=OFF \
   -D OPENCV_ENABLE_NONFREE=ON \
   -D INSTALL_PYTHON_EXAMPLES=OFF \
   -D BUILD_EXAMPLES=OFF ..
make -j4


sudo make install
sudo ldconfig
Now, you have successfully installed OpenCV 4.0 on your Raspberry Pi.
Setting up the environment:
Now, we will clone the repository from github. But before this make sure that you have git installed locally in your system.
Step 1. Clone the repository using the git clone command and then open the directory.
pi@raspberry:~$ git clone https://github.com/Shikhar-SRJ/rpi_based_mask_detector_new.git

pi@raspberry:~$ cd rpi_based_mask_detector
Step 2. Install the project requirements using pip3.
pi@raspberry:~$ pip3 install -r requirements.txt
Step 3. Run the project.
pi@raspberry:~$ flask run --host=0.0.0.0
Step 4. Accessing the application through Google Chrome. Search <ip address of your raspberry pi>:5000.
For example: 192.168.43.202:5000