Some time ago I presented you a way to use standard Arduino libraries on the Unihiker k10 development board. Specifically, the project consisted of using the TFT-eSPI library and an integrated sensor with the result displayed on an analog meter. This time I will present you a project where I will test the Wi-Fi functionality as well as using the A and B buttons.
And again I use a combination of "unihiker_k10.h" and other standard libraries. These buttons are connected to a pin on the I/O Expansion chip and not directly to the microcontroller, which theoretically means that there is no way to use other libraries.
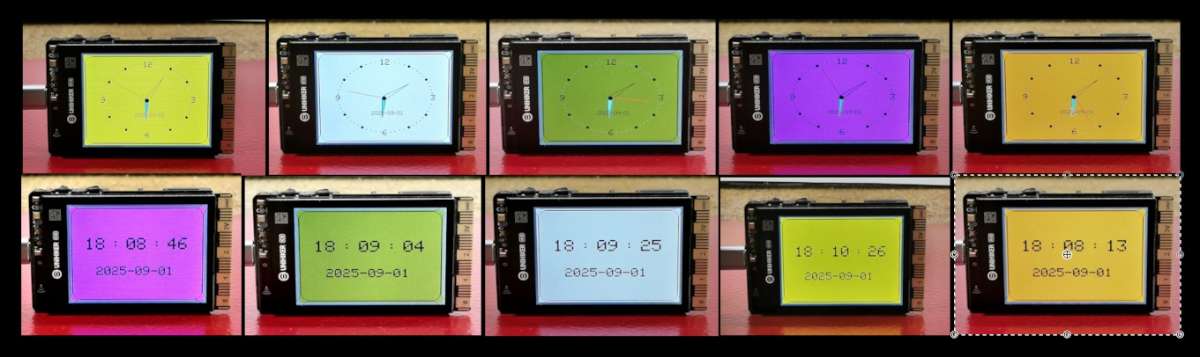
I decided to make an Analog Clock project that will be another example in my collection of unusual Arduino clocks.
This clock uses NTP (Network Time Protocol) to synchronize time over the internet. To demonstrate the functionality of the buttons, I expanded the code to display the time and date in digital format, as well as change the background colors. To make this cute cloc project, we don't need any external components or soldering, so it's a suitable for beginners. Let me briefly explain how to install support for Unihiker K10 in Arduino IDE. Let me remind you that the Arduino IDE version must be 1.8.19 or older.
We go to File-> Preferences-> Additional boards manager, and enter the given link:
https://downloadcd.dfrobot.com.cn/UNIHIKER/package_unihiker_index.json
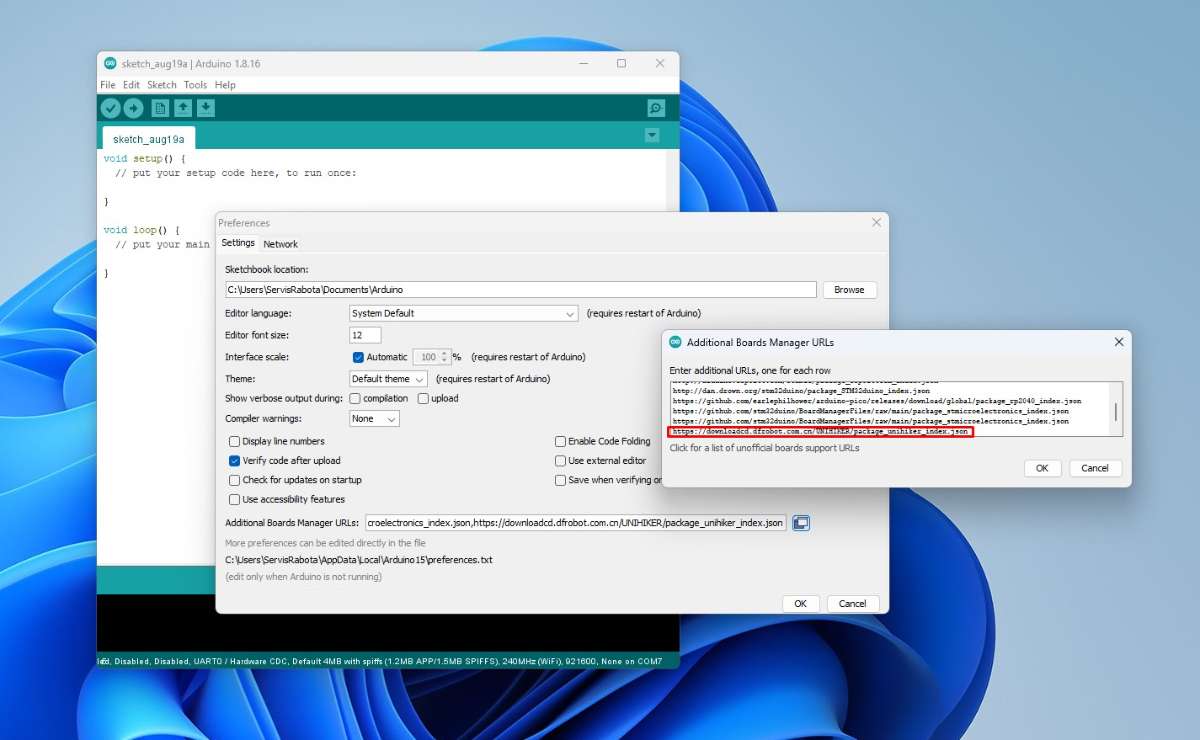
Then in Tools-> Boards Manager we write Unihiker, and we install the support for Unihiker from DFRobot.
.jpg)
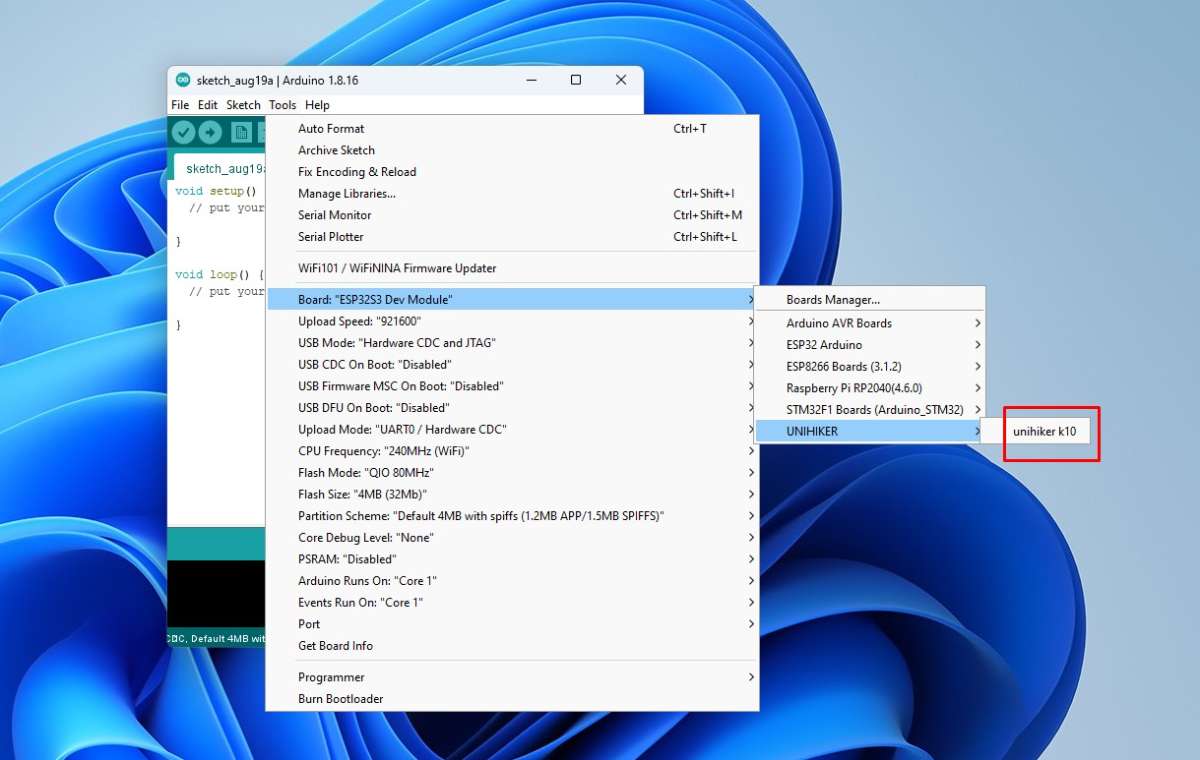
Now we go to Tools -> Unihiker -> Unihiker K10.
With this, the support for this development board in Arduino IDE is installed.
As for the code, I can say that it is not ideally optimized, but you can easily modify it according to your own needs and desires.
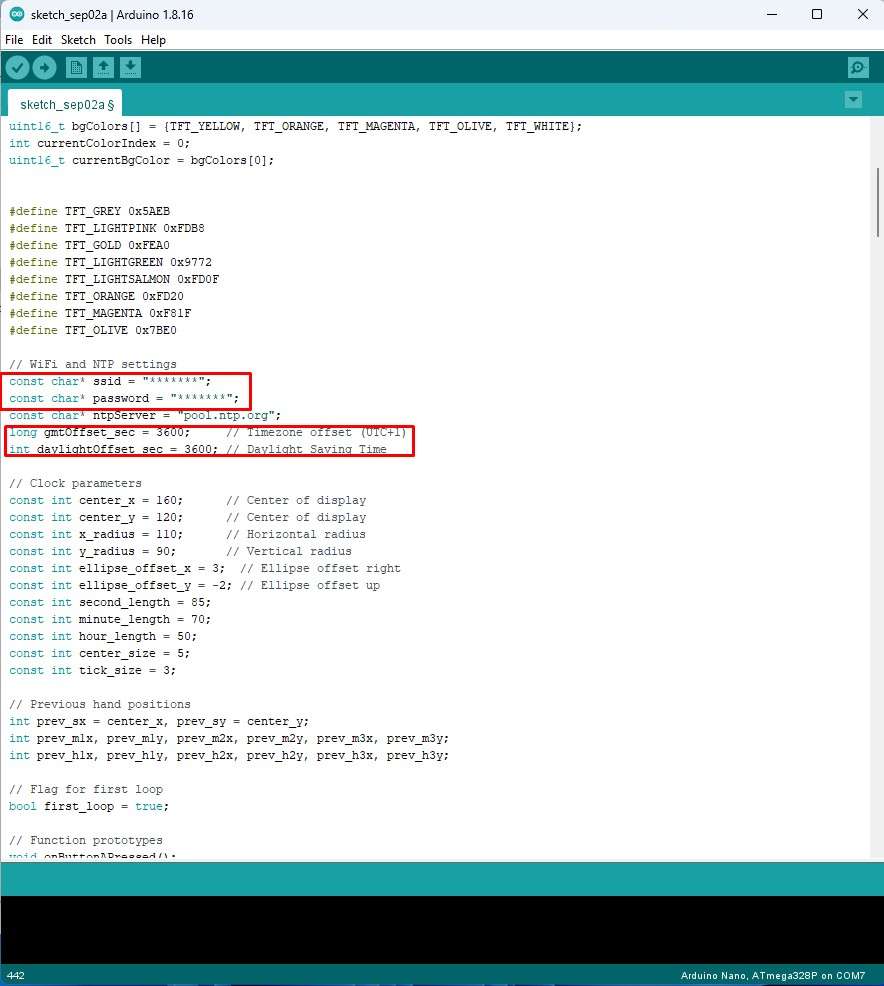
At the beginning you need to enter your Wi-Fi credentials, the time zone you live in and Daylight Saving Time. Then the code is divided into several separate, easy-to-understand functions in which you can change various parameters and, if you have the time and desire, create your own clockfaces.
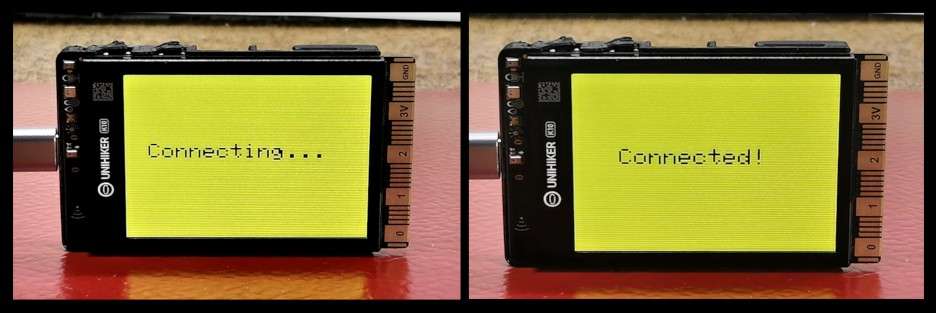
Now let's see how the device works in real conditions. Immediately after switching on, information about Wi-Fi availability appears and if the connection is successful, an ellipsoidal Analog clock with a yellow background appears on the display as defined in the code.
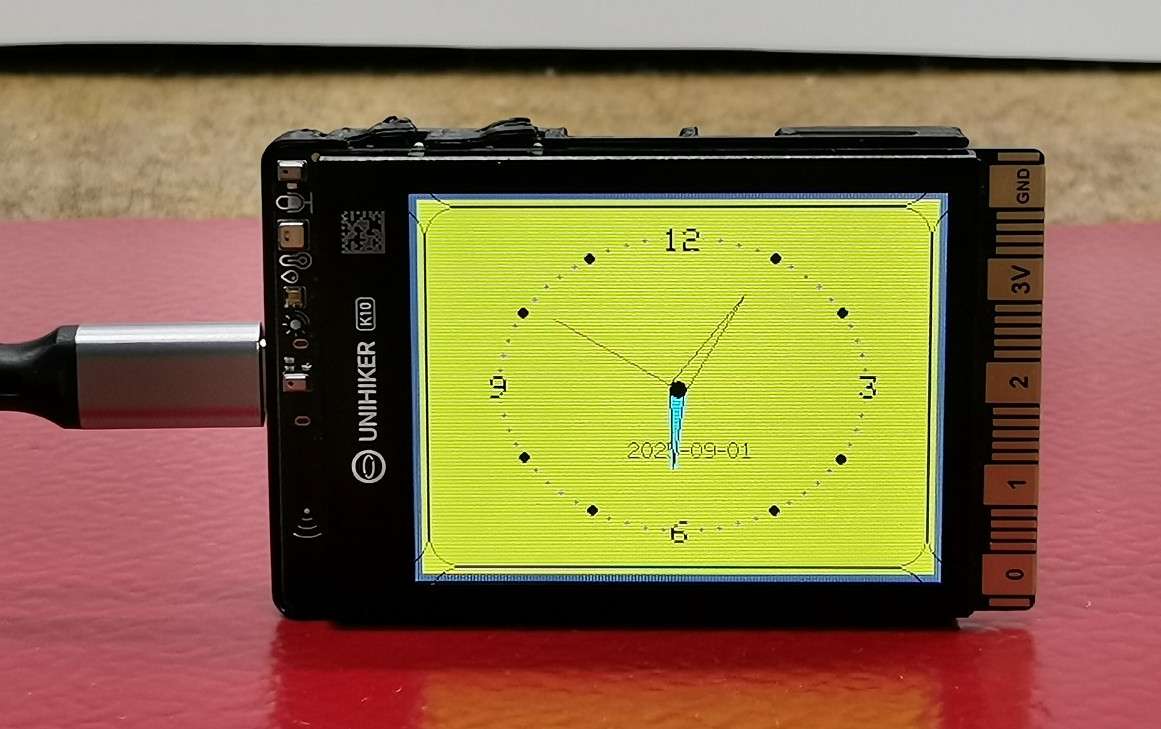
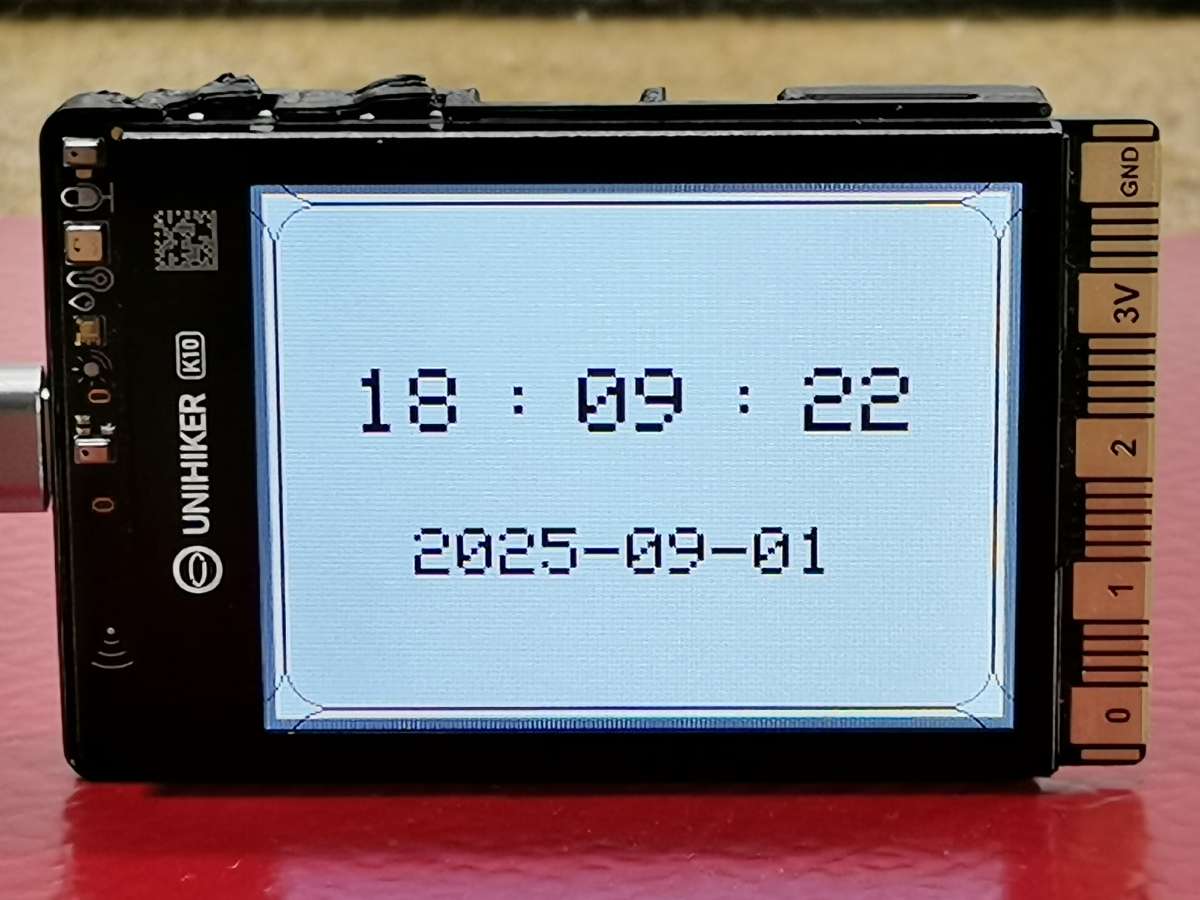
The clock contains a colored arrow for showing hours, an empty arrow for minutes and a thin red arrow for seconds. The date is written in the lower part. Now by pressing the A button, the next screen appears, which displays the time and date in digital format. With the B button, we can change several previously defined colors for the clock background.
Let me just tell you that the main goal of this project was to present you with a way to use standard libraries on this largely AI-oriented development board, so I slightly neglected the functionality of the device by omitting the Alarm function.