
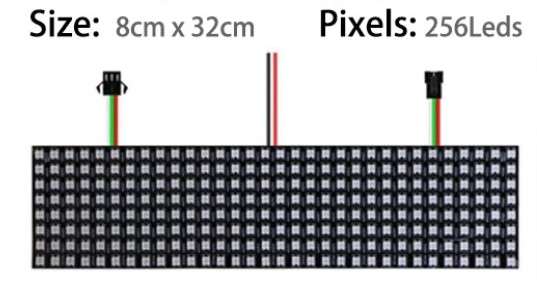
The WS2812B is an individually addressable RGB LED that allows you to control each LED's color and brightness independently. A color matrix is a grid of these WS2812B LEDs arranged in rows and columns to create a display capable of showing various colors and patterns.
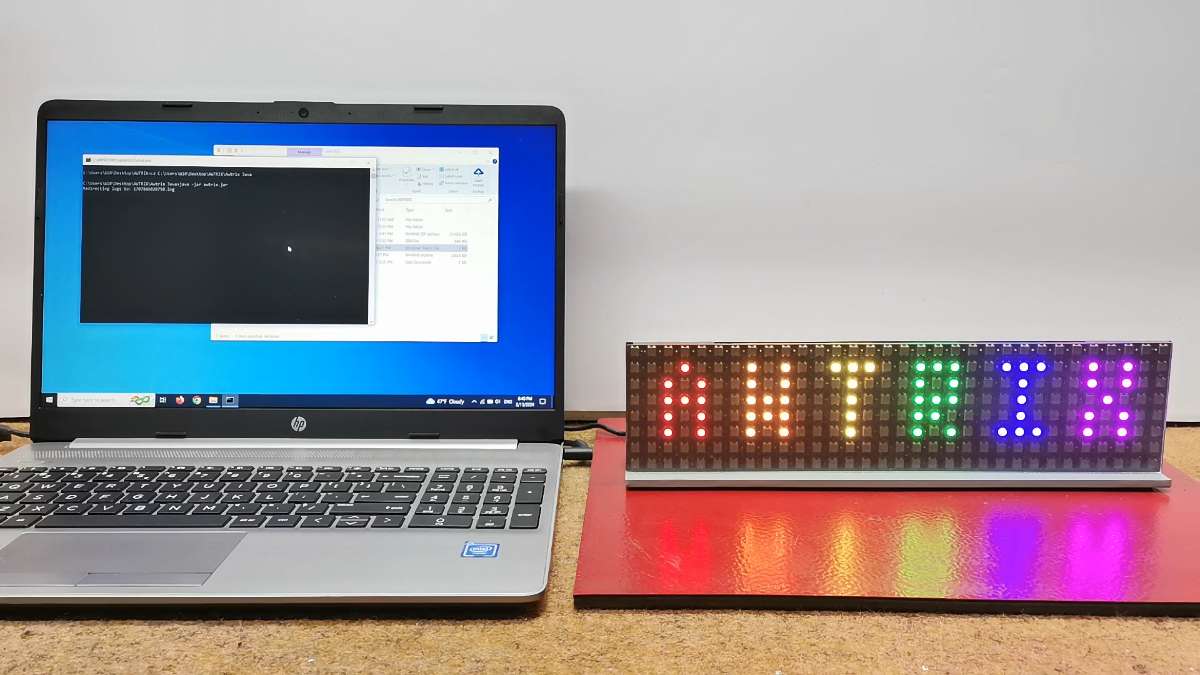
The project which I will present to you is called "Awtrix" from AWsome maTRIX, and is presented on the blueforcer(The project which I will present to you is called "Awtrix" from AWsome maTRIX, and is presented on the blueforcer site, and unfortunately its support was officially discontinued, but however I think that even with the existing options, this is a wonderful project. It is based on few components, so it can be easily replicated by users with less technical skills. The matrix is driven by the ESP8266 WLAN microcontroller, which communicates with a Java-based host. Almost any existing system based on Windows, MacOS or Linux can serve as a host.
) site, and unfortunately its support was officially discontinued, but however I think that even with the existing options, this is a wonderful project. It is based on few components, so it can be easily replicated by users with less technical skills. The matrix is driven by the ESP8266 WLAN microcontroller, which communicates with a Java-based host. Almost any existing system based on Windows, MacOS or Linux can serve as a host.
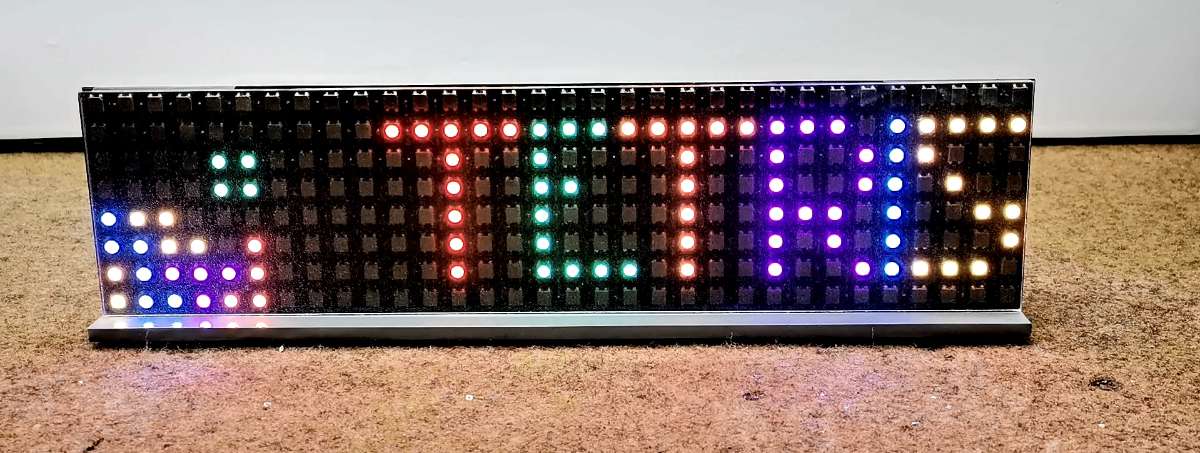
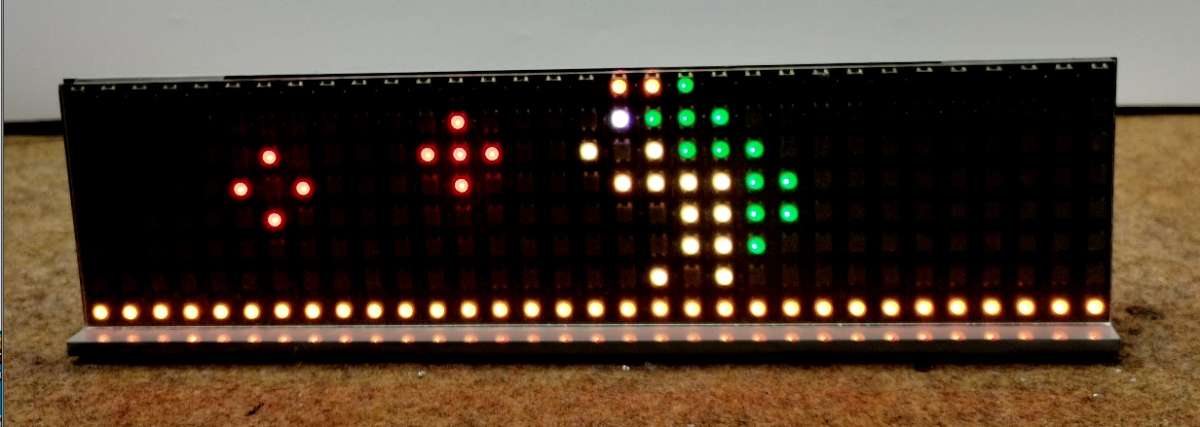
The display can show everything, from time and weather data, to Facebook or Instagram Likes or even games like Snake or Pong. The project is mainly based on apps that are available for free download in the integrated App Store. Also with powerful integrated tool you can create own standard or animated icons.
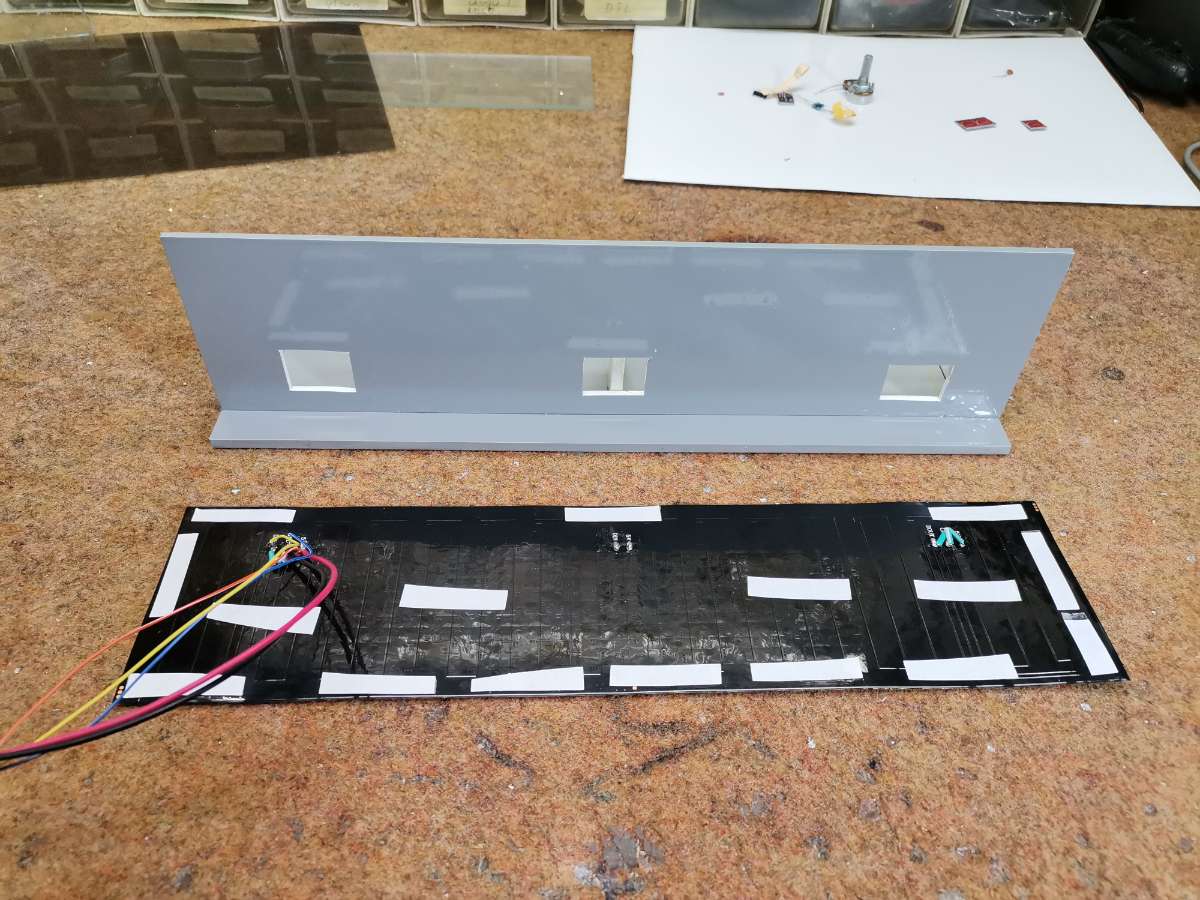
The hardware part consists of several components:
- At least the device works with only two components:
- ESP8266 microcontroller board
- and 8x32 color matrix with WS2812B LEDs
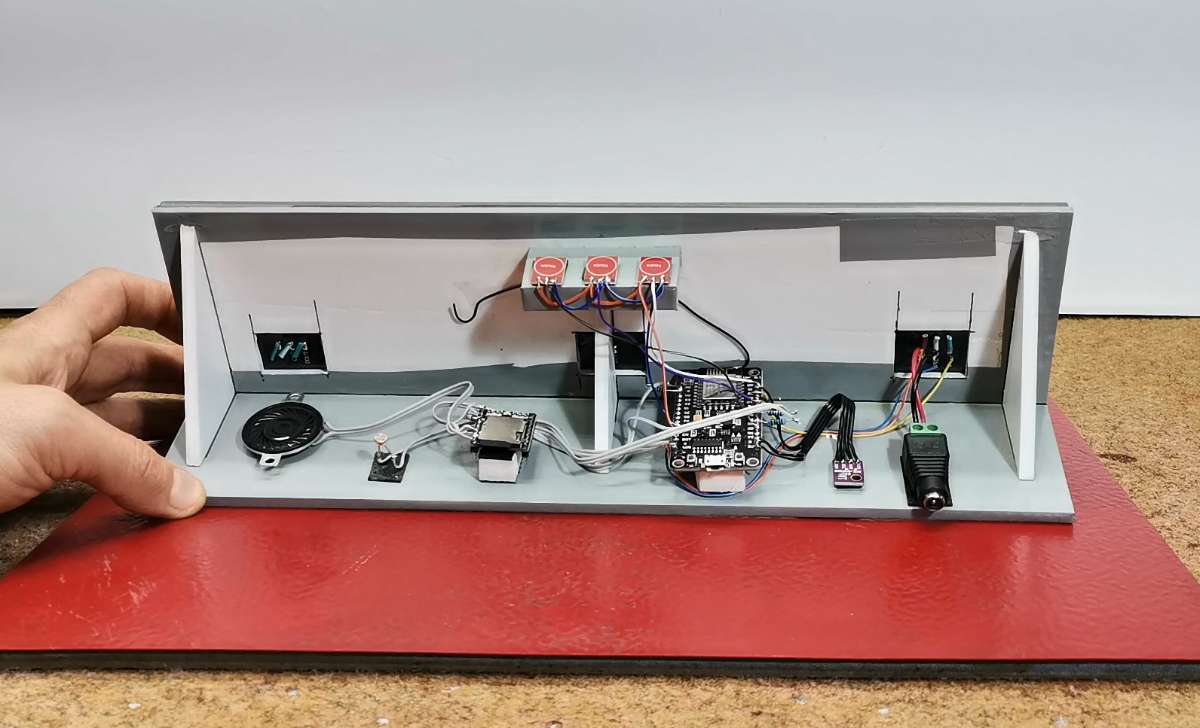
I made the version with many add-ons, and in addition to the components mentioned above, it also contains
- DFplayer mini .mp3 player board
- Loudspeaker
- BME280 Module
- LDR resistor for automatic control of matrix light intensity
- and 3 Buttons for manual control of displayed content
Now let me describe in more detail the method of installation of the microcontroller, as well as the installation of the Java host application through which we manage the content displayed on the matrix. First, we need to download the NODEMCU flasher from the given page and launch it.
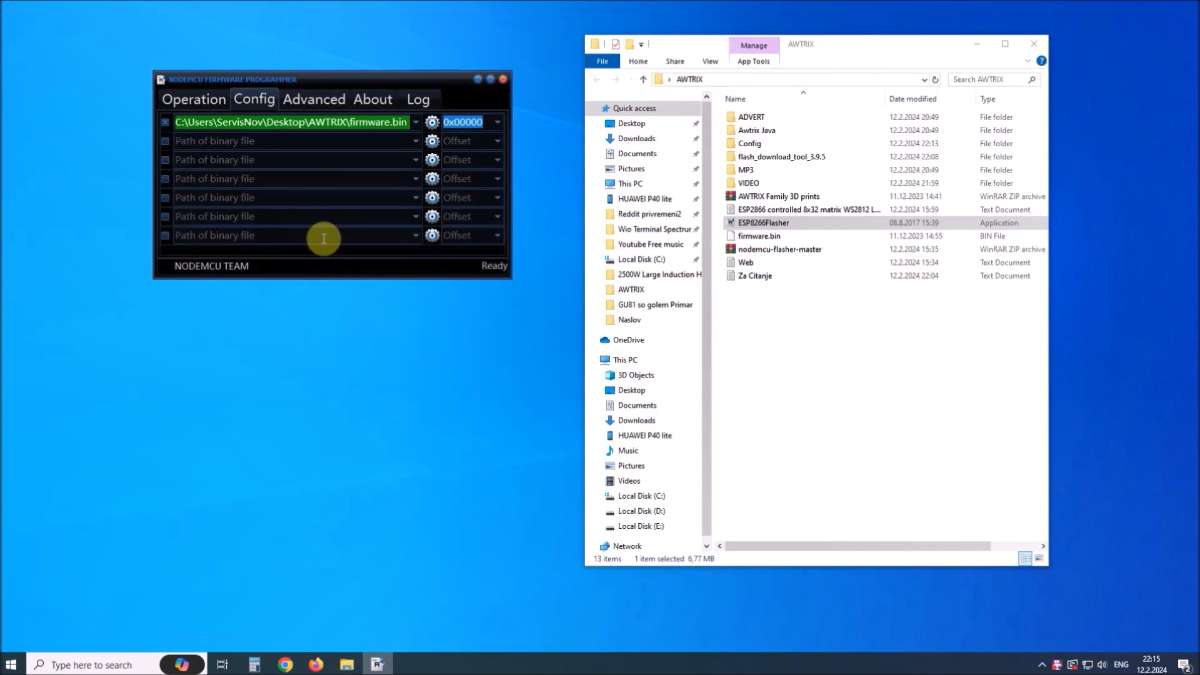
The software will automatically detect the port that the microcontroller is plugged into. Next, in the Config tab, the given Firmware.bin file should be selected. We press flash and when the procedure is finished, the MCU is ready.
When we start the device ESP8266 is not yet set to the local Wi-Fi, and the text "Hotspot" will appear on the matrix.
As the name says, the controller will now open a WLAN hotspot. With any WLAN device the controller can now be configured via the hotspot, in this case via my laptop. We connect to the WLAN with the SSID "AWTRIX Controller". The WLAN password is "awtrixxx". A web interface appears on the browser, which we need to fill in with data from our local network.
SSID and password of your local WLAN must be entered in the fields provided.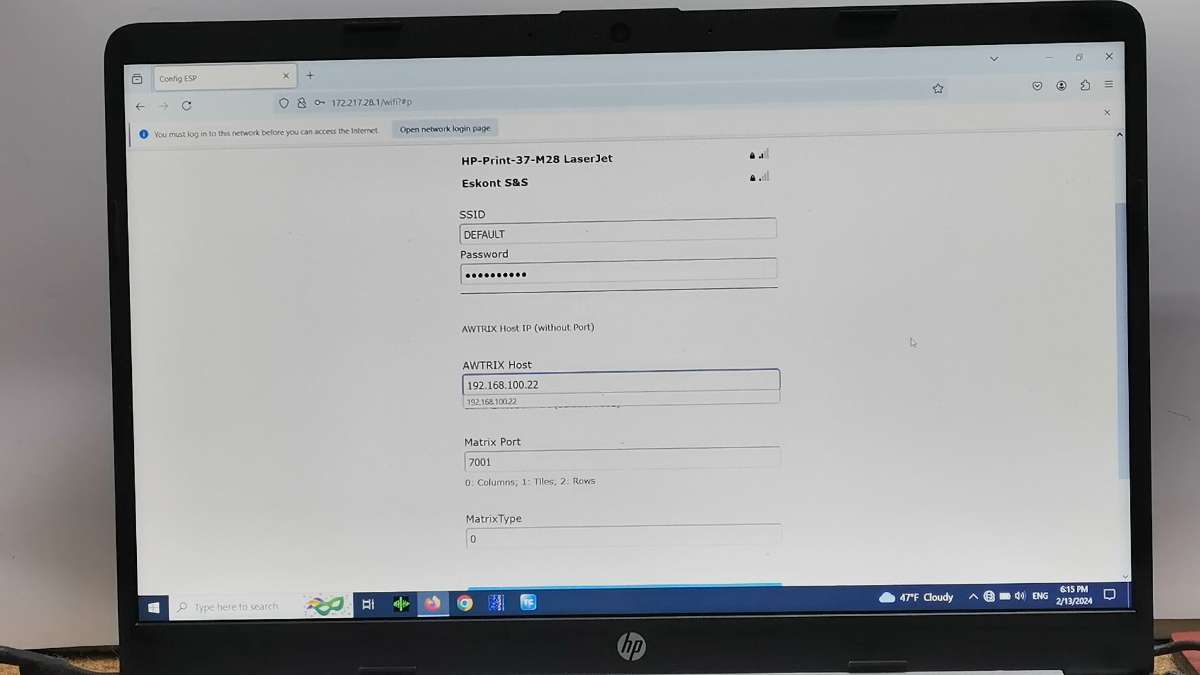
The IP address of the local computer where the Java application is running should be entered in field "awtrix server". In this case it is my laptop. Now the local network data is entered into the MCU, and it will connect to this network at startup. At this point the matrix is expecting data from the Host.
Now, We download the Awtrix Java application and run it from the command line or terminal with the command:
java -jar awtrix.jar
I also wrote a small batch file for this purpose, so that I can run the application directly. In the future, this application will have to be constantly active for the matrix to function normally.
Finally we can start the application by entering the previously entered host address (http:// [HOST-IP]:7000/). Through this web interface we will control and adjust the way the matrix functions.
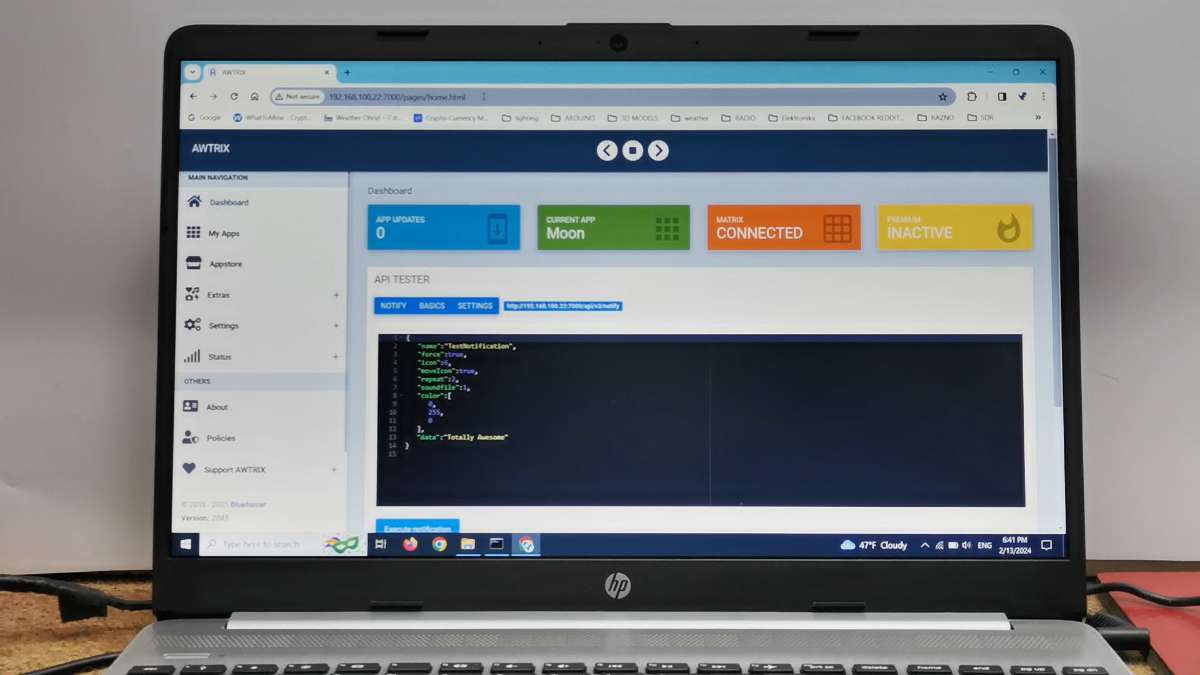
Let's briefly explain the basic features:
On the main page you will find some important information like current app and if your matrix is connected to the host.
On the left is the sidebar which allows you to navigate to all functions of AWTRIX.
- On My application page previously downloaded applications from the App Store are located
- The next tab is a built-in App Store where you can download various applications for free.
- Then the Extras tab
- Settings where we make basic settings for the way the matrix works
- And Current matrix status
Just to emphasize that on the source page indicated above, all options and possibilities are described in much more detail.
In the video you can see how the device works in real conditions.

As for the external appearance of the device, I tried to make a simple, but still functional version. However, if you own a 3D printer, there is a .stl file for making a grid nad housing for this project on the Thingiverse site.
And finally a short conclusion:
This is an extremely simple project and is based on few components, so it can be easily replicated by users with less technical skills. However, its possibilities are almost limitless, so it is disappointing that it has been discontinued. The display can show everything, from time and weather data, to Facebook or Instagram Likes or even games like Snake or Pong.