
CONCEPT
In t, his amid pandemic the disinfection is very essential to prevent spreading viruses. It affected every walk of our life directly or indirectly. Disinfection is very difficult in crowded areas like hospitals, shopping areas etc. So the low-cost and sustainable solution is more acceptable in this case.
The disease is transmitted by Bio-organisms such as bacteria and viruses. It is well-known fact that such organisms become inactive when exposed to Ultraviolet rays. Especially amid this pandemic, UV-C rays are a very effective way to eradicate those destructive bio-organisms. But it's also very dangerous falling these rays on the human body.
That is why robots are relevant in such situations. Robots are in use for several applications where humans can be at risk of exposure. Robots can perform daily tasks with great precision, clarity, and consistency with very little or without human assistance.
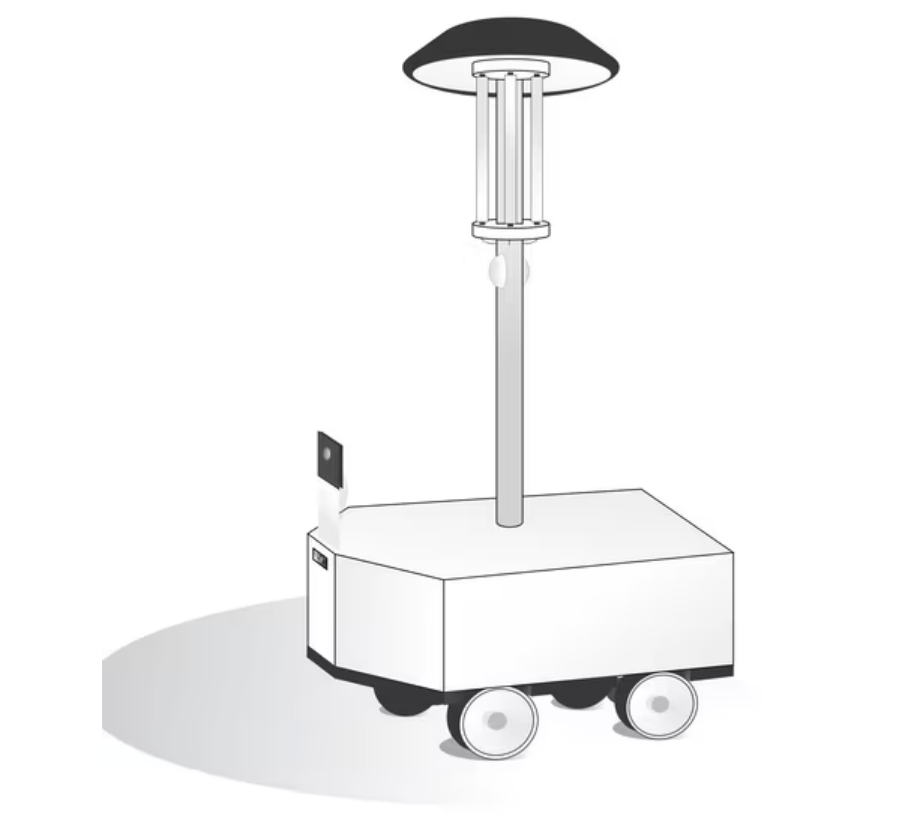
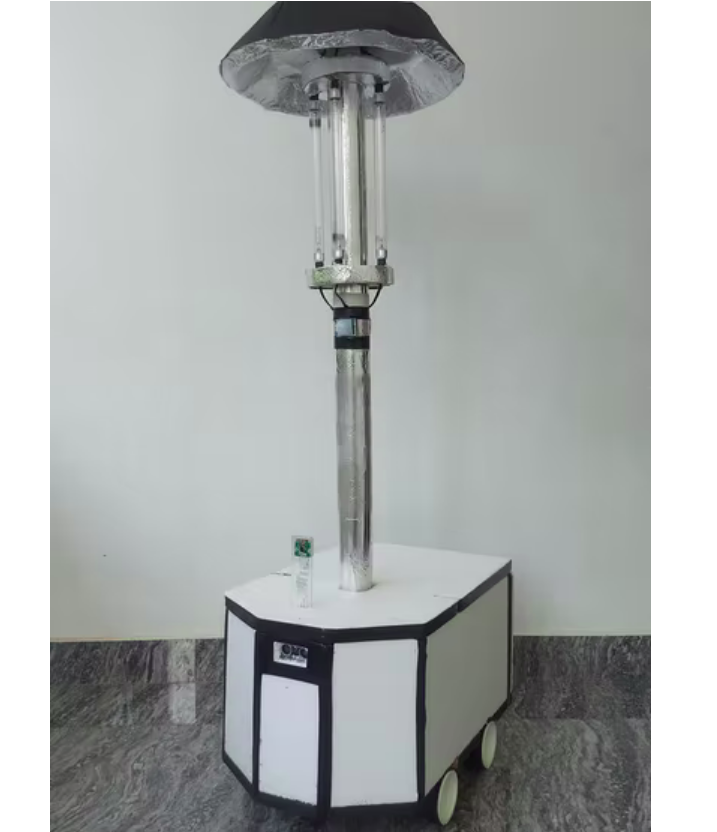
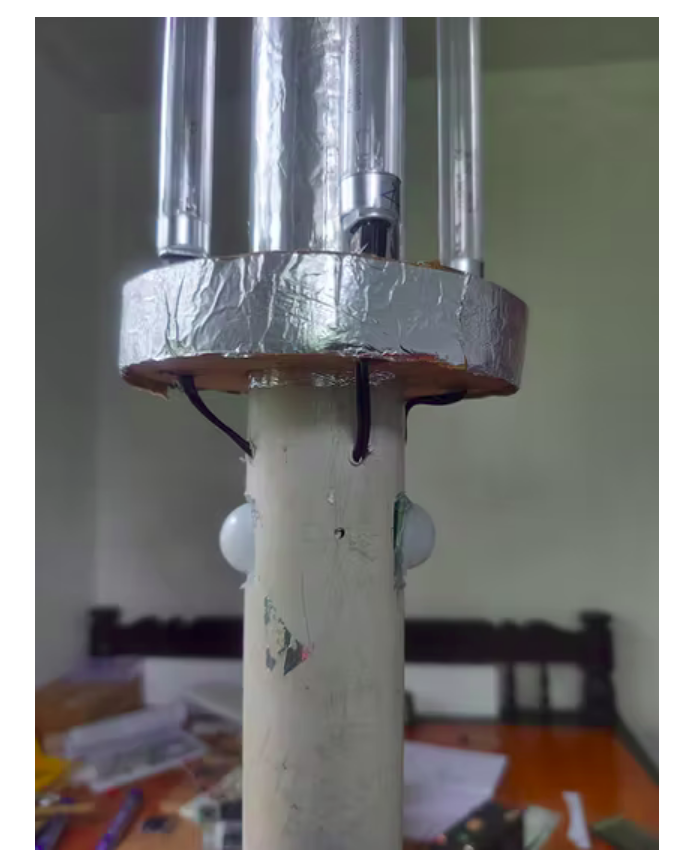
Here we are creating the Robot called UV disinfection robot. This remotely controlled robot also contains extra safety features like collision avoidance and human exposure. This robot is 1.5 meters long.
PROJECT - video
Here ois ur remote-controlled disinfecting robot at work. It automatically turns off the UV lamp when detecting human exposure.UV lamp can be controlled manually
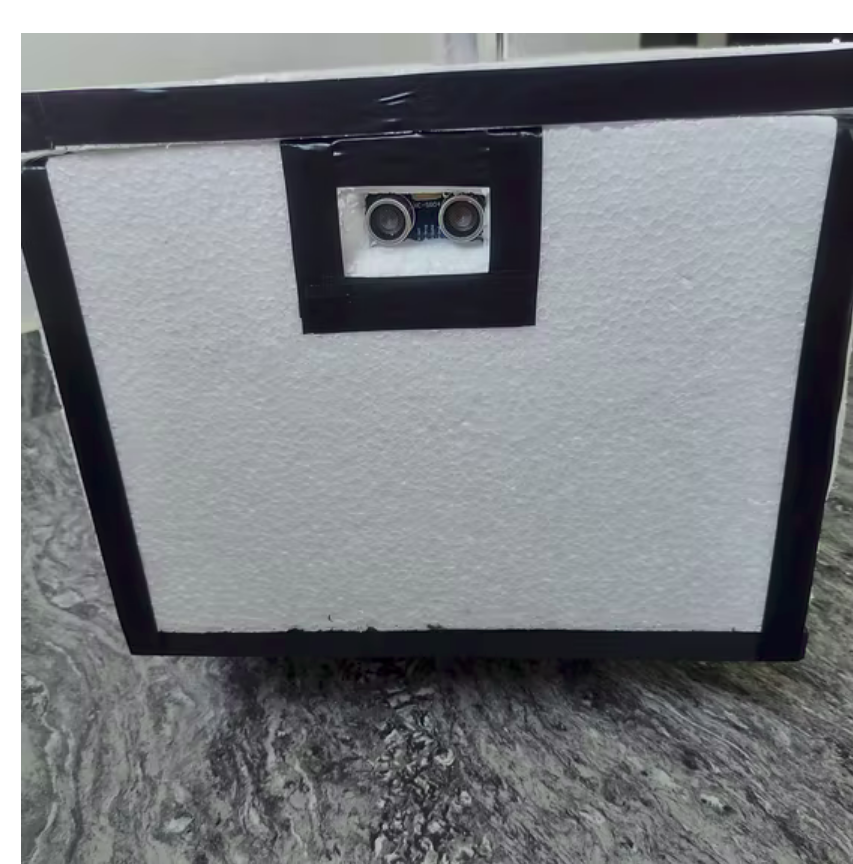
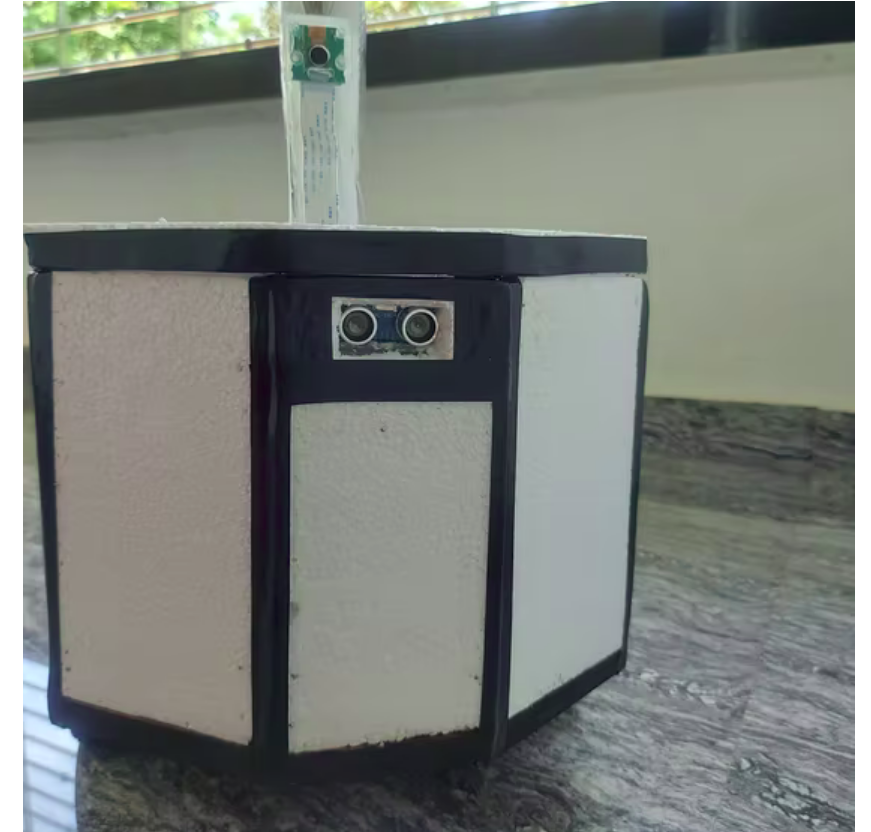
It should be turned on when it reaches the disinfection site. If human presence is detected during operation, it will be turned off by itself. It must be turned on manually to work again. When the robot starts to move, it will detect obstacles up to 30cm in front and stop there and sound the alarm. If we see an obstacle in front of it and try to move it forward, it will come to a standstill.
Here the views of the camera
Step 1: Building the UV Robot
plan
Step 2: Coding
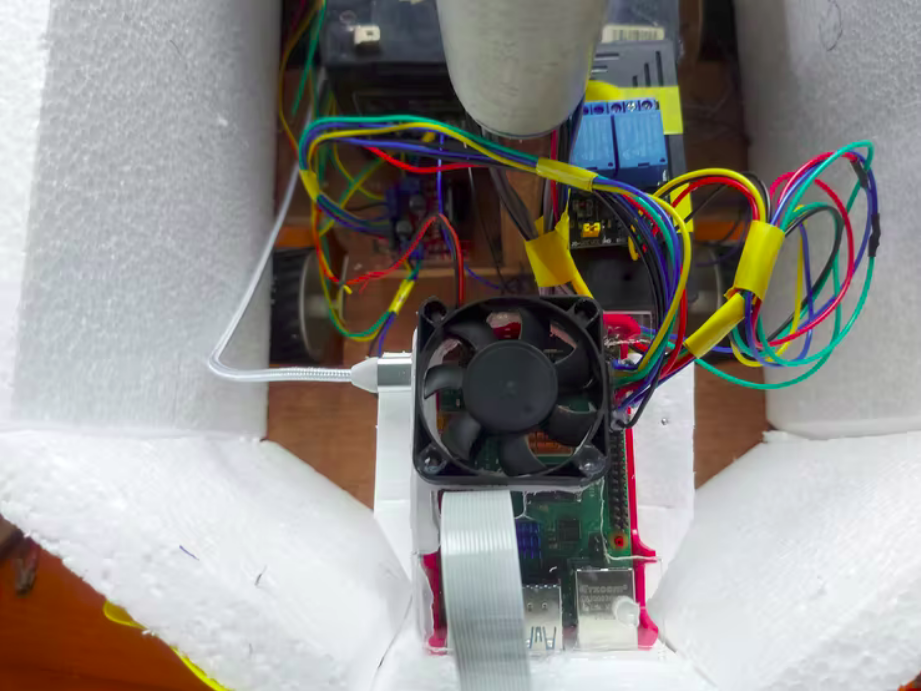
You have to use Raspberry pi to control this robot. This project is made with Raspberry pi 4. Its connected to internet and control through the internet, you can monitor the camera views when the robot moves and you can also control the UV lamp.
When the robot moves and manually turn on the UV lamp, while any movement is detected suddenly it detects and automatically turn off the UV lamp and alert. When the robot starts to move, it will detect obstacles up to 30cm in front and stop there and sound the alarm.
Here we used the keyboard to control the robot, when pressing arrow keys it will move accordingly and control the UV light when pressing 'Q' and 'W' - ON and OFF. You can also change the keys by changing the coding.
- Step 2.1: Setup Raspberry pi
First, you need to install the latest version Raspbian. I recommend downloading the latest version with desktop and recommended software from raspberry pi.
You have to download the software and mount it into an SD card with a pi imager software. Then you connect display, Keyboard, mouse and boot it up
After installing the OS, simpler to access VNC, CAMERA.
For enabling VNC and Camera follow these steps,
Select Menu > Preferences > Raspberry Pi Configuration > Interfaces and Ensure VNC is Enabled and also Camera
The camera preview doesn't show just by enabling VNC, you'll go to VNC settings
Click on VNC icon > Menu > Options > Troubleshooting > Enable direct capture mode and Apply the settings
- Step 2.2: Installing the library
The libraries are imported to add the special functions to this code.
To install the libraries open the terminal
First, we need pygame library to get keys to control the robot
sudo apt-get install python-pygamefor importing the library
import pygameThe otherbuilt-in libraries are built in libraries.So we do not need to install.
- Step 2.3: Keypress
The keyboard keys importing to this project for controlling the robot, by using the pygame library. First import the pygame library
import pygameInitializing a window
pygame.init()pygame.display.set_mode((100,100))Creating a function to get key from the keyboard
def getKey(keyName): ans = False for eve in pygame.event.get():pass keyInput = pygame.key.get_pressed() myKey = getattr(pygame,'K_{}'.format(keyName)) if keyInput [myKey]: ans = True pygame.display.update() return ans- Step 2.4: Camera
The camera is enabled before. We have to get a preview
from picamera import PiCamerafrom time import sleepdef piCam(w=200,h=100,x=0,y=0,fill=True): camera = PiCamera() camera.resolution = (w,h) camera.start_preview(fullscreen= fill,window=(x,y,w,h))- Step 2.4: Motor, pir, ultrasonic sensor and controlling UV light
The motor driver, ultrasonic sensor, PIR sensor and relay terminals are connected to the raspberry pi GPIO pins
The motor driver has 6 pins three pins to motor 1 and three pins to motor 2. Two enable pin or PWM pin and other pins are direction control pin for every two motors.
For forwarding direction
GPIO.output(In1A,GPIO.HIGH) # motor1 forwardGPIO.output(In2A,GPIO.LOW)GPIO.output(In1B,GPIO.HIGH) # motor2 forwardGPIO.output(In2B,GPIO.LOW)For backward direction
GPIO.output(In1A,GPIO.LOW) # motor2 backwardGPIO.output(In2A,GPIO.HIGH)GPIO.output(In1B,GPIO.LOW) # motor2 backwardGPIO.output(In2B,GPIO.HIGH)Setting PWM
pwmA = GPIO.PWM(EnaA,100) pwmA.start(0) pwmB = GPIO.PWM(EnaB,100) pwmB.start(0)For turning the robot changes the duty-cyclecle and we can turn the robot.
PIR sensor is added to detect human exposure. Here the code
if GPIO.input(pir1): # pir1 is defined as pir1 = 18 print(" Detected ")The ultrasonic sensor have 2 pin ECHO and TRIGGER(VCC, GND not included)
The basic distance measurement is that measuring the time between triggering and echo. We can use the code to measure the time
GPIO.output(TRIG, True) time.sleep(0.00001) GPIO.output(TRIG, False) while GPIO.input(ECHO)==0: GPIO.output(led, False) pulse_start = time.time() while GPIO.input(ECHO)==1: #Check whether the ECHO is HIGH GPIO.output(led, False) pulse_end = time.time() pulse_duration = pulse_end - pulse_start distance = pulse_duration * 17150 distance = round(distance,2) measuredDistance=measuredDistance+distanceFor controlling the UV lamp use 2 channel relay.
if getKey('q'): #for on GPIO.output(Relay1,GPIO.LOW) # uv light onelif getKey('w'): #for off GPIO.output(Relay1,GPIO.HIGH) #uv light offIts done. Then run.
Conclusion
This robot can disinfect a wide area with ultraviolet rays. In this situation, such robots are very useful to hospitals, shopping malls, and other people gathering areas.
We now have this robot built in a way that can be controlled remotely, if we use LIDAR we can automatically control this robot from being controlled by remote control and reduce the use of ultrasonic sensors.It will more accurate and efficient. Then we have installed a none movable camera instead of a moving one, we can use the servo motor to change none movable as a movable camera. We used a small UV tube, if we use a big UV tube the rate of illumination will be increased and it will be more efficient to disinfect a wide area. While using the big UV tube we need to change the inverter.
COVID-19 has terrified billions of people around the world, so we built such a low-cost disinfection robot with the sole purpose of taking part in the fight against the pandemic.Th,a is robot has infinite future possibilities. We hope you can use it most effectively.
Thanks for reading!