


In this project, I'll show you how to use free software called 3dSlicer to convert an MRI/CT/US file to a 3d printed model.
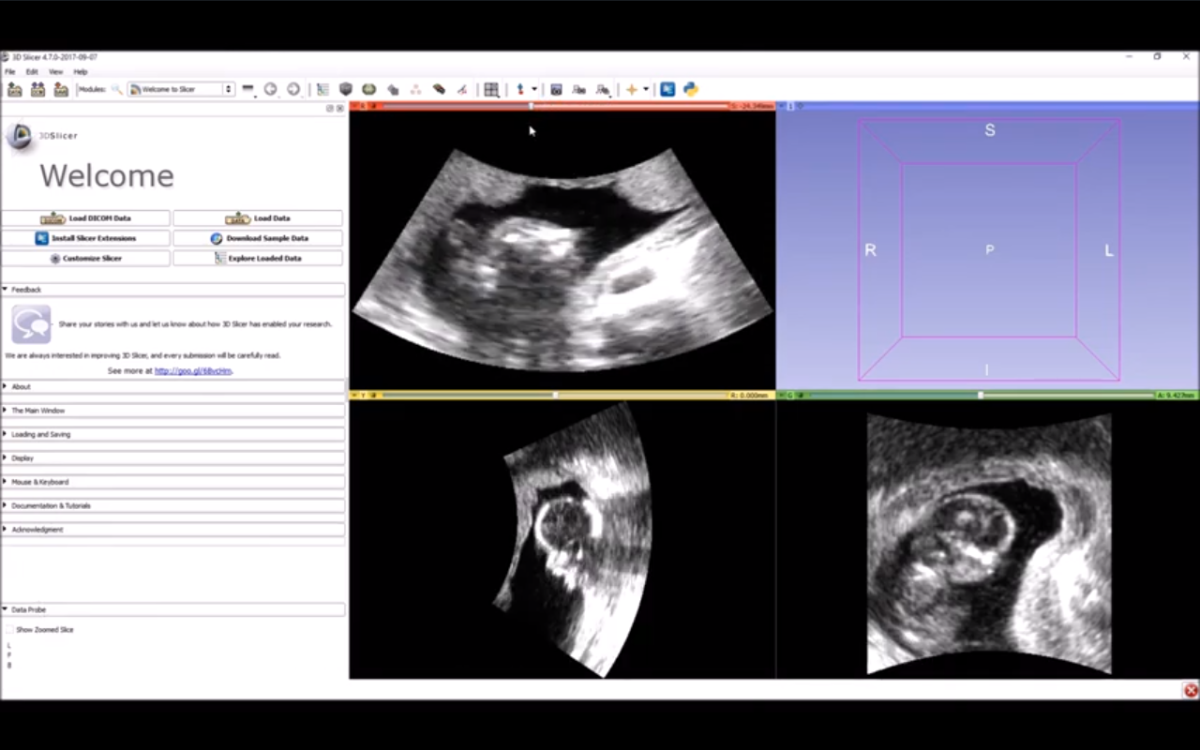
I choose ultrasonography file of a baby to 3D print the file in any printers.
What 3D printing actually is??
It adding substances layer by layer and form the objects. Its called 'added manufacturers' technology. The slicer slices 3D cad model into layer by layer and generates G-code for the machine to print in 3D printer.
There are several types of 3D printing, which include:
- Stereolithography (SLA)
- Selective Laser Sintering (SLS)
- Fused Deposition Modeling (FDM)
- Digital Light Process (DLP)
- Multi Jet Fusion (MJF)
- Direct Metal Laser Sintering (DMLS)
- Electron Beam Melting (EBM)
Most commonly used method of 3Dprinting is FDM.
The materials used to print the data in a 3D printer have a wide range of physical, chemical, and textural qualities, allowing for a wide range of applications based on our needs. The majority of 3D printers can print PLA, ABS, PTEG, TPU, and other materials.
I decided to utilize White PLA for this project. Because it provides a smooth finish.
Requirements for this project : 3dSlicer for generating stl file, Slicing software for generating G-code like SuperSlicer,Cura,Simplify3D , FDM 3D printer.
Step 1:You can run virtual machines and Docker containers by downloading all of the relevant software and files and following the steps. Binder service, for example, offers 3D Slicer Plus Jupyter notebook in a web browser for free (no installation needed, the application can run in any web browser if you have experience in virtual machine ).
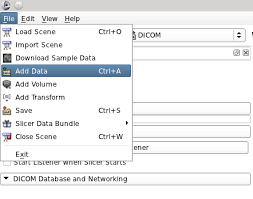
Step 2: Open 3dSlicer software and go to File and click Add Data file and choose your file.
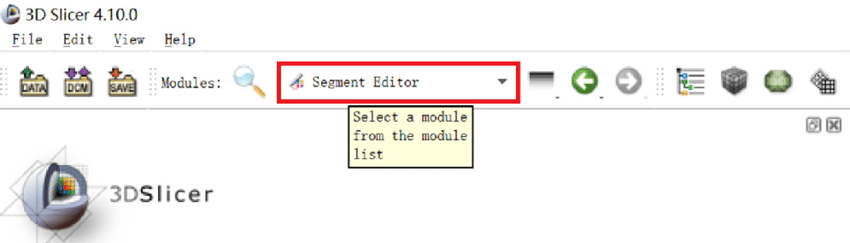
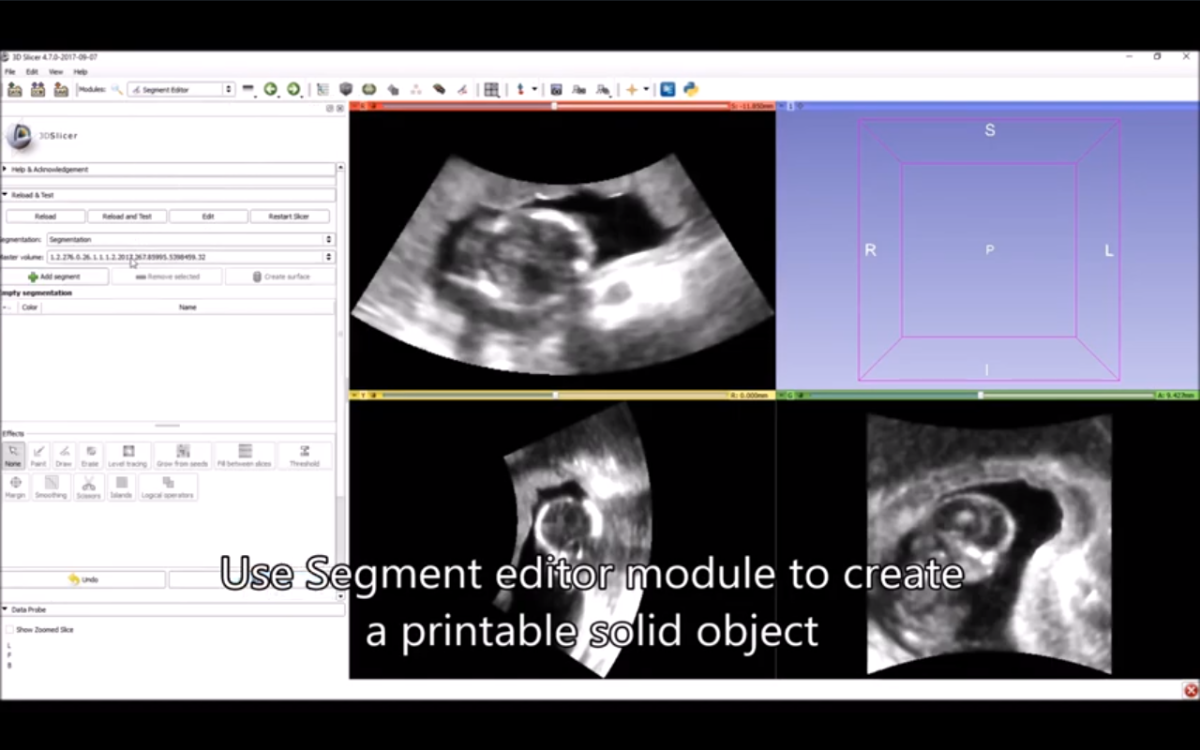
Step 3: Select the Segment Editor from list.
Step 4 : Click on Add Segment.
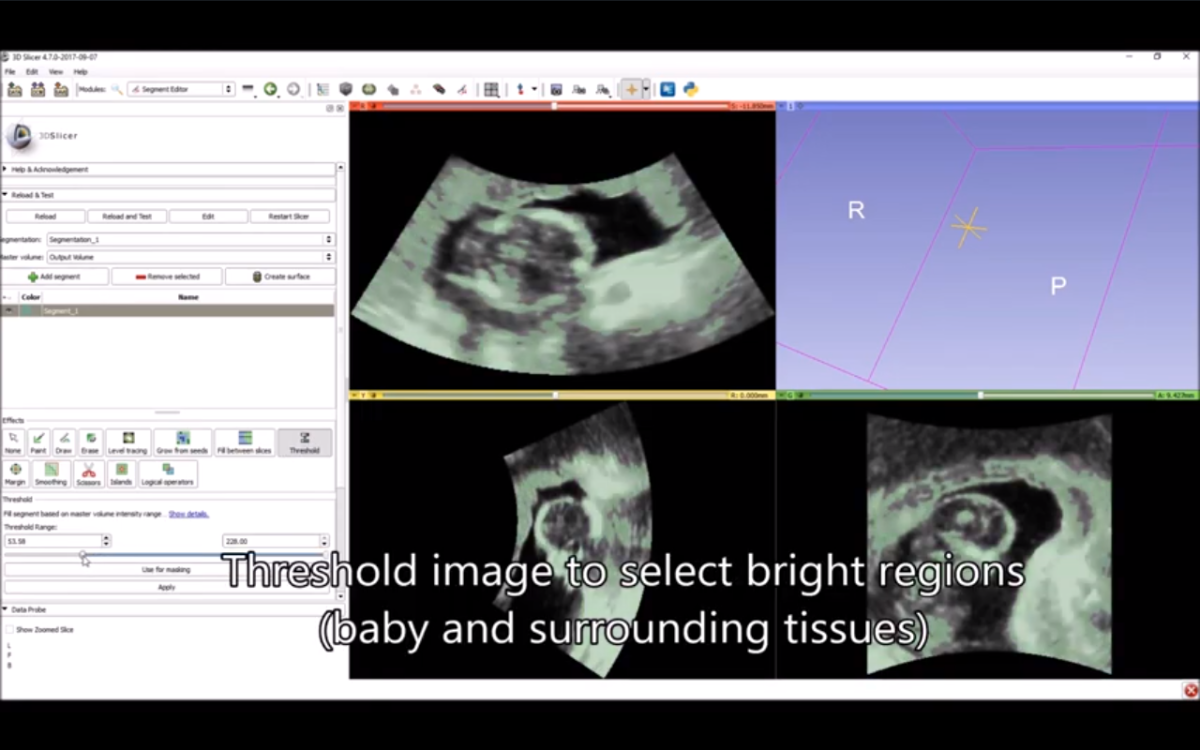
Step 5: Select the Threshold values to Select bright region to trim the ultrasonography file and create a better quality model.
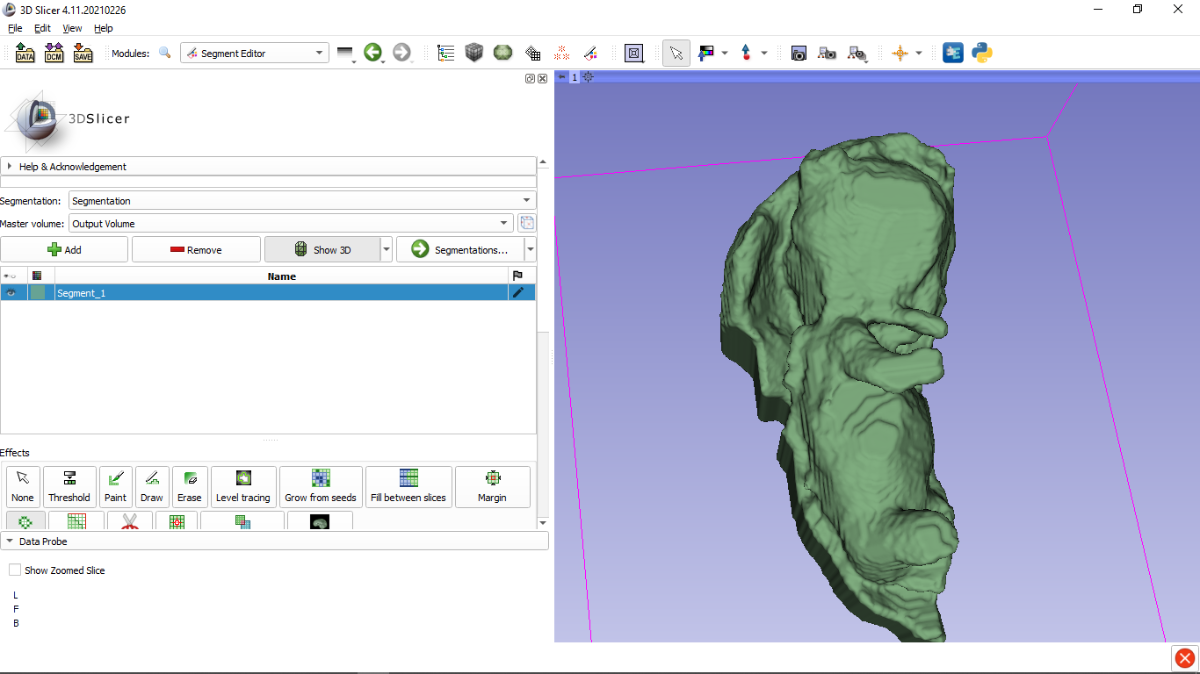
Step 6 : Click on "show3d" to view the model before generating the G-code. Edit the model upon your requirement until you get the desired view of the model which you want to print.
Here, I removed background for better view of the model.
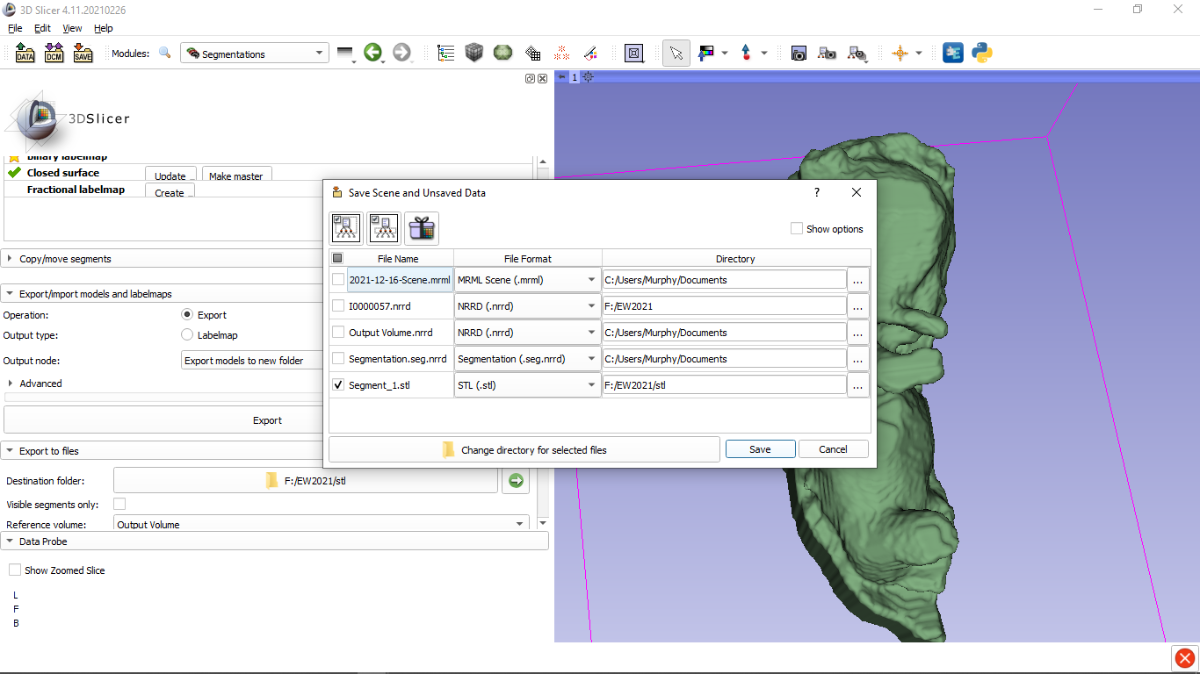
Step 7: Export the file as STL File for converting the 3D file into G-code in SuperSlicer.
Step 8: Open STL file in SuperSlicer and choose the layer height.
Print Details which I have used that are common in any Slicer of your choice :
Filament used: White PLA
Nozzle Temp: 210°C to 215°C.
Bed Temp: 60°C.
Layer Height: 0.1000mm for high quality or 0.2000 for normal quality,
Infill: 20 to 30 %,
Skirt: 2mm,
Speed: 60mm/s,
Generate Support: On.
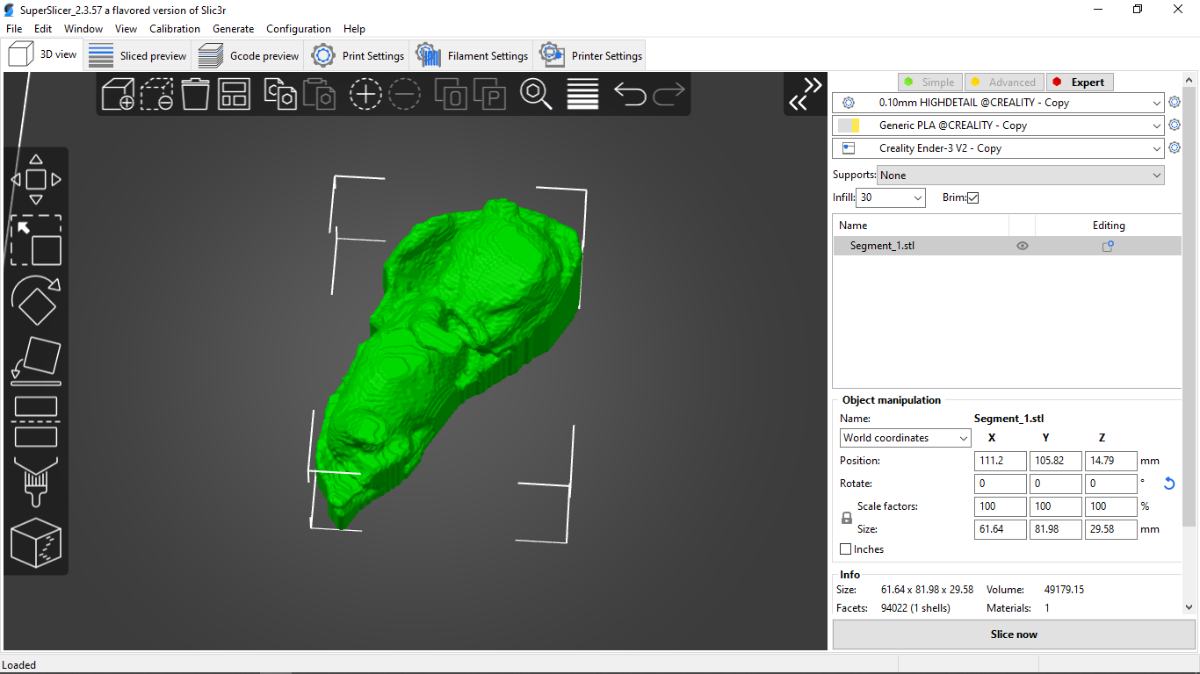
Step 9: Click on Slice now option to generate G-code.
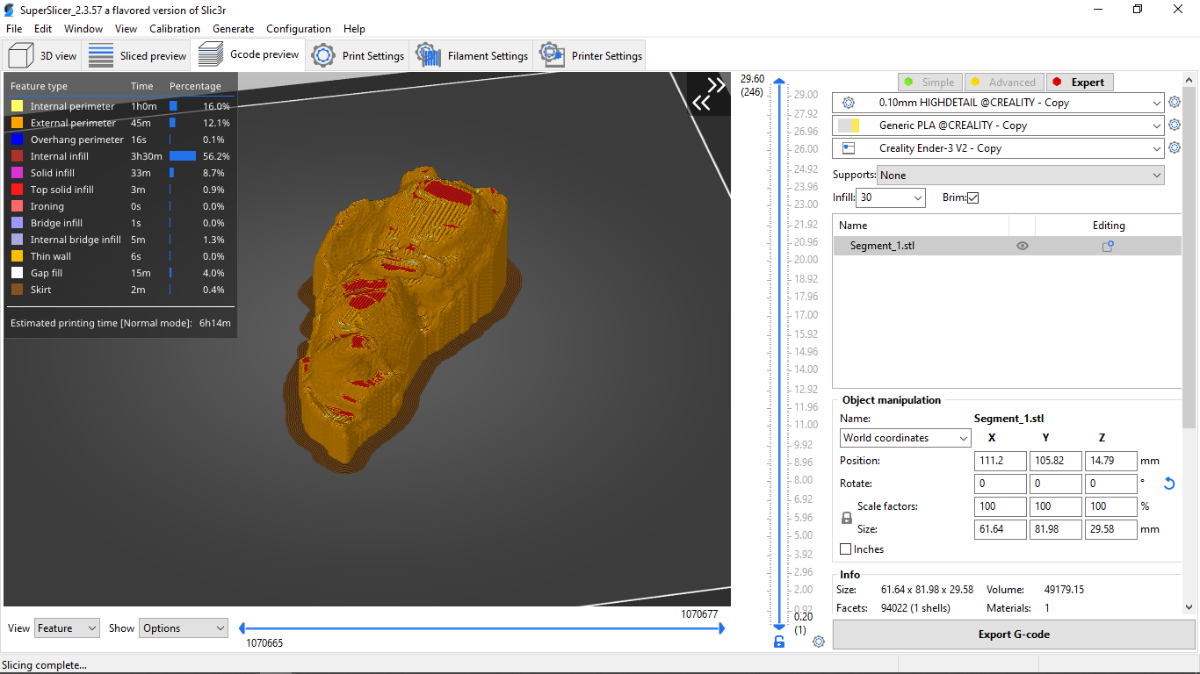
Step 10: Click on Export G-code and save the file to USB Pen drive or SD-Card for your 3D printer and wait for your print to finish the job.
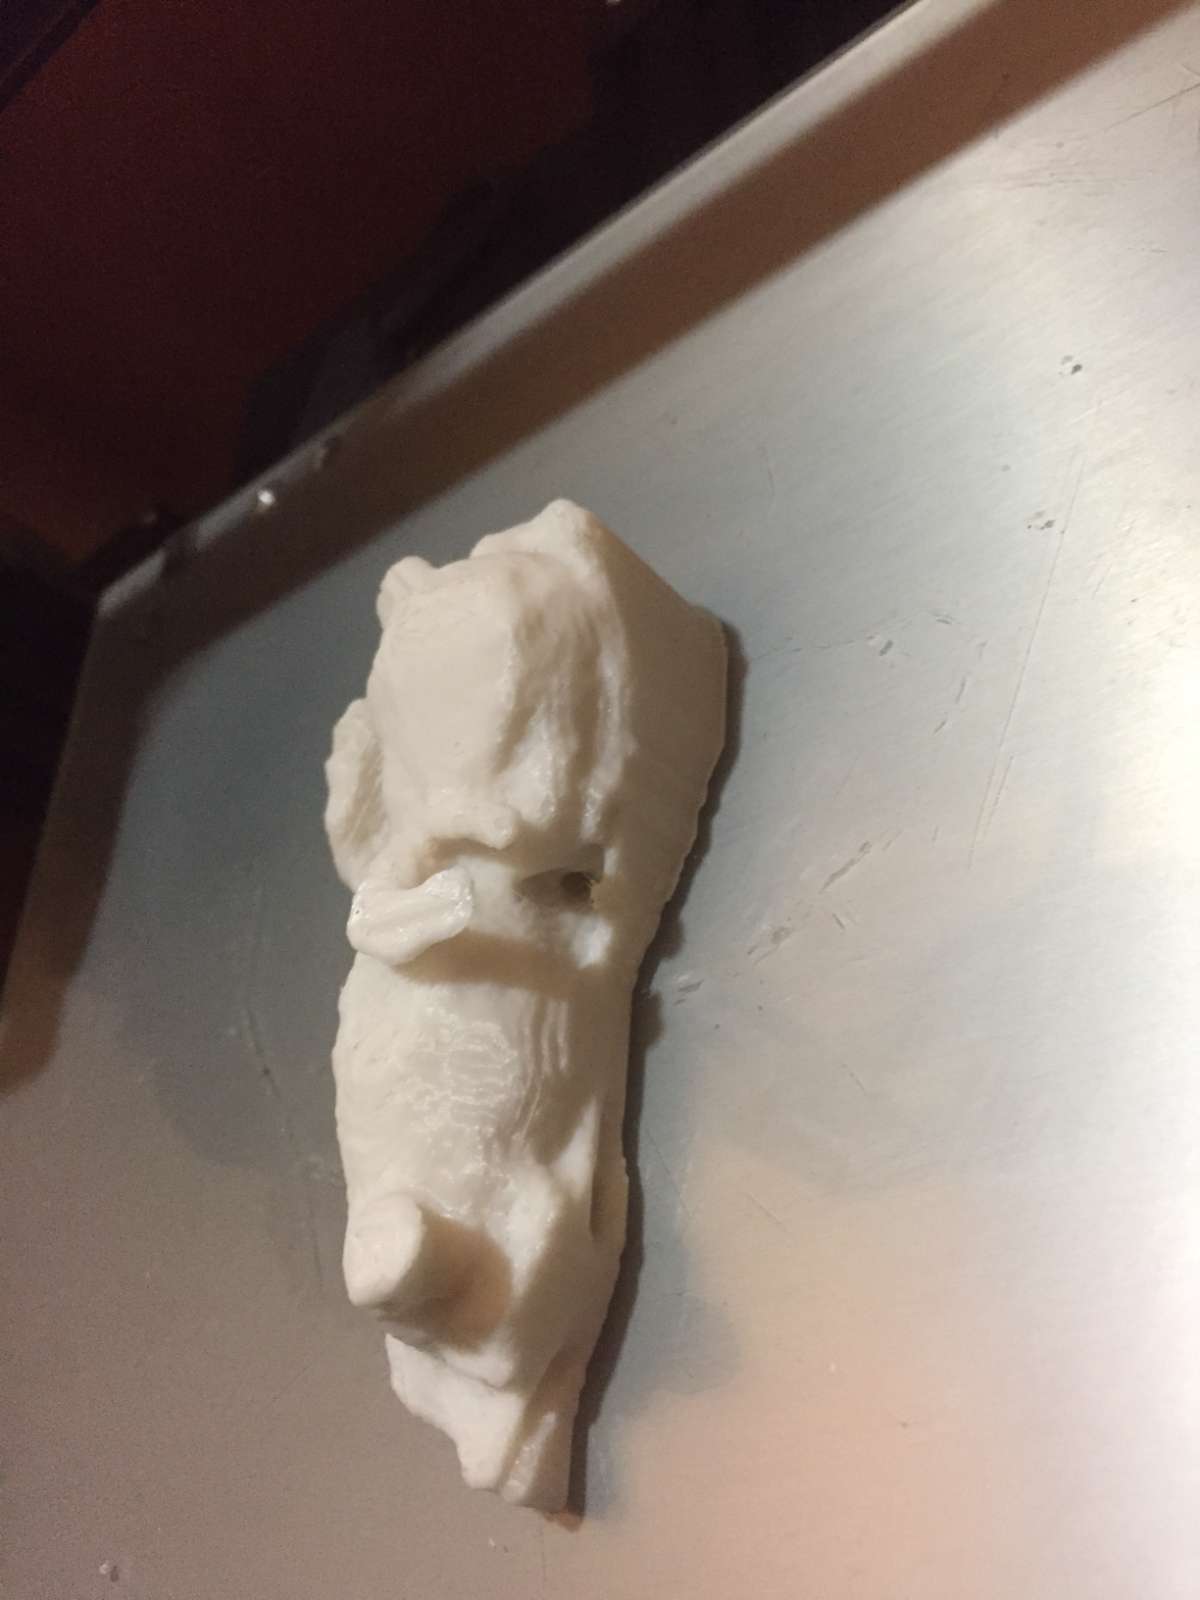
Final Result:

.JPG)
Please share your feedback and opinion
Thank You....!!!