
Now, What is line following robot? Its a robot which is able to detect the line and follow the path by managing the motors and getting data from different sensors. There robots are mostly use in Warehouses, Automated Guided Vehicles (AGVs), delivery system or in research lab.
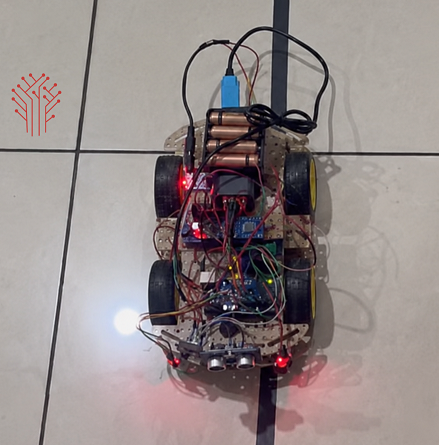
Below is a similar project that I mentioned based on Raspberry Pi where I use combination of different sensors, motors along with L298N motor drivers. Here the Pi keep checking the surface for the line and manage its movement and direction accordingly.
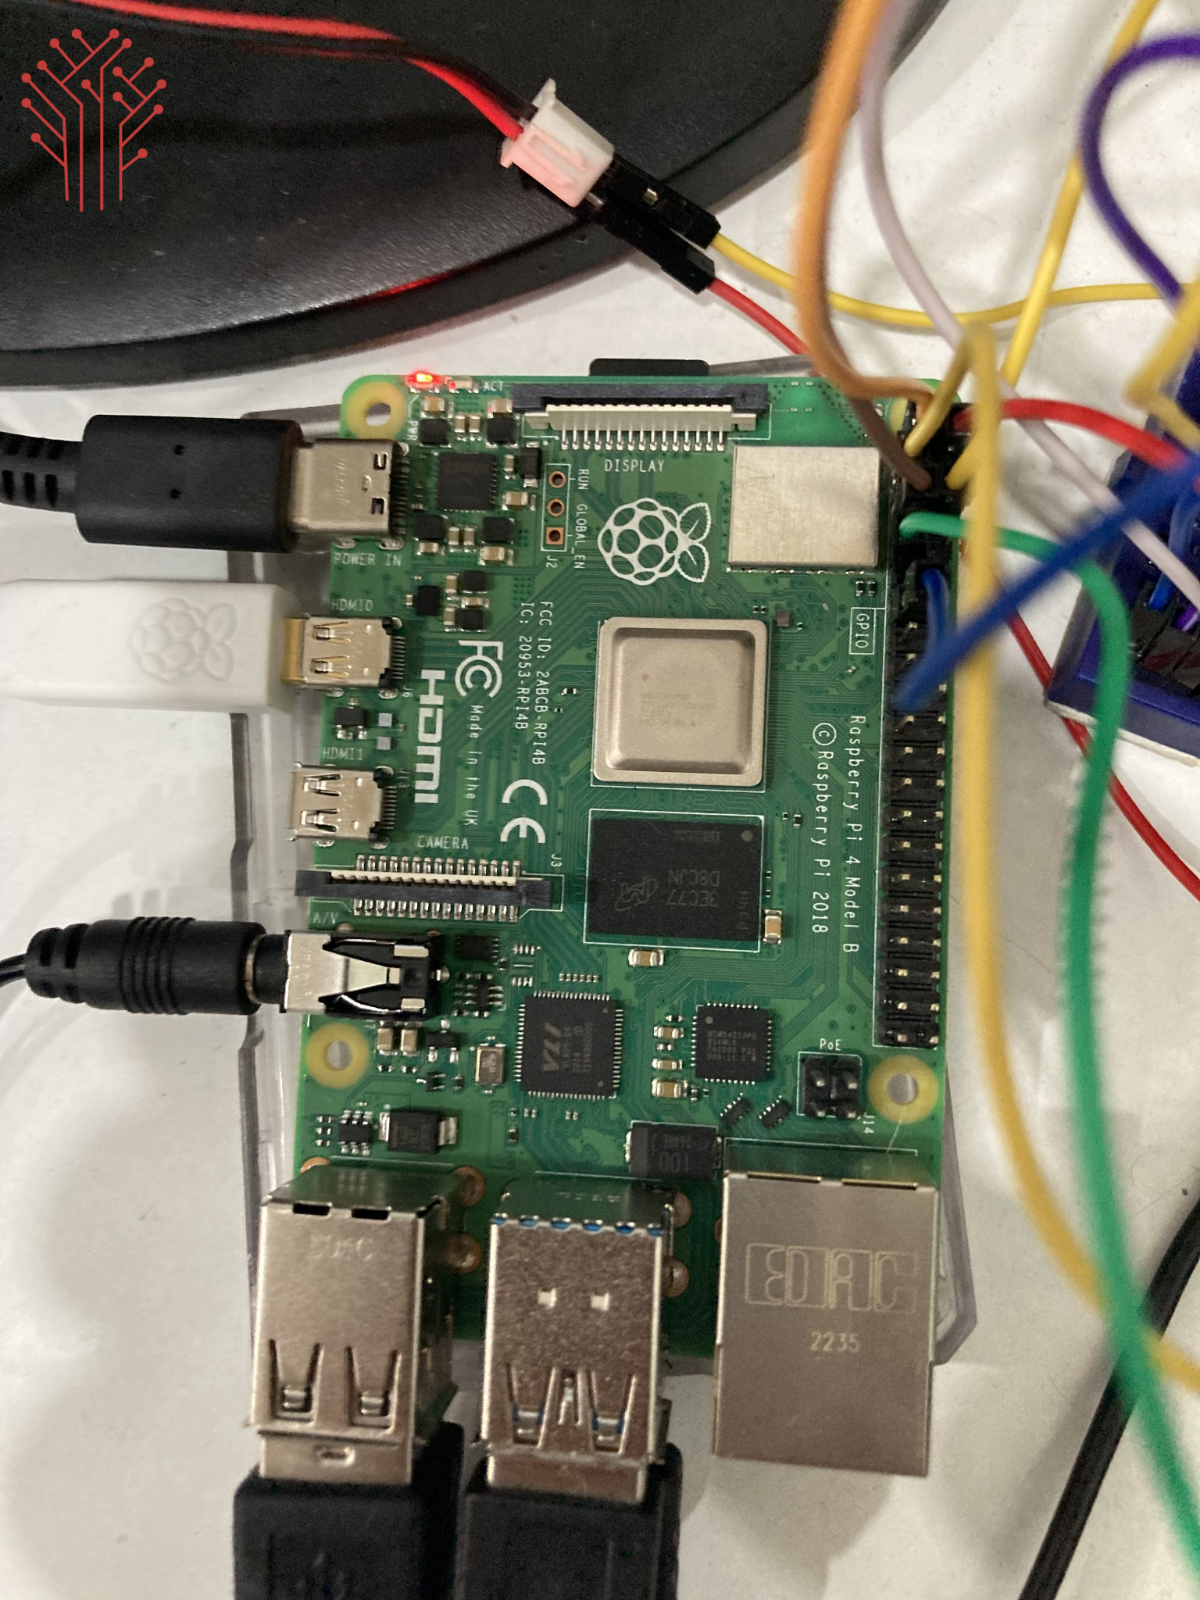
The Raspberry Pi acts as a central processing unit of the line following robot, and it reads the data from different sensors connected with GPIO pins, and processes the navigation and sends command to motors accordingly in real time.
This project is useful for beginners learning:
- Embedded Linux systems
- Raspberry Pi GPIO programming
- Sensor interfacing
- Robotics automation
- Motor driver control
- Python based robotics
This project can be scaled to other sectors like medicare, military or as simple as clothes where its used in stitching machine.
Project Features
• Fully autonomous line tracking robot
• Raspberry Pi controlled navigation system
• Real-time IR sensor monitoring
• Dual motor differential steering
• Python based robot control logic
• Compact and low-cost robotic platform
• Easy hardware interfacing
• Expandable for advanced robotics
• Stable indoor path tracking
• Educational and industrial learning project
Understanding Line Following Technology
Line following robots work by detecting contrast differences between dark and light surfaces.
IR Sensor Working
IR sensors consist of:
- IR LED transmitter
- IR receiver photodiode
When IR light falls on a surface:
- White surfaces reflect more IR light
- Black surfaces absorb IR light
The sensor output changes according to the reflected light intensity.
Robot Navigation Logic
The robot continuously checks the left and right sensor outputs.
| Left Sensor | Right Sensor | Robot Action |
| White | White | Move Forward |
| Black | White | Turn Left |
| White | Black | Turn Right |
| Black | Black | Stop / Adjust |
Working Principle
The robot uses two IR sensors mounted beneath the chassis to detect the line path.
- The Raspberry Pi continuously reads sensor values.
- Sensor data is processed using Python logic.
- According to the detected line position:
- Motors rotate forward
- Left motor slows for left turn
- Right motor slows for right turn
- L298N motor driver controls motor direction and power.
- The robot automatically follows the black line path.
This process runs continuously in real time.
Step-by-Step Working of the Robot
Step 1: System Power ON
When the robot is powered ON, the Raspberry Pi boots up and initializes all connected components including IR sensors and the motor driver.
Step 2: Line Detection by IR Sensors
The IR sensors continuously scan the surface below the robot. They detect the difference between black and white surfaces based on infrared reflection.
Step 3: Sensor Signal Generation
Based on surface detection, the IR sensors generate digital signals (HIGH or LOW) and send them to the Raspberry Pi through GPIO pins.
Step 4: Data Processing by Raspberry Pi
The Raspberry Pi reads sensor inputs in real time and processes them using a Python program to determine the robot’s position on the track.
Step 5: Decision Making
Based on sensor values, the Raspberry Pi decides the movement:
- Both sensors on line → Move forward
- Left sensor off line → Turn left
- Right sensor off line → Turn right
- Both sensors off line → Stop or adjust
Step 6: Motor Control Execution
The Raspberry Pi sends control signals to the L298N motor driver, which drives the DC motors accordingly to adjust movement direction.
Step 7: Continuous Loop Operation
This process runs in an infinite loop, allowing the robot to continuously detect the line and adjust its movement in real time.
Step 8: Real-Time Correction
If the robot deviates from the path, the sensors immediately detect the change and the system corrects the direction instantly.
Circuit Diagram
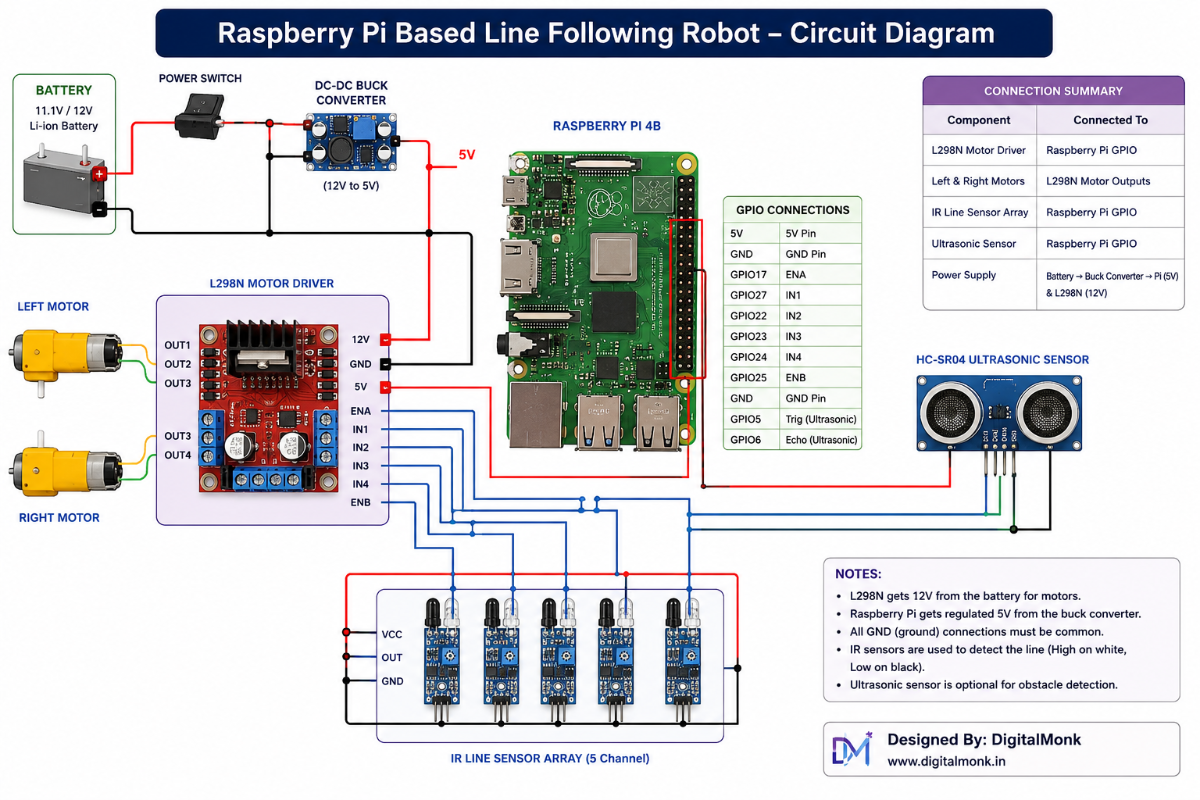
The circuit consists of:
- Raspberry Pi GPIO interface
- L298N motor driver
- Dual IR sensor inputs
- DC motor connections
- Battery power system
Motor Driver Overview
The L298N motor driver is used to control the speed and direction of DC motors.
Functions of L298N
- Bidirectional motor control
- Dual motor driving capability
- PWM speed control support
- High current motor operation
- Safe motor switching
The Raspberry Pi GPIO pins provide low-current control signals to the L298N driver.
Raspberry Pi Setup
Install Raspberry Pi OS
- Download Raspberry Pi Image
- Flash Raspberry Pi OS to SD card
- Insert SD card into Raspberry Pi
- Connect power supply
- Enable SSH or VNC if required
Sensor Placement Tips
- Keep sensors close to the surface
- Maintain equal spacing
- Avoid excessive height
- Prevent loose wiring
- Test under stable lighting conditions
Testing Procedure
Initial Testing
- Verify GPIO connections
- Check motor rotation
- Confirm sensor readings
Path Testing
Create a black line track using black electrical tape on a white surface.
Observation
- Robot should move smoothly
- Turns should be responsive
- Sensors should detect path correctly
Project Results
The robot successfully:
- Followed black line tracks
- Adjusted movement automatically
- Performed smooth directional turns
- Maintained stable navigation indoors
The Raspberry Pi processed sensor data efficiently with low response delay.
Applications
- Warehouse automation robots
- Smart transportation systems
- Industrial AVG robots
- Educational robotics kits
- Research and development
- Path navigation systems
- Delivery robots
- Factory automation
- Robotics competitions
- Smart manufacturing systems
Advantages
- Low-cost robotic platform
- Easy to build
- Beginner-friendly project
- Real-time navigation
- Expandable architecture
- Python programming support
- Raspberry Pi processing power
- GPIO interfacing learning
Limitations
- Sensitive to lighting conditions
- Limited outdoor performance
- Basic navigation algorithm
- No obstacle detection
- Requires proper sensor calibration
Conclusion
This Raspberry Pi based line following robot demonstrates how autonomous robotic systems can be developed using embedded Linux platforms, IR sensing technology, and motor control techniques.
The project combines hardware interfacing, Python programming, sensor processing, and robotic navigation into a practical automation system. It is highly suitable for students, robotics enthusiasts, and engineers interested in learning autonomous robotics.
The design is simple, scalable, and can be further upgraded into advanced AI-powered robotic platforms for industrial and research applications.