This are the Components Needed for this project. You can get them easily.

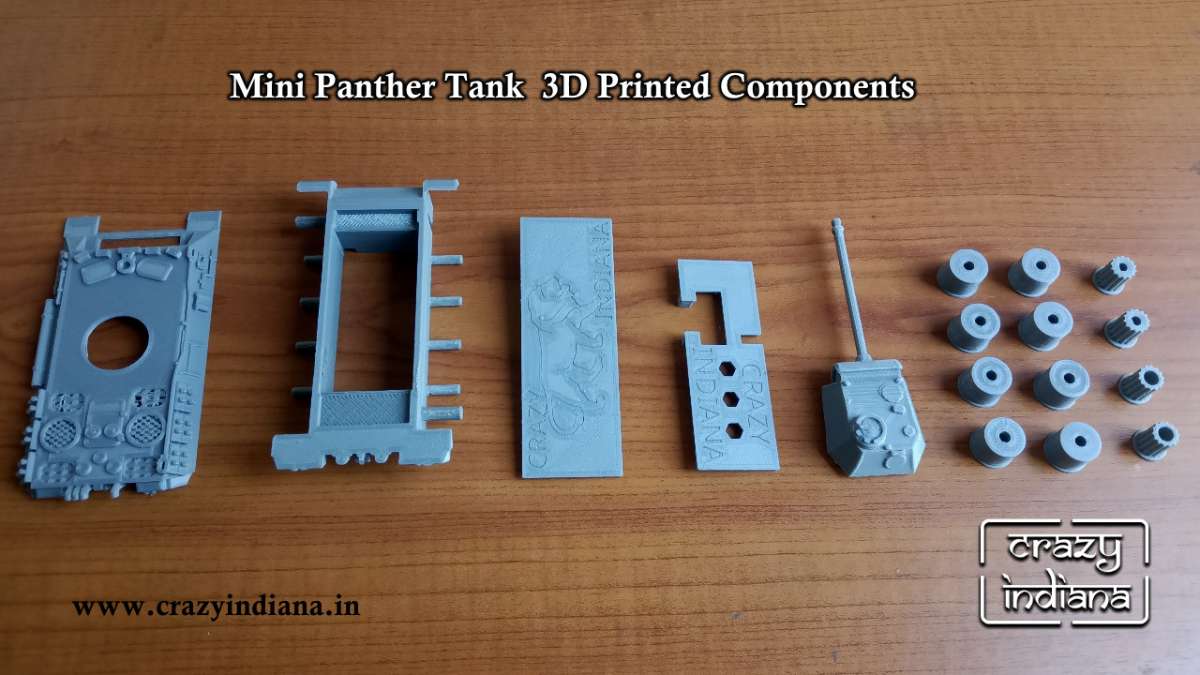
Next Step you have to 3D Print the tank sections . This can be easily printed with 3D Printer. Download 3D .stl files here.
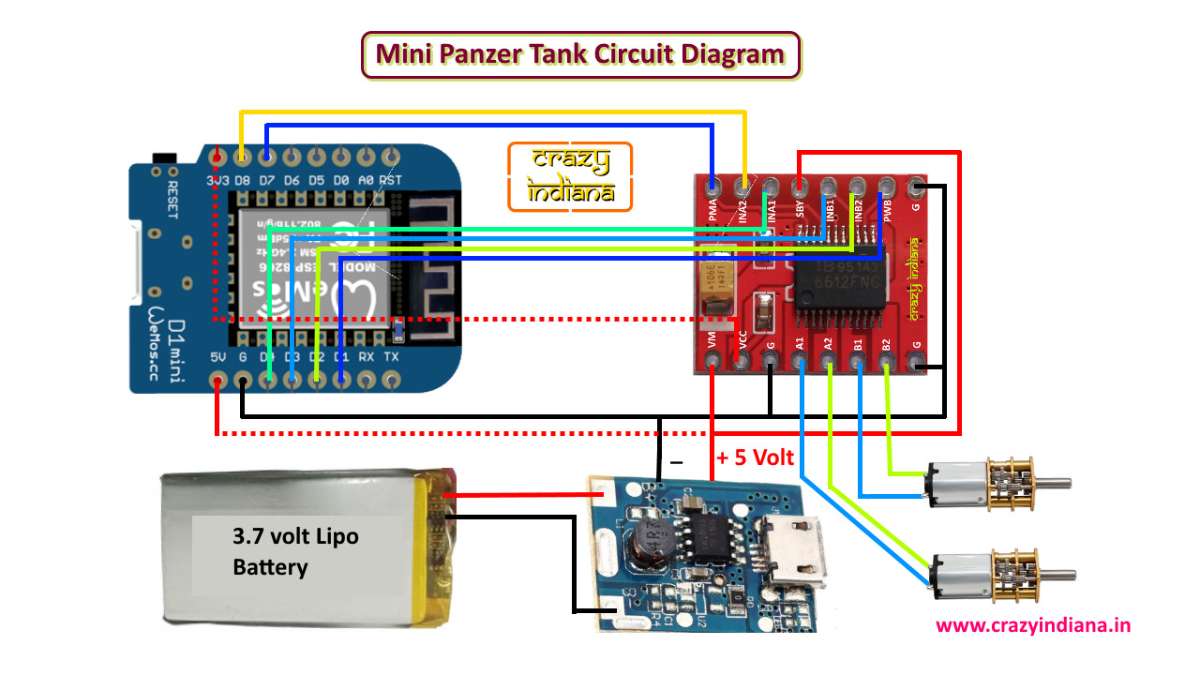
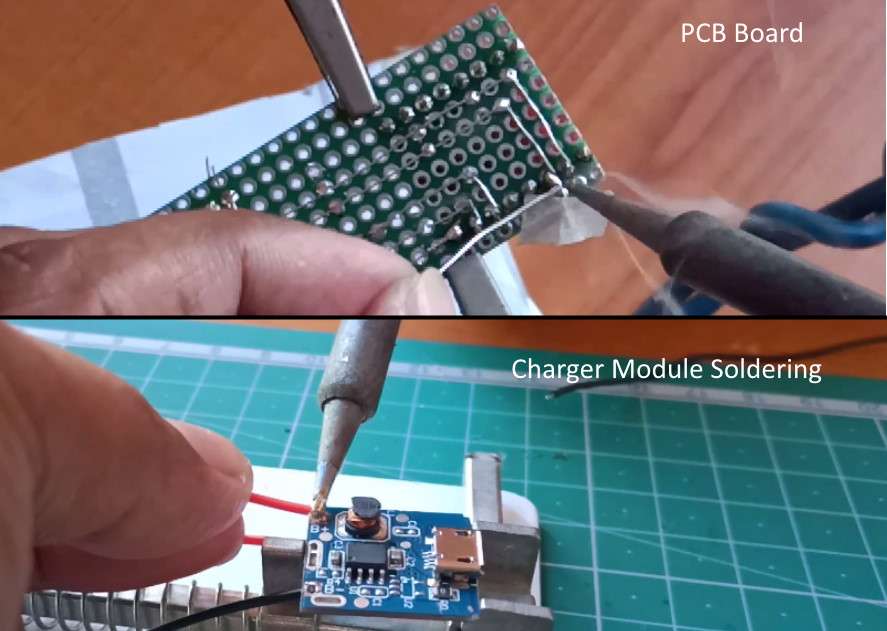
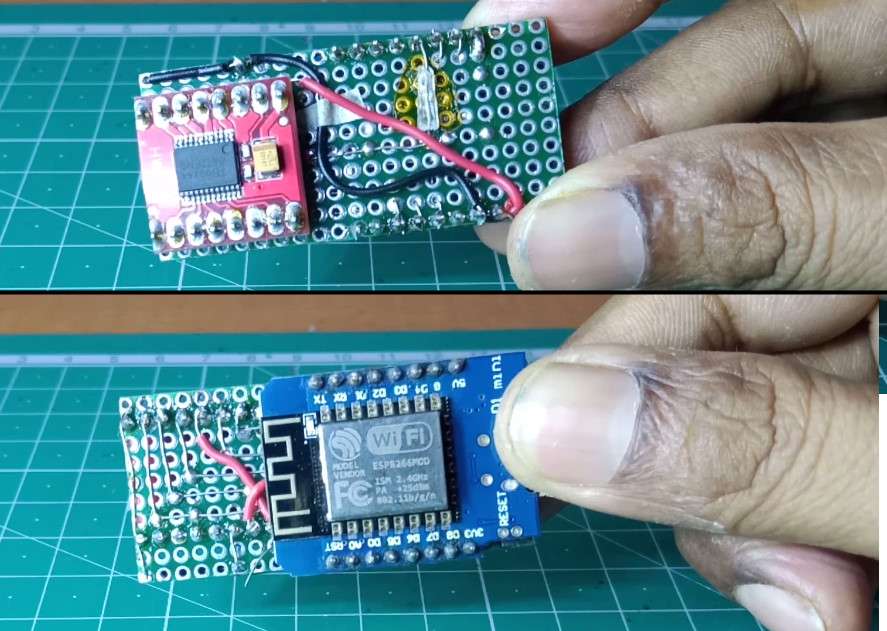
Next step Making the PCB Board.First you need Double Layer PCB Board & cut it according to inner space of the tank. In one side you put D1 Mini & in opposite side put the Motor Driver.& solder it as per the circuit Diagram. And also trim the legs of the components. Next solder wire for motor output & power connection. Power is coming from Lipo Battery to charging module which is used for charging the battery and output from this mod
ule is 5 volt which drives the component & motors of the Tank. Check the video for details instruction.Also 2 Leds are connected parallel to D6 Pin(+) & negative to common ground. Also you need to remove the usb port from charging module & solder wire for getting power 5 volt. Check the video for complete instruction.
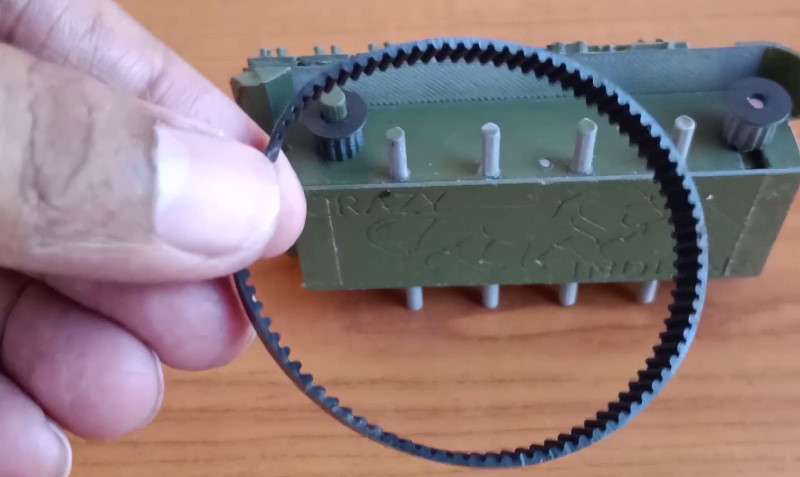
Next Step Making the Tank Belt. I have made 2 set of wheels one is for 6mm GT2 Belt another for 9mm GT2 belt. So print the wheel set according to belt size.Next Cut the belt on middle of the teeth & the belt should't be tight. It should easily fit. After cutting use Feviquick adhesive to fix it & done your belt is ready. Note that 6mm belt is easier to cut then 9mm belt.

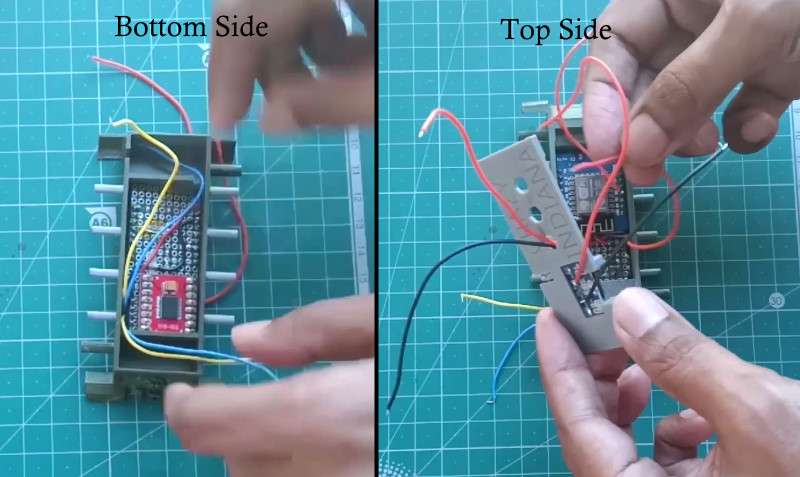
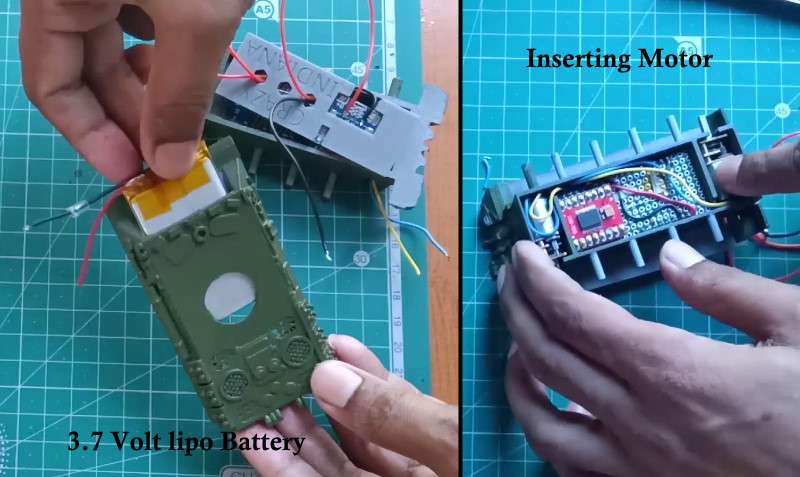
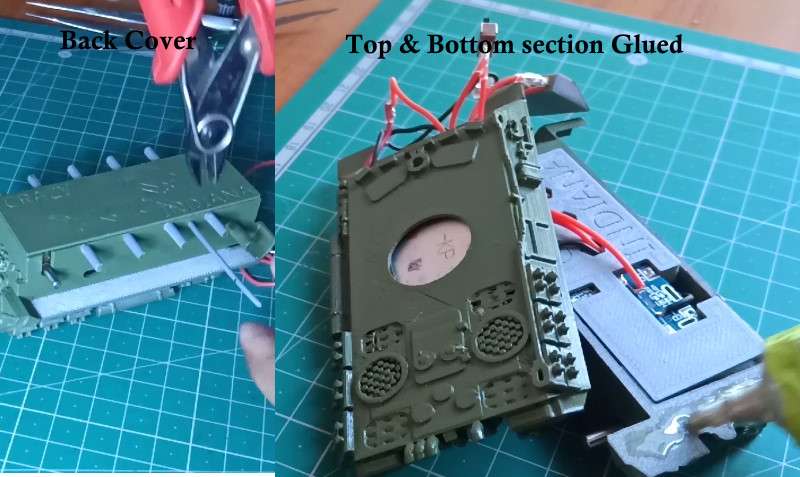
Next Step Assembling the components. Check the video for complete instruction. First insert the PCB Board with components D1 Mini should be facing Top. Then Connect the motor in the back & close the cover . There are no screw you need to put a straw or a 3D Printer filament in the hole & trim the edge so that it doesn't obstruct with wheels. Next insert the charging module with the the 3D printed board it will fit perfectly . Insert the Lipo Battery to the top section & connect it with Charger module.Then connect the 5 volt positive wire(output) from charging module to switch & to power the PCB board.Also connect the Led parallel to D6 Pin(+) & negative to common ground.Next Glue the Tank Top & bottom section together. And Finally insert the Front Module with switch & Led. Next insert the two geared wheels then belt . Finally put the free wheels & the wheel cap with little glue. Place the turret at top of tank done...
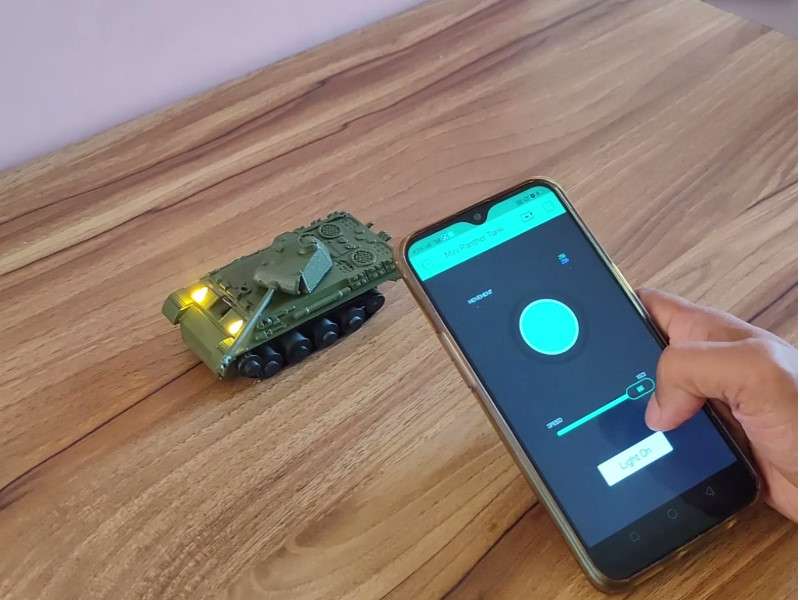
Next Step is Uploading Code.Now download the code below & open Arduino IDE select board D1 mini & upload the code to D1 Mini. Next download & install Blynk to your phone. Make new project & follow the instruction as per the video.

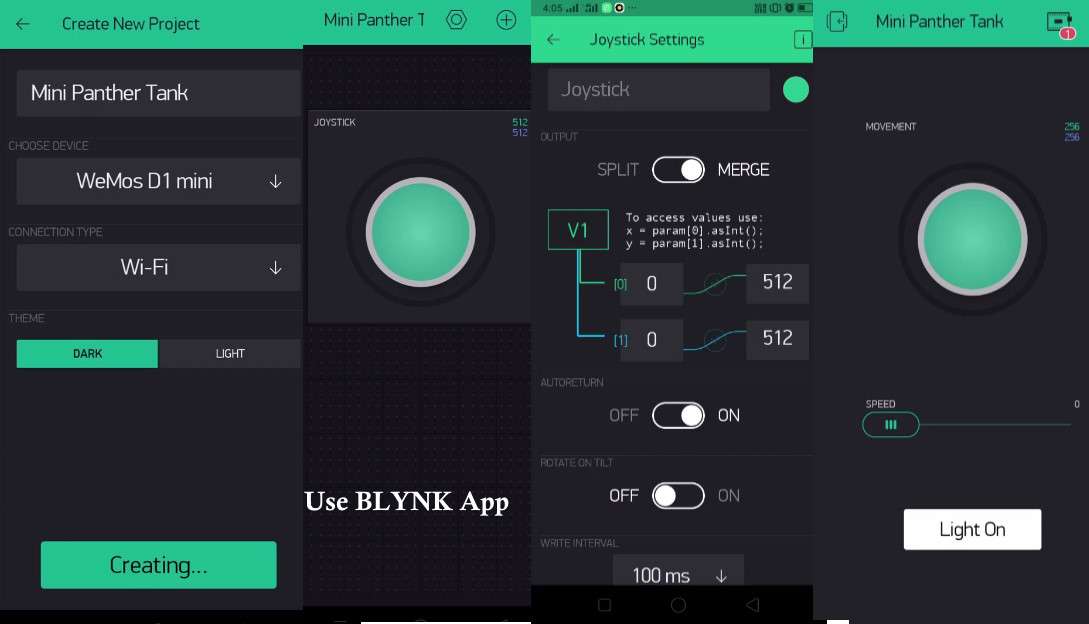
Get Ready To Play. Switch On the Tank . Turn on your Hotspot / Router . Open Blynk App & control the Panther Mini Tank. For more projects check Youtube / Website