

Introduction
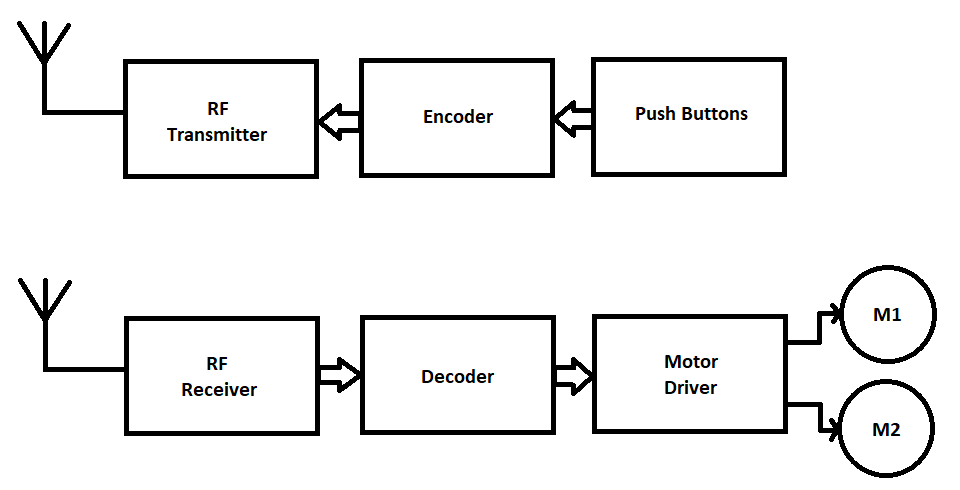
RF controlled robot is controlled by using Four push button placed at transmitter side. Here we only need to push the buttons to control the robot. A transmitting device is used in your hand which also contains a RF Transmitter and a RF Encoder. This transmitter part will transmit command to robot so that it can do the required task like moving forward, reverse, turning left, turning right and stop. All these tasks will perform by using four push buttons that are placed on RF transmitter.
Block Diagram of RF Controlled Robot
Step 1
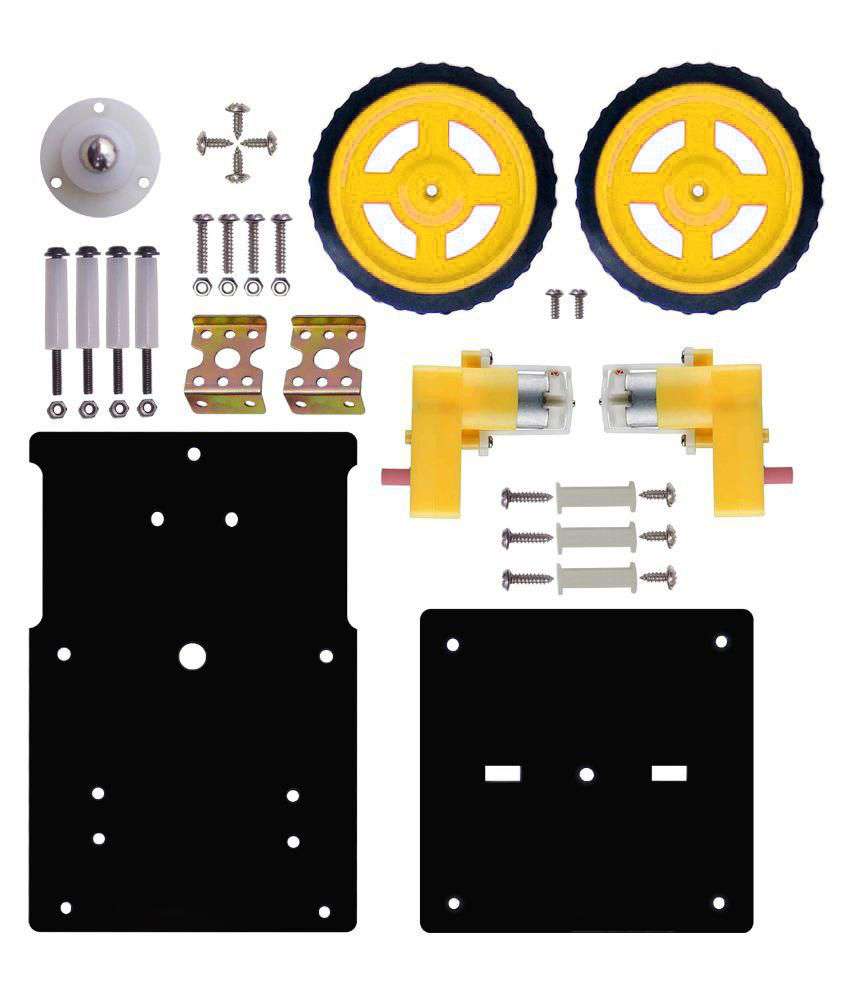
Connect this raw materials
Step 2
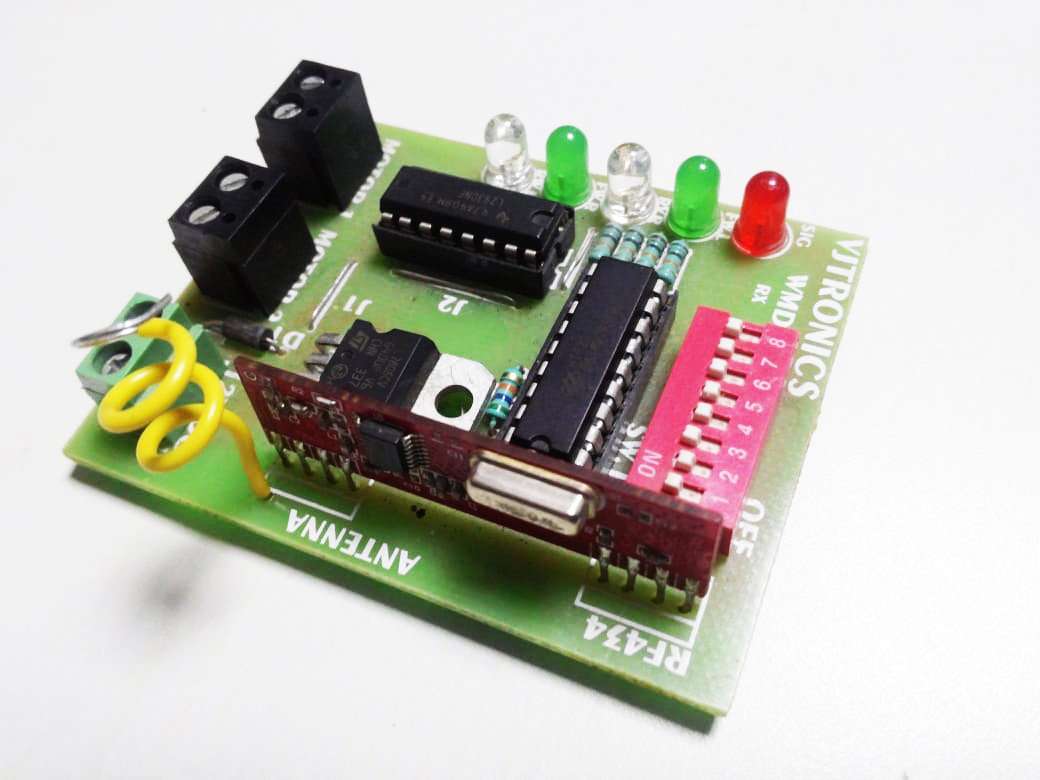
RF 434 MHz:
The RF 434MHz Module is based on ASK transmitter module. This Module is designed specifically for remote-control application. This module is very easy to use and excellent performance, with a low external component count. The RX is designed specifically for remote-control and wireless security receiver operating at 434MHz.
RF 434MHz Transmitter Module:
RF 434MHz Receiver Module
Step3
Connect bow motor connection to the Motor driver L293D. and give the lipo batterys 11.1V supply to the RF Receiver Module Like shown in image below.
Give the 9Volt battery supply connection to the RF Transmitter module.

Now enjoy it!