
Mission:
My mission is to provide sunlight to the trees so that they grow because the trees which are near the wall do not get sunlight, so I have to save them.
Story:
In my garden, there are small trees which are adjacent to the wall of the garden, due to this the trees did not get sunlight properly. Those trees are small and unable to grow, as a nature lover I listen to their problems and decided to save them. So I designed this plant lighter that redirects sunlight to the trees for the optimal amount of time so that they get proper growth and with no harm.
The below image shows the wall which is just in front of my garden which will get sunlight from 14:00 to 17:00. This is an optimal place where I can fit From Shadow to Sunshine system so that it can reflect sunlight from here to the garden.
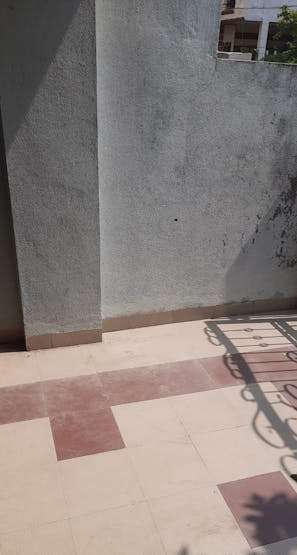
Wall in front of my garden.
The below video shows how the sunlight will be reflected from wall to garden.
https://youtube.com/shorts/QaM8LQ1uvdU?si=AbUTP5JbLdnHay1b
Engineering a Beam of Hope:
What is system?
From Shadow to Sunshine system is a device that runs on electric power, and it redirects the sunlight with the help of a mirror (Shining surface).
.jpeg)
From Shadow to Sunshine system
As you are able to see in the image the Arduino with LDR (Light dependent resistance) is used to detect sunlight, when sunlight is directed on it activates the motor. A motor that is used over here is a servo in the image left side is a servo motor that is capable to handle 9gram of weight which is good for mirror handling and another advantage is the servo allows us to rotate at a specific angle continuously i.e. sweeping. So here From Shadow to Sunshine system will redirect sunlight with the help of a mirror and servo. There is a power bank on the back, it will power Arduino and servo both.
Assembly:
Reflector:
This is having a servo and a U shape aluminum strip attached to it. Then with the help of cardboard and masking tape, I attached the mirror to that U shaped aluminum strip as shown in the image below.
.jpeg)
.jpeg)
Reflector system back and front side view.
The base for the system and components attaching:
I used a cardboard sheet 20x20 cm which will act as a base to carry the whole system. this base is stuck on L shape aluminum strip and a 3mm hole is done in the strip so that it can be attached to the wall.
Then I also gathered all components of the system i.e power bank, Arduino with LDR attached, and reflector.
.jpeg)
This is how I use double-sided tape and masking tape to attach the base on the strip
Then I use double-sided tape to put the components on the board, as shown in the below image
.jpeg)
Attaching components with double sided tape
Then I did cut according to the size of the servo to affix it to the base. As shown below image.
.jpeg)
Cut for servo
Then I mounted it on the wall with the help of a 3 mm drill and screw.
.jpeg)
From Shadow to Sunshine system mounted on the wall
Circuit and Code:
The circuit connection is shown in the schematic diagram, check the attachment where I attached LDR on Analog input 0 of Arduino. And servo on D9 pin which is PWM pin of Arduino. The below image shows the flow chart of code and the code is attached in the code section check it below.
.jpeg)
Flow chart of From Shadow to Sunshine system
Working Video:
The below video shows how the plants are saved now.
https://youtube.com/shorts/6kWoW8uVYfA?si=jA02cbGphvH2C91q
here in mirror you can se reflected image of garden and also in garden reflected sunlight from mirror to garden is there.
Key Takeaways:
- This project showcases a clever solution to a common gardening problem.
- It highlights the importance of sunlight for plant growth.
- It demonstrates the potential of Arduino and robotics in creating eco-friendly solutions.