Project Overview:
This project presents an autonomous UV-C disinfection robot designed to revolutionize sanitation procedures in hospital isolation wards. It leverages the proven germicidal power of UV-C light to effectively eliminate pathogens on surfaces and in the air, minimizing the risk of hospital-acquired infections (HAIs) and protecting healthcare workers.
Key Features:
Autonomous Navigation: Utilizes line following and obstacle detection algorithms for self-directed movement within isolation wards.
a. 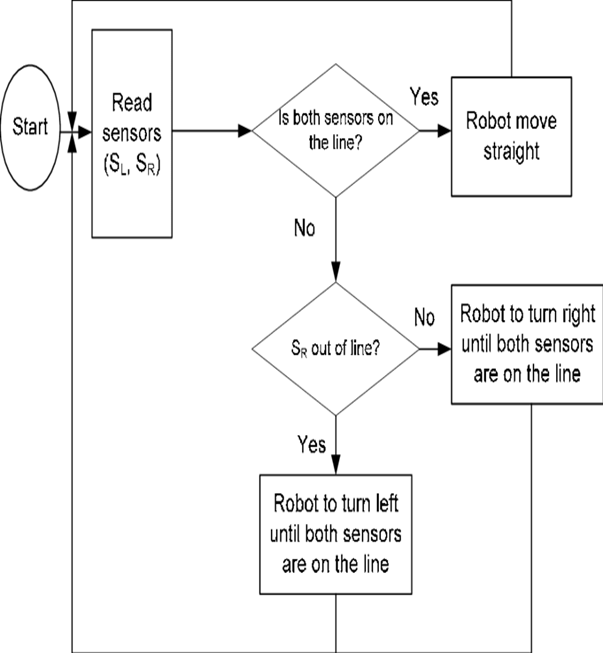 b.
b. .png)
Algorithm for (a)path following , (b) obstacle avoidance
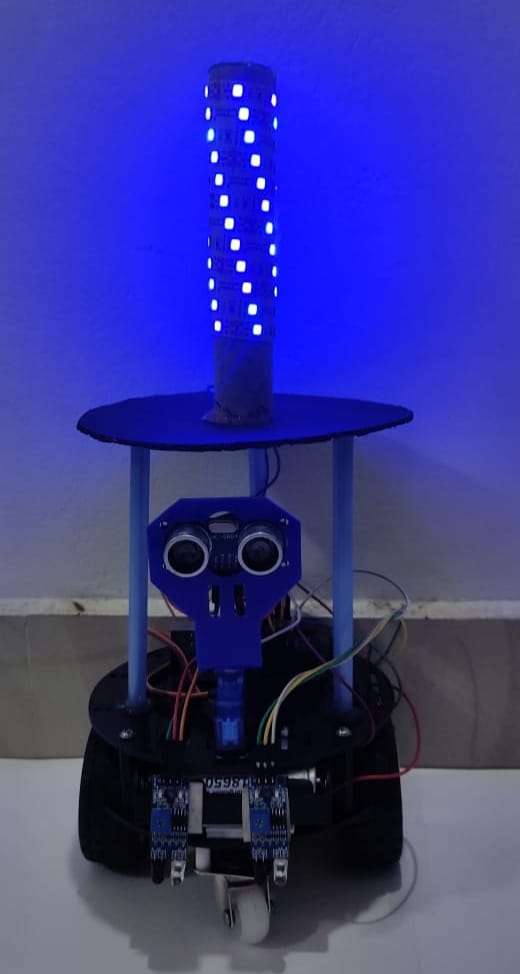
UV-C Disinfection: Placed UV-C lamps on top of robot to deliver 360-degree disinfection, ensuring comprehensive elimination of microorganisms.
note: UV-C rays are harmful for human body so I have used led light strip in a lamp model structure to represent the UV-C in this prototype as a demonstration purpose.
Arduino Uno Control: Sensor integration, and decision-making are handled by an Arduino Uno microcontroller.
Sensors: I have used obstacle avoiding method in my robot prototype so that this robot can detect obstacles and disinfect the obstacles surface. Also used path following methods for easy navigation.
Building the Robot:
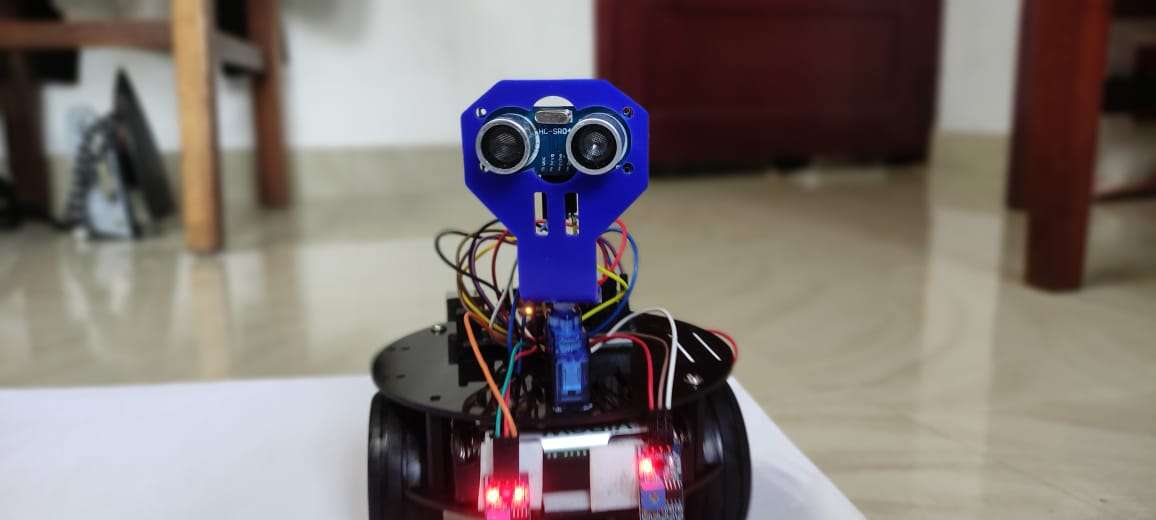
Initial prototype of robot model
.jpg)
Hardware Components:
Arduino Uno microcontroller
L298N motor driver
UV-C lamps
Infrared and ultrasonic sensors
Motors, wheels, Chassis
Software Development:
The robot is programmed using Arduino IDE.
The code include line following and obstacle detection algorithms for autonomous navigation.
Sensor integration and control functionalities are implemented within the codebase.
// CODE FOR PATH FOLLOWING

distance_F = Ultrasonic_read();
Serial.print("D F=");Serial.println(distance_F);
 if((digitalRead(R_S) == 0)&&(digitalRead(L_S) == 0)){
  if(distance_F > Set){forword();}
                  else{Check_side();}
 }
else if((digitalRead(R_S) == 1)&&(digitalRead(L_S) == 0)){turnRight();}
else if((digitalRead(R_S) == 0)&&(digitalRead(L_S) == 1)){turnLeft();}
delay(10);
}
void servoPulse (int pin, int angle)
{
 int pwm = (angle*11) + 500;
 digitalWrite(pin, HIGH);
 delayMicroseconds(pwm);
 digitalWrite(pin, LOW);
 delay(50);
}
// CODE FOR OBJECT AVOIDANCE

long Ultrasonic_read() {
  digitalWrite(trigger, LOW);
  delayMicroseconds(2);
  digitalWrite(trigger, HIGH);
  delayMicroseconds(10);
  long time = pulseIn (echo, HIGH);
  return time / 29 / 2;
}
void compareDistance() {
   if(distance_L > distance_R)
  {
    turnLeft();
    delay(500);
    forword();
    delay(600);
    turnRight();
    delay(500);
    forword();
    delay(600);
    turnRight();
    delay(400);
   }
  else
 {
   turnRight();
   delay(500);
   forword();
   delay(600);
   turnLeft();
   delay(500);
   forword();
   delay(600);
   turnLeft();
   delay(400);
  }
}
void Check_side() {
    Stop();
    delay(100);
 for (int angle = 70; angle <= 140; angle += 5)
{
   servoPulse(servo, angle);
 }
    delay(300);
    distance_R = Ultrasonic_read();
    Serial.print("D R=");Serial.println(distance_R);
    delay(100);
  for (int angle = 140; angle >= 0; angle -= 5)
 {
   servoPulse(servo, angle);
  }
    delay(500);
    distance_L = Ultrasonic_read();
    Serial.print("D L=");Serial.println(distance_L);
    delay(100);
  for (int angle = 0; angle <= 70; angle += 5)
 {
   servoPulse(servo, angle);
  }
    delay(300);
    compareDistance();
}

void forword()
{
digitalWrite(in1, LOW);
digitalWrite(in2, HIGH);
digitalWrite(in3, HIGH);
digitalWrite(in4, LOW);
}
void backword()
{
digitalWrite(in1, HIGH);
digitalWrite(in2, LOW);
digitalWrite(in3, LOW);
digitalWrite(in4, HIGH);
}
void turnRight()
{
digitalWrite(in1, LOW);
digitalWrite(in2, HIGH);
digitalWrite(in3, LOW);
digitalWrite(in4, HIGH);
}
void turnLeft()
{
digitalWrite(in1, HIGH);
digitalWrite(in2, LOW);
digitalWrite(in3, HIGH);
digitalWrite(in4, LOW);
}
void Stop()
{
digitalWrite(in1, LOW);
digitalWrite(in2, LOW);
digitalWrite(in3, LOW);
digitalWrite(in4, LOW);
}
Full code is given below.
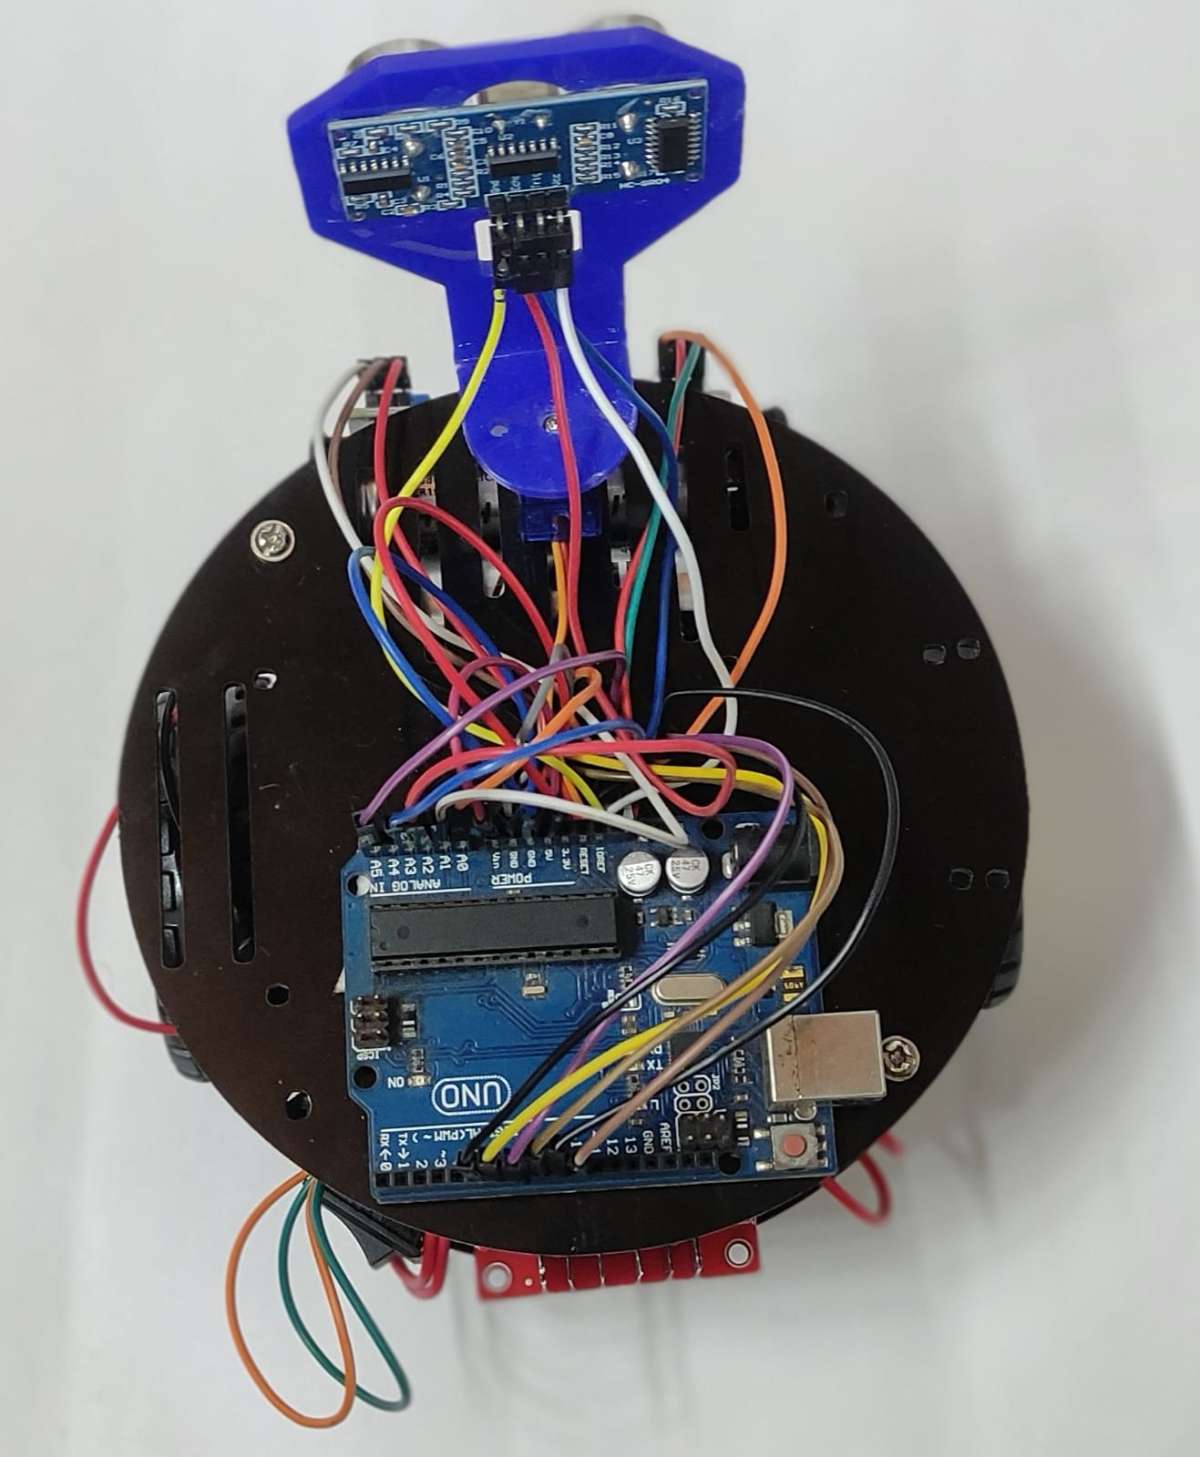
Assembly and Testing:
The robot is assembled using the selected hardware components according to the design
The code is uploaded to the Arduino Uno microcontroller.
Many testing is conducted to ensure proper functionality of movement, obstacle detection, and UV-C lamp operation.
Simulation:
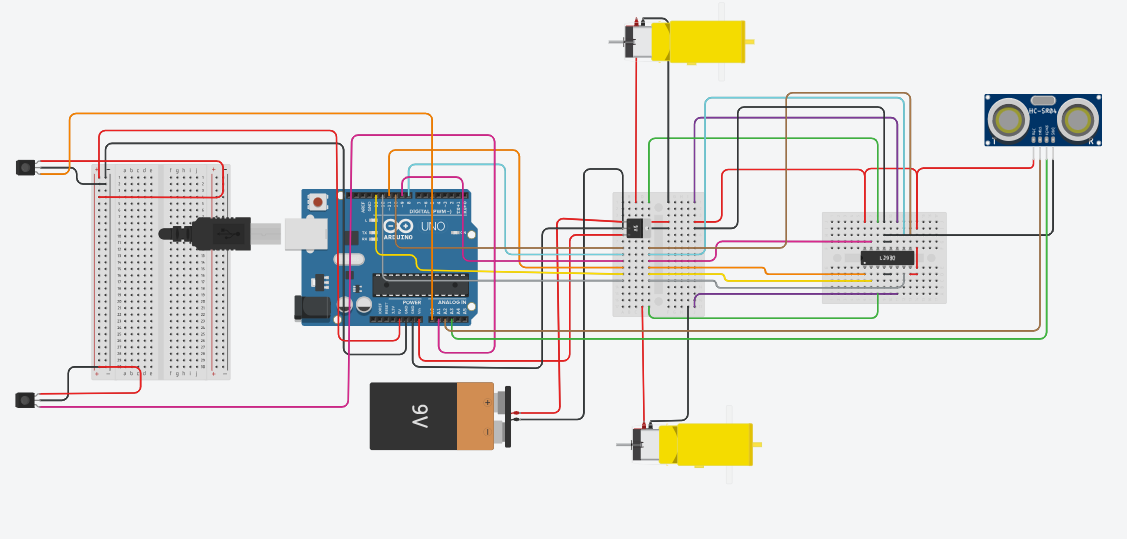
Simulation using Tinker CAD
Assembling components:

Testing:
.jpeg)
Initial Design
 1.png)
Usability Testing
 1(0).png)
Iterated Design
 1.png)
FINAL PRODUCT