


Need of the project
As we are aware that, a large number of young individuals stay away from their home for higher education, jobs & other stuff.

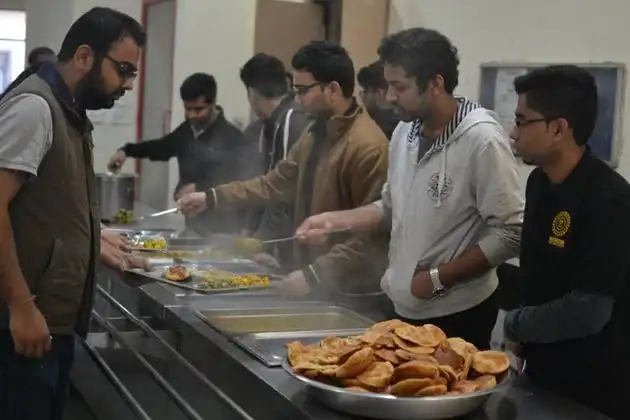
We often imagine how working individuals are busy in their hectic daily schedule, meanwhile they tend to get exhausted while returning from their jobs and then end up buying online food which is quite expensive or in some cases unhealthy too.

Same applies to Hostellers or abroad studying college students who have to either make their own food after returning from a tiresome day from their college or have to depend on mess for breakfast or brunch.
But it is costly and unhealthy to eat online food or stale food at mess.
Thus, we decided to research and work on a project using which we can overcome this problem.
Hence, we came up with an ideation of automating this cooking process, so that every individual can enjoy homemade food which will eventually be prepared by a robot in a hygiene surrounding.
Also, we took it to the next step by accepting the challenge to start the cooking process by accepting command through Google Assistant and serving the food hot when the respective person reaches home.
Implementation
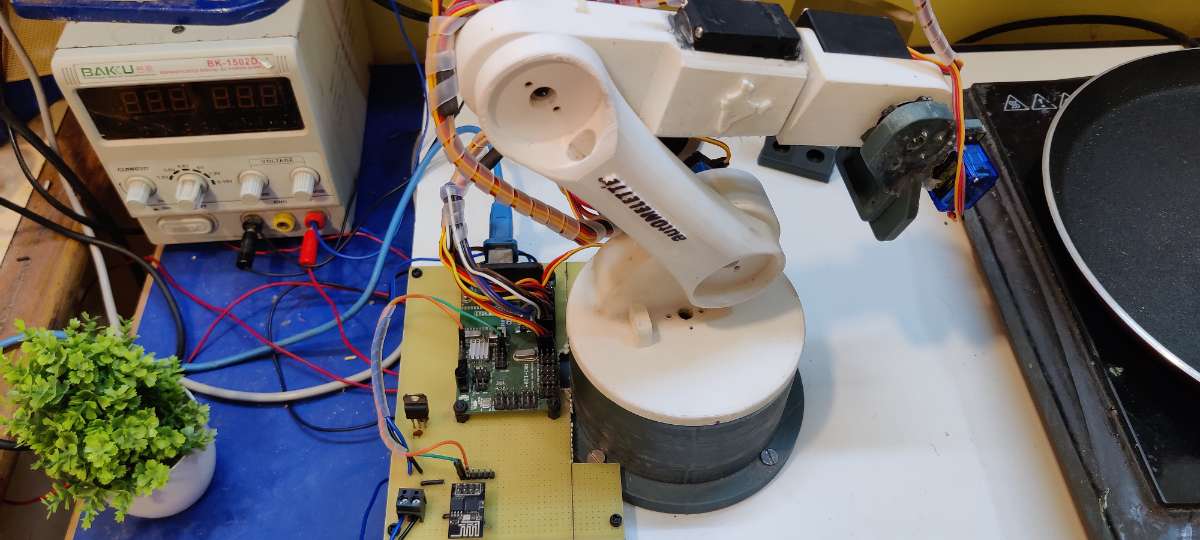
First, we did research on this project including its need, components requirement and its overall budget. Then we designed the 3D parts of the robotic arm using a reference model. After thoroughly checking the dimensions of arm we built a “. step” file of the design.
Then this file was sent to the local 3D printing service provider for printing the designed parts, as our system must deal with lot of heat so we used ABS material for printing.
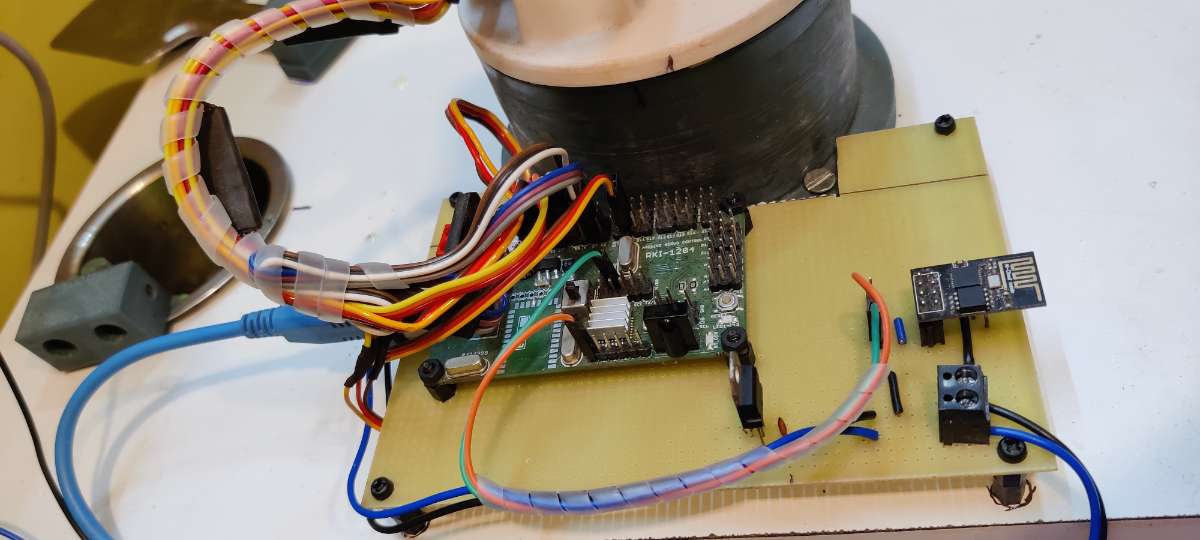
Meanwhile we designed the circuitry using Easyeda software.
On arrival of 3D printed parts all the parts were assembled. We also attached the servos to their respective positions on the Arm.
We interfaced the controller and servos using cables and then we went on with the programming of Arm as per the cooking process.
We also interfaced an esp01 with the controller for commanding the cooking process remotely using the concept of Geo location tracking.
We accepted the command through Google Assistant and triggered the controller whenever the person enters a predefined radius making it possible to serve hot food until the person reaches home.
Flow of operations -
1) ARM at initial position - Start.
2) Move the ARM at the position of Oil brush.
3) Lock the stack of Oil brush.
4) Pick the Oil brush and place on the pan.
5) Move the Oil brush in the predefined zig-zag manner to spread the oil.
6) Pick the oil brush upwards and move it towards its inital place.
7) Unlock the stack of Oil brush.
8) Move the Arm towards pre extracted Egg Yolk and Albumen vessel.
9) Lock the stack of ladle and pick it a few cms in upward direction.
10) Hold it at the same postion for few seconds.
11) Move the Arm over the pan.
12) Move the Wrist of arm 180 degree in clockwise direction.
13) Hold for few secods.
14) Move the Wrist of arm 180 degree in anti clockwise direction.
15) Move Arm towards the vessel and place the ladle at its initial position.
16) Unlock the stack of ladel.
17) Move Arm to its initial position.
18) Wait for 2 minutes.
19) Move the Arm towards stack of Spatula.
20) Lock the stack of spatula.
21) Pick the spatula and place upon pan.
22) Move the Arm forward on the pan to pick the cooked Omelette.
23) Pick the Omelette.
24) Move arm towards plate.
25) Tilt downwards to drop the omelette.
26) Arm at initial position - Stop.

Hard and Software Selection
Hardware Selection -
Motors Selection -
While designing we considered stepper Motors as our first preference as the required torque was high, but these are quite bulky and robust, which results to huge cost of motors, also it was not possible to design an arm consisting of stepper motors with low budget. Thus, we went for Servo Motors which would go in our budget.
We have selected 3 * 20 Kgcm high torque motors from which 1 motor is at the base for 1st axial rotation of the arm and other 2 motors are used for 2nd and 3rd axial movement of upper and lower arm.
2 * 10Kgcm is used for axial movement of wrist of the Arm.
One 2Kgcm motors is used for locking mechanism of attachable equipment like Spoon, Oil brush and Spatula.
Controller Selection -
At the beginning, we selected Arduino Uno as our main control board, but it was not feasible to control the positions of arm in real-time which would also take large amount of time for programming the same.
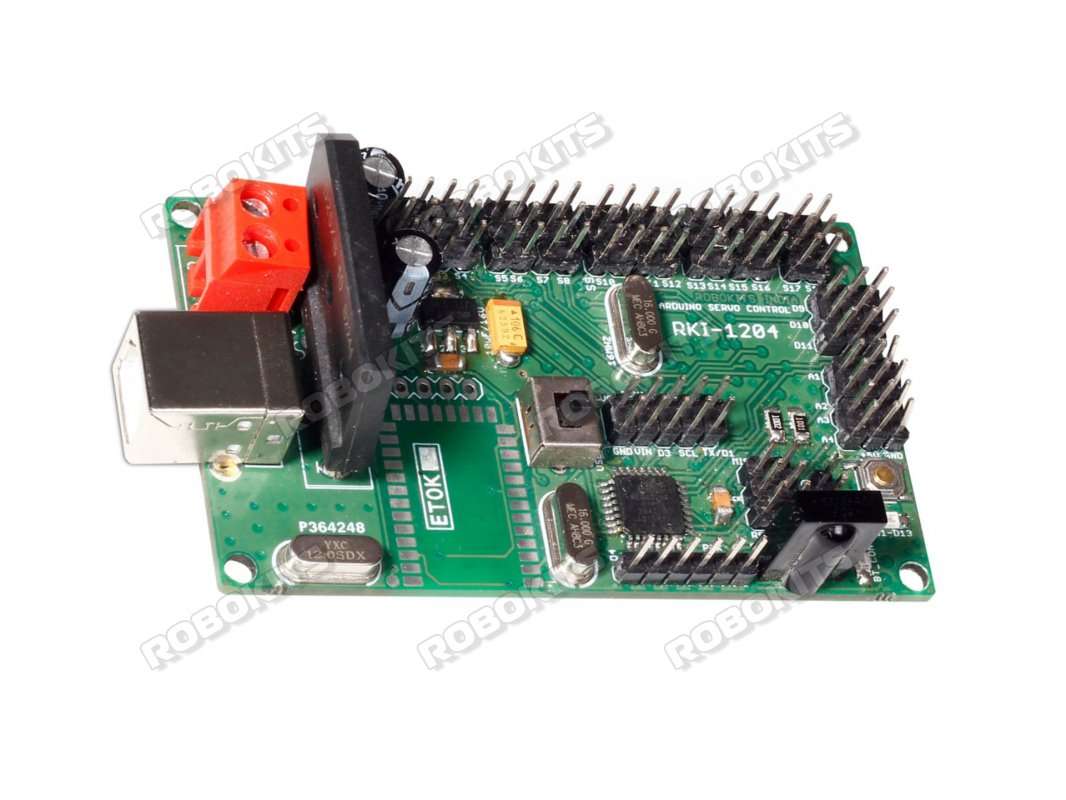
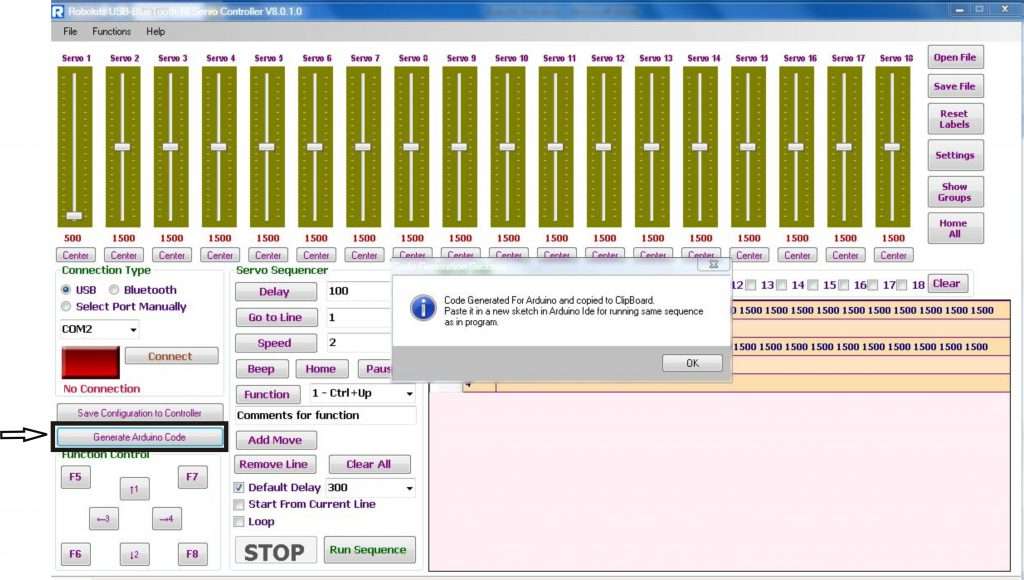
Thus, we changed to ARDUINO UNO BASED USB 18 SERVO CONTROLLER which consist of Onboard ATMEGA 328p chip with I2C interface for up to 18 servos. This board was easy to program with a GUI for controlling each servo in real-time which eventually saved our time for programming.
Also, an ESP8266-01 is interfaced with this controller board for communication with ADAFRUIT cloud.
Whenever the order is placed by user the ESP sends signal to controller to begin the cooking process.
Software Selection -
Solidworks –
We found the best software till now for creating 3d models is SolidWorks, Hence as we were familiar with it since diploma, we choose solid works as main.
Easyeda –
It is used for building the schematic diagram of our system.
Robokit servo controller software –
It is GUI used to control servos in realtime.
Arduino IDE -
It is an Integrated Development Environment software used to compile and upload codes to any Arduino boards.
Google Assistant –
It is an artificial intelligence powered virtual assistant developed by Google which can take commands or questions (commands for our project) and respond to it accordingly. In our project it triggers the IFTTT on saying – “Hey Google” and then “Prepare an omelette i am hungry” command.
IFTTT –
We have used it as a mediator between Google Assistant and Adafruit service. Whenever the Google Assistant receives a predefined command, it triggers the IFTTT which in turn triggers the adafruit io button. Also, we have used the geo location tracking service to trigger the adafruit button when the user enters a predefined area.
Adafruit IO –
It responds to the trigger of IFTTT by setting the button as HIGH which is further read by ESP01 which is constantly observing the state of buttons.
Circuit Diagram
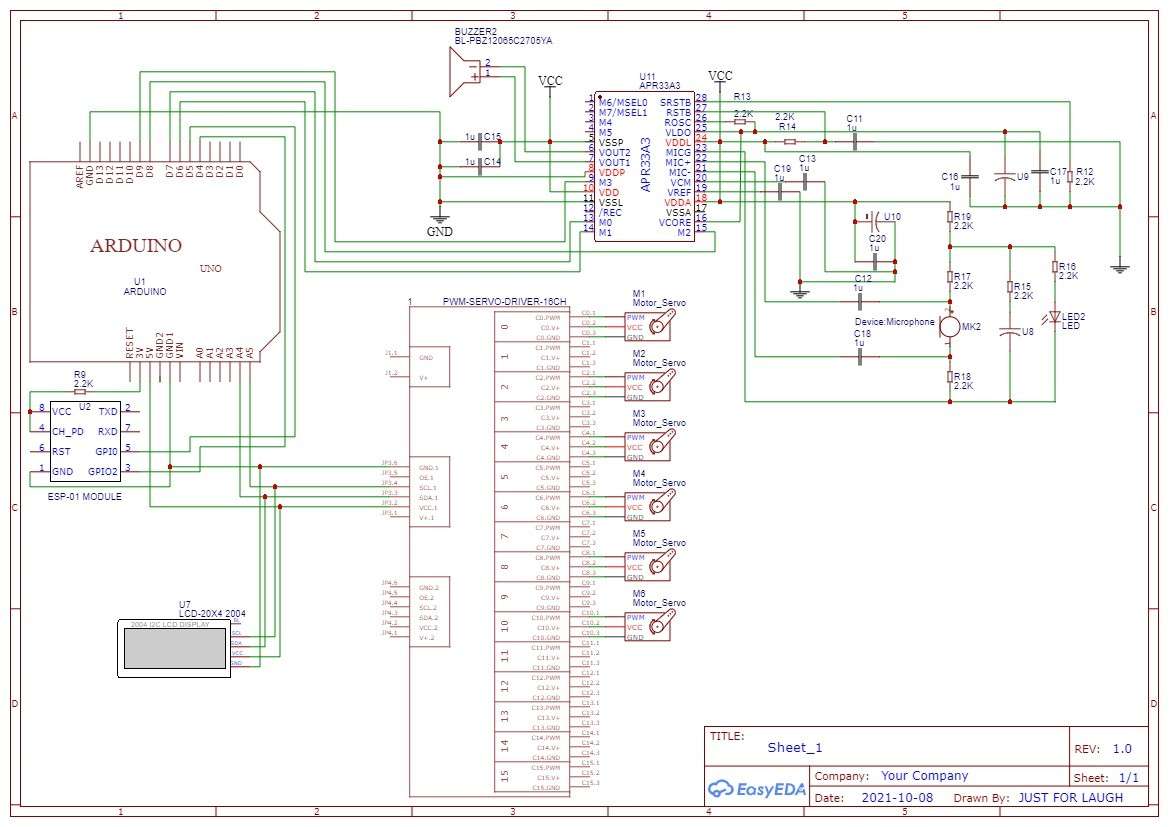
Explanation
All the servo motors are connected to Arduino via servo control board. But we have used Arduino Uno Based USB 18 Servo Controller board practically which is capable of interfacing servos.
Esp8266-01 controller is used to for IOT part of our project, the GPIO 2 pin is connected to D4 pin of Arduino. The pin is high when esp01 receives command from adafruit io which is read by Arduino and further cooking processes are carried out.
In order to provide a good user experience an LCD and Voice playback module can be interfaced with the controller.
LCD will display the current cooking process being carried out and also the time remaining to complete the cooking process.
An APR33A3 Voice Record & Playback Module can be used to provide audio playback of the cooking process being carried out, also it can inform user after the completion of cooking process.