If you need to add functions like my robot
- Ai asistant
You need Xiaozhi.me
2. Bt control
3. Obstacle avoiding
4. Automatic leds
5. For battery level indicator no code is needed you only have to connect it from battery and for other functions like 2.,3., and 4. You need code which is this
#include <AFMotor.h>
#include <SoftwareSerial.h>
SoftwareSerial BT(2, 3);
AF_DCMotor leftMotor(1);
AF_DCMotor rightMotor(2);
#define TRIG_PIN A2
#define ECHO_PIN A3
#define LDR_PIN A0
#define LED_PIN 12
String command = "";
// ---------- ULTRASONIC ----------
long getDistance() {
digitalWrite(TRIG_PIN, LOW);
delayMicroseconds(2);
digitalWrite(TRIG_PIN, HIGH);
delayMicroseconds(10);
digitalWrite(TRIG_PIN, LOW);
long duration = pulseIn(ECHO_PIN, HIGH, 30000);
if (duration == 0) return 999;
return duration * 0.034 / 2;
}
// ---------- MOTOR CONTROL ----------
void stopRobot() {
leftMotor.run(RELEASE);
rightMotor.run(RELEASE);
}
void forwardRobot() {
leftMotor.setSpeed(180);
rightMotor.setSpeed(180);
leftMotor.run(FORWARD);
rightMotor.run(FORWARD);
}
void backwardRobot() {
leftMotor.setSpeed(180);
rightMotor.setSpeed(180);
leftMotor.run(BACKWARD);
rightMotor.run(BACKWARD);
}
void turnLeft() {
leftMotor.setSpeed(180);
rightMotor.setSpeed(180);
leftMotor.run(BACKWARD);
rightMotor.run(FORWARD);
}
void turnRight() {
leftMotor.setSpeed(180);
rightMotor.setSpeed(180);
leftMotor.run(FORWARD);
rightMotor.run(BACKWARD);
}
// ---------- SAFETY STOP ONLY ----------
void safetyStop() {
if (getDistance() <= 20) {
stopRobot();
}
}
// ---------- LIGHT CONTROL ----------
void lightControl() {
int ldrValue = analogRead(LDR_PIN);
if (ldrValue < 200)
digitalWrite(LED_PIN, HIGH);
else
digitalWrite(LED_PIN, LOW);
}
// ---------- SETUP ----------
void setup() {
Serial.begin(9600);
BT.begin(9600);
pinMode(TRIG_PIN, OUTPUT);
pinMode(ECHO_PIN, INPUT);
pinMode(LED_PIN, OUTPUT);
stopRobot();
}
// ---------- LOOP ----------
void loop() {
// ---------- BLUETOOTH CONTROL ----------
while (BT.available()) {
char c = BT.read();
if (c == '\n' || c == '\r') {
command.trim();
if (command == "forward") {
forwardRobot();
}
else if (command == "backward") {
backwardRobot();
}
else if (command == "left") {
turnLeft();
}
else if (command == "right") {
turnRight();
}
else if (command == "stop") {
stopRobot();
}
command = "";
}
else {
command += c;
}
}
// ---------- SAFETY SYSTEM ----------
safetyStop();
// ---------- LIGHT ----------
lightControl();
}Here its function video of robot
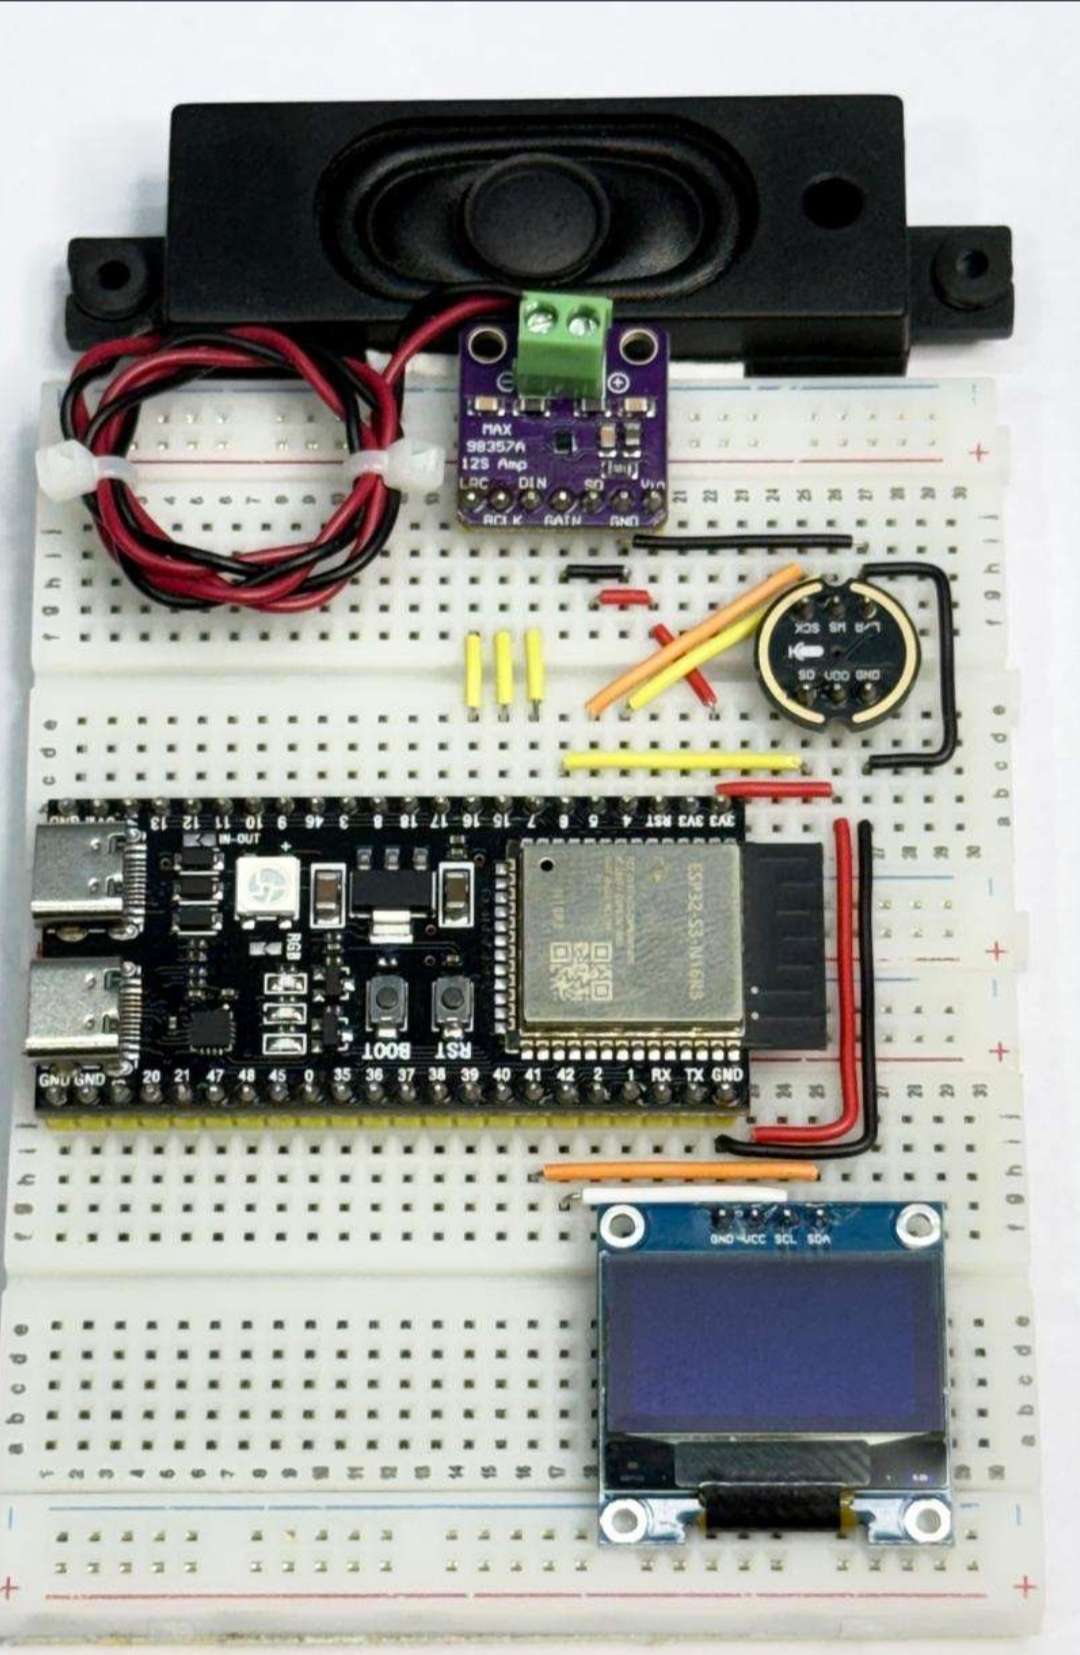
Here is the wiring image of ai asistant
Sorry but when i click this image some components is not connected and speaker is another sorry for that
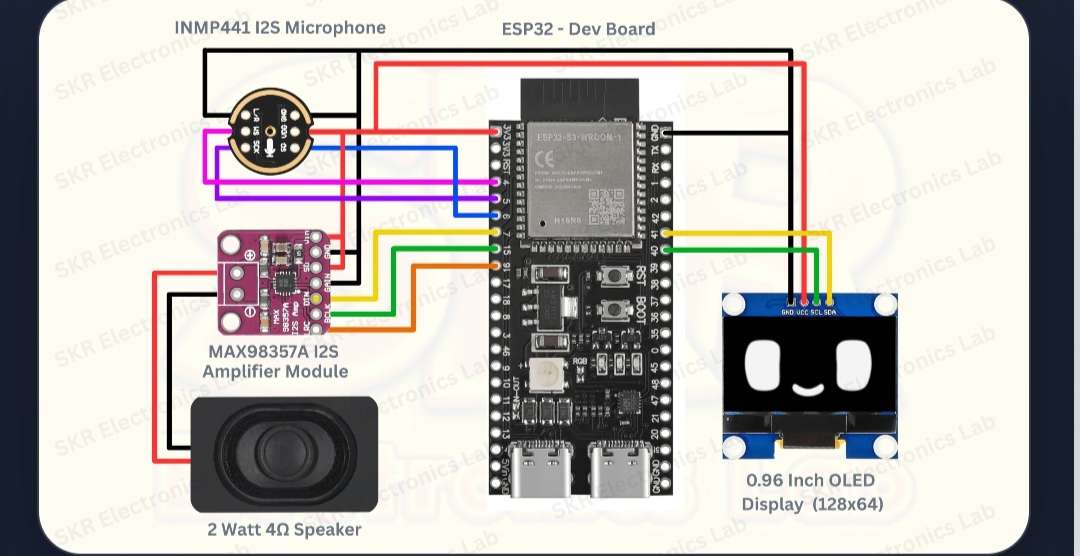
Here is the ai asistant wiring diagram
Sorry but another functions images is not available so sorry for that .
I used many jumper wires m-m, m-f, f-f
I used many sticks of hot glue gun
And i used soldering iron and its wire.