
How To Make AirTag Using Your NodeMCU:-
Introduction:-
Hi everyone this me Rohan welcome back with Another Project In this project I have talked about how you can make your own AirTag by yourself?
Story:-
So I got the inspiration to make this thing after the apple event of 23 April 2021 in which apple company launched one of their product which is named as AirTag. When it was launched, after that I searched about it on the internet and I came to know that it is a button like device under which you can find your keys or your stuffs and you can also keep it in your wallet or purse like a key ring and like a coin. After that I searched more about it and on searching I came to know that when we click on play sound button, it produces a sound due to which we find that lost thing. So after that I thought why not make it from NodeMCU. So then I worked on it and I succeeded in it too. And now I want to tell you all how I made this. So here we go then,
Step1:-
So as you have seen what is needed to make it, but I will tell you once again. So first you need NodeMCU Esp8266 Board .Now some of you might be thinking that why only NodeMCU because it already has Wi Fi module, so then you need Piezo Buzzer Jumper Wires (breadboard) it is optional if you want, you can use it otherwise you can also do soldering.
Step2:-
Now we will see how to connect it, So the negative wire of the buzzer will go to the GND pin and positive wire will go to the D8 pin you can use any data pin. just change the pin number in the code.

Step3:-
Now you have to download the Blynk App So Blynk was designed for the Internet of Things. It can control hardware remotely, it can display sensor data, it can store data, visualize it and do many other cool things.
Step4:-
After Downloading the Blynk app all you need is to login to the app via Google or Facebook or you can also create an account on that platform
Step5:-
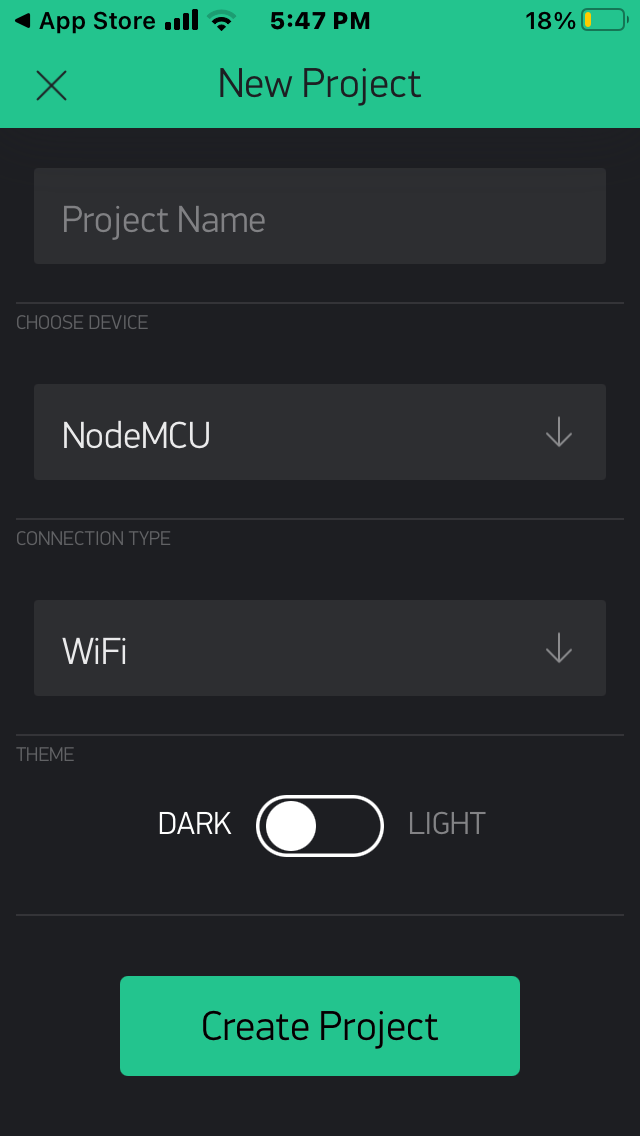
After that click on new project then a pop menu will appear And it will be written that the auth token has sent to your email id.

Step6:-
you have to paste that to your code in the auth part
Step7:-
now in the app, as So when you click on a new project on your app one more thing will ask in which you have to select your board as well as connectivity you have to keep nodemcu inboard and Wi-Fi in connectivity
Step8:-
Then you have swipe the screen from right to left, a menu will appear, in that you will get different widgets, you have to choose the button from them.
Step9:-
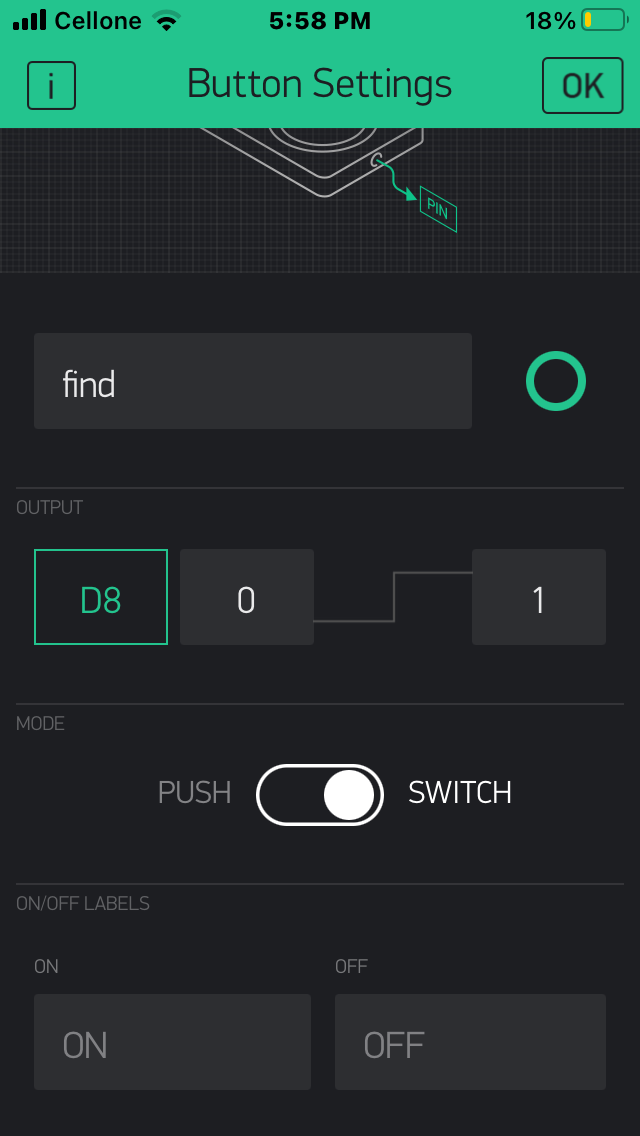
Now tap the button you have added once, in that you have to select the pin of the button in which your buzzer is connected, you will see the pin part in the output section, after that you have to select "switch" instead of "Push" and keep one thing in mind that while selecting the pin Let it be digital, don't change it and if you want, you can also change the name of the button.
Step10:-
Upload the code to NodeMCU make sure you have entered your SSID which name of your Wi-Fi and the Password of your hotspot and also add your Auth Token After that click on the play icon if there is any exclamation like that it means your Board is not connected so for that check it once
Step11:-
After all these things now connect your AirTag with your any object you can also call it Minitag as it is my version
You Can Also Watch This Video If you want to understand:-