
Object detection models are vital for many computer vision applications. They can show where an object is in a video stream or allow you to count the number of objects detected. But they’re also very resource-intensive— models like MobileNet SSD can analyze a few frames per second on a Raspberry Pi 4, using a significant amount of RAM. This has put object detection out of reach for the most interesting devices: microcontrollers. Microcontrollers are cheap, small, ubiquitous, and energy-efficient—and are thus attractive for adding computer vision to everyday devices. But microcontrollers are also very resource-constrained, with clock speeds as low as 200 MHz and less than 256 Kbytes of RAM—far too little to run complex object, detection models. But… that has now changed! We have developed FOMO (“faster objects, more objects”), a novel DNN architecture for object detection, designed from the ground up to run on microcontrollers.

Live Classification
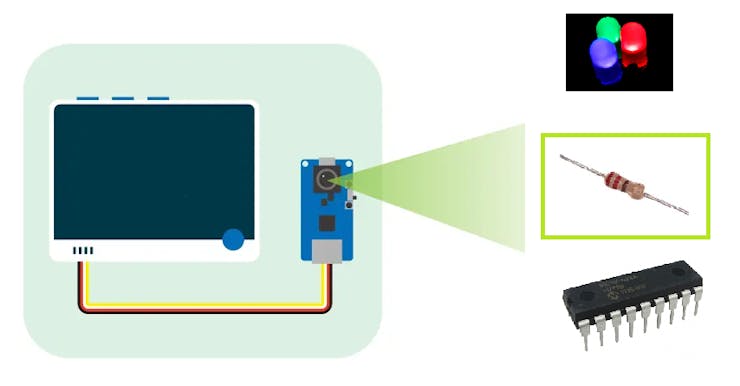
Sensor & Block Information
- Camera module with input images 160 x 160 pixels - An image block to normalize the image data, and reduce the colour depth to grayscale
- FOMO transfer learning block-based on MobileNetV2 0.35
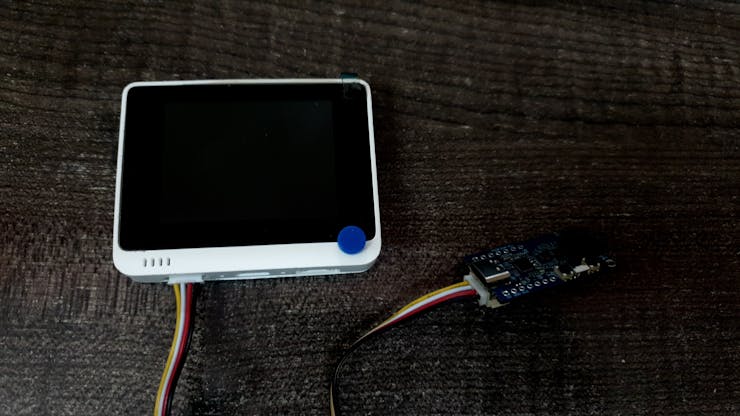
Hardware Build
We will be deploying the edge impulse model on the Seeed Grove AI & Wio Terminal.
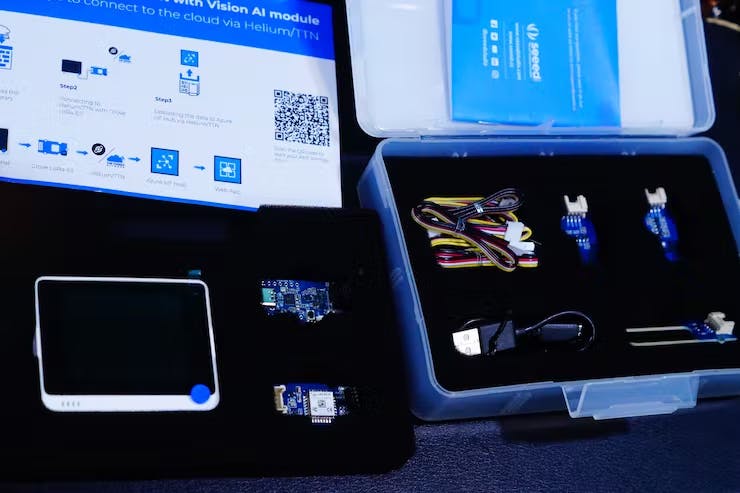
The Hardware is designed to distinguish between resistors, LED, and ICs with the trained object detection model.
Data Collection
To collect the data, we need to connect a device that can collect the images. For this project, we will be using Android mobile. Click on the Devices tab, and connect the mobile using the QR code.
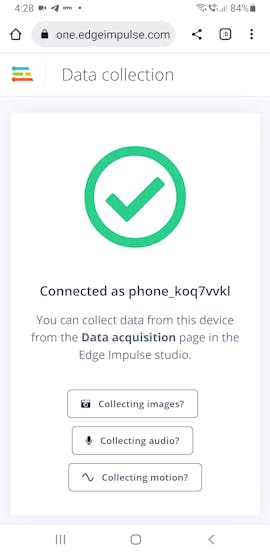
Connected to mobile
Now select the Label as IC, LED, and Resistors respectively, and click the Capture button to collect the image data.
 |  |  |
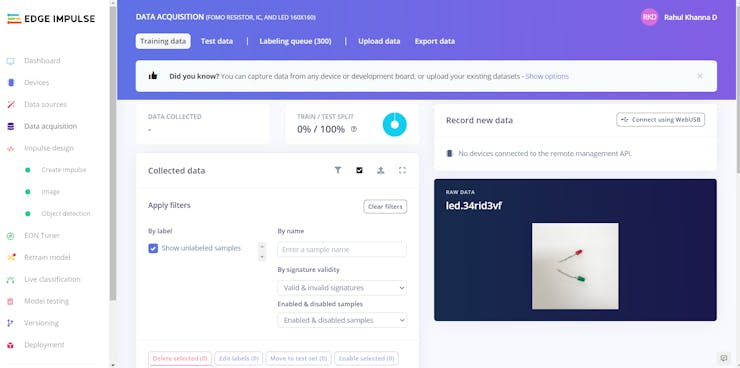
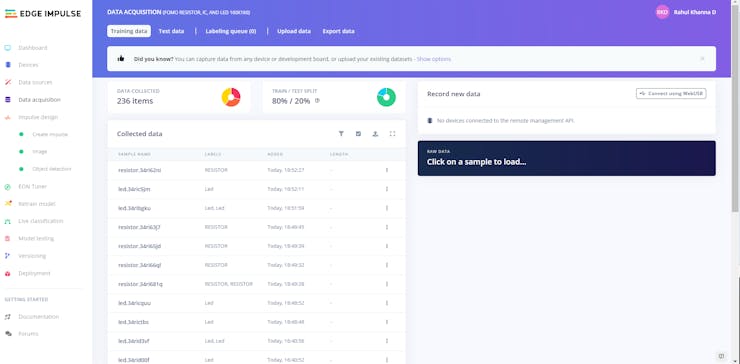
Data acquisition
Design an impulse
Now we had collected the dataset for Training and Testing. We use 80% of the data for training and the rest 20% of the data for testing the model.
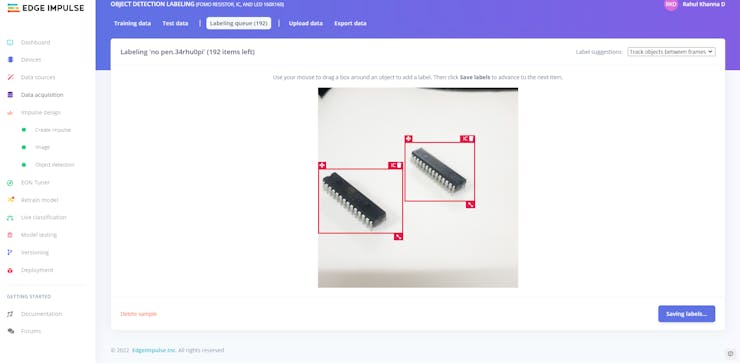
Now we have to label the data on the images as shown below.
 |  |
We correct the data collected to 80% train and 20% test split by moving the data from train to test dataset or vice-versa. In this example, we have got an 80% / 20% split here.
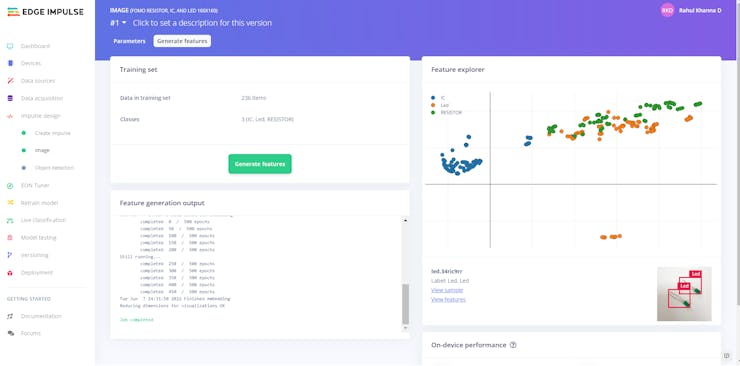
Next, we create an impulse by selecting the Image data, processing block, learning block, and output features.
- We have used 160x160 images
- Add Image processing block
- Add the learning block generated from the previous steps
- We have 3 output features (IC, Led, Resistors)

Next, we generate features by clicking the GenerateFeatures button. This takes a few seconds to generate the features. Feature explorer explains the relation between the three features ( IC, Led, Resistor).
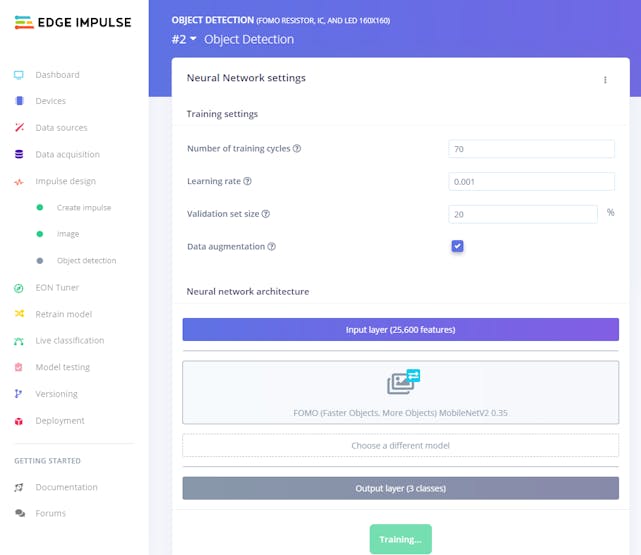
We set the parameters as shown below. Once the Training settings, click on the Training button to start training the model.
We can see the training output once the training is done. The training output explains the confusion matrix, Inferencing time, RAM usage, and Flash usage. The confusing matrix has TP, TN, FP, and FN for the features (LED, Resistor, and IC).

From the above training output, we can find the F1 score as 96.7% for the quantized (int8) model which is a decent output of an object detection model. The Flash usage is 77.6K which can be deployed to an edge device easily.
Setting up the Hardware
Connect the Grove AI to the Wio Terminal as shown below
We will be generating the uf2 model file from the TensorFlow lite model. Refer to the yolov5_swift Github repo to know more. Double-click the BOOT button to upload the model. Drag and drop the model into the Grove AI drive.

Once the model is uploaded, the upload object detection code to the Wio Terminal. Now let's test the functioning.
Deploy
Now let's deploy and test them on the phone. Click on the Deployment and click on connect to mobile phone tile. Scan the QR code shown using the scanner on the mobile camera.

Once the classifier is loaded on the mobile, the inferencing is done on edge as shown below.

Stick the camera to the Wio Terminal as shown below.

If you face any issues building this project, please ask me. Please do suggest new projects that you want me to do next.
Give a thumbs up if it helped you and do follow my channel for interesting projects. :)
Share this video if you like.
Github - https://github.com/Rahul24-06/
Happy to have you subscribed: https://www.youtube.com/c/rahulkhanna24june
Thanks for reading!