Plate Vision is an Edge AI based smart vehicle access management system designed to automatically recognize Indian vehicle number plates, maintain entry records, and enable automated gate control. The project is built using a Raspberry Pi, USB camera, OpenCV, EasyOCR, and Python, allowing all image processing and OCR operations to be performed locally on the edge device without relying on cloud services.
The system continuously captures live video from a camera and monitors a predefined region where vehicle number plates are placed. Using OpenCV, the captured frames are processed in real time, and the selected region of interest is extracted for Optical Character Recognition (OCR). EasyOCR is then used to detect and extract alphanumeric characters from the number plate. The recognized text is cleaned, formatted, and validated against the standard Indian vehicle registration format using regular expressions.
Once a valid number plate is detected, the system automatically captures an image of the vehicle and stores it as evidence. Simultaneously, the vehicle details, including registration number, date, time, and image reference, are recorded in an Excel-based log file. To avoid redundant entries, a duplicate detection mechanism prevents the same vehicle from being logged repeatedly within a predefined time interval.
One of the key advantages of Plate Vision is its Edge AI architecture. Since all recognition and decision-making processes are performed locally on the Raspberry Pi, the system offers low latency, reduced network dependency, improved privacy, and continuous operation even without internet connectivity. This makes it suitable for deployment in environments where real-time response and data security are important.
The project serves as a practical demonstration of Edge AI, Computer Vision, Image Processing, OCR technology, and Embedded System Design. It can be adapted for use in smart parking systems, residential societies, educational institutions, office campuses, industrial facilities, toll collection systems, and other vehicle access management applications.
By combining affordable hardware with powerful open-source software tools, Plate Vision provides a scalable and cost-effective solution for intelligent vehicle monitoring and automated access control while showcasing the growing potential of Edge AI in real-world applications.
The following steps describe the complete development and implementation process of the Plate Vision system, from hardware setup and operating system installation to number plate recognition, data logging, and gate automation.
Components Used:
- Raspberry Pi 5 with Active Cooling Fan
.png)
- Intel Realsense Depth D455
.png)
- LG Monitor
- MicroSD Card (32GB)
.png)
- Power Cable (Type C)

- Micro-HDMI Cable
Software Used:
- Ubuntu 24.04 LTS
- Python 3
- OpenCV
- EasyOCR
- OpenPyXL
- Raspberry Pi Imager
.png)
Step 1: Installing Ubuntu OS for Raspberry Pi 5
To prepare the Raspberry Pi for development, Ubuntu OS was installed on a MicroSD card using Raspberry Pi Imager.
Installation Procedure :
- Insert the MicroSD Card: Insert the MicroSD card into the card reader and connect it to your laptop or computer.
Open Raspberry Pi Imager: Launch the Raspberry Pi Imager application on your computer.
Select the Raspberry Pi 5 and click next.
.png)
Select Operating System: Click Choose OS and select:
Other General Purpose OS → Ubuntu → Ubuntu Desktop 24.04 LTS (64-bit)
.png)
.png)
.png)
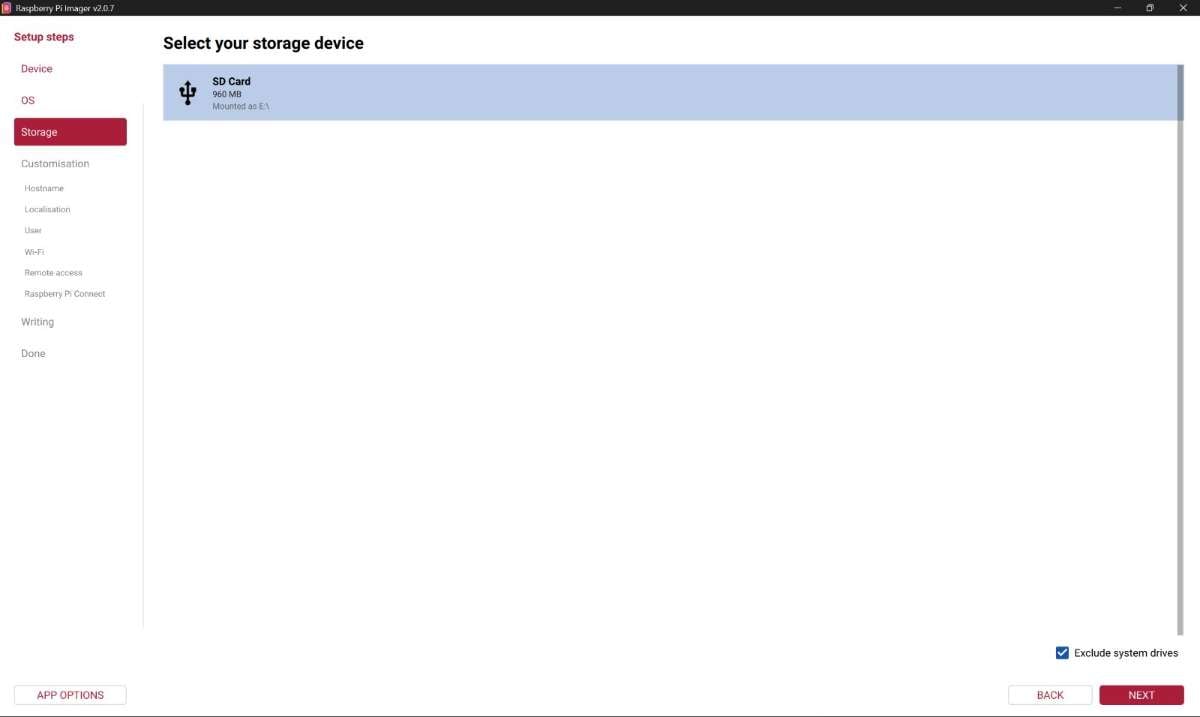
Select Storage Device: Click Choose Storage and select the inserted MicroSD card.
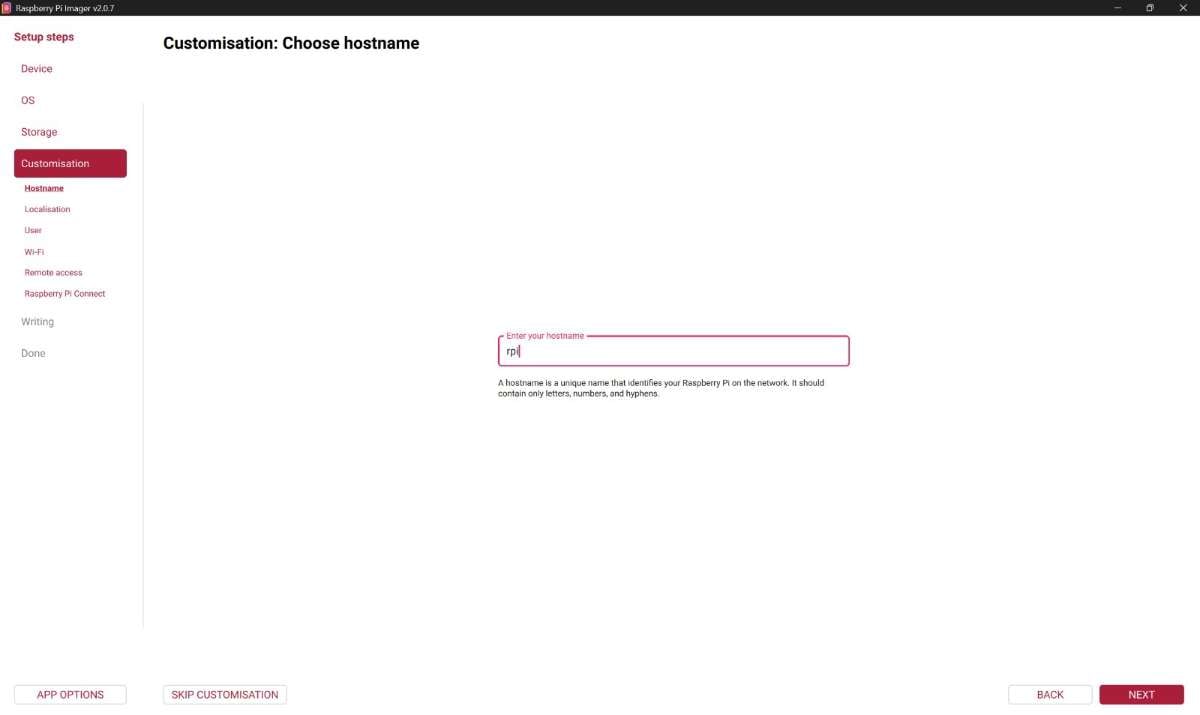
Enter all the Customization Options.
.JPG)
.JPG)
.JPG)
.JPG)
Write the Operating System: Click Write and wait for the operating system image to be flashed onto the MicroSD card. The process may take several minutes depending on the card speed.
.JPG)
Now the Ubuntu OS was installed on a MicroSD card successfully.
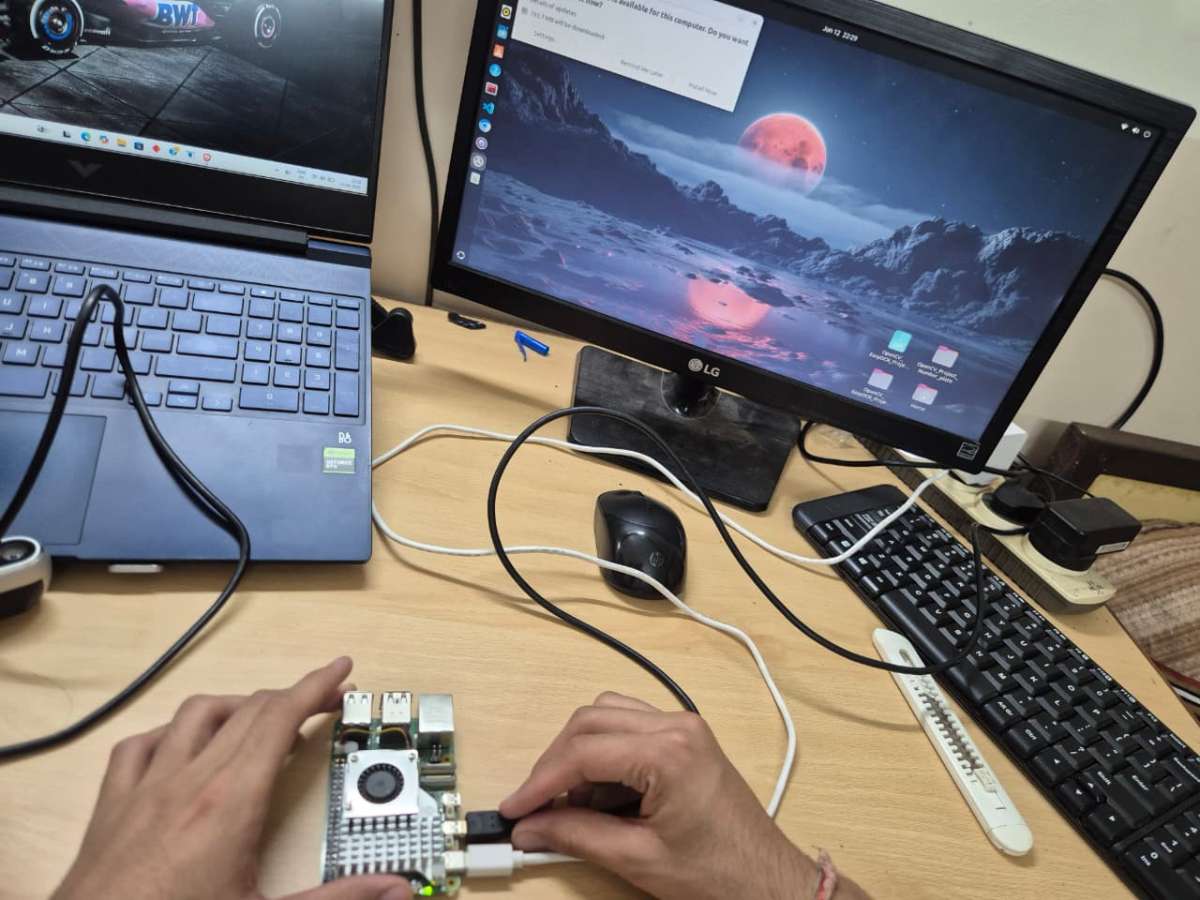
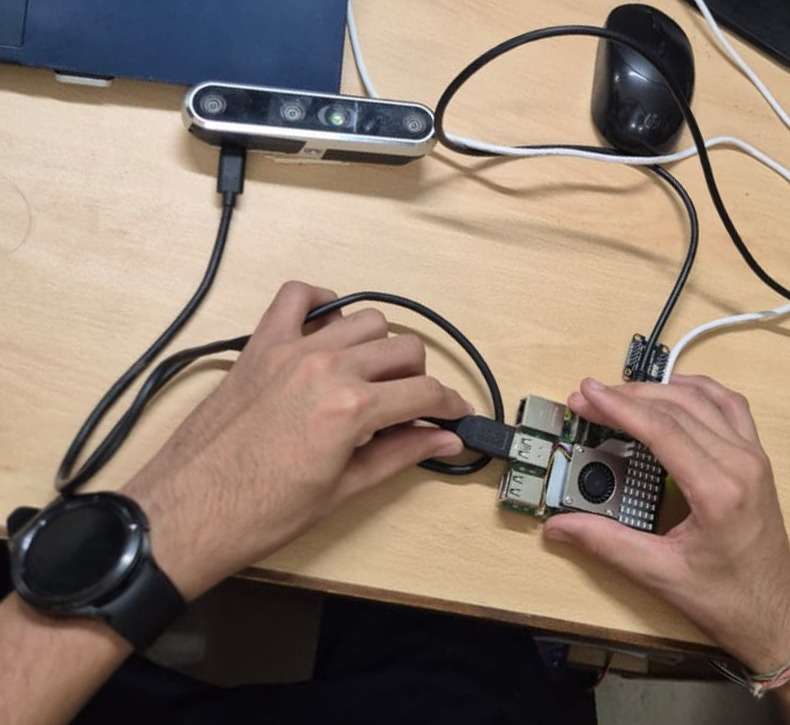
Step 2: Hardware Setup
The hardware setup consists of a Raspberry Pi 5, USB camera, display monitor, power supply, and optional gate control hardware. The USB camera is connected to the Raspberry Pi and positioned such that the vehicle number plate falls within the camera's field of view. A monitor is connected to the Raspberry Pi for system monitoring and testing. For gate automation, a signal is sent which can be connected to any digital actuators.
Hardware Connections:
- Insert the MicroSD card containing Raspberry Pi OS.
.png)
- Power the Raspberry Pi using a Type-C Cable.

- Connect the monitor using Micro-HDMI.
- Connect the USB camera to USB port of the Raspberry Pi.
Overall Project Hardware Setup:
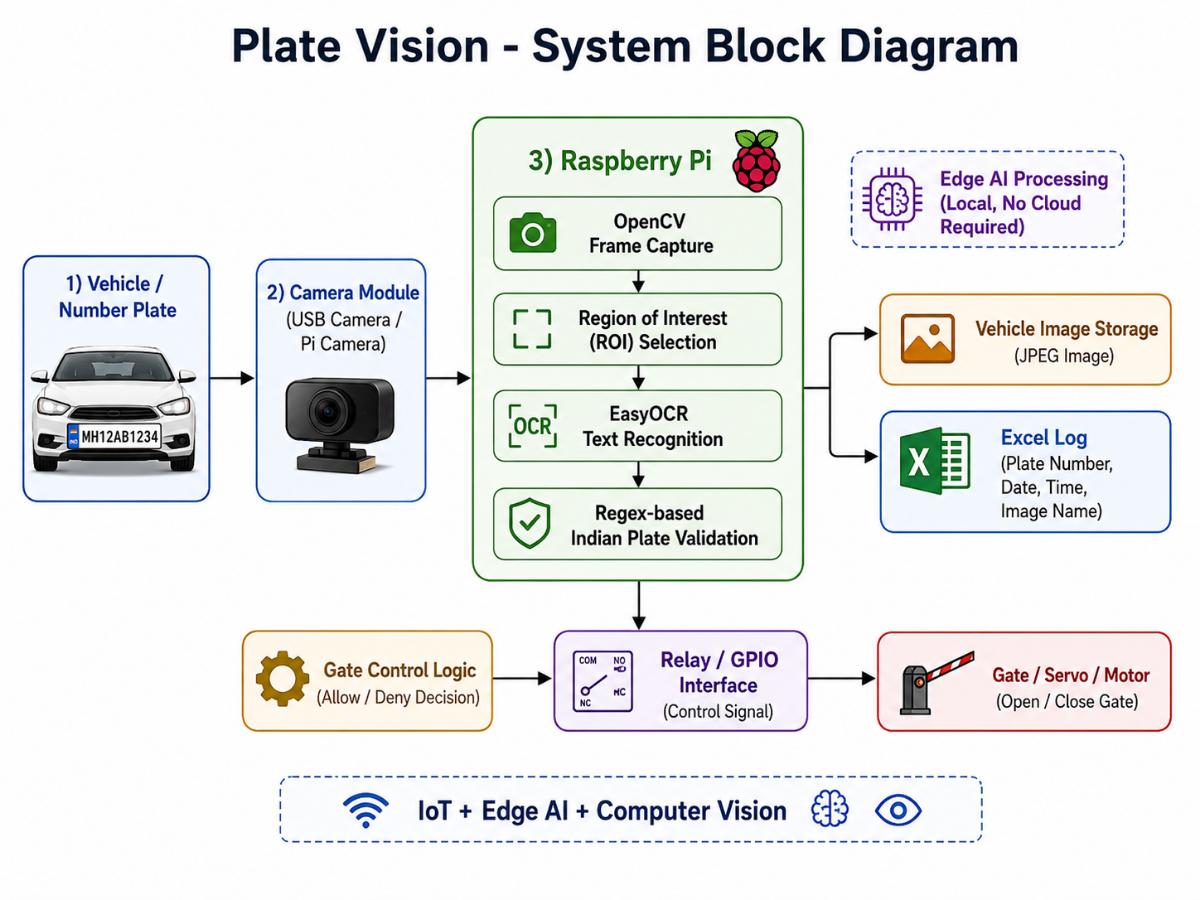
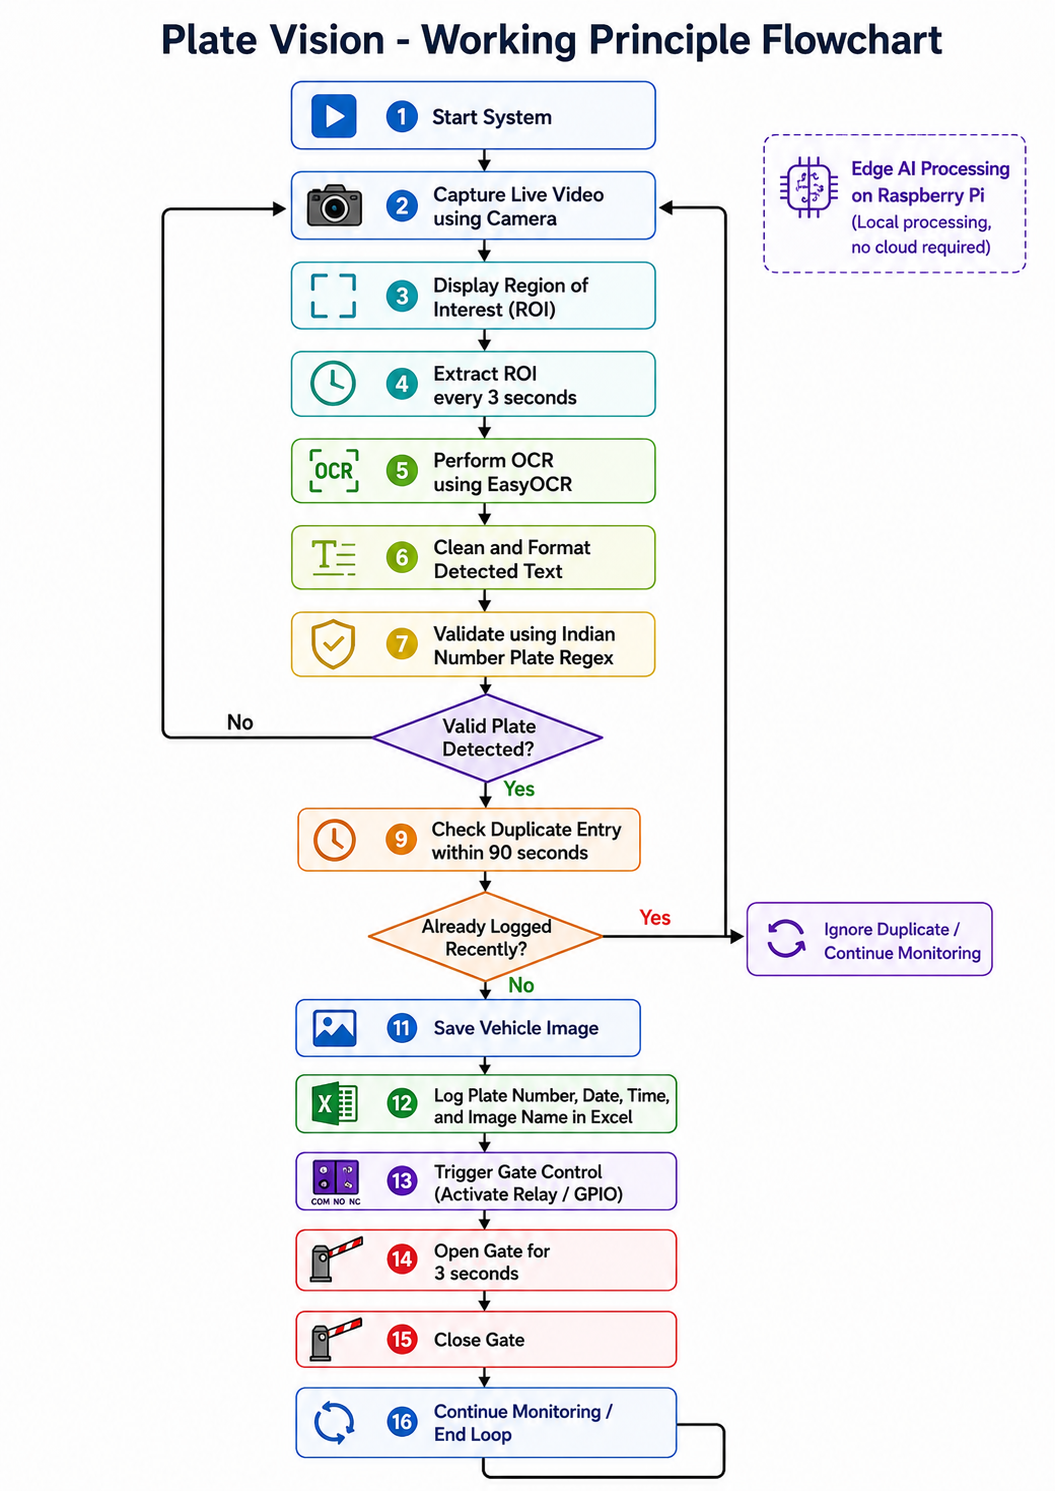
Step 3: System Architecture
Before implementing the software modules, the overall workflow of the system was designed. The block diagram below illustrates how vehicle images are captured, processed using OpenCV and EasyOCR on Raspberry Pi, validated against Indian number plate formats, logged into an Excel database, and finally used to generate a gate control signal.
Step 4: Installing Required Software Packages
After successfully installing Ubuntu OS on the Raspberry Pi, the required software packages and Python libraries were installed to support image processing, optical character recognition, and data logging functionalities.
First, the system packages were updated to ensure compatibility and stability:
sudo apt update
sudo apt upgrade -y
Next, Python package management tools were installed and updated:
sudo apt install python3-pip -y
pip3 install --upgrade pip
The required libraries for the Plate Vision system were then installed:
pip3 install opencv-python
pip3 install easyocr
pip3 install openpyxl
Purpose of Installed Libraries
| Library | Purpose |
|---|---|
| OpenCV | Capturing camera input and performing image processing operations |
| EasyOCR | Extracting text from vehicle number plates |
| OpenPyXL | Creating and updating Excel-based vehicle logs |
| Python 3 | Core programming environment used for project development |
After completing the installation, the Raspberry Pi environment was fully prepared for implementing the number plate recognition and gate automation system.
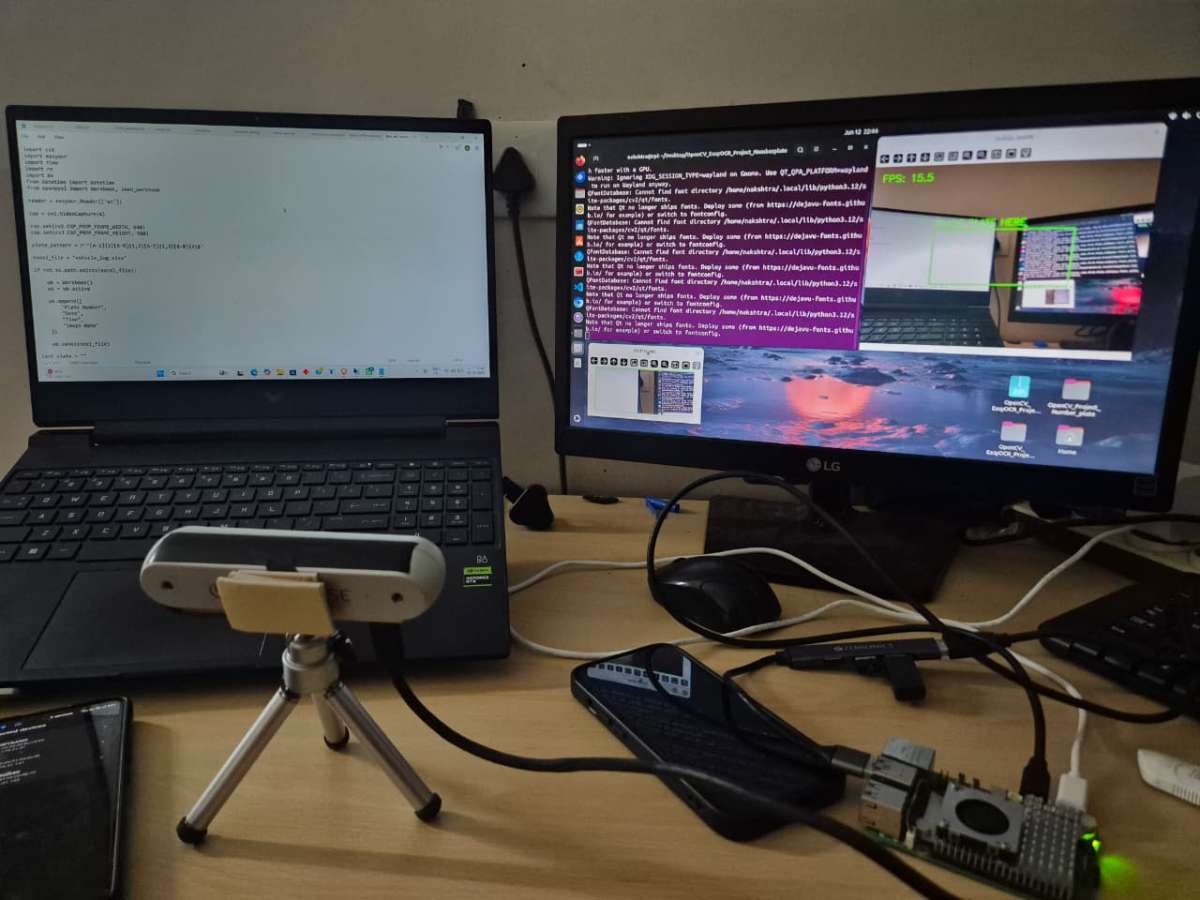
Step 5: Running the Plate Vision System
After completing the hardware setup and software installation, the Plate Vision application can be launched from the terminal.
Navigate to the project directory and execute the main Python script in the terminal of the directory:
python3 main.pyOnce the program starts, the USB camera begins capturing live video. A detection region is displayed on the screen where the vehicle number plate should be positioned. The system continuously monitors this region and performs OCR processing at regular intervals.
When a valid Indian vehicle number plate is detected:
- The vehicle image is captured and stored.
- The registration number is extracted and validated.
- Vehicle details are logged into the Excel database.
- Duplicate entries are prevented.
- A gate control signal is generated for automation.
The system continues running until the user presses the Q key to exit the application.
Step 6: Camera Input Using OpenCV
The camera feed was accessed using OpenCV. The live video stream was displayed on the screen, and a fixed Region of Interest was created where the vehicle number plate should be placed.
cap = cv2.VideoCapture(0)

cap.set(cv2.CAP_PROP_FRAME_WIDTH, 640)
cap.set(cv2.CAP_PROP_FRAME_HEIGHT, 480)
This allowed the system to process only the required plate area instead of the complete frame, making the system faster and more efficient.
Step 7: Region of Interest Selection
A green box was drawn on the video frame to guide the user where the number plate should be placed. The selected region was cropped and sent for OCR processing.
roi = frame[y1:y2, x1:x2]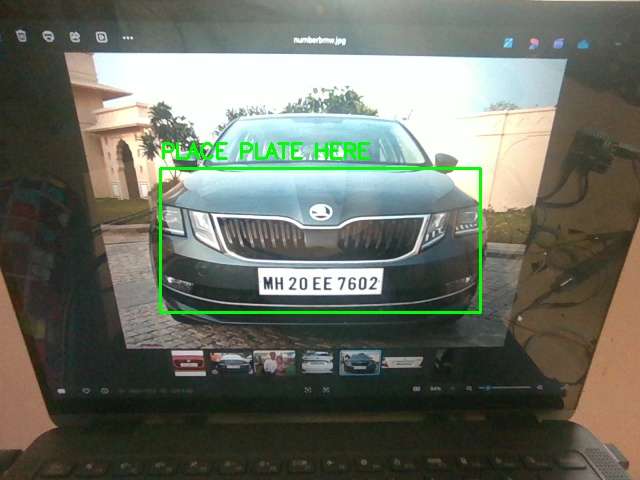
Step 8: OCR Processing Using EasyOCR
The cropped number plate region was processed using EasyOCR. EasyOCR extracted the text from the plate image.
reader = easyocr.Reader(['en'])
results = reader.readtext(roi)
The detected text was cleaned by removing spaces and hyphens and converting it into uppercase format.
text = text.replace(" ", "")
text = text.replace("-", "")
text = text.upper()
Step 9: Indian Number Plate Validation
After OCR, the detected text was checked using a regular expression for Indian number plate format.
plate_pattern = r'^[A-Z]{2}[0-9]{1,2}[A-Z]{1,3}[0-9]{4}$'Examples of valid plates:
RJ14AB1234
UP32AB1234
DL8CAF5030
MH12DE1433.jpeg)
If the detected text matched this format, it was accepted as a valid vehicle number plate.
Step 10: Vehicle Image Capture
When a valid plate was detected, the full vehicle frame was captured and saved inside the captured_vehicles folder with the plate number and timestamp.
image_name = detected_plate + "_" + timestamp.strftime("%Y%m%d_%H%M%S") + ".jpg"
cv2.imwrite(image_path, frame)
For Example: MH20EE7602_20260607_121302
This creates image proof for every vehicle entry.
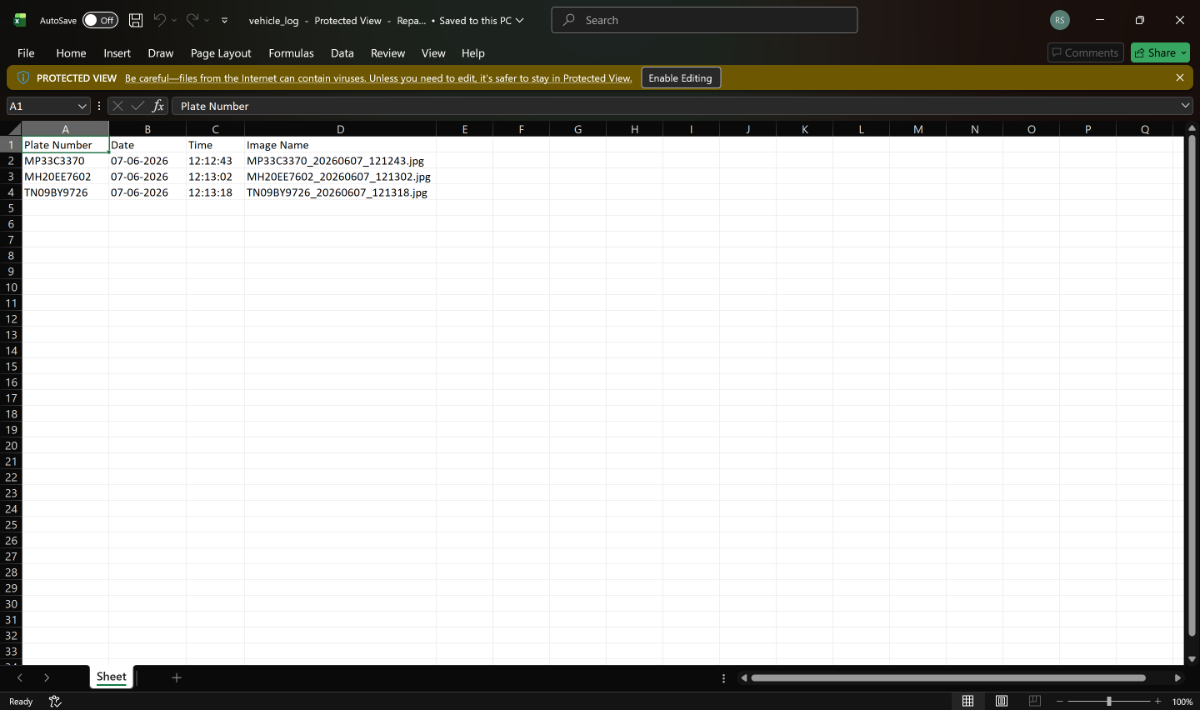
Step 11: Excel-Based Vehicle Logging
The vehicle details were saved automatically in an Excel file using OpenPyXL. The log file stores the plate number, date, time, and captured image name.
ws.append([
    detected_plate,
    date_str,
    time_str,
    image_name
])
Step 12: Duplicate Entry Prevention
To avoid repeated logging of the same vehicle, I added a duplicate prevention mechanism. The same plate is not saved again within 90 seconds.
if detected_plate not in last_saved or now - last_saved[detected_plate] > 90:This makes the system more practical for real gate entry usage.
Step 13: Gate Open/Close Action
After successful recognition and logging, the gate opening function is triggered. In the prototype, the gate action is simulated using print statements. It can also be connected to a real relay or servo motor using Raspberry Pi GPIO.
def open_gate():
    print("GATE OPENED")
    time.sleep(3)
    print("GATE CLOSED")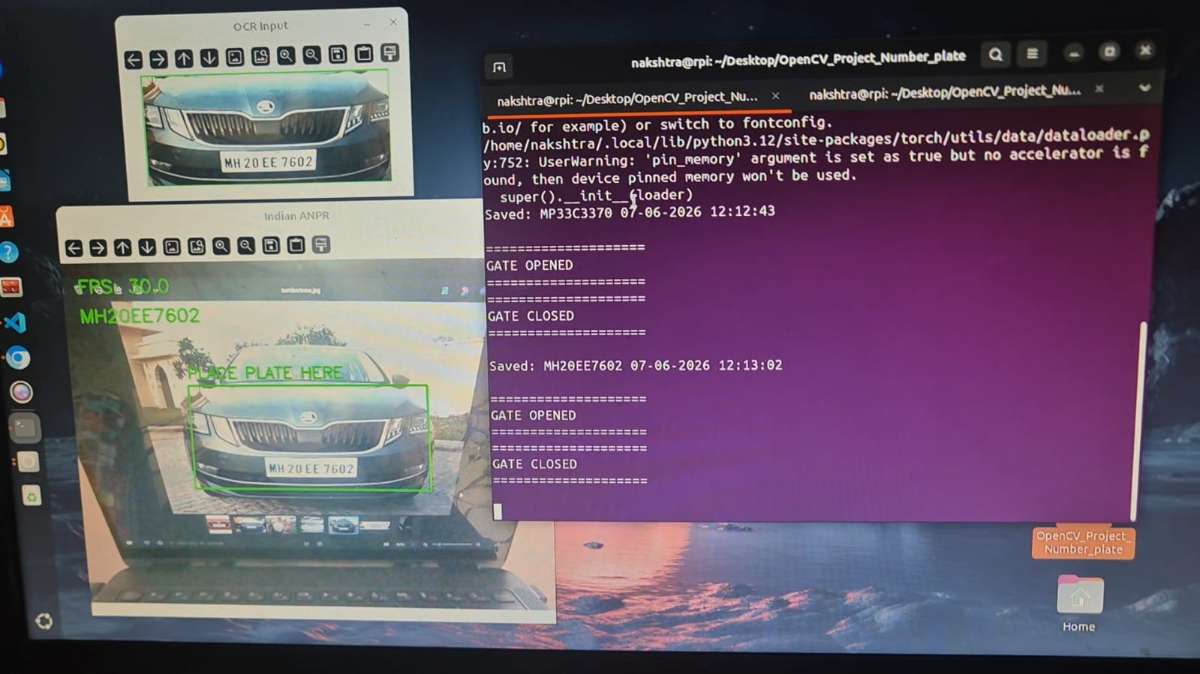
For real hardware, the relay can be controlled using GPIO.
from gpiozero import OutputDevice

relay = OutputDevice(17, active_high=False, initial_value=False)

relay.on()
time.sleep(3)
relay.off()
Step 14: Video Demonstration
The complete working of the project was recorded as a video demonstration.
Final Working Flow
Final Outcome
The final system successfully detects Indian vehicle number plates, validates them, stores vehicle entry details with image proof, prevents duplicate entries, and triggers gate access. Since all processing is performed locally on Raspberry Pi, the project works as a practical example of Edge AI, Computer Vision, and Smart Automation.