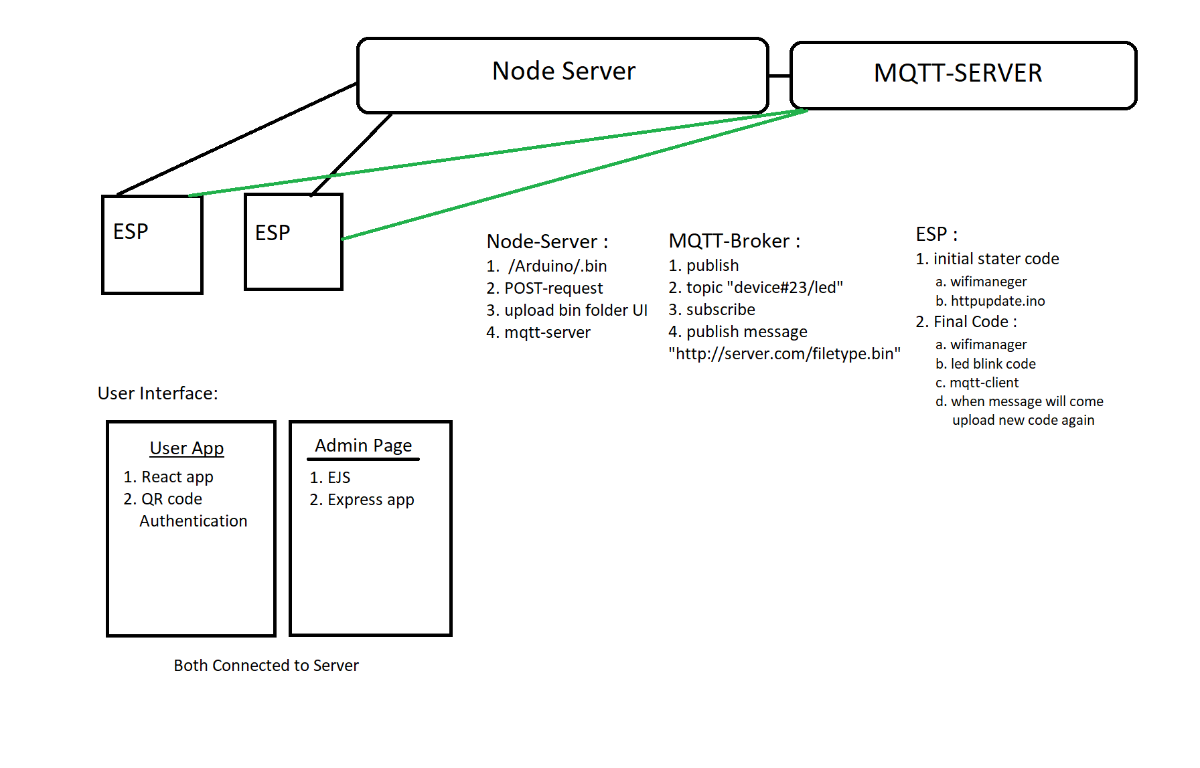
This Home Automation project is divided into two parts first one is to create a node server and the second is the microcontroller code.
In this Home Automation project, instead of using Firebase types services, NodeJs is used to create a custom server.
ESP Used MQTT for communication with the server. Here MQTT is used for low power consumption data transferring.
For ESP there are TWO sketches there
- Initial sketch
At first, all the ESPs are loaded with initial sketches. Connecting to the WiFi ESPs should be authenticated by Scan The QR code. The QR code Has the ESP board Information after scanning with iot-app. The App sent an HTTP post request including the scanned data and After getting the request the server first searches its database that the ESP is already present if not then the server creates a database for new ESP. and allow the ESP to Upload the main sketch(./Uploads/main.ino.bin). Also, the server sent a JWT token to iot-app so that it can access the APIs.
2. Main sketch
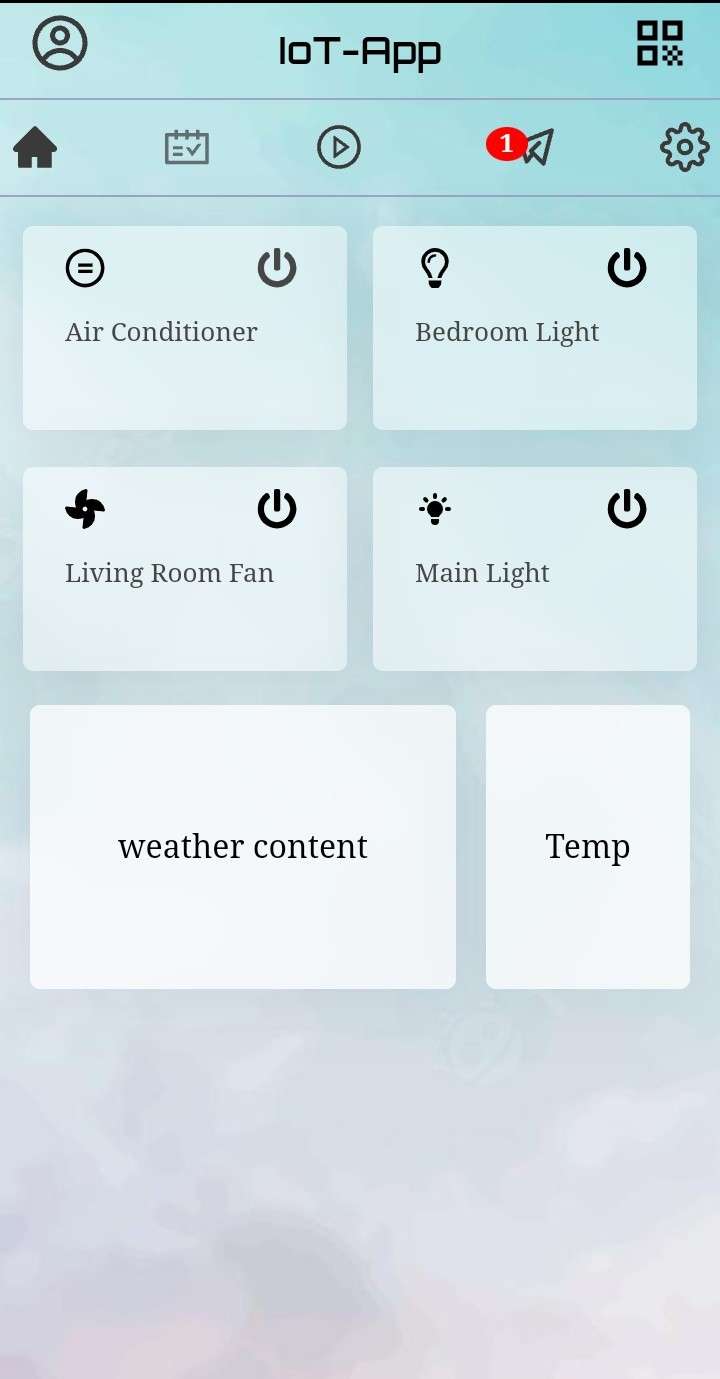
The main sketch has all the actual functional code which is On/Off the Light, AC, Fan & Lights.
Overview Of this Project:
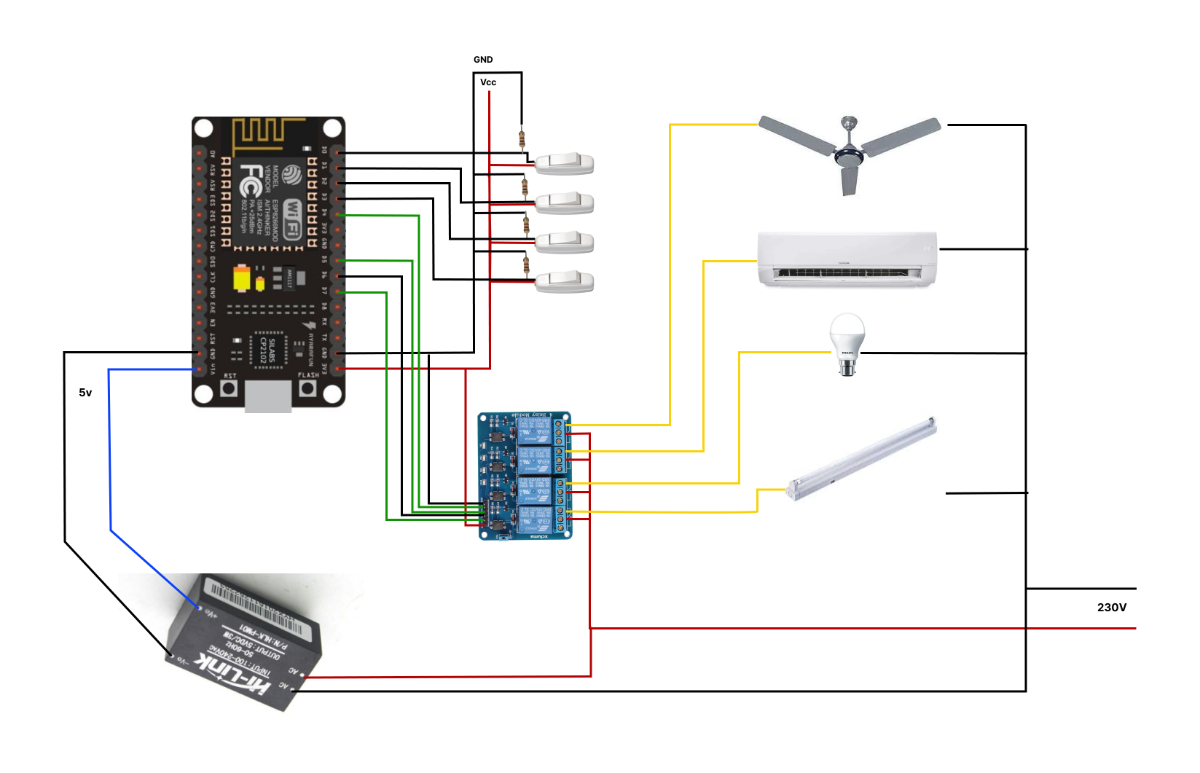
Hardware used :
- ESP8266
- Relay Module(4 channel)
- 5V power Supply(Hi-Link)
Software Specification:
- VS-Code
- PlatformIO
- Arduino IED
- NodeJS
Protocols:
- Server-side protocols :
- HTTPS
- WebSockets
- MQTT
- Microcontroller-side protocols:
- HTTP
- MQTT
- UART
Server Site Library:
- Express
- Socket.io
- MQTT
- Multer
Microcontroller-Side Library:
DataBase:
- MongoDB (MongoDB Atlus)
Power Supply:
- Hi-Link 5V Power Supply(Click).
MQTT Broker:
- broker.mqtt-dashboard.com
User UI:
Admin UI:
.png)
Features:
- OTA update.
- Low power consumption.
- WiFi Support.
- Auto Update Code.
- Access From Anywhere In The World With an Internet connection.
- Messaging system.
- QR code Authentication.
- User record (using MongoDB database).
Circuit Diagram:
Projects Video: