This project monitors the ECG waveform/ graph generated from AD8232 sensor online using an IOT platform using Ubidots. The components required are NodeMCU, ECG sensor, Data Cable, USB Adapter and Breadboard.
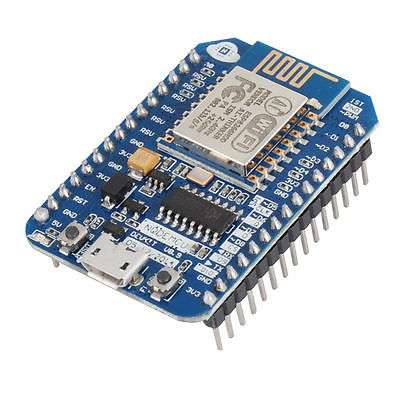
NodeMCU
NodeMCU is an open-source LUA based firmware developed for the ESP8266 wifi chip. By exploring functionality with the ESP8266 chip, NodeMCU firmware comes with the ESP8266 Development board/kit i.e. NodeMCU Development board.
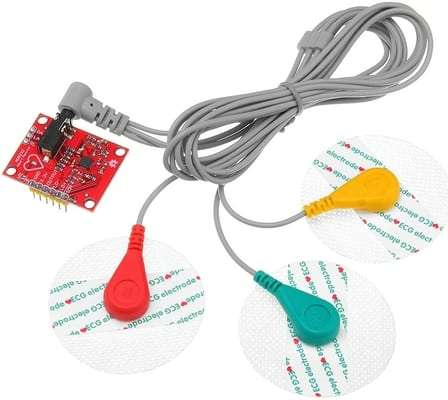
AD8232 ECG Sensor
This sensor is a cost-effective board used to measure the electrical activity of the heart. This electrical activity can be charted as an ECG or Electrocardiogram and output as an analog reading. ECGs can be extremely noisy, the AD8232 Single Lead Heart Rate Monitor acts as an op-amp to help obtain a clear signal from the PR and QT Intervals easily.
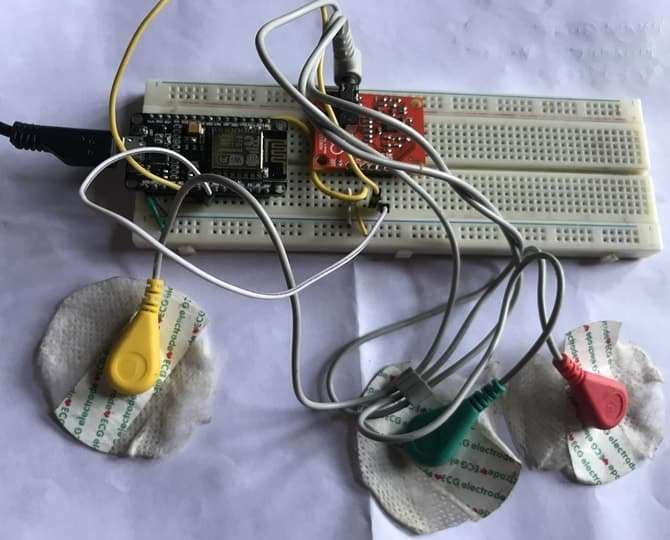
Here is a circuit diagram for Interfacing AD8232 ECG Sensor with NodeMCU ESP8266. The AD8232 module breaks out nine connections from the IC that you can solder pins, wires, or other connectors to. SDN, LO+, LO-, OUTPUT, 3.3V, GND provide essential pins for operating this monitor with an Arduino or other development board. Also provided on this board are RA (Right Arm), LA (Left Arm), and RL (Right Leg) pins to attach and use your own custom sensors. Additionally, there is an LED indicator light that will pulsate to the rhythm of a heartbeat. There are 6 pins in AD8232 Breakout Board. SDN is not connected. Connect the OUTPUT to analog A0 of NodeMCU. Connect the LO+ & LO- to D5 & D6 of NodeMCU respectively. Supply the AD8232 kit with 3.3V VCC & Connect its GND to GND.
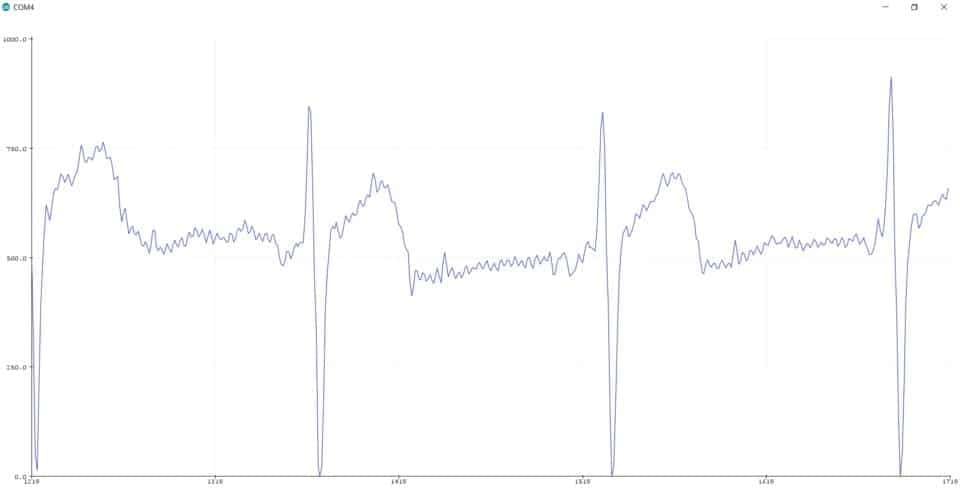
Once the code is upload, open the Serial Monitor and Set the Baud Rate to 9600. The ECG waveform can be seen below as a visualizations effect on Serial Monitor.