MyDigikey List URL: https://www.digikey.in/en/mylists/list/1OQTQB8IKW
Health 360 — The Story & Step-by-Step Build
Health 360 is a non-invasive, wearable system that optically measures physiological signals, such as glucose, oxygen, heart rate, and temperature, and streams the results to a dashboard. Below is a friendly, practical story that walks you through why we built it, the parts, and how to assemble, wire, and program it step by step. Code is included in code blocks as requested.
1) The problem we solve
People want continuous, low-effort health monitoring that requires no finger pricks, hospital visits, or bulky equipment.
The challenge: Extract usable physiological signals through skin NIR spectroscopy and combine them with oxygen, heart rate, and temperature data, along with intelligent processing, to estimate health markers, including non-invasive glucose estimation research.
The end result: a compact system that measures, processes, and transmits readings for visualization and ML analysis.
Our concept (Expected Product- AI-based Concept) -
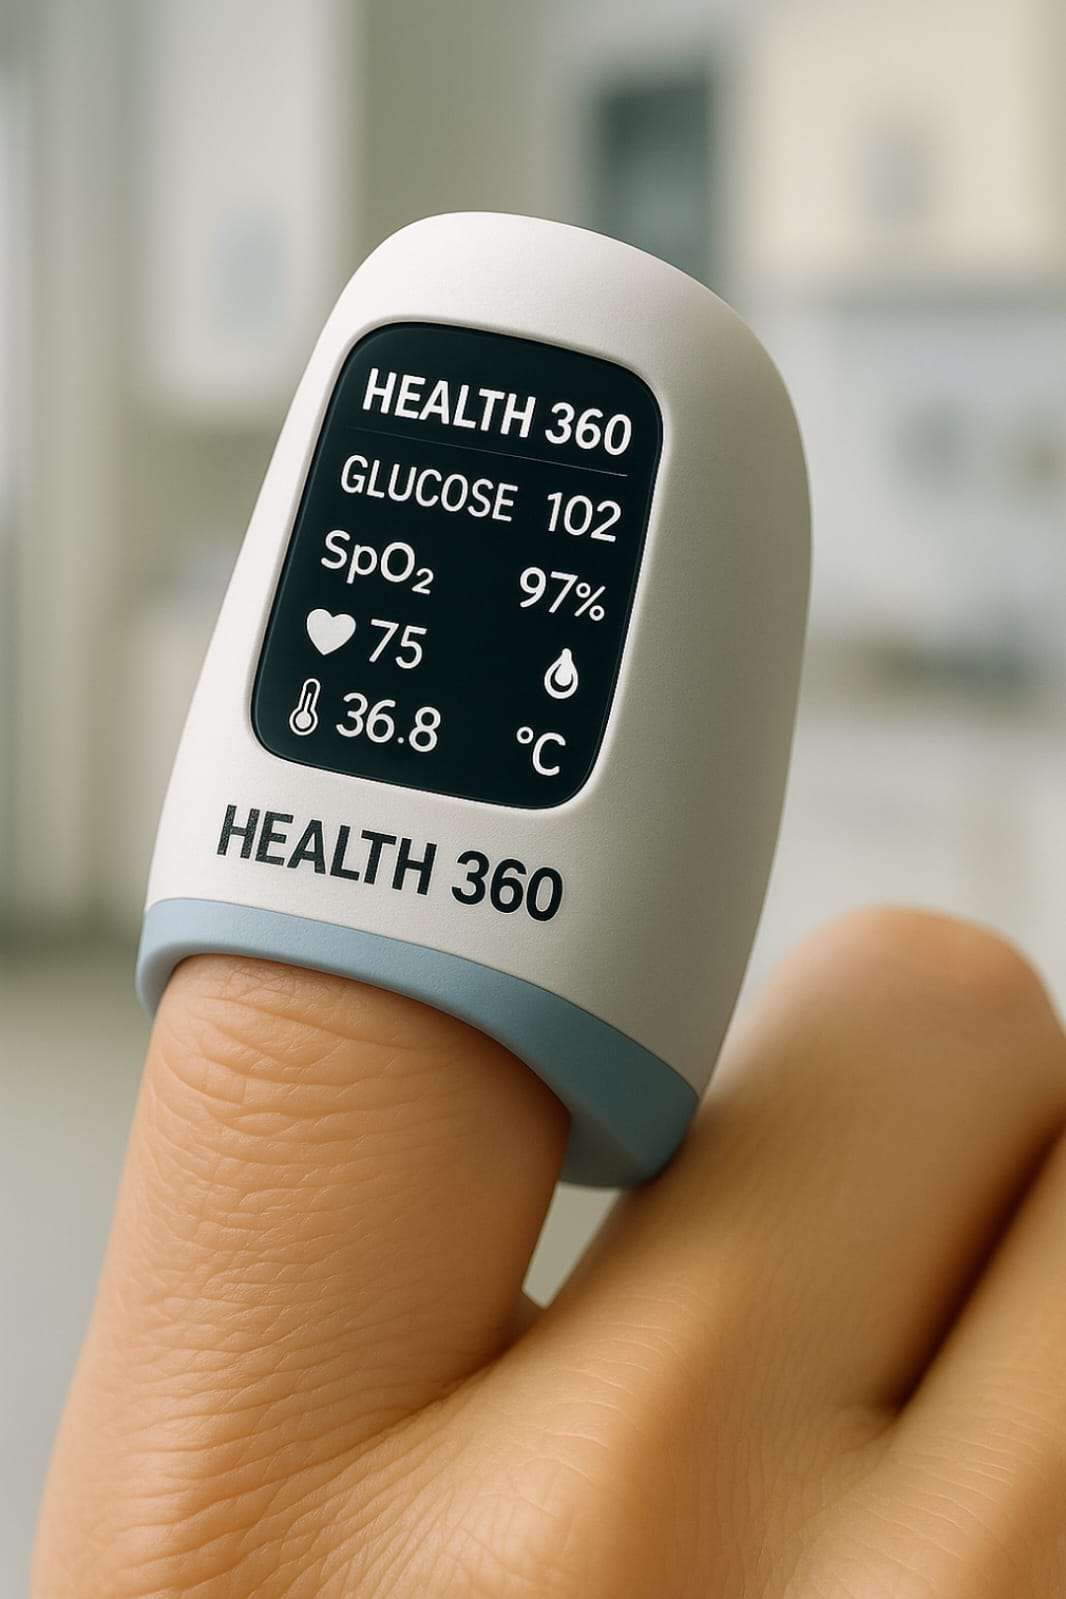
2) What you will achieve (end result)
- Real-time optical sampling (NIR + RED LED + photodiode) to capture tissue response.
- Accurate temperature reading using TMP117.
- Accurate oxygen and heart rate using MAX30102
- Data logged to Serial/dashboard (Blynk / Firebase / local) for training ML models.
Pipeline ready for model inference (off-device or TinyML on ESP32).
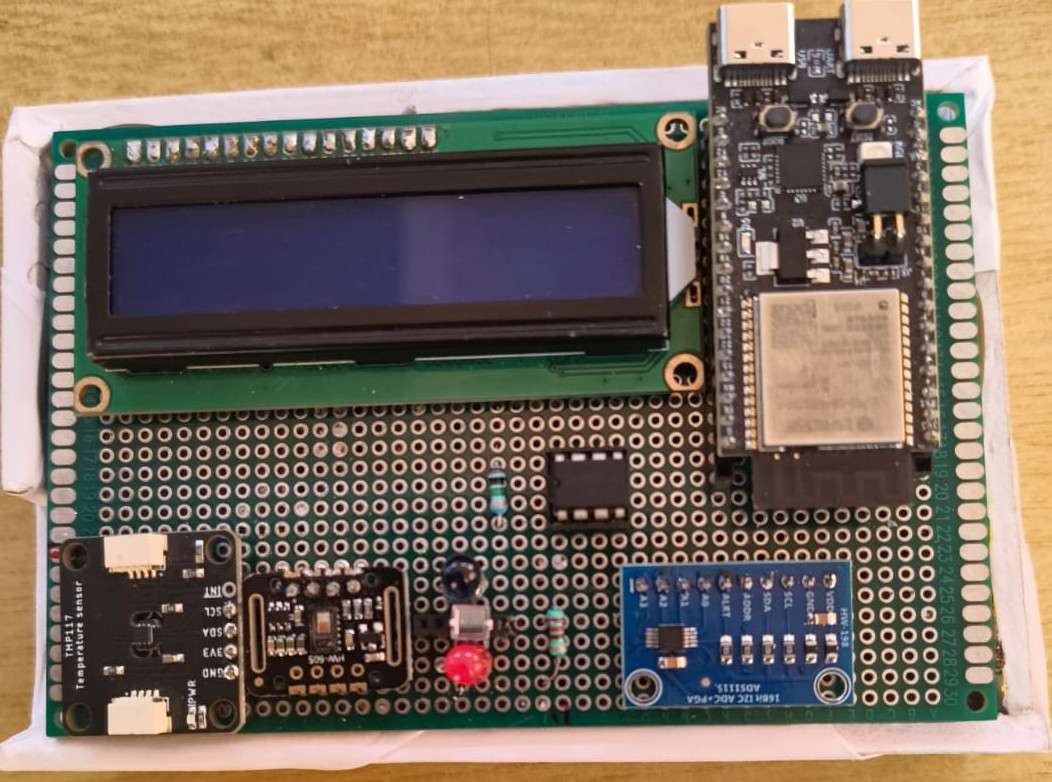
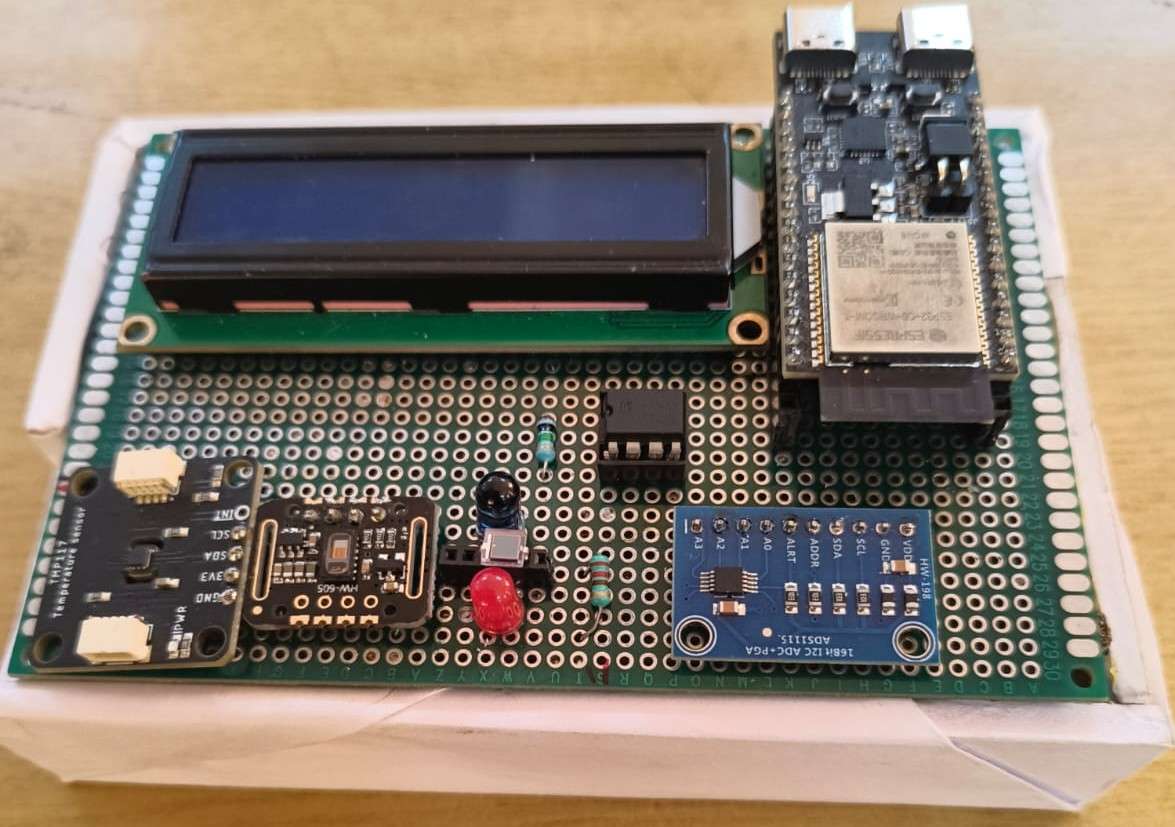
3) Components
- ESP32-C6 DevKitC-1-N8 — MCU, Wi-Fi, BLE
- NIR LED 940 nm — illumination for deep tissue optical sensing
- Red LED (5mm) — complementary ratio extraction
- Photodiode (BPW34) — detects transmitted/reflected light
- LM358 — converts photodiode current to voltage
- TMP117 — precision digital temperature sensor (I2C)
- ADS1115 — 16-bit external ADC
- Resistors, breadboard / PCB, wires
- MAX30102 — integrated PPG sensor for SpO2 and Heart Rate
- USB cable
- Jumper Wires
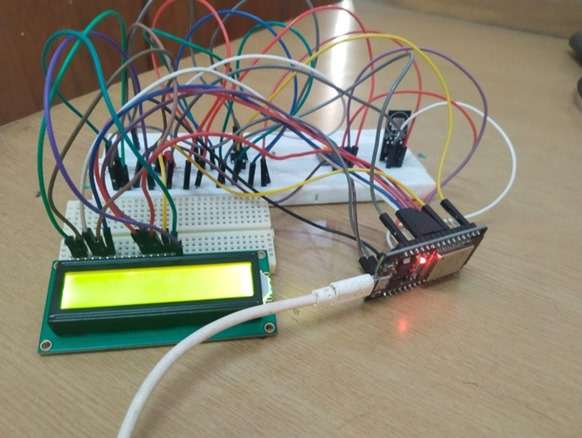
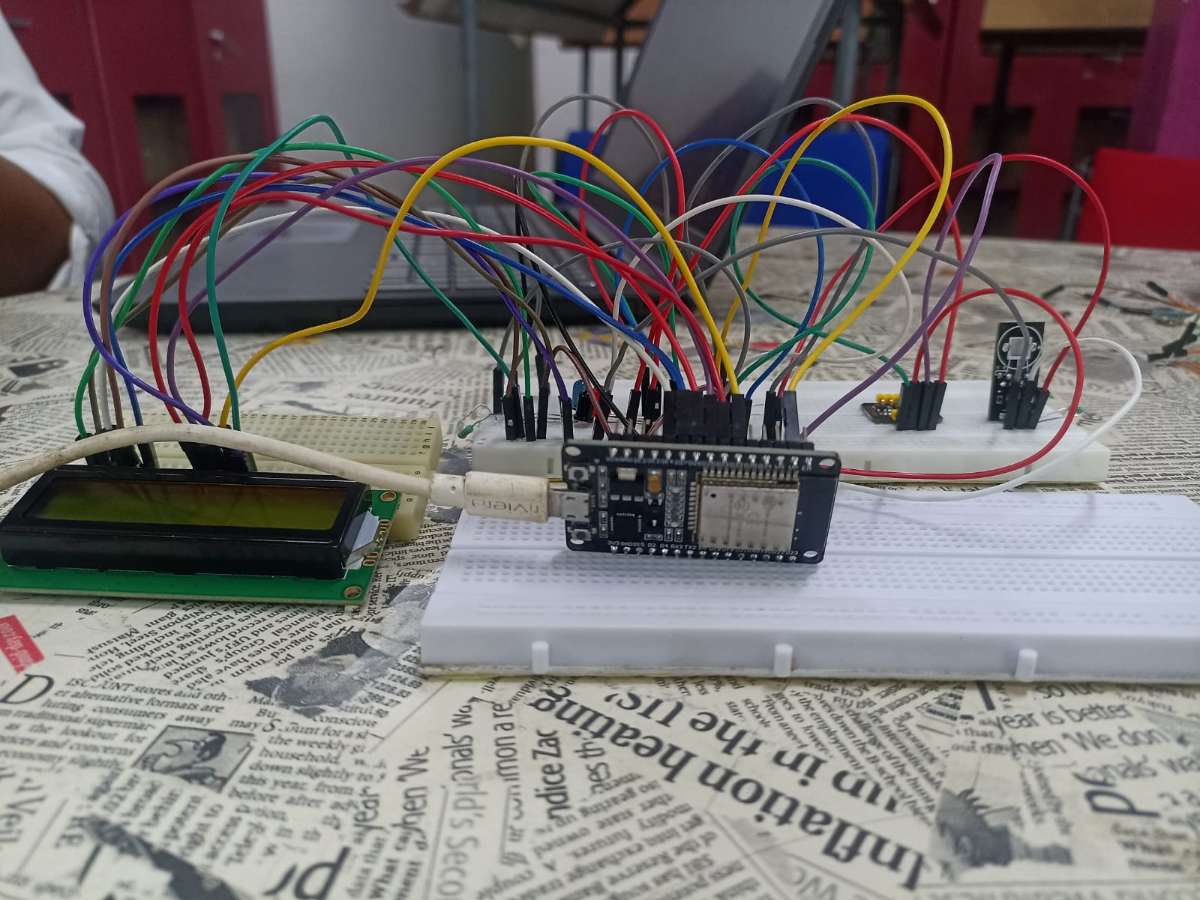
4) Step-by-step build story
Step 1 — Plan & prototype
Decide what signals we need for Health 360, and we capture:
- Optical response from tissue using NIR 940 nm and RED LED.
- Temperature using TMP117.
Oxygen and Heart Rate using MAX30102.
Sketch: 1) NIR LED and Red LED → tissue → photodiode → LM358 → ADS1115 → ESP32.2) TMP117 to ESP32.
3) MAX30102 to ESP32.
Step 2 — Concept
- Use the photodiode wired as a passive light sensor producing a small voltage that the ADS1115 will measure.
- Use NIR and Red LEDs as the illumination sources and switch them on/off from the ESP32 GPIO to produce pulsed illumination.
- Keep the MAX30102 connected as an integrated PPG sensor for SpO2 and Heart Rate, and as a fall-back source of clean PPG.
- Use the TMP117 for temperature readings.
- Display immediate values on the I2C LCD and stream CSV lines to Serial for data collection.
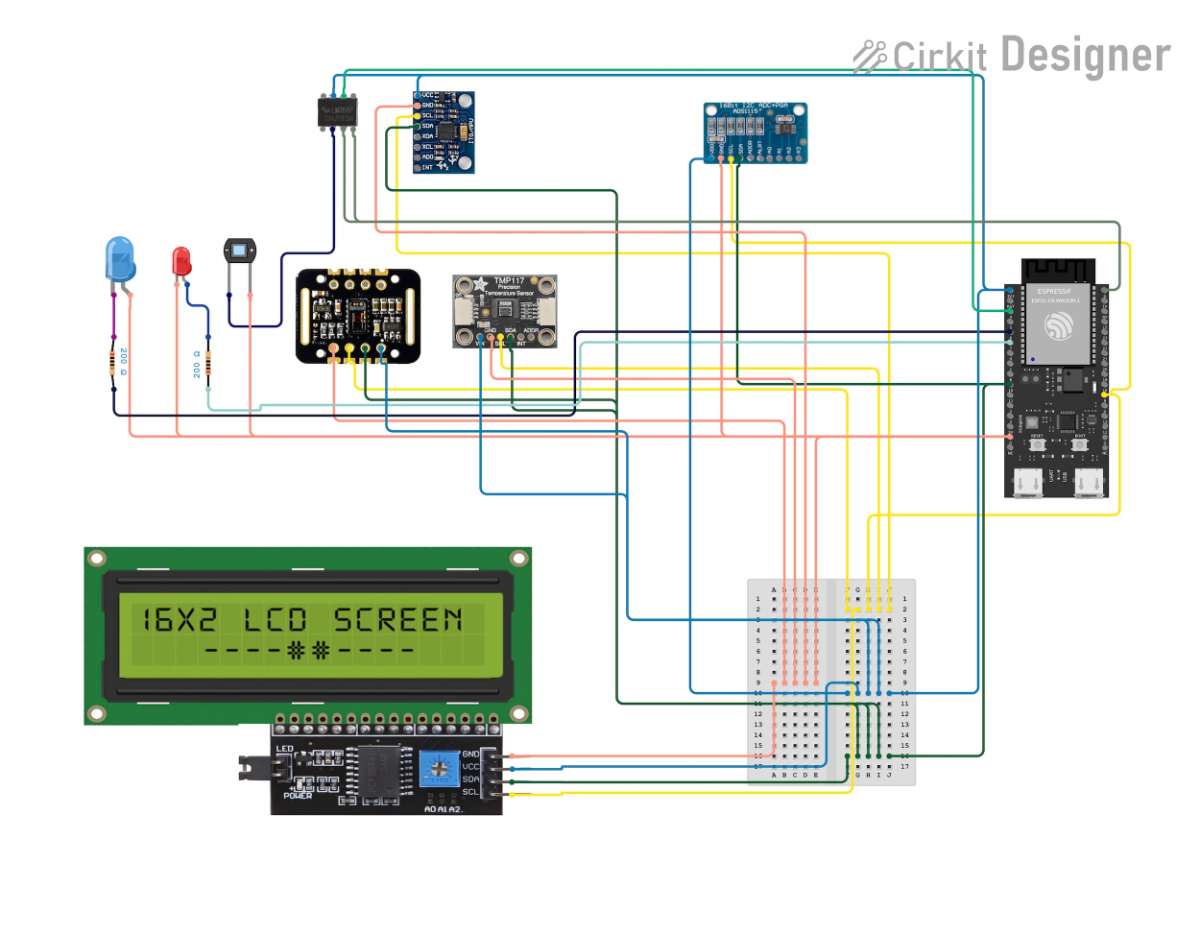
Step 3 — Wiring
- I²C bus (Shared):
- ESP32 SDA → TMP117 SDA, ADS1115 SDA, MAX30102 SDA, LCD SDA
- ESP32 SCL → TMP117 SCL, ADS1115 SCL, MAX30102 SCL, LCD SCL
- All I2C devices to 3.3V and GND
- Photodiode → LM358 (reverse biased):
- Photodiode anode → GND
- Photodiode cathode → Non-Inverting Input of LM358
- LM358 → ADS1115:
1. LM358 Output → A0 of ADS115
- LEDs (NIR & Red):
- NIR LED anode → ESP32 GPIO through resistor
2. NIR LED cathode → GND
3. RED LED anode → ESP32 GPIO through resistor
4. RED LED cathode → GND
Circuit connection
Step 4 — Sketchbook
#include <Wire.h>
#include <LiquidCrystal_I2C.h>
#include <Adafruit_ADS1X15.h>
#include "MAX30105.h"
#include "spo2_algorithm.h"
#include <WiFi.h>
#include <HTTPClient.h>
#include <ArduinoJson.h>

#define SDA_PIN 6
#define SCL_PIN 7

const char* WIFI_SSID = "";
const char* WIFI_PASSWORD = "";

const char* FIREBASE_URL = "";

Adafruit_ADS1115 ads;

LiquidCrystal_I2C lcd(0x27, 16, 2);

TwoWire I2C_MAX = TwoWire(1);
MAX30105 particleSensor;

#define TMP117_ADDRESS 0x48
#define TMP117_TEMP_RESULT 0x00
#define TMP117_DEVICE_ID 0x0F
void printToSerial(int16_t rawValue, float voltage, float glucose) {
Serial.print("Raw ADC: ");
Serial.print(rawValue);
Serial.print(" | Voltage: ");
Serial.print(voltage, 1);
Serial.print(" mV | Glucose: ");
Serial.print(glucose, 1);
Serial.print(" mg/dL");
if (max30102Available) {
if (validHeartRate && heartRate > 30 && heartRate < 200) {
Serial.print(" | HR: ");
Serial.print(heartRate);
Serial.print(" BPM");
}
if (validSPO2 && spo2 > 70 && spo2 <= 100) {
Serial.print(" | SpO2: ");
Serial.print(spo2);
Serial.print("%");
}
}
if (tmp117Available && !isnan(bodyTemperature)) {
Serial.print(" | Temp: ");
Serial.print(bodyTemperature, 1);
Serial.print(" C");
}
Serial.println();
}
void updateCalibration(float knownGlucose, float measuredVoltage) {
OFFSET_VOLTAGE = measuredVoltage - (knownGlucose * GLUCOSE_SENSITIVITY);
Serial.print("Calibration updated: ");
Serial.print("Offset = ");
Serial.print(OFFSET_VOLTAGE);
Serial.print(" mV for ");
Serial.print(knownGlucose);
Serial.println(" mg/dL");
}
Step 5 — Train ML model
- Use Python (Colab) to train a RandomForest (regressor & classifier) on a labeled dataset.
- Save model and evaluate RMSE, MAE, R2, Accuracy, and Precision.
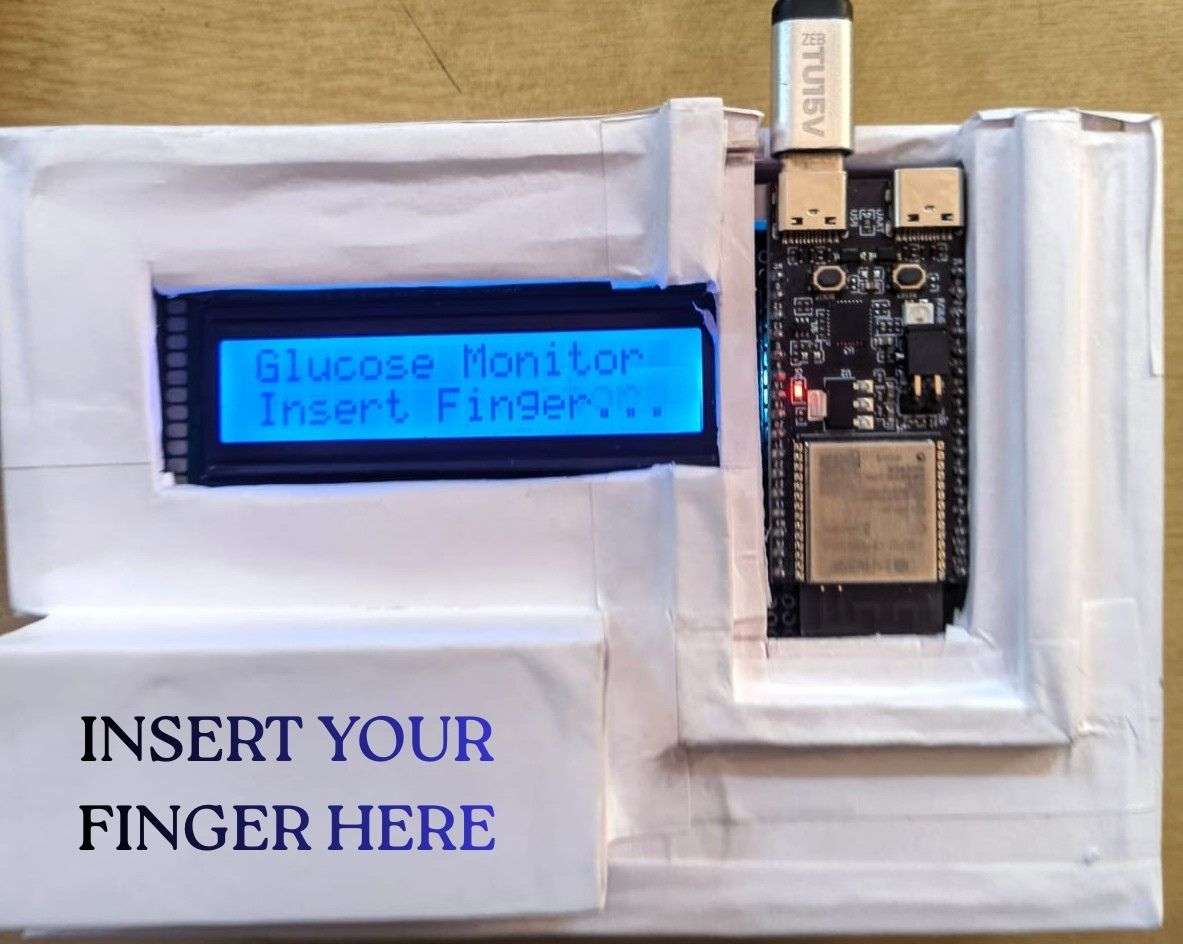
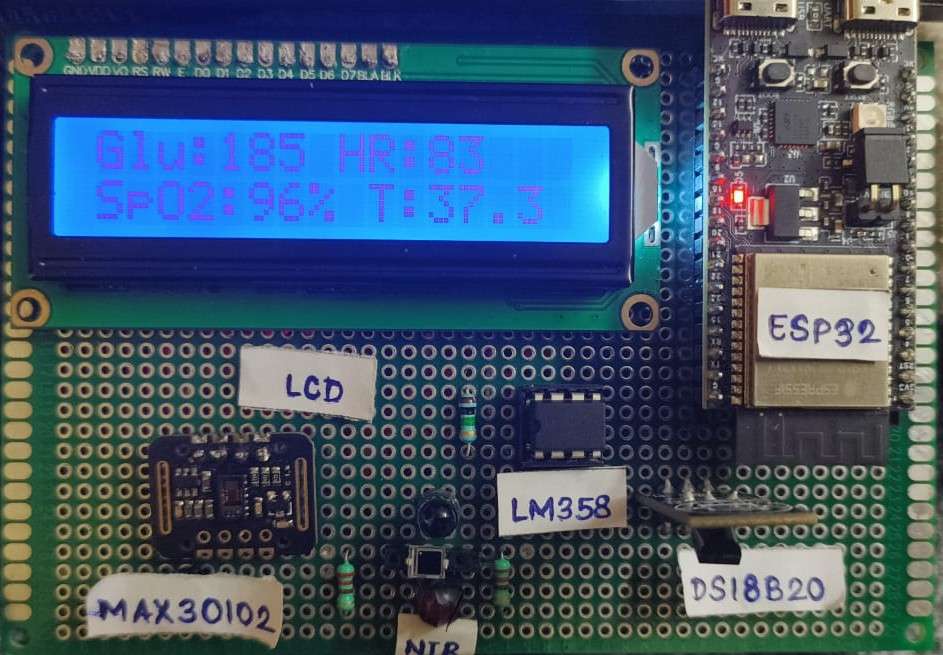
5) Prototype Images
Video
7) Bringing It All Together: The Health 360 Outcome
Health 360 brings together simple yet powerful sensing modules—NIR and Red LEDs, a photodiode with LM358 and ADS1115, MAX30102, and TMP117 onto a compact ESP32 platform to achieve non-invasive, continuous health monitoring. By illuminating the skin, capturing optical responses, measuring SpO2, heart rate, and temperature, and combining everything with real-time display and data logging, the system evolves from a basic prototype into a reliable health-insight tool.
The step-by-step build transforms raw components into a functional device capable of collecting high-quality physiological data for analytics and machine learning. Ultimately, Health 360 demonstrates how accessible hardware and thoughtful engineering can create a practical, intelligent, and non-invasive health monitoring solution ready for real-world expansion.