


- 1) This metal detector alert monitoring system that I have made because in the consideration of the critical requirements in relation to foreign body prevention and detection.
- 2) The designing of a metal detector robot vehicle can be done by using any micro-controller.
- 3) The proposed system comprises a transmitter (Tx) and receiver (Rx) circuit.
- 4) It is a war field land rover that alerts on sensing planted land mine ahead and it is useful for finding metal inclusions hidden within objects, or metal objects buried underground.
- 5) They often consist of a handheld unit with a sensor probe which can be the change in the magnetic field due to the metallic object can be detected
Steps to Build Project
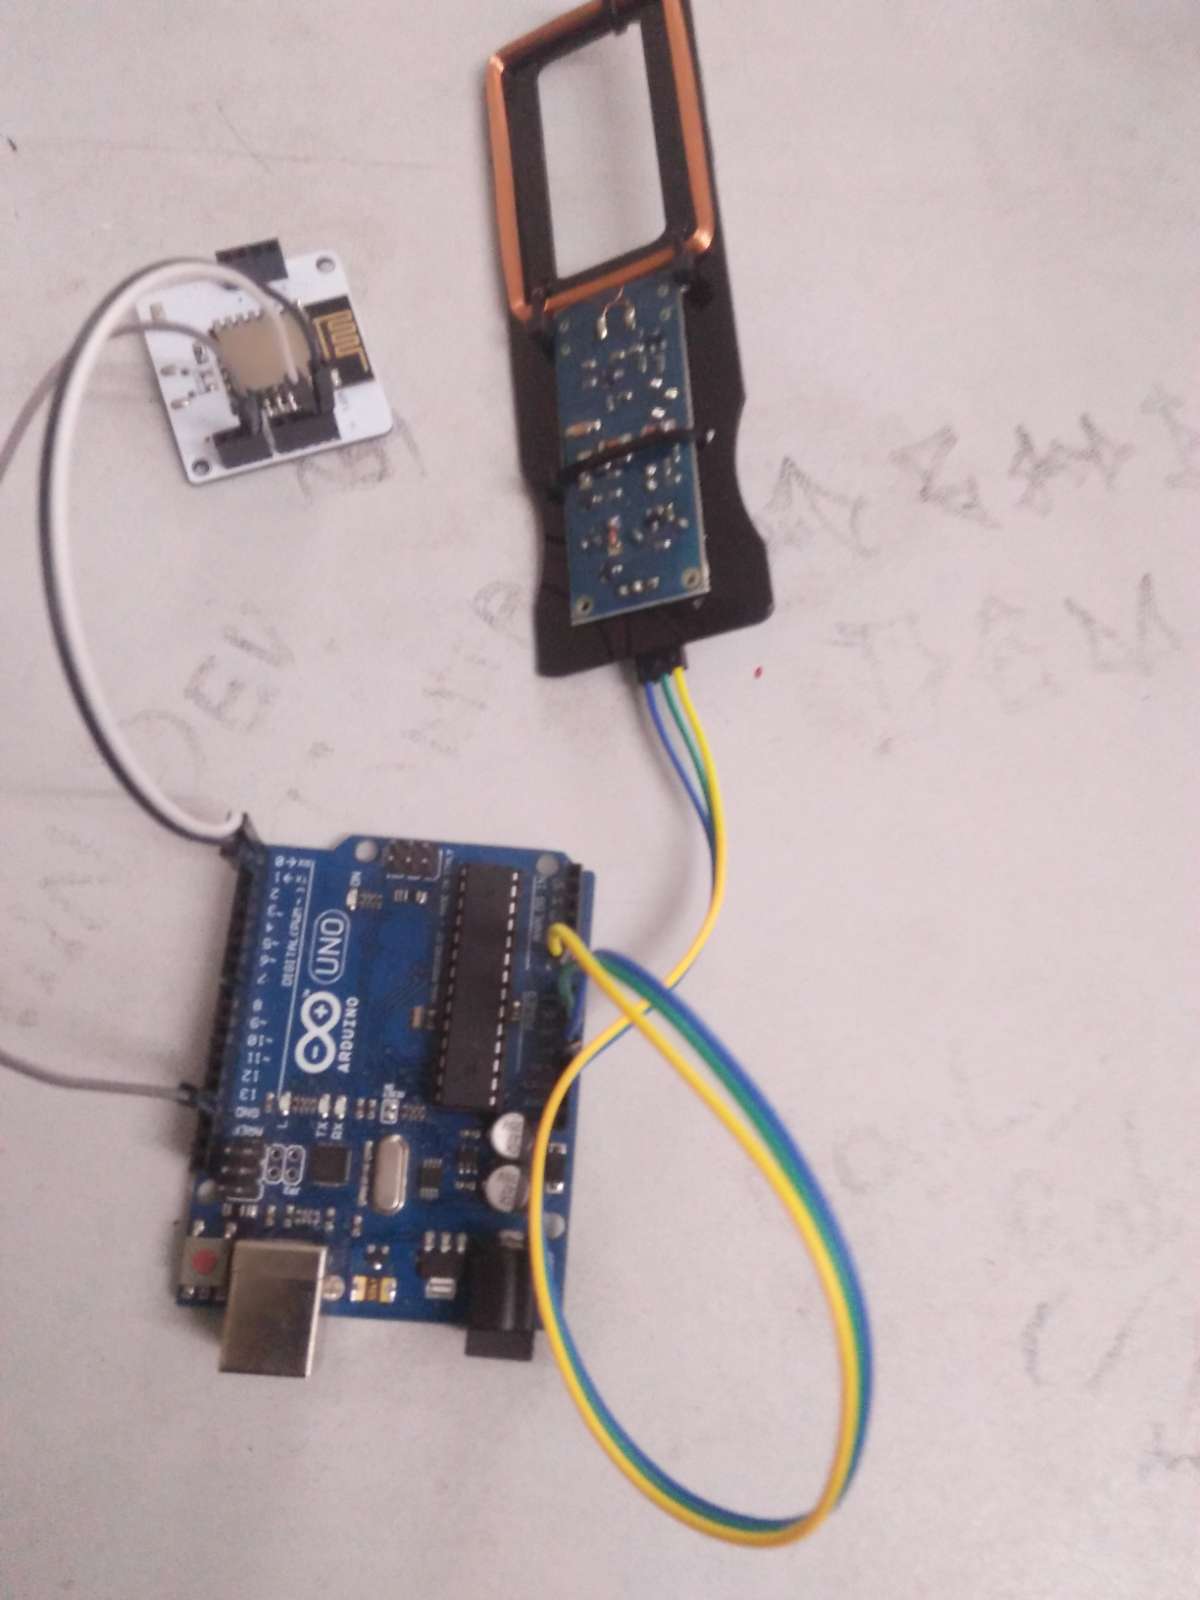
Step 1: First we should have to make a metal detector sensor by connecting it as it is given in the circuit diagram.
Step 2: After making of all the connections we should have to connect it through Bolt cloud using some process.
Step 3: After connecting it through the Bolt module you should download the blue print code which is .json format which i have given you below .
Step 4: Before going to see the mail alert and you should have to upload code in the Arduino ide after upload the code you should move to make the id on integromat
Using the following step to clone the 'Water Level Detection' scenario, that I created.
1. Download the blueprint of the Water Level Detection scenario attached in the code section of this project. Remember to save the file with the filename 'MetalDetection.json'.
2. Create a scenario, by clicking the blue 'Create a new scenario' button at the top right corner, and click on continue.
3. Click on the 'more' button at the bottom of the screen.
4. Select 'Import Blueprint' and click on 'Choose file'.
5. Navigate to the folder to which you download the 'MetalDetection.json' file, select the file and click open. Once done click save. The MetalDetection scenario will be loaded.
6. Click on the name of the scenario and change it to Metal Detection.
Use the following steps to configure the Metal Detection scenario.
1. Get your Bolt Cloud API key clicking here. The images below show how to enable and copy the API key.
2. Go back to the Integromat scenario, and click on the first BoltIoT bubble, and then click the 'add' button.
3. Paste the API key you had copied earlier, and click on 'continue' button.
4. Add the device name of your device. You can find out your Bolt WiFi module's device name by clicking here. Then click on ok.
5. For the second and third BoltIoT bubble, you can click on the drop down menu and select 'My Bolt Connection'. Remember to add the correct device name to each of them.
6. Click on the math bubble, and change the value 4 to the height at which you have kept your sensor,. Then click on ok.
7. Click on the red dot between the math and gmail bubble, replace 2 with the metal at which you want to be alerted, and click on ok.
8. Click on the gmail bubble, and click on the edit button.
9. Add your email id and click ok.
10. Click on the Add button, then continue button and allow Integromat access to your gmail account.
11. You can add more recipients by click on 'Add a recipient' button, and then click ok.
12. Make sure that your circuit is powered up, and click the Run button. The scenario will run and wait before the filter, indicated by the '1' in a thought bubble.
Mounting the System
Once this is done, all you have to do is mount the system such that the sensor points to the floor, power up the system and ensure that the Bolt has continuous access to the internet via your WiFi.
Applications
The system can be used in the following applications.
- The consideration of the critical ... requirements in relation to foreign body prevention and detection
- For finding metal inclusions hidden within objects, or metal objects buried underground.
- The change in the magnetic field due to the metallic object can be detected.