PRAVESH: Smart RFID Entry and Exit System for Campus Management
Replacing paper registers with real-time digital access logs
PRAVESH is a smart campus access system that replaces handwritten entry and exit registers with RFID-based digital logging. Built with Arduino UNO R4 WiFi, an RC522 RFID reader, a PHP backend, and a MySQL database, it records student movement quickly, clearly, and in real time.
The project is designed for schools, colleges, hostels, and similar institutions that still depend on manual registers. Instead of maintaining paper logs that are slow to fill, difficult to verify, and easy to misuse, PRAVESH creates an instant digital record every time a user scans an RFID card.
Demo video: Watch on YouTube
Live dashboard: Open demo
Source code: GitHub repository
The problem
In many campuses, entry and exit details are still written by hand. That process creates predictable problems:
- Records take time to write and verify.
- Handwriting can be unclear or incomplete.
- Administrators do not get real-time visibility.
- It is difficult to track why someone left and when they are expected back.
PRAVESH solves this with RFID-based identification, Wi-Fi-enabled logging, and a simple dashboard workflow. A user only needs to scan a card. The system reads the UID, sends it to the backend, stores the event in the database, and updates the dashboard immediately.
What makes PRAVESH different
PRAVESH is not just a card scanner or a basic attendance logger. It combines hardware, backend logging, and follow-up record collection into one practical workflow:
- RFID-based identification for fast scanning
- Arduino UNO R4 WiFi for real-time communication
- LCD, RGB LED, and buzzer for instant user feedback
- PHP and MySQL backend for structured record storage
- Email form to collect reason for visit and expected return time
- Dashboard for user management, live records, and Excel export
This means the system records not only who entered or exited, but also the context behind each movement.
Why it matters
- Faster entry and exit processing for students
- Better accountability for administrators
- Reduced dependence on paper registers
- Cleaner and more searchable records
- Low-cost hardware that is realistic for campus deployment
System overview
The complete system works as a connected chain:
- A user scans an RFID card on the reader.
- The Arduino reads the UID and checks Wi-Fi connectivity.
- The UID is sent to the backend using HTTP POST.
- The backend matches the UID with the registered user.
- The event is stored in the MySQL database.
- An email form can collect the reason for visit and expected return time.
- The admin dashboard updates with the latest movement record.
- The system resets and waits for the next scan.
Main features
- RFID card and key-tag support
- Real-time UID transmission over Wi-Fi
- Digital entry and exit log storage
- Email-based visit detail collection
- Admin dashboard for monitoring and user management
- Excel export for reporting
- On-device feedback through LCD, LED, and buzzer
Components used
- Arduino UNO R4 WiFi
- RC522 RFID card reader module
- RFID cards and key tags
- LCD1602 display with I2C interface
- RGB LED
- 5V passive buzzer
- 10K ohm resistor
- Jumper wires
- Breadboard
How we built it
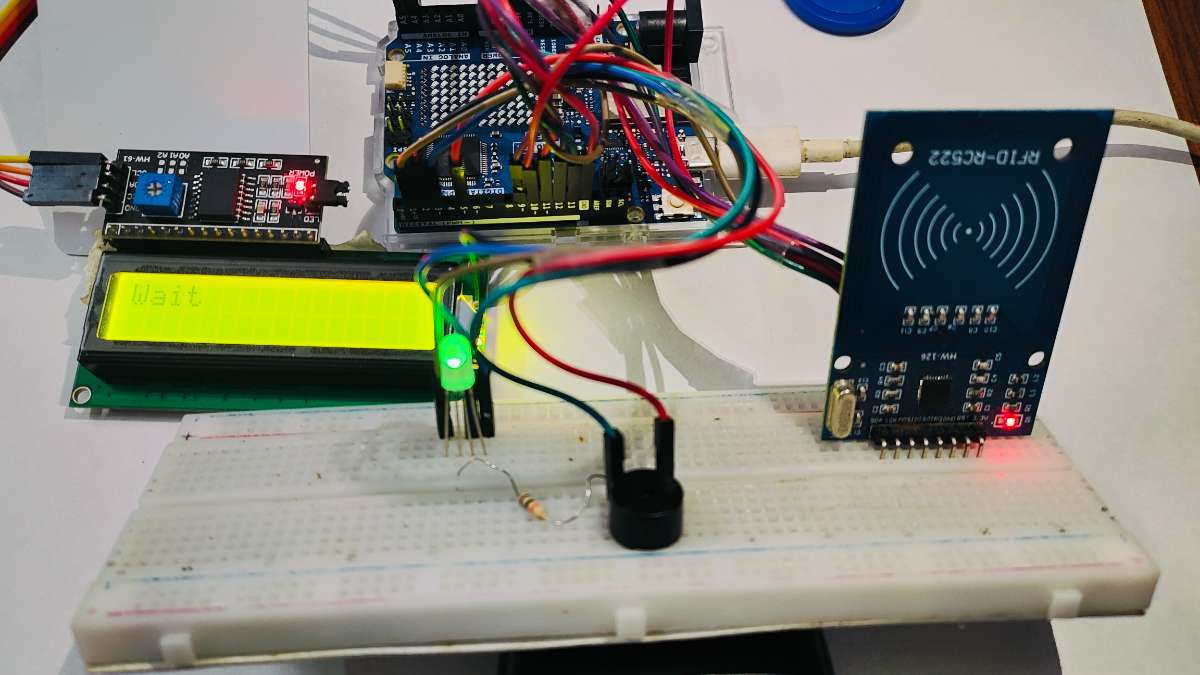
1. Hardware prototype
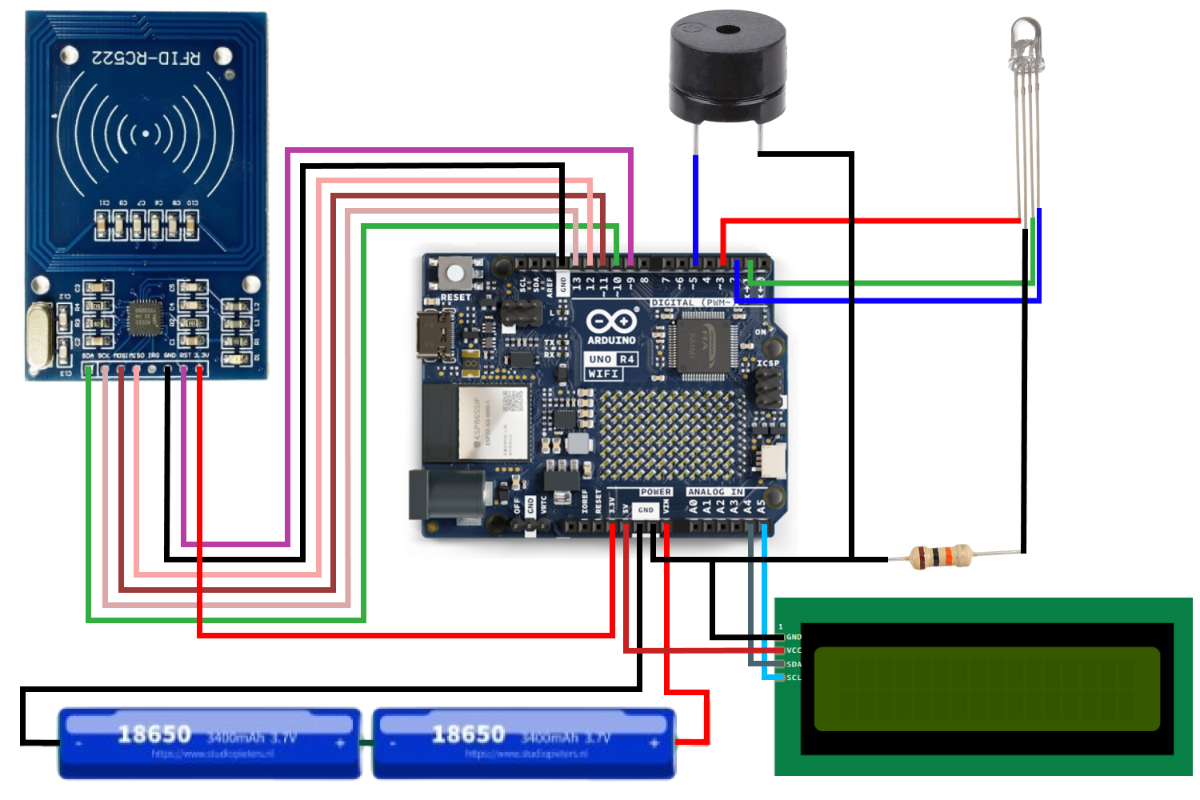
We used the Arduino UNO R4 WiFi as the main controller because it combines microcontroller functionality with built-in wireless connectivity. The RC522 module handles RFID card scans, while the LCD, RGB LED, and buzzer provide immediate feedback to the user.
Important connections:
- RFID
SDAto Arduino pin10 - RFID
SCKto Arduino pin13 - RFID
MOSIto Arduino pin11 - RFID
MISOto Arduino pin12 - RFID
RSTto Arduino pin9 - Buzzer to pin
5 - LCD
SDAtoA4 - LCD
SCLtoA5
2. Arduino firmware
The Arduino firmware is responsible for connecting to Wi-Fi, waiting for RFID scans, reading the UID, sending it to the server, and updating the LCD and LEDs so the device remains easy to use.
String postData = "uid=" + uid;
client.beginRequest();
client.post("/rfidattendance/test_data.php");
client.sendHeader("Content-Type", "application/x-www-form-urlencoded");
client.sendHeader("Content-Length", postData.length());
client.beginBody();
client.print(postData);
client.endRequest();
This step is the core of the system. A physical scan becomes a digital event that the backend can process instantly.
Device states during operation
When the firmware runs, the device gives clear visual feedback so the user always knows its current state.
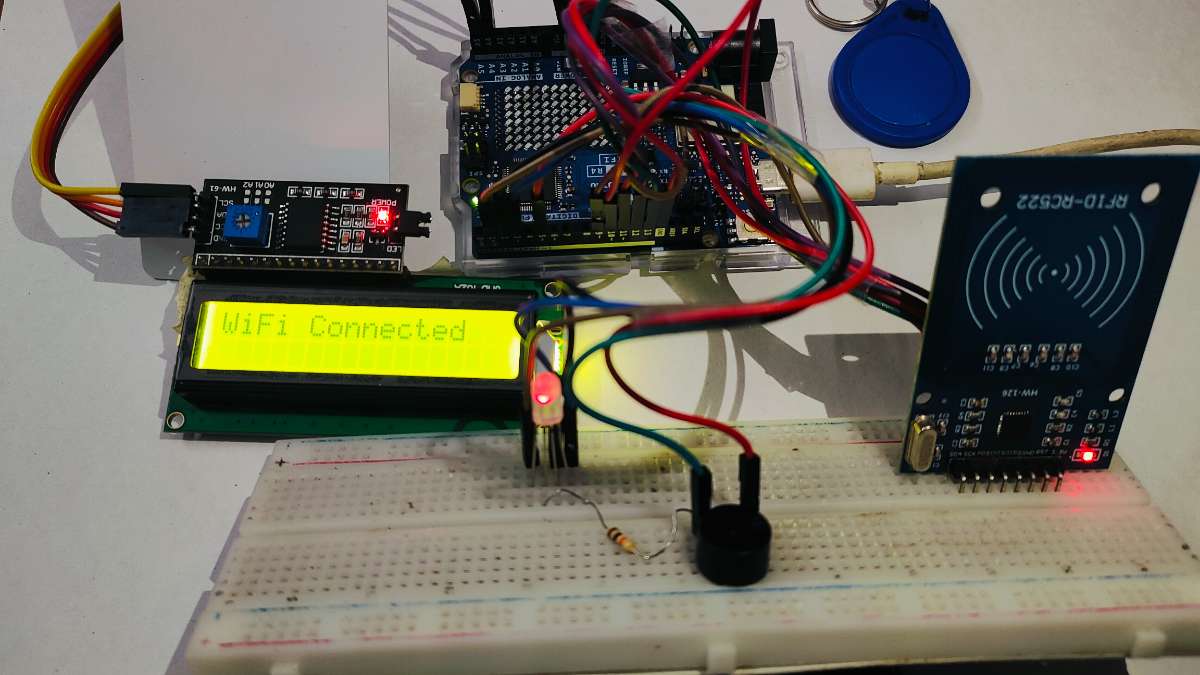
Wi-Fi connecting
If the board is not connected to Wi-Fi, the red LED stays on and the display shows that the system is trying to connect.

Wi-Fi connected
Once the network connection is established, the display confirms that Wi-Fi is connected.
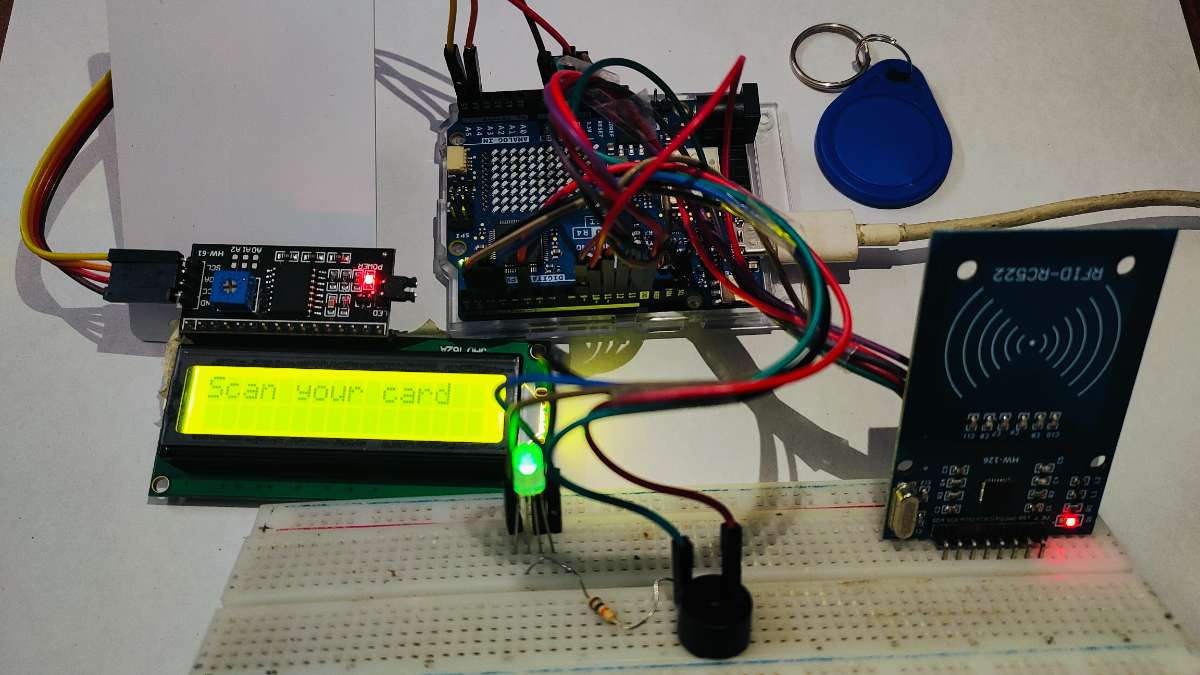
System ready
After initialization completes, the green LED indicates that the system is ready for the next RFID scan.
3. Backend and database
We used PHP for backend processing and MySQL for storage. When a UID reaches the server, the backend identifies the user, records the event, and stores it in a structured database for later review.
The database stores:
- user identity
- card UID
- entry and exit timestamps
- email address
- reason for visit
- expected return time
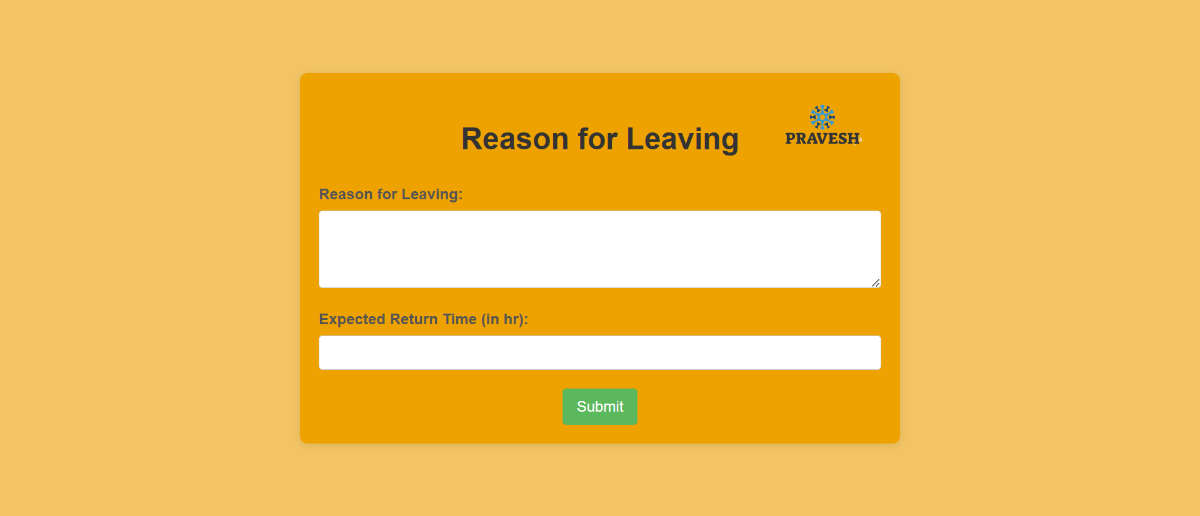
4. Email workflow
To make the project more useful than a basic scan logger, we added an email form workflow. After a scan, the system can send a form to the user asking for the reason for visit and the estimated return time. Once the form is submitted, the database is updated automatically.
5. Admin dashboard
We built a web dashboard using HTML, CSS, JavaScript, PHP, and MySQL. It helps administrators manage users and monitor records from one interface.
The dashboard supports:
- admin login
- user management
- live record viewing
- entry and exit monitoring
- Excel export for reports
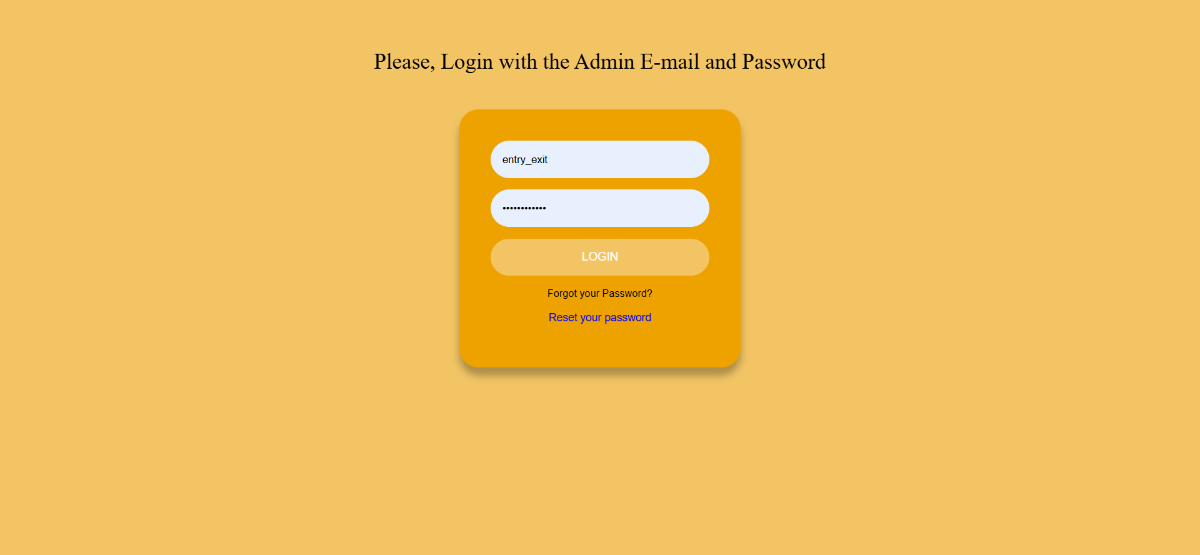
Login page
The dashboard starts with a login page so only authorized administrators can access the system.
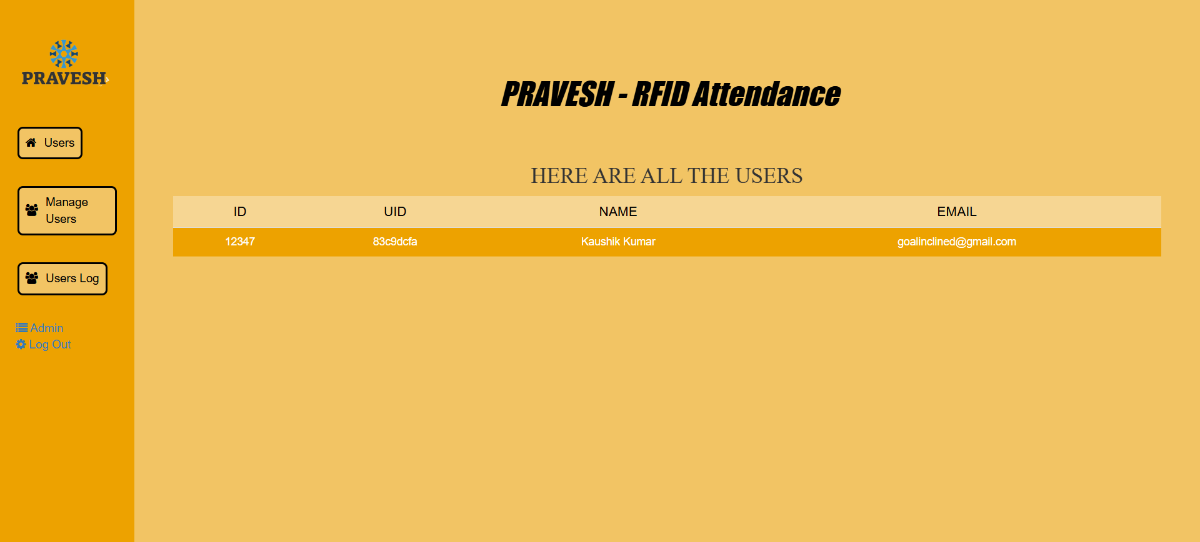
Users page
This page lists registered users and their core identity details.
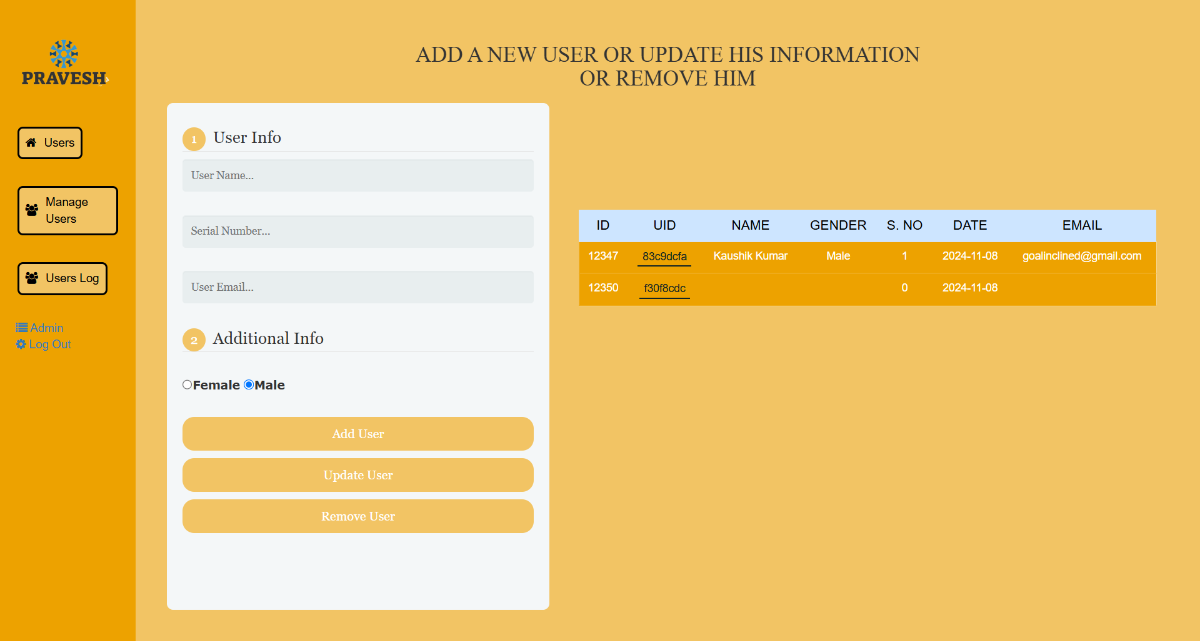
Manage users page
Administrators can add, update, and remove users through the management interface.
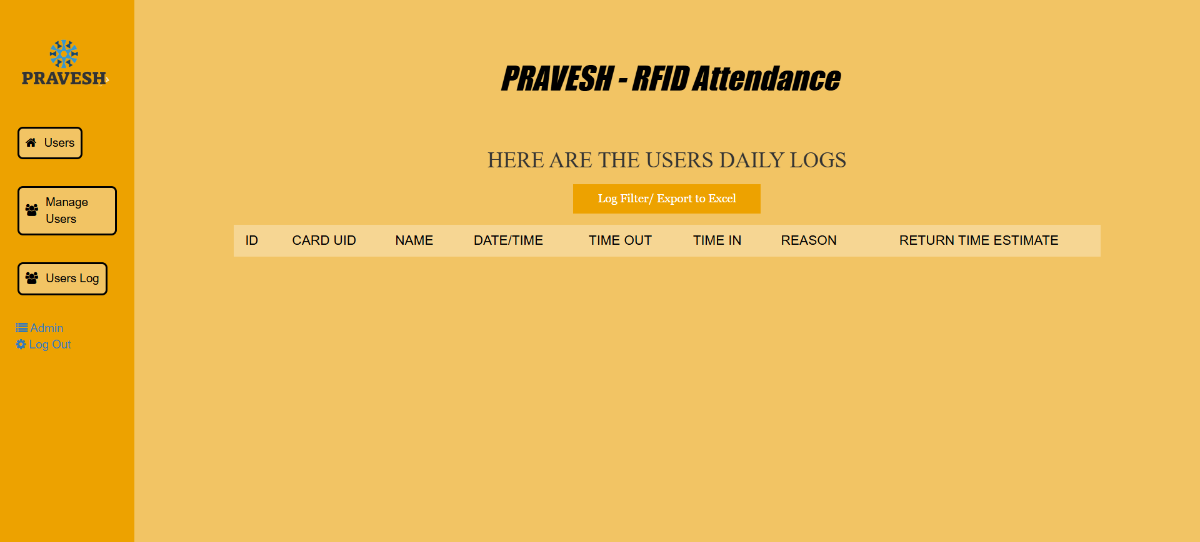
Users log page
The log page provides a clear view of recorded entry and exit activity.
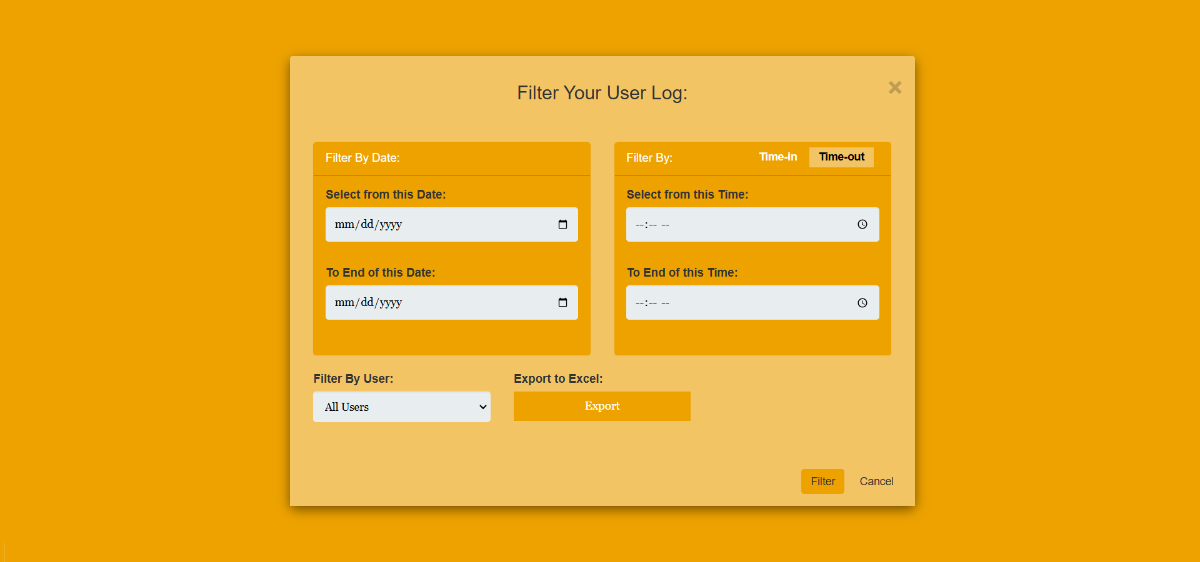
Export page
Records can be filtered and exported to Excel for reporting and administrative review.
6. Full workflow testing
We tested the project from end to end: card scan, UID transfer, database storage, email workflow, and dashboard update. This confirmed that PRAVESH works as a complete system rather than as disconnected modules.
Working evidence
RFID scan in progress
When a card is scanned, the LCD shows a wait message while the UID is sent to the server.
System reset after a successful scan
After the request is processed, the system returns to the ready state and prompts the next user to scan their card.
.jpg)
Results
PRAVESH improves the speed and accuracy of campus entry and exit tracking by replacing paper records with a real-time digital workflow. It gives students a faster scanning experience and gives administrators a more reliable way to monitor movement, collect visit details, and generate reports.
How to reproduce the project
Hardware setup
- Connect the RFID reader, LCD, buzzer, and RGB LED to the Arduino UNO R4 WiFi.
- Upload the Arduino sketch from the project to the board.
- Update the Wi-Fi credentials and backend endpoint before flashing.
Software setup
- Set up a PHP-enabled server such as XAMPP or WAMP.
- Import the MySQL database schema.
- Place the backend files in the server directory.
- Configure the database connection.
- Run the dashboard and test the complete RFID-to-database flow.
Project links
- GitHub repository: PRAVESH-Smart_Entry-Exit_System
- Live dashboard: pravesh-demo
- Demo video: YouTube demonstration
Team
- Kaushik Kumar: hardware design and Arduino development
- Harsh Vardhan: full-stack development and system integration
License
This project is released under the Apache License 2.0. See the LICENSE file for details.