
From Filament Spools to Fresh Greens: My Recycled Hydroponic Tower
Why I built this
.jpg)
Okay, real talk — if you're into 3D printing, you already know the problem. Every time you finish a roll of filament, you're left with one more empty plastic spool. And they just... pile up. Mine were stacking in a corner, and tossing them in the bin felt so wasteful. So one day I'm staring at this little tower of clear plastic spools and the thought hits me: what if these could actually grow me something to eat?
That's how this whole project was born. I wanted to hit two birds with one stone — give these spools a proper second life instead of letting them become landfill, and grow my own fresh greens at home. No more buying those sad little packets of herbs that wilt after three days in the fridge. The goal was simple: a steady, homegrown supply of basil and lettuce, picked fresh whenever I want. Basically, chasing that "vegetable freedom."
Quick primer in case "hydroponics" is new to you: it's a way of growing plants without any soil. Instead, the roots are fed directly with nutrient-rich water, which usually means faster growth, less mess, and far less water wasted than growing in the ground. A hydroponic tower takes that idea and stacks it vertically — plants grow out of the sides of a tall column while water trickles down through it — so you can pack a surprising number of plants into a tiny footprint. It's a great fit for growing food at home when you don't have a garden or much space.
Where the idea came from
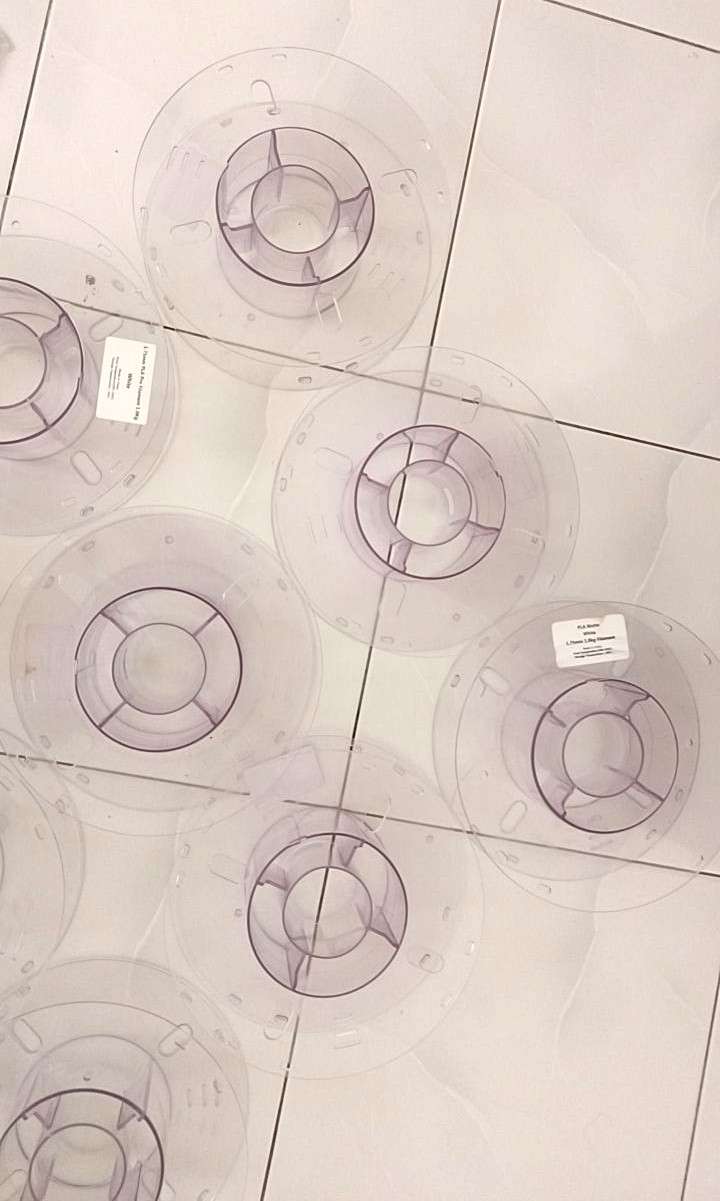
The more I looked at a filament spool, the more I realized the shape is just about perfect for this. It's round, it's got a hollow center, and when you stack a few together they naturally form a tower. But the part I love most? My spools are transparent. So instead of an ugly, opaque plastic tube, the whole tower ends up looking clean and kind of futuristic — you can see the roots and the water moving through it. It turned into a display piece as much as a growing system.
But beyond just looking cool, the real push behind this was sustainability. We toss out so much plastic without a second thought, and 3D printing — as fun as it is — creates its own little stream of waste too. I wanted to prove that "waste" is really just a resource waiting for a better idea. If an empty spool can become a home for living, growing food, then that's recycling with a real, edible payoff. This project is my small way of tying together two things I care about: making/printing, and growing food in a way that's kinder to the planet.
The recycled heroes
Before the techy stuff, here's the part I'm proudest of: the entire backbone of this tower is built from things that were basically headed for the bin. These are the real stars of the build:
- Empty filament spools: the whole tower body. Transparent 3D-printer spools that were just stacking up in a corner gathering dust. (Recycled element #1)
- My childhood water bucket: the reservoir at the base. An old bucket I've had since I was a kid and hadn't touched in years — and somehow it fits the spool almost perfectly. (Recycled element #2)
- Washed-out takeaway containers: the seed-germination greenhouses. After a meal I rinse the box clean, and the lid doubles as a humidity dome for sprouting seeds. (Recycled element #3)
- An old roll of TPU filament: printed into all the flexible net cups that hold the plants. It was an impulse buy from 2023 that I'd never found a use for (I probably grabbed it just to test and mess around at the time) — it never even made it into a dry box, so it had gone stringy and was a real pain to clean up. (Recycled element #4)
Everything else — the pump, hoses, lights, and nutrients — is standard kit.
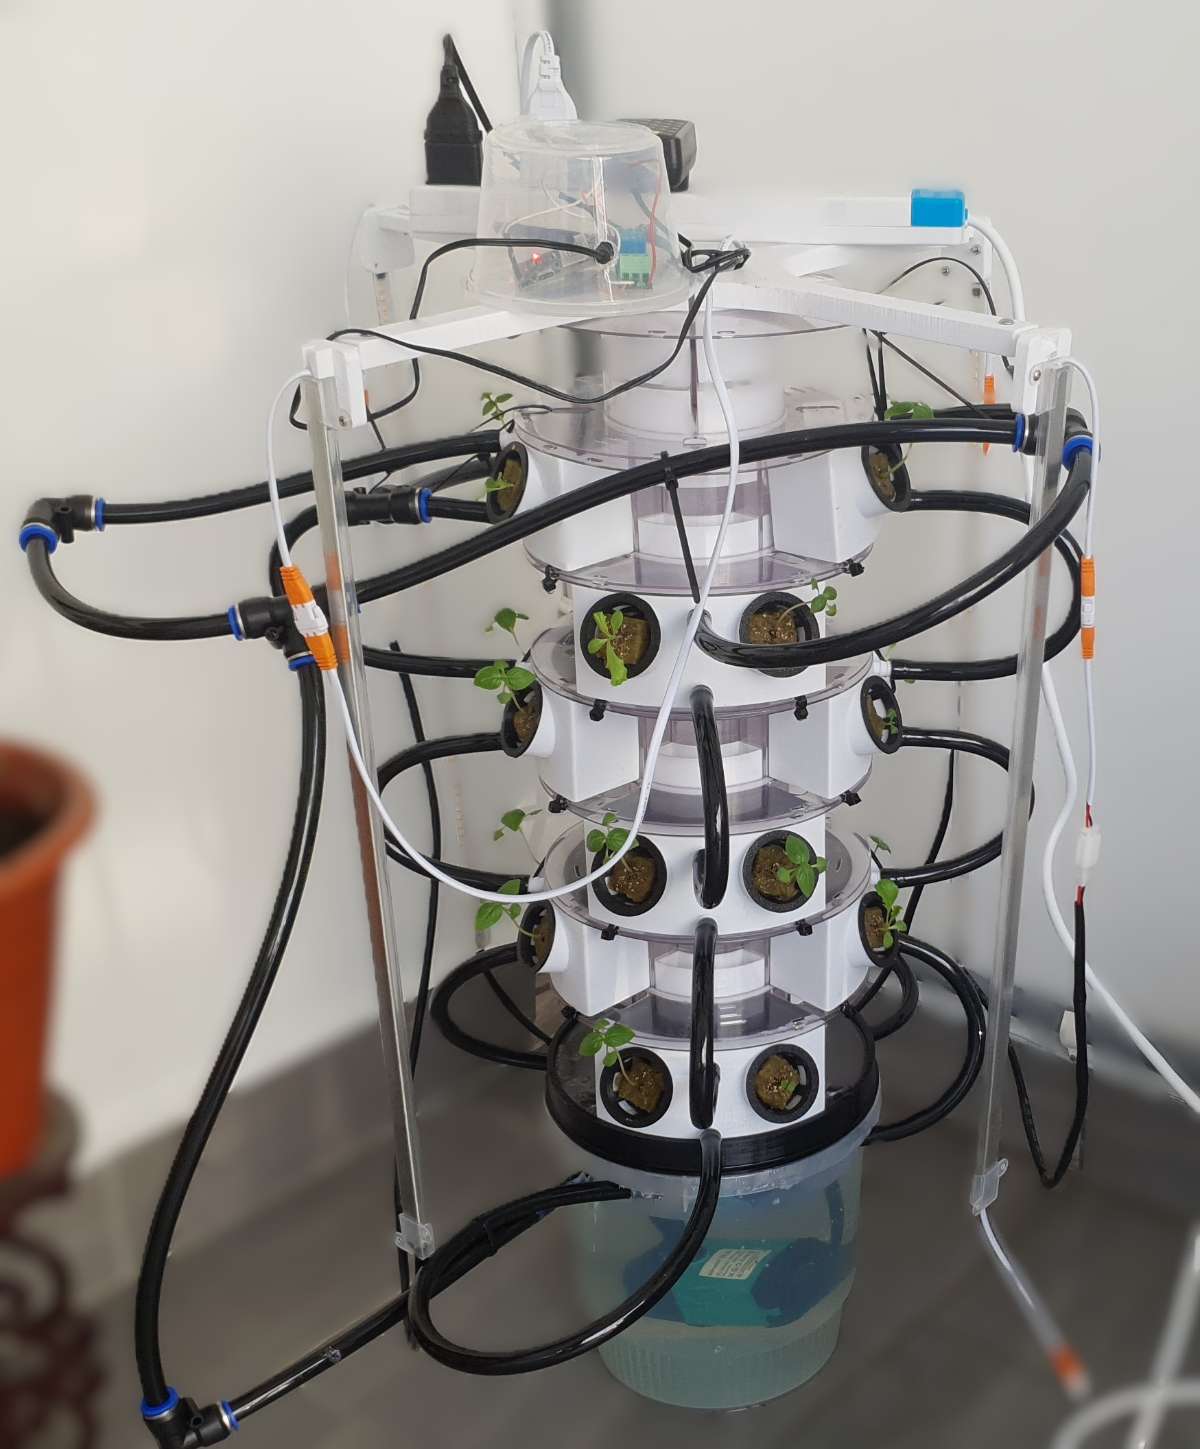
How I built it
Alright, here's the fun part — how this thing actually went together. Fair warning up front: this is a first prototype, so the outside looks a little wild, with hoses going everywhere. But every messy-looking bit is doing a job, and it works exactly the way I wanted. On top of that, every single 3D-printed part in this build I designed myself from scratch in Fusion 360, so the whole thing is custom-fit to the spools.
.png)
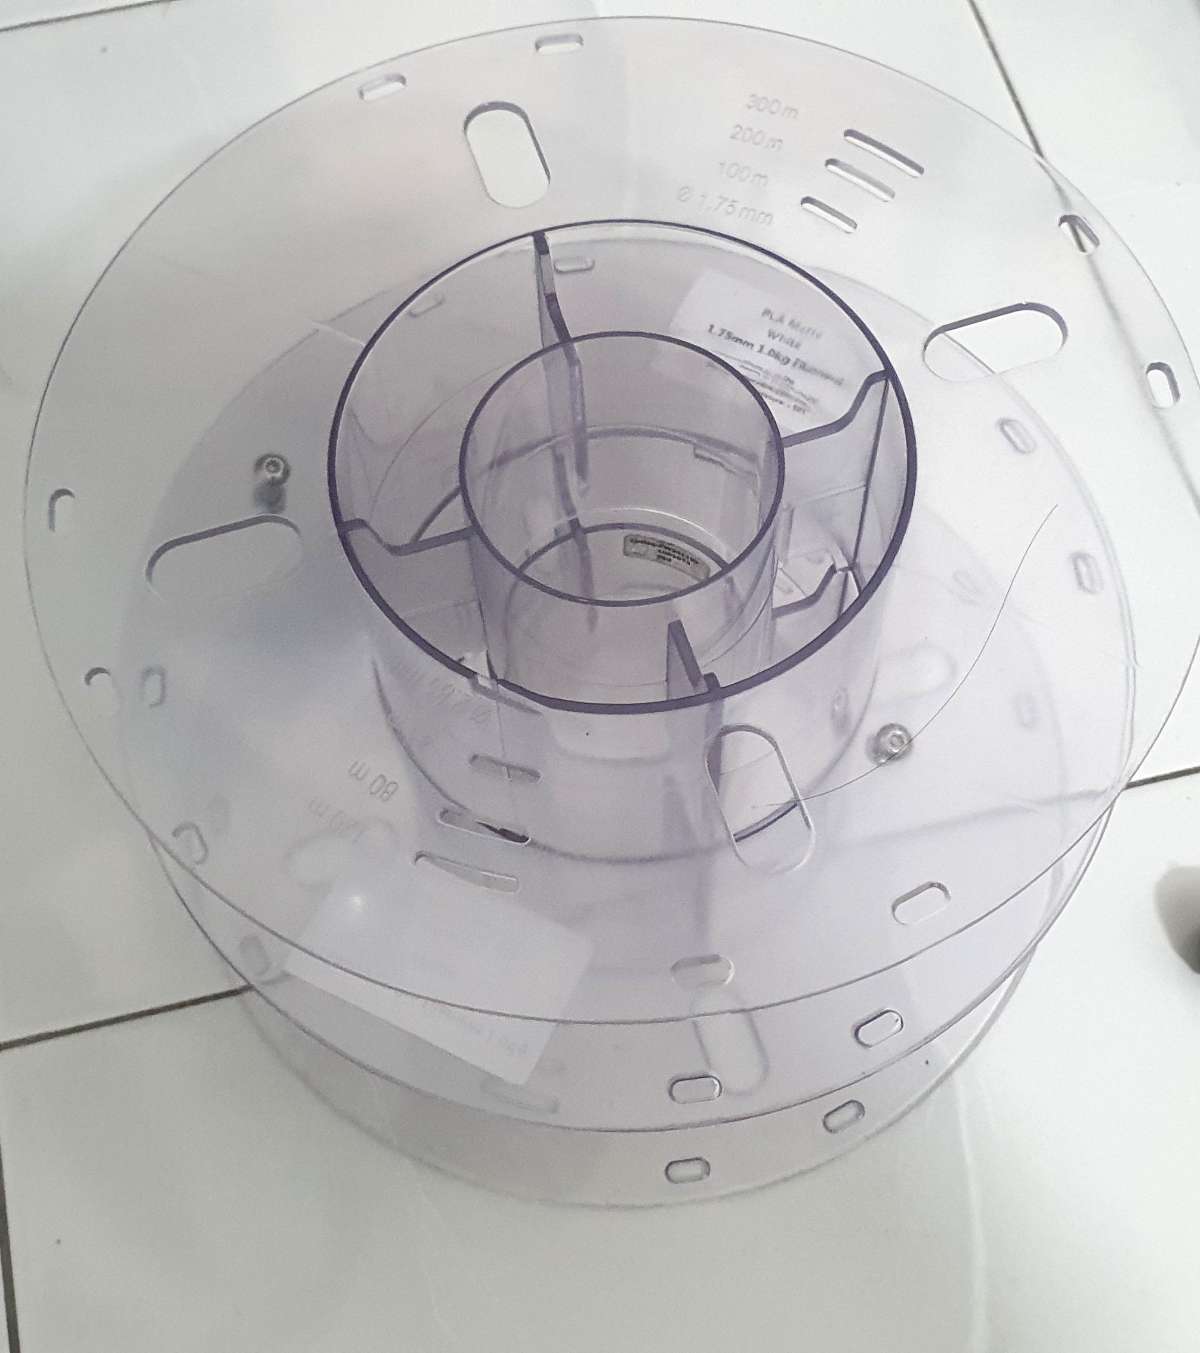
1 The tower (stacked spools)
The body of the tower is built entirely from those empty, recycled filament spools, stacked one on top of another. The best bit is that my spools already come with a divided internal structure — little built-in compartments — so I barely had to modify anything. I stacked 6 functioning layers, plus 1 extra spool on top as a "buffer" that holds the grow-light frame (the light can't really reach that top spool, so I just let it sit there and do structural duty). Why stop at 6? Because 6 layers is about the maximum my grow light can cover evenly — go past that and the lower plants end up sitting in shadow.
.jpg)
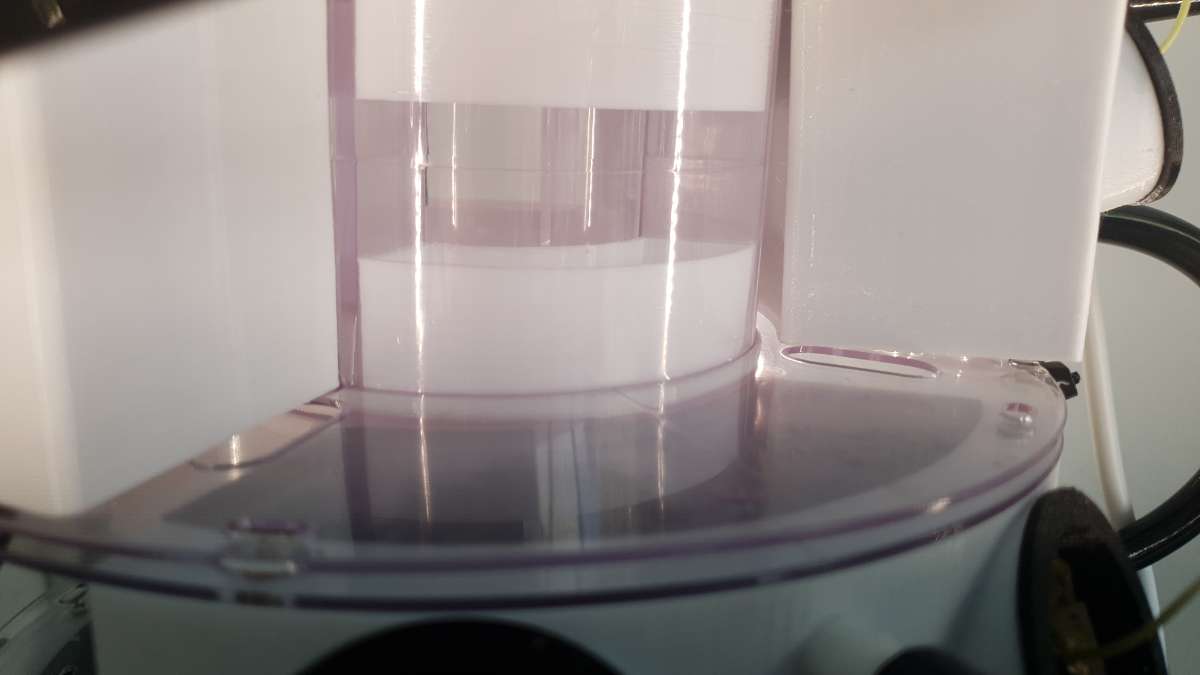
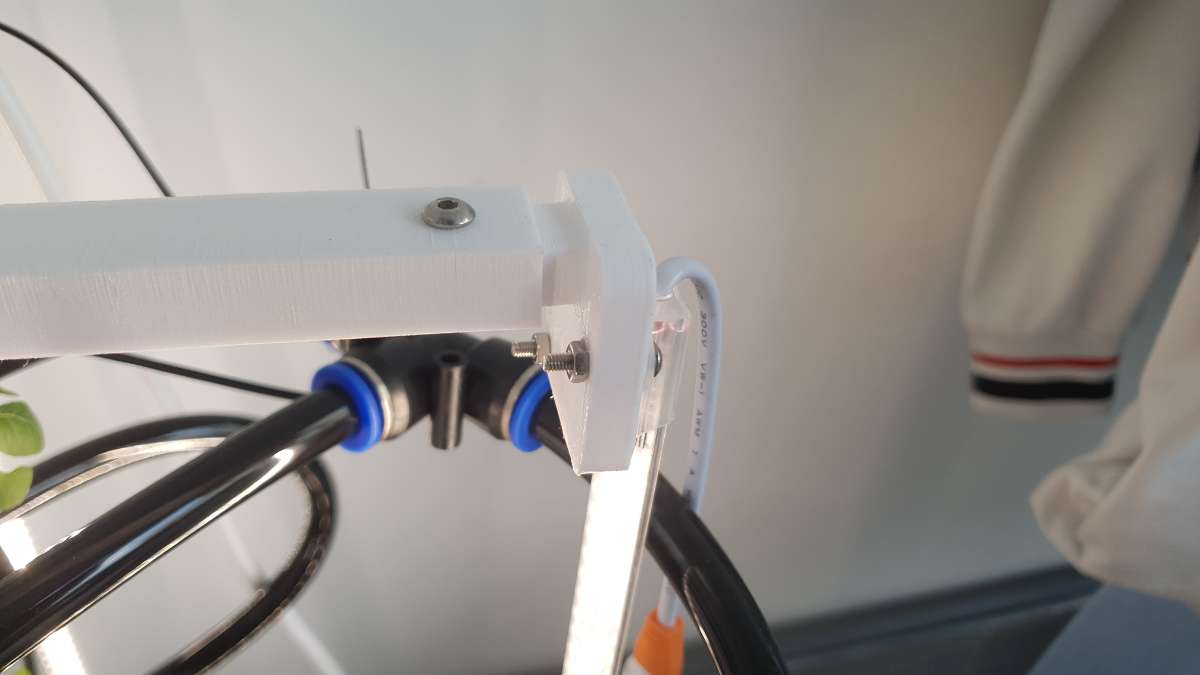
Now, stacking spools is one thing — keeping them from wobbling apart is another. So I designed a PETG connector that joins each spool to the one above it, locking the layers together tightly. It keeps the whole tower solid so it won't slip or topple over — pretty important once you've got six layers of water and growing plants stacked up.
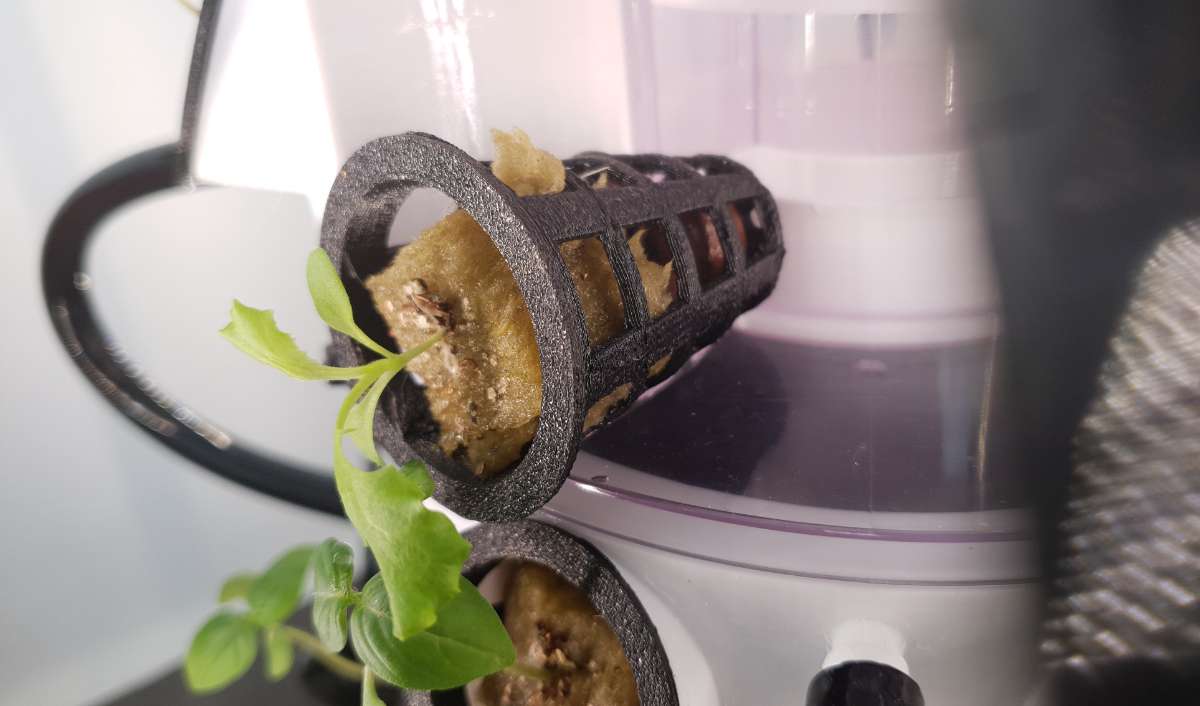
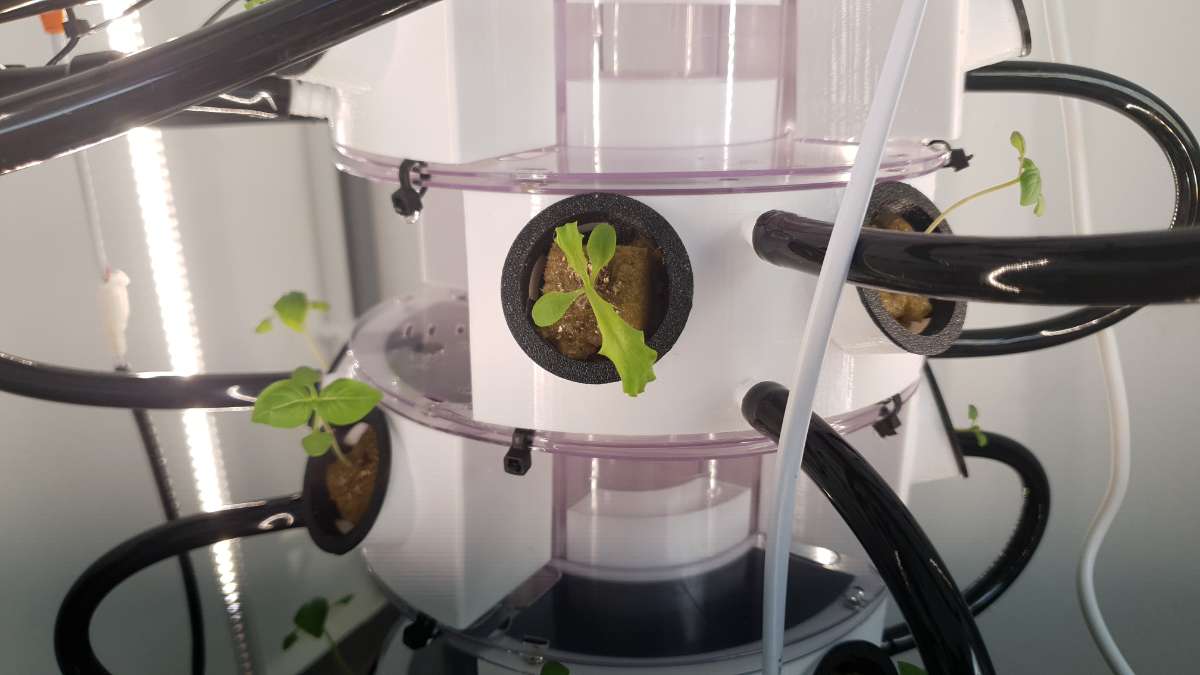
2 The planting containers
Into each spool's compartments I slot white PETG printed containers — 4 per spool, each with 2 planting holes. Do the math and that's 8 plants per layer, so the whole tower can hold a small jungle. Here's the part that made me really happy: the spools already have 2 holes on each side, so I just screw each container straight in with M3 8mm screws. No drilling, no fuss — everything was basically ready to go.
.jpg)
.jpg)
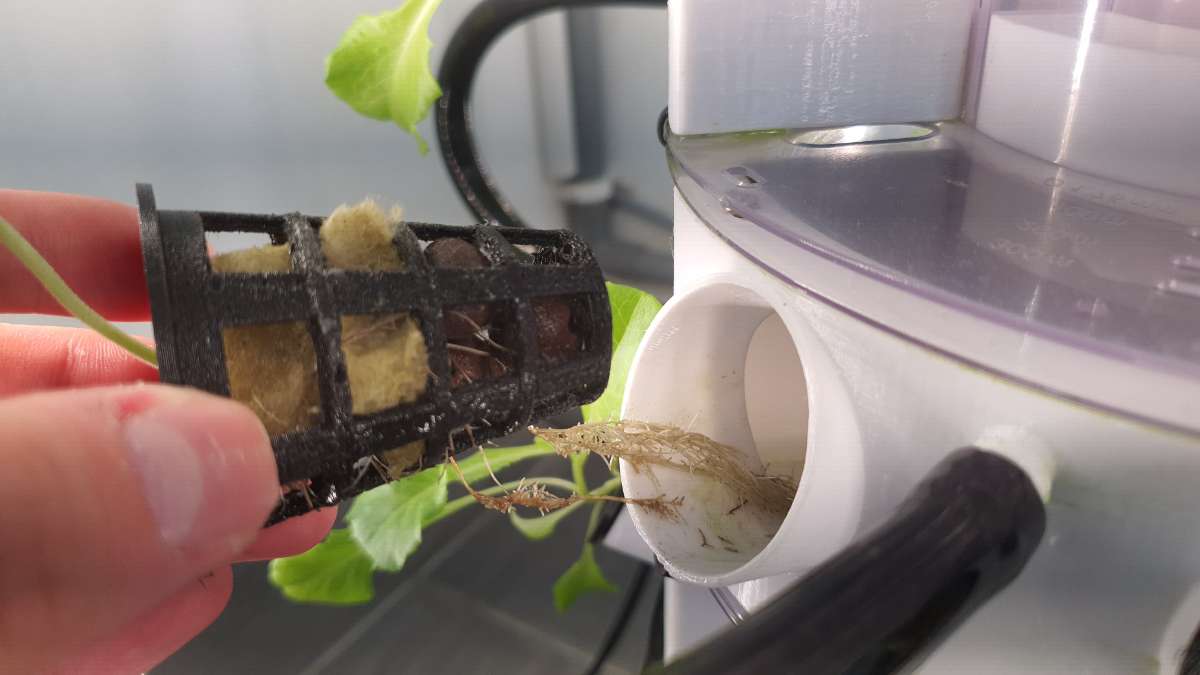
3 The net cups (printed from recycled TPU)
Sitting inside each of those planting holes is a net cup — the little mesh pot that actually cradles the rockwool cube and the seedling. This is where that mystery 2023 TPU roll finally earned its keep: I printed every net cup in TPU.
And honestly? TPU turned out to be a brilliant fit for this job, not just a way to burn through old stock:
- It's soft and flexible, so the cups are easy to squeeze, pop the rockwool in and out, and reuse over and over without cracking.
- It shrugs off acid. My nutrient water sits at pH 5.5–6, and TPU stands up to that acidity without breaking down over time.
- It handles heat, sun, and UV much better over the long haul — which matters for a part that lives under grow lights (and maybe outdoors someday) for months on end.
With 8 plants per layer across 6 layers, that's a lot of net cups to print — which is exactly how I finally finished off that entire roll.
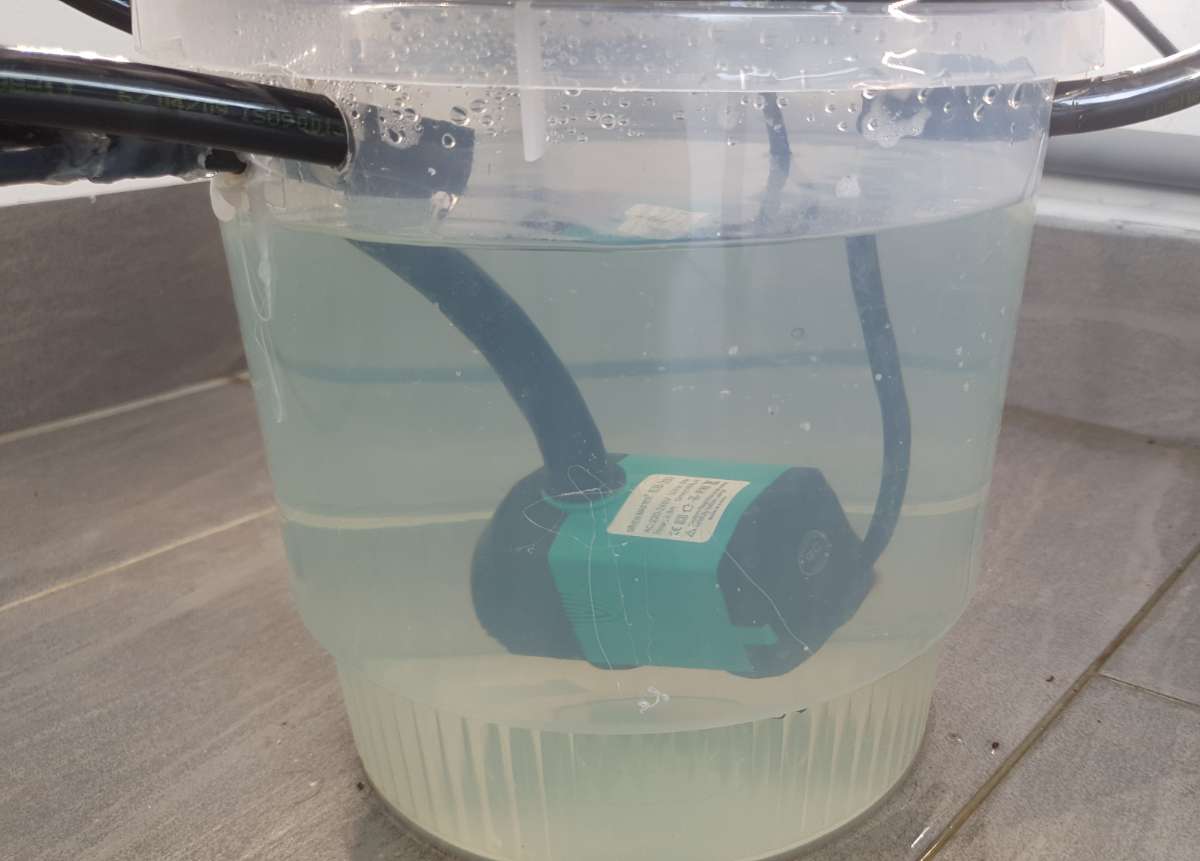
4 The reservoir (and yes, the bucket)
At the very bottom sits the water reservoir — and I'll be honest, it's an old bucket I've literally had since I was a kid and hadn't used in years. So no judging the bucket! Funny enough, it turned out to fit the filament spool almost perfectly, like it was meant to be. Recycled element #2 — and probably my favourite rescue of the whole build.
5 Water flow & plumbing
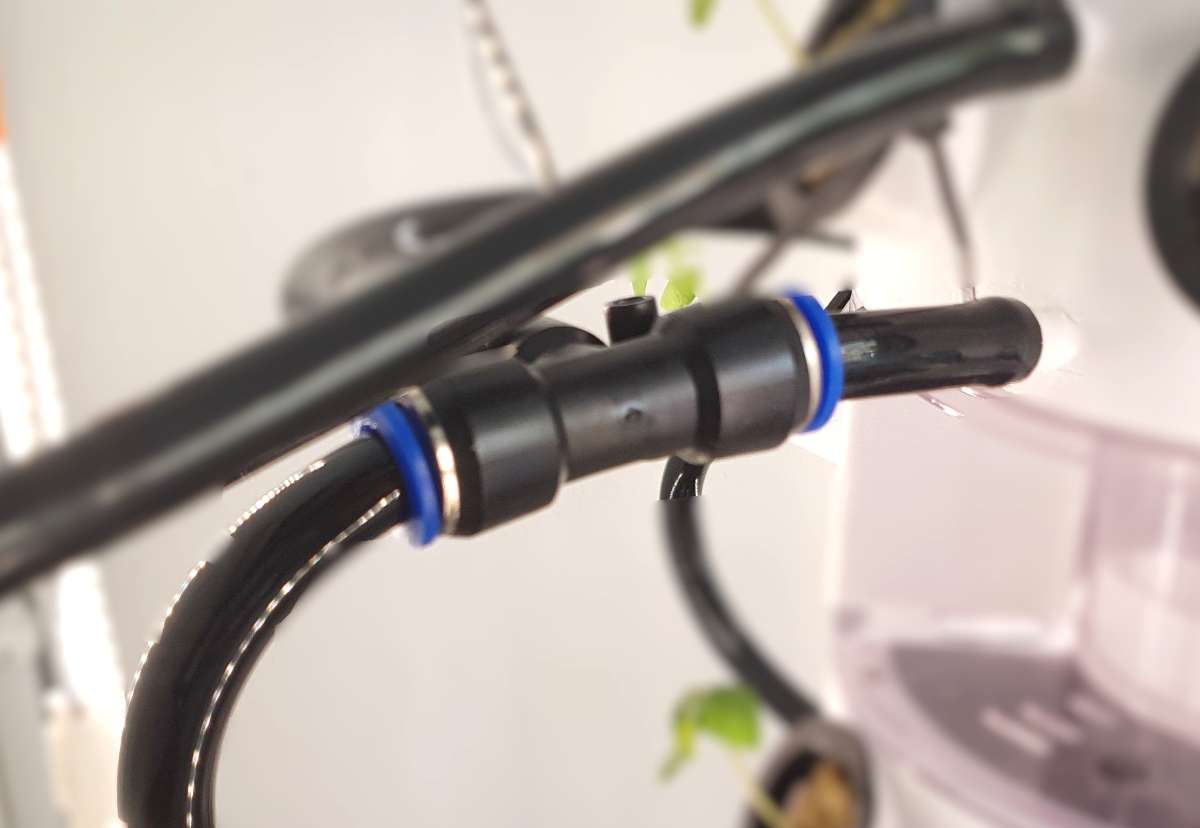
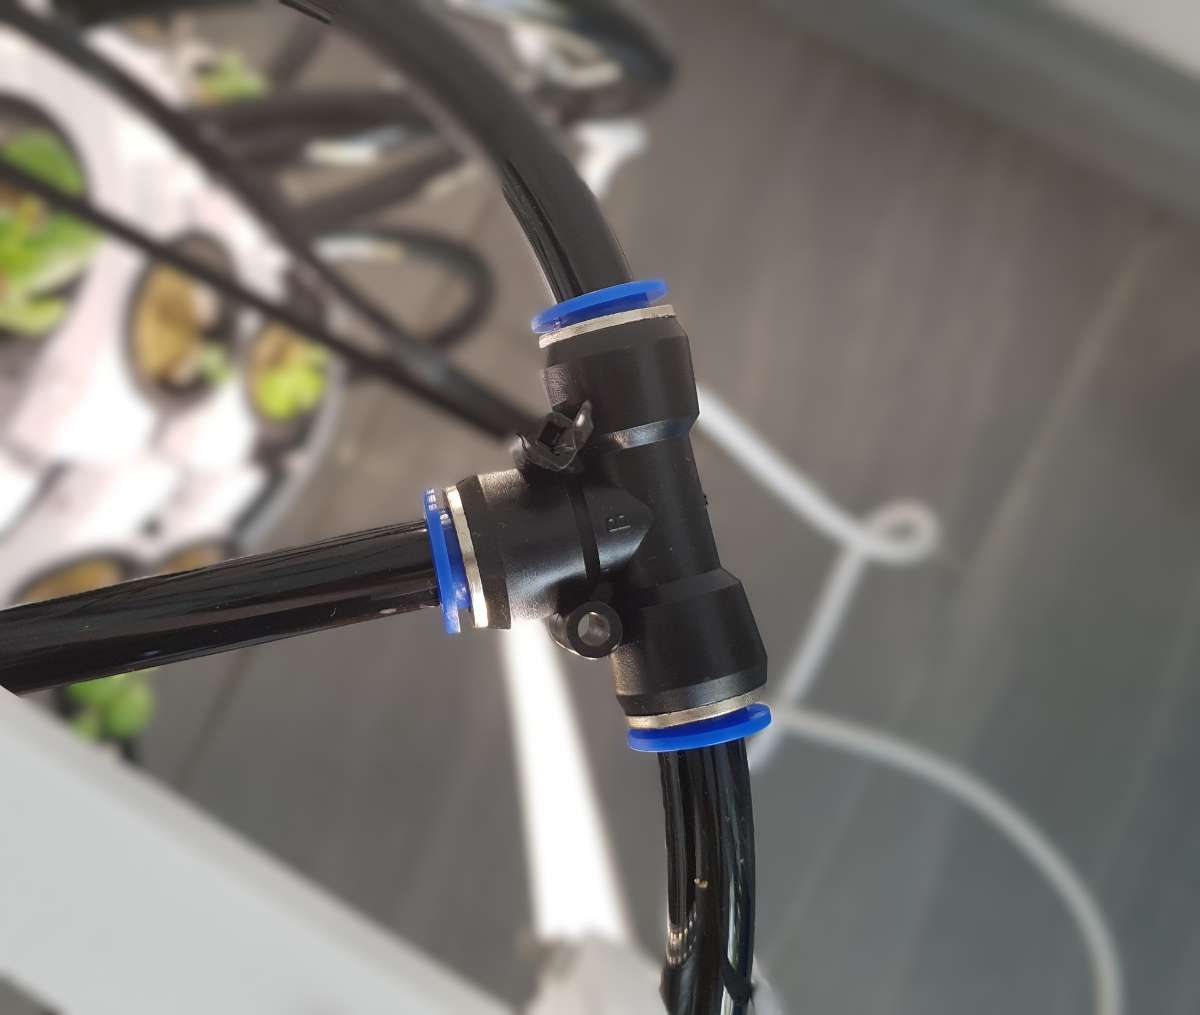
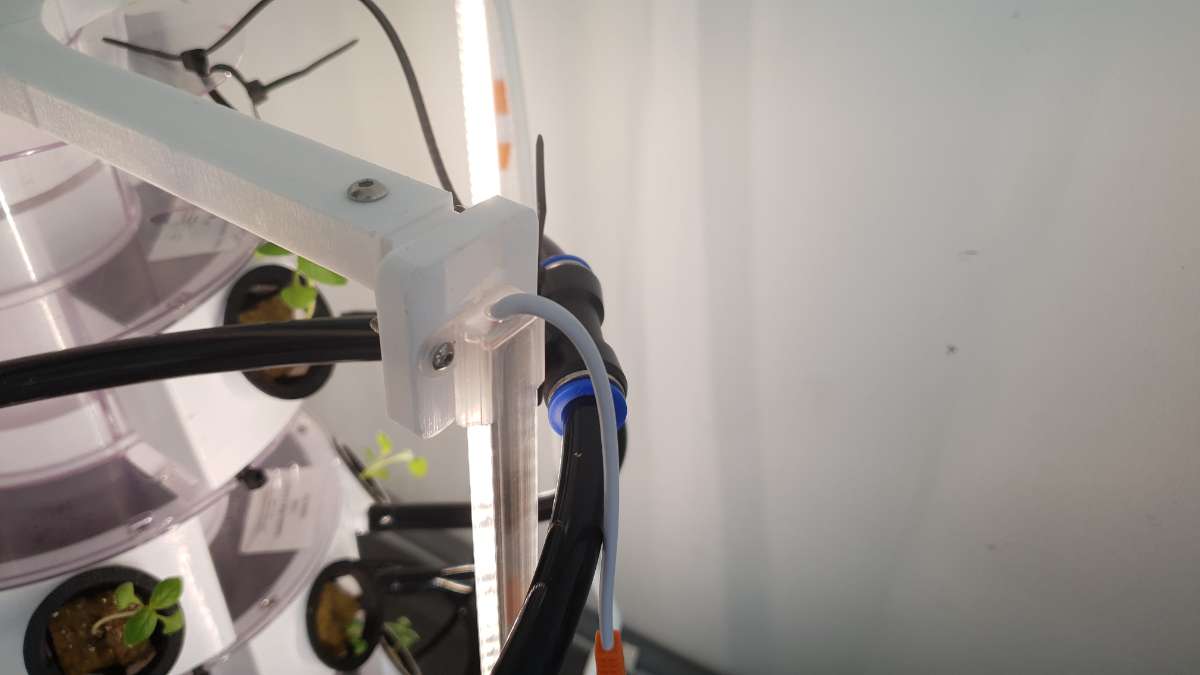
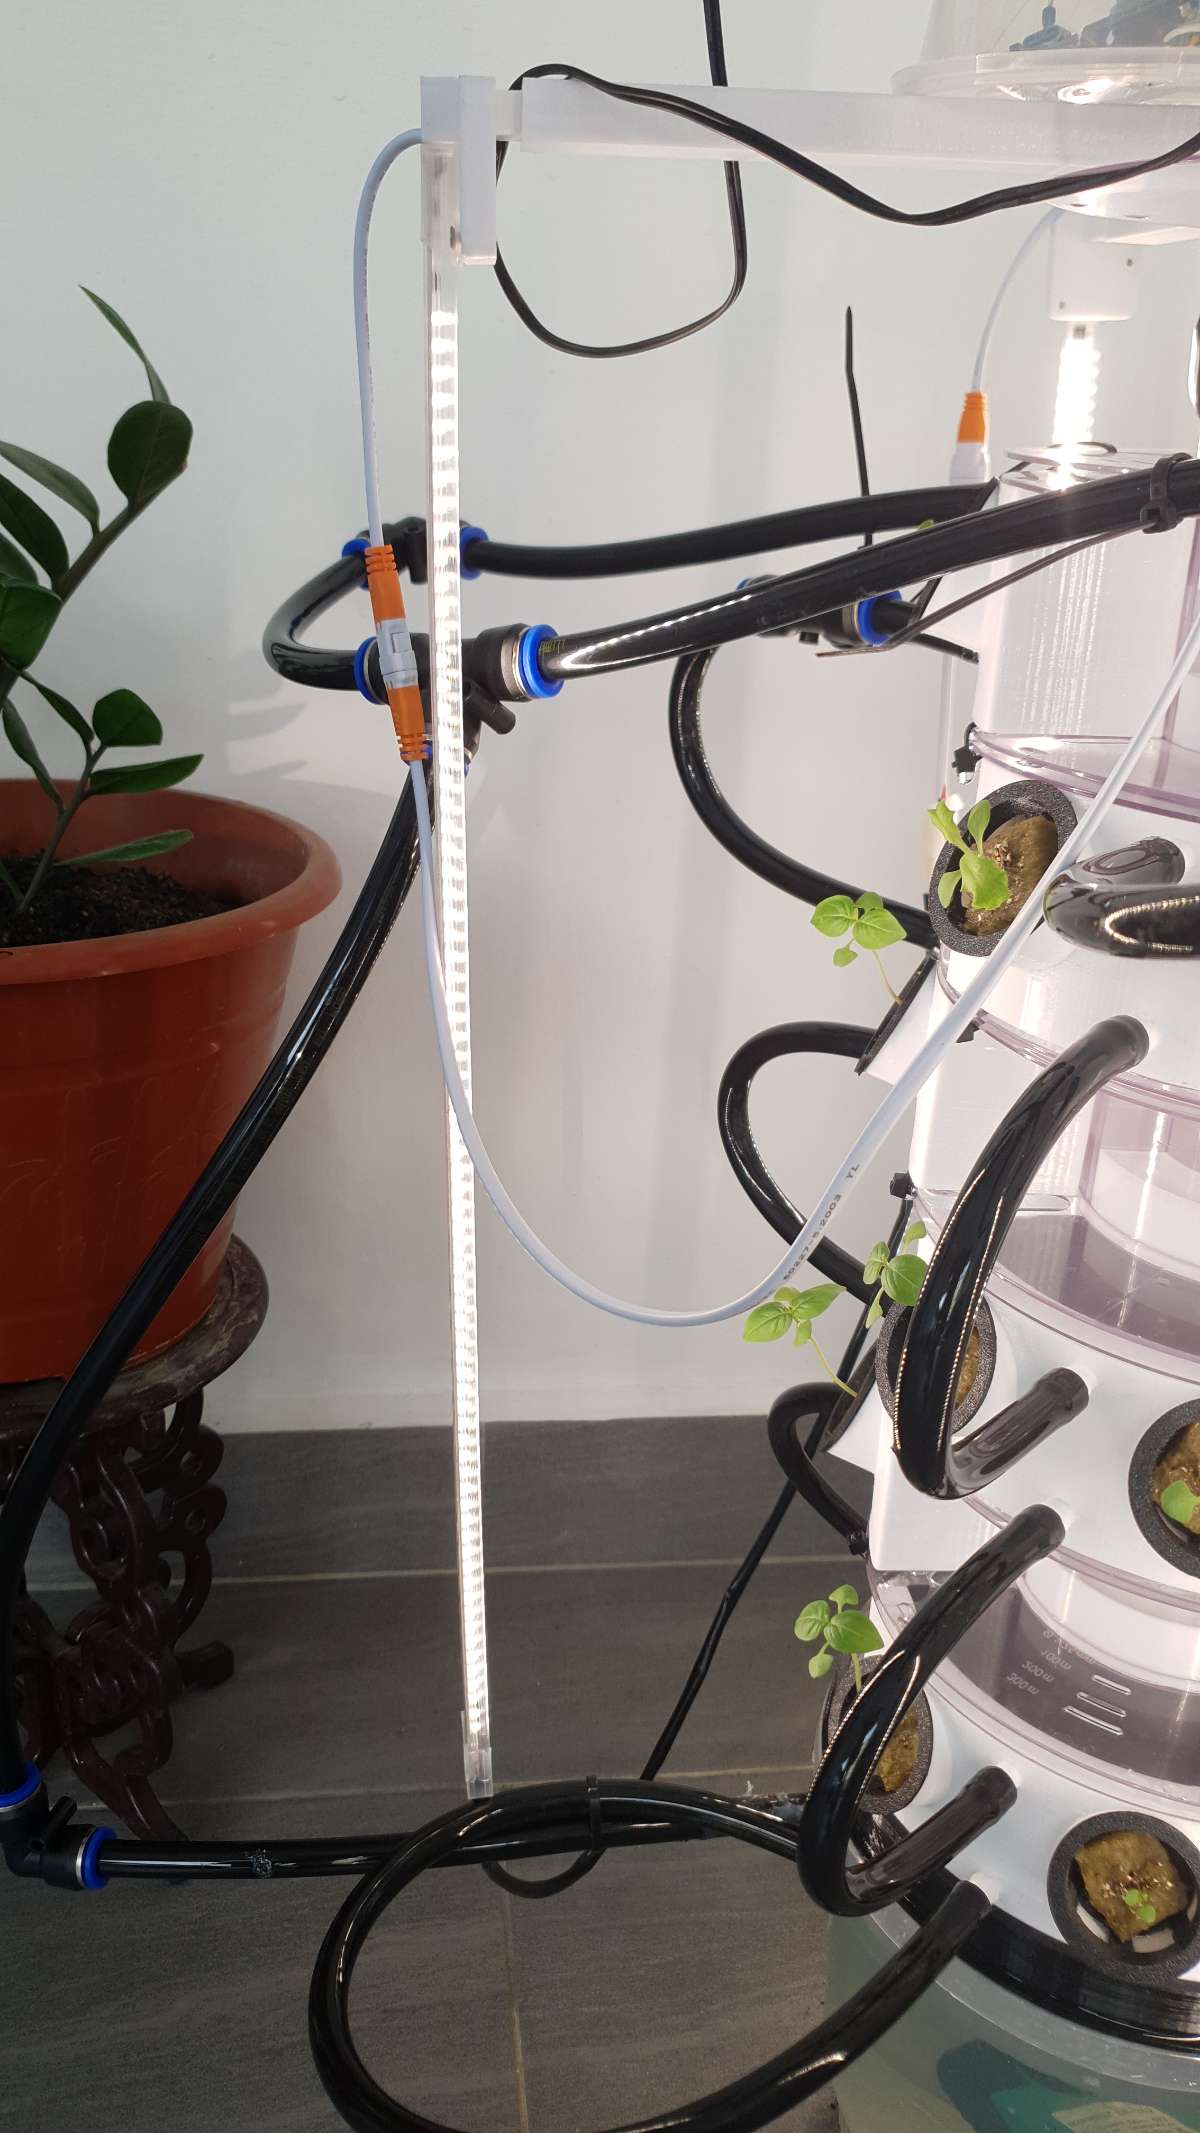
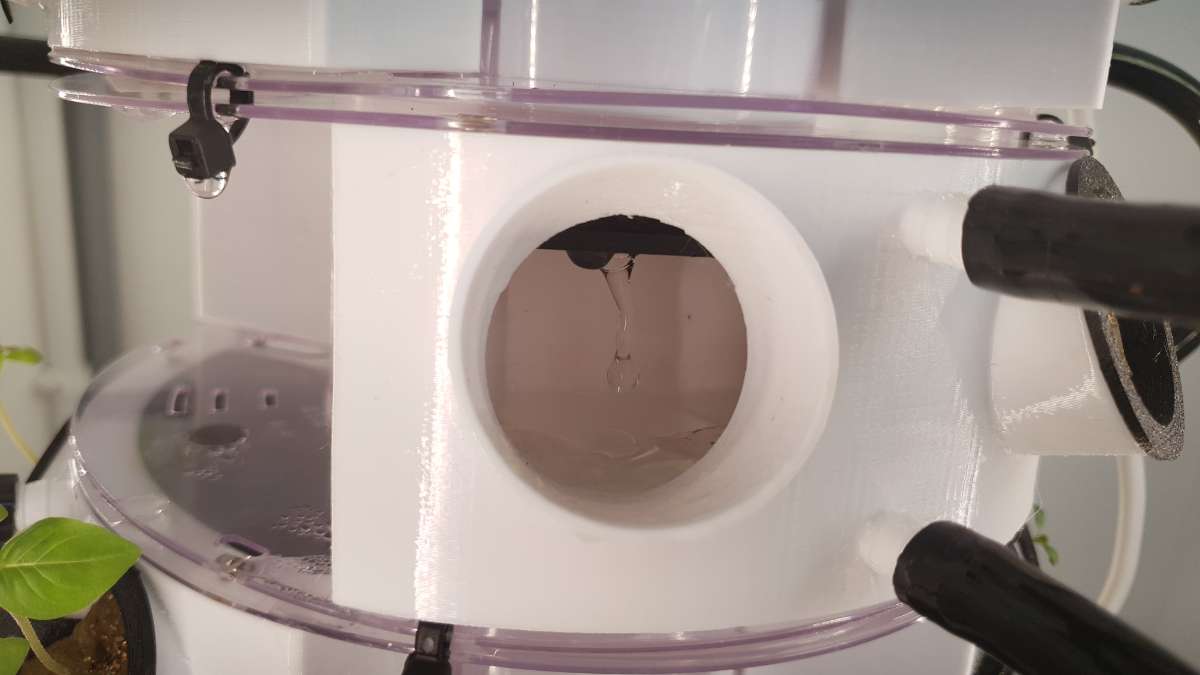
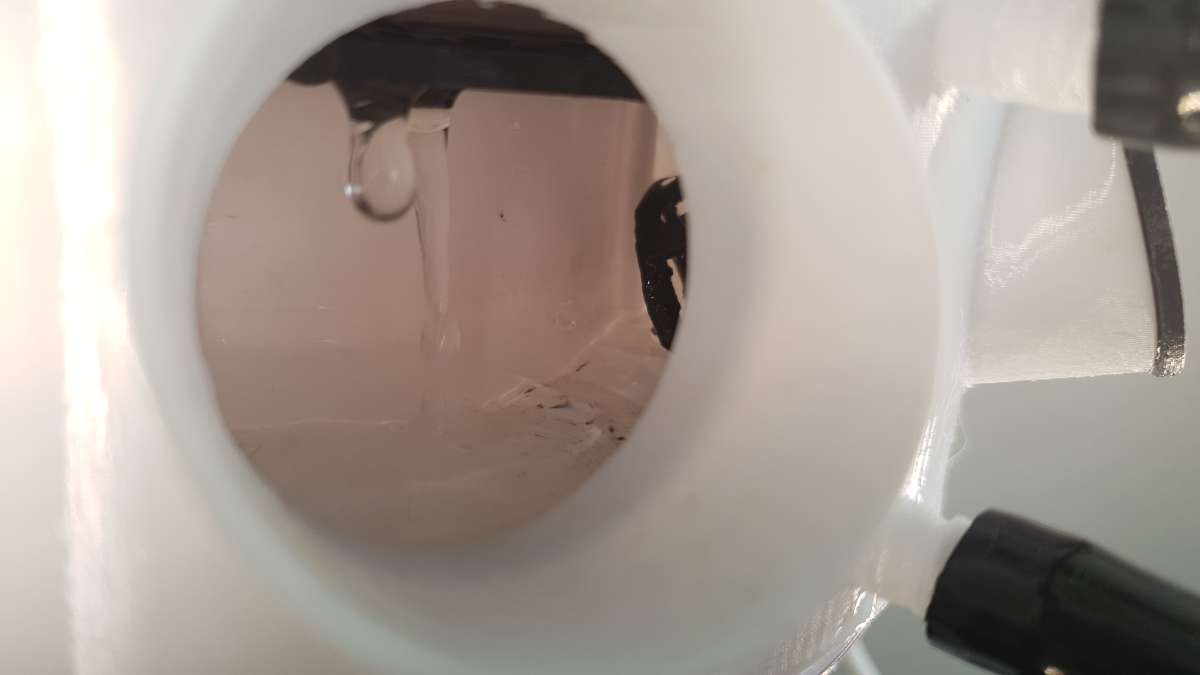
The water does a full loop. A pump down in the bucket pushes water all the way up to the top of the tower, and from there gravity takes over — the water trickles down, overflowing from one container into the next, layer by layer, until it drains back into the bucket. To make that happen I drilled 4 holes on each side for the overflow piping between containers, plus 1 hole for the pump line running up. The whole thing is plumbed with 12mm x 8mm PU hose (the design is sized specifically around that tube) and PE-12 / PV-12 quick-connect couplings, which make it easy to pull apart and tweak.
6 The brain: Arduino + pump
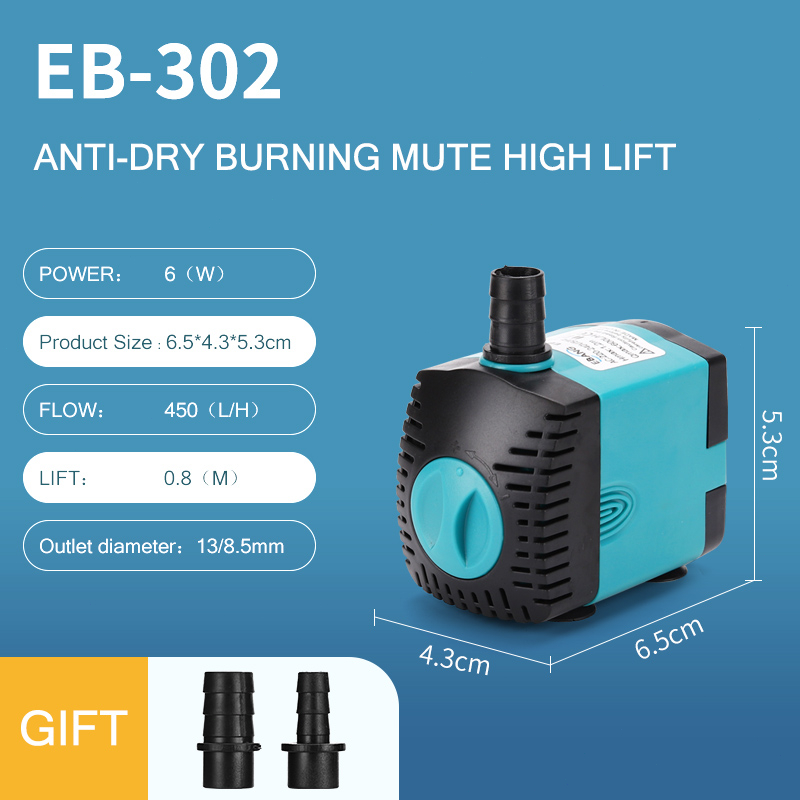
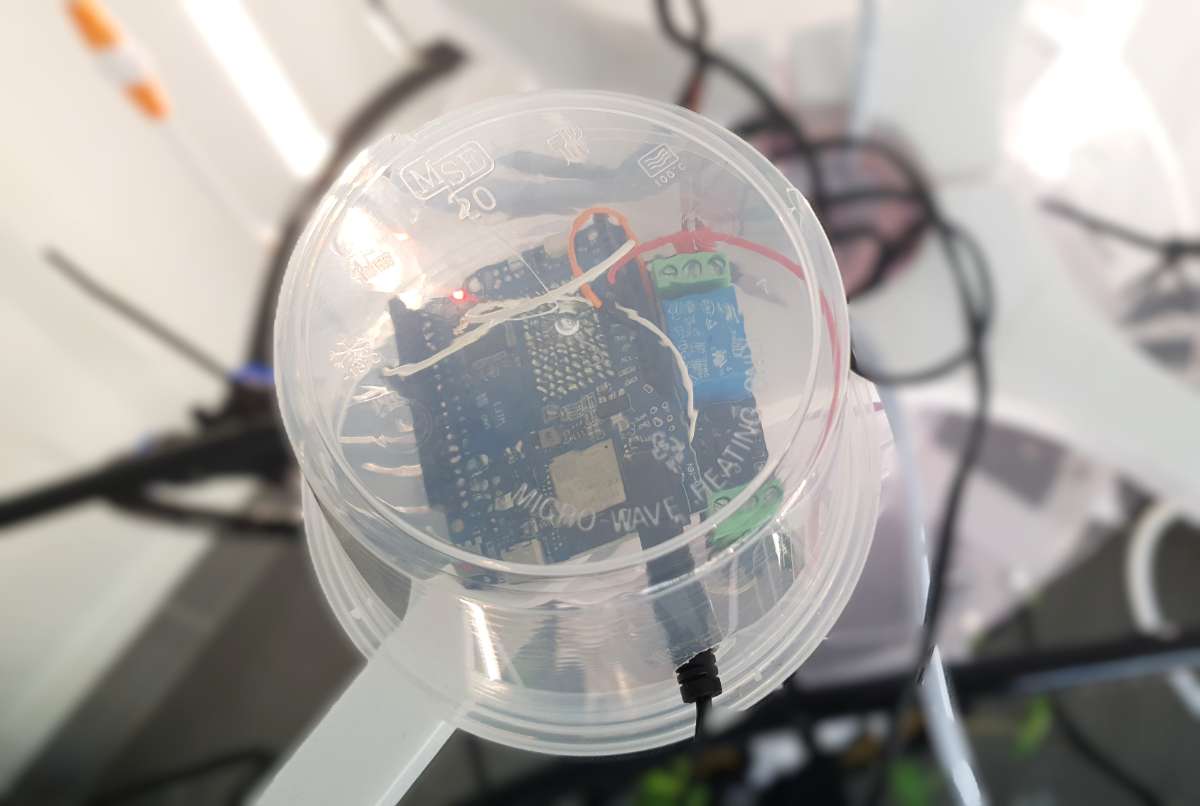
Here's where it gets a little nerdy. An Arduino UNO R4 WiFi runs the show, switching a 6W 450L/h submersible pump on and off through a 3V relay (I stripped the pump's wire and ran it straight into the relay).
Now, the electronics are sitting right above a tank of water, so they need to stay dry. My high-tech solution? I enclosed the Arduino and relay inside another washed-out takeaway container — because come on, if we're going to recycle, we recycle all the way, not just part of it. It keeps water and moisture off the board, and the whole thing just sits on top of the tower. Nothing fancy: call it a "properly designed enclosure." (Recycled element #5)
For the watering schedule, I measured the timing myself. When the bucket is full, the pump needs about 10 seconds to push water all the way up to the top of the tower. As the water level drops, the pressure drops with it, so it needs longer — by the time the tank is nearly empty, it takes around 18 seconds. So the pump starts at 10 seconds and adds 2 seconds every 4 hours, stepping up until it reaches that 18-second ceiling, where it just runs continuously. Once I refill the bucket back to full, I power-cycle the Arduino and the whole cycle starts over. Simple, but it keeps the tower watered without me babysitting it.
7 Lighting
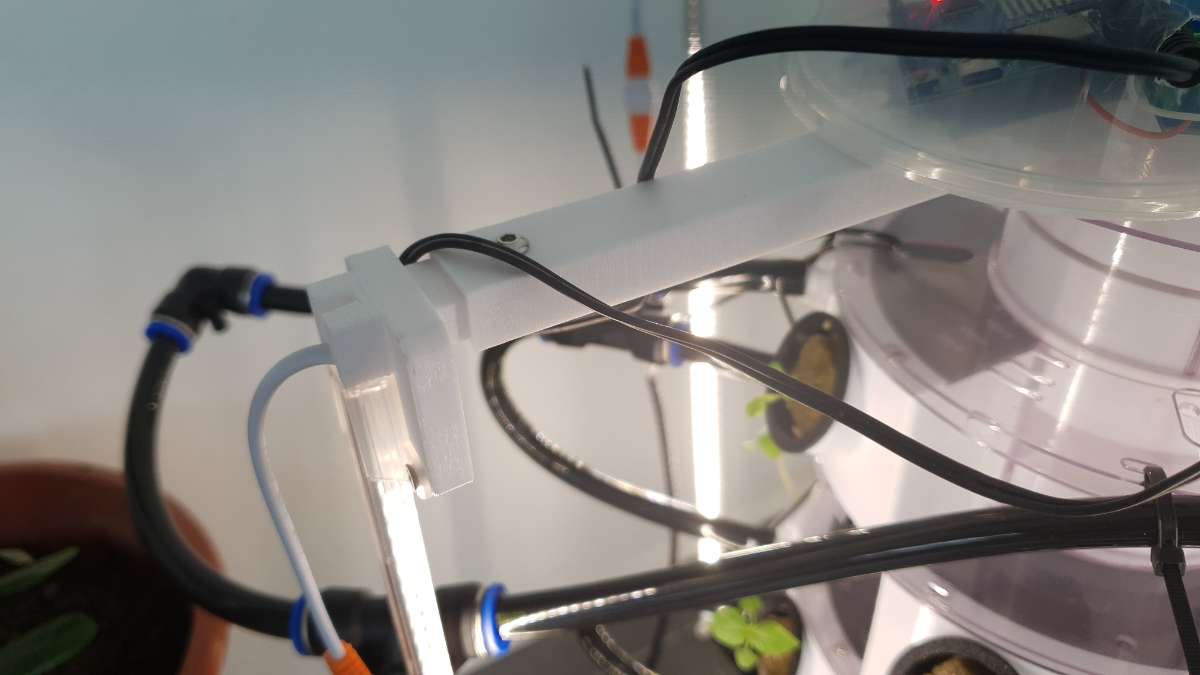
For light I'm using full-spectrum 4000K LED grow strips. Because I wanted the light spread evenly all the way around the tower (not just one bright side), I designed custom holders that mount at each corner of the spools — and that built-in divided structure gave me natural points to anchor them.
.png)
The holders are extendable, too: each arm starts about 10cm from the plant pots and can slide out to 20cm, so I can push the light further back as the plants get bigger and need more room. The LED strips just screw straight onto the holders, which keeps everything solid and makes a strip easy to swap out if one ever dies.
I didn't bother automating the lights, though — I just switch them on when I want the plants growing and off when I head to sleep.
Power on — and the water flows
This was the moment of truth: would the whole loop actually work? Short answer — yes, and even better than I hoped.
When the pump kicks in, it pushes water from the bucket all the way up to the top container. That fills up and overflows into the container on the layer below, which fills and spills into the next one, and so on — the water floods down the tower layer by layer until it finally drains back into the bucket, ready to go around again. The pump handles it beautifully, feeding every single container on the way down.
And I have to say: watching it run is weirdly mesmerizing. There's just something about those little streams of water dripping from one layer down into the next — it's beautiful. Gorgeous, even. I didn't expect the most satisfying part of this whole build to be standing there watching water fall, but here we are.
The growing process: from seed to harvest
Everything here started from tiny seeds — no buying baby plants from a shop. Here's how I got the basil and lettuce going.
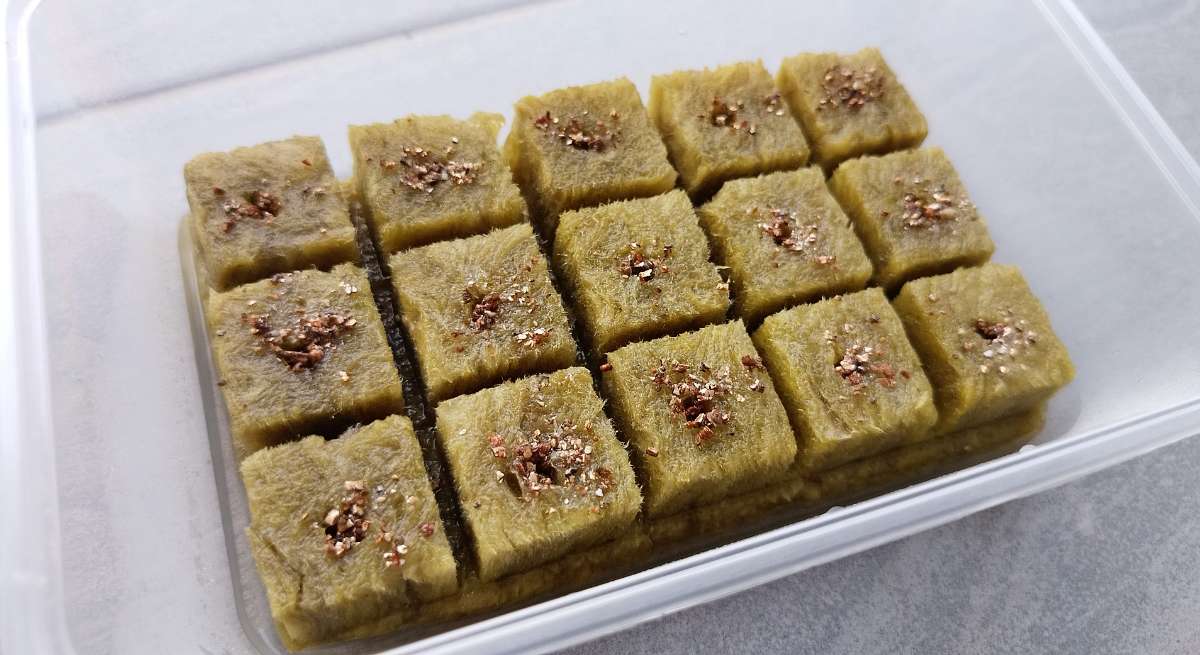
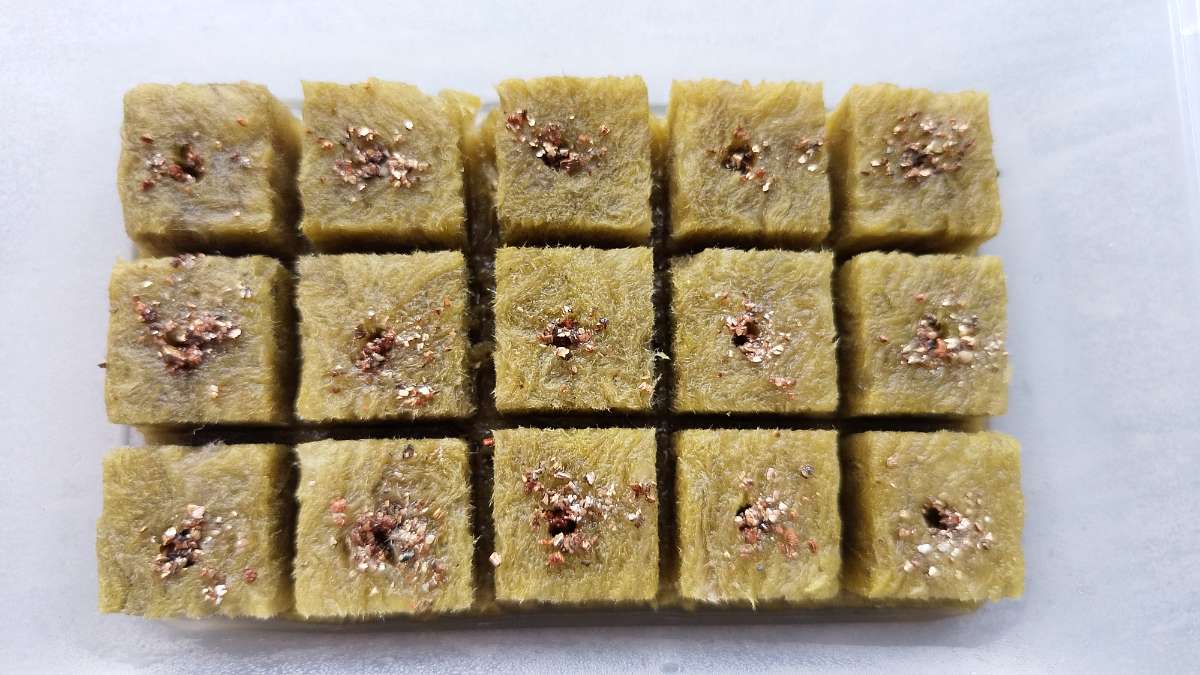
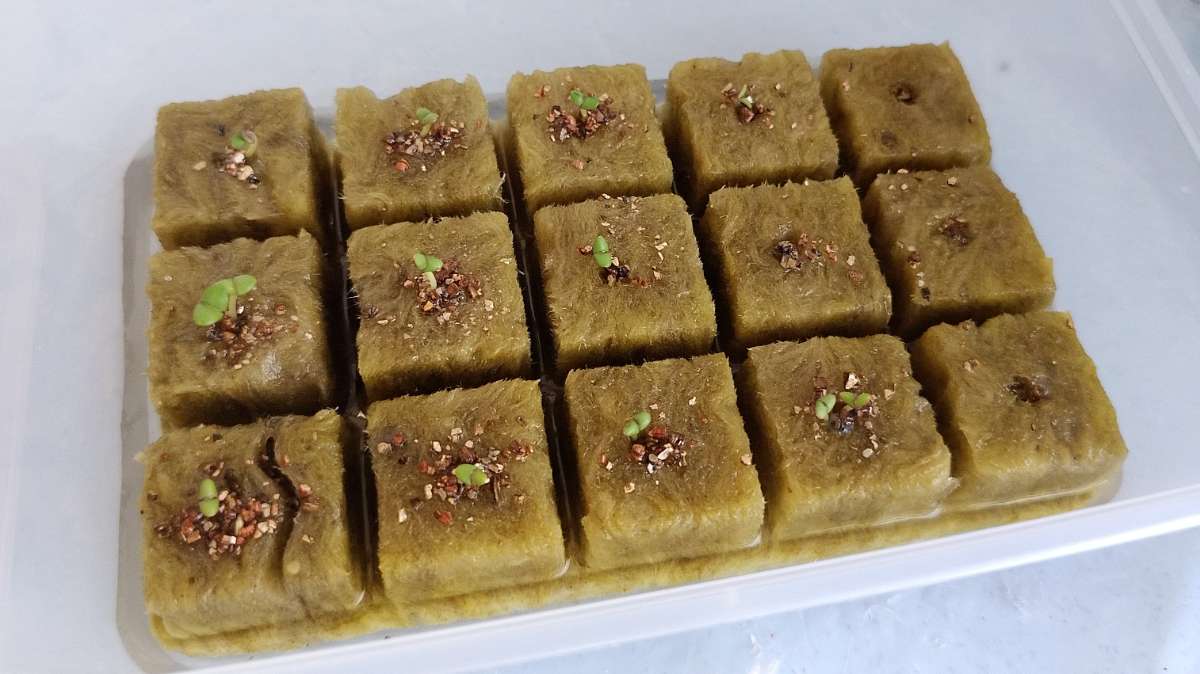
Day 0: Germination
I start the seeds in rockwool cubes. After dropping a seed into each cube's hole, I sprinkle a little vermiculite on top — it covers the hole and helps the seeds breathe and stay nicely moist while they sprout.
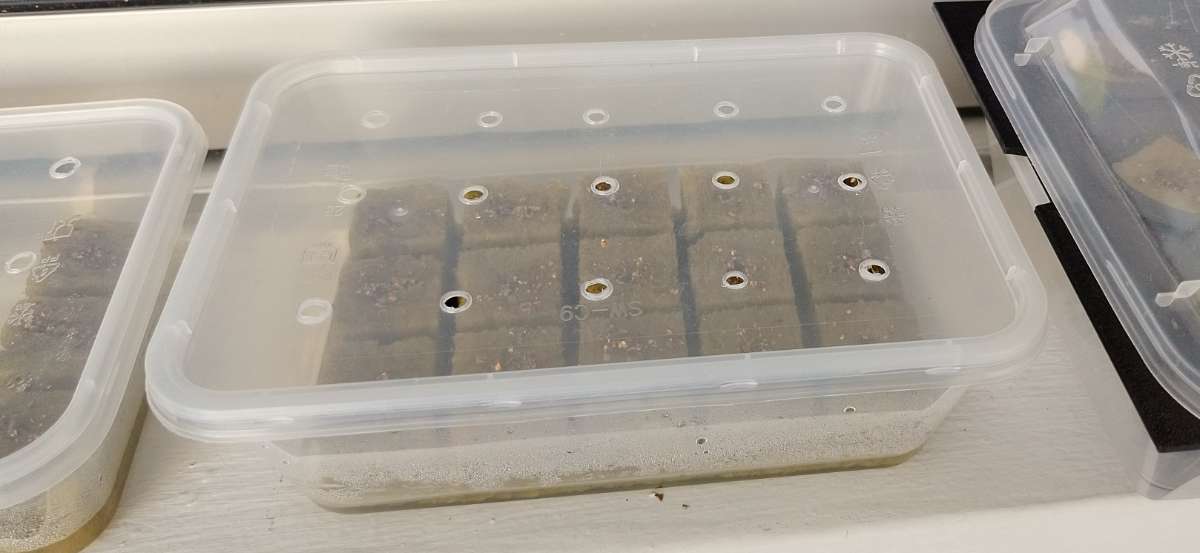
Seeds like it dark and humid to germinate, so for the "incubator" I just... reuse a takeaway container after a meal — give it a good wash, pop the lid back on, and boom, instant mini greenhouse. (Recycled element #3, if you're keeping count.)
For the water, I keep the pH around 5.5–6, which is the sweet spot basil and lettuce seem to love. I lower it with a pH Down concentrated solution — my bucket holds about 5 litres, and the bottle's ratio works out to roughly 1ml per litre, so I add around 5ml and top the water back up.
Day 10
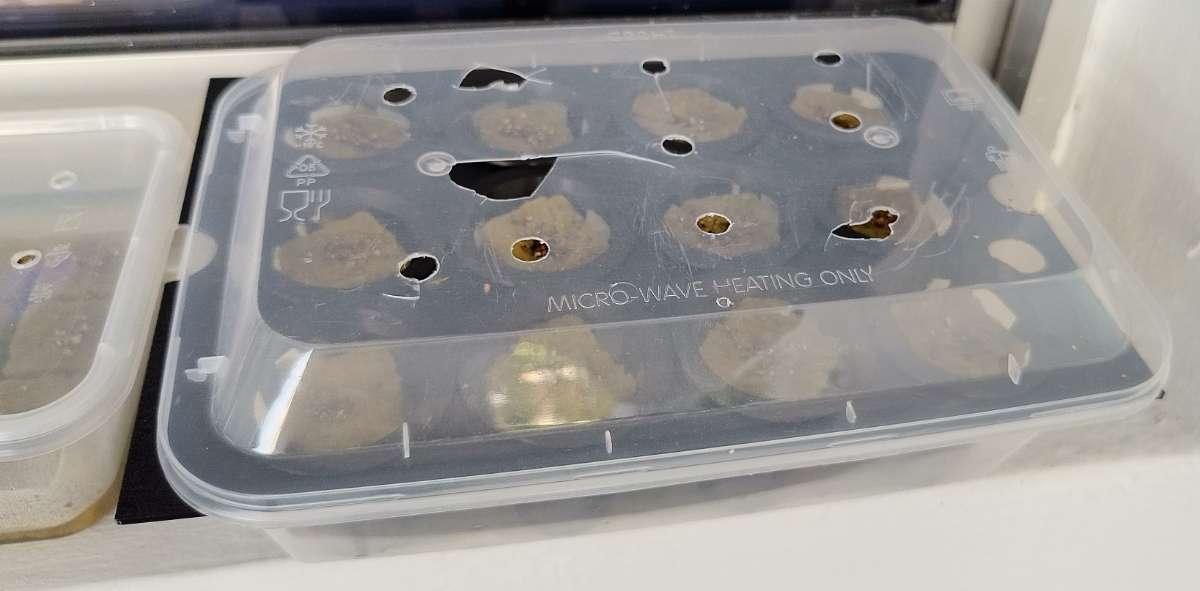
Give it a few days under the grow light and the little guys start popping up — first the seed leaves, then their real leaves. Watching those first green shoots push out of the rockwool never gets old.
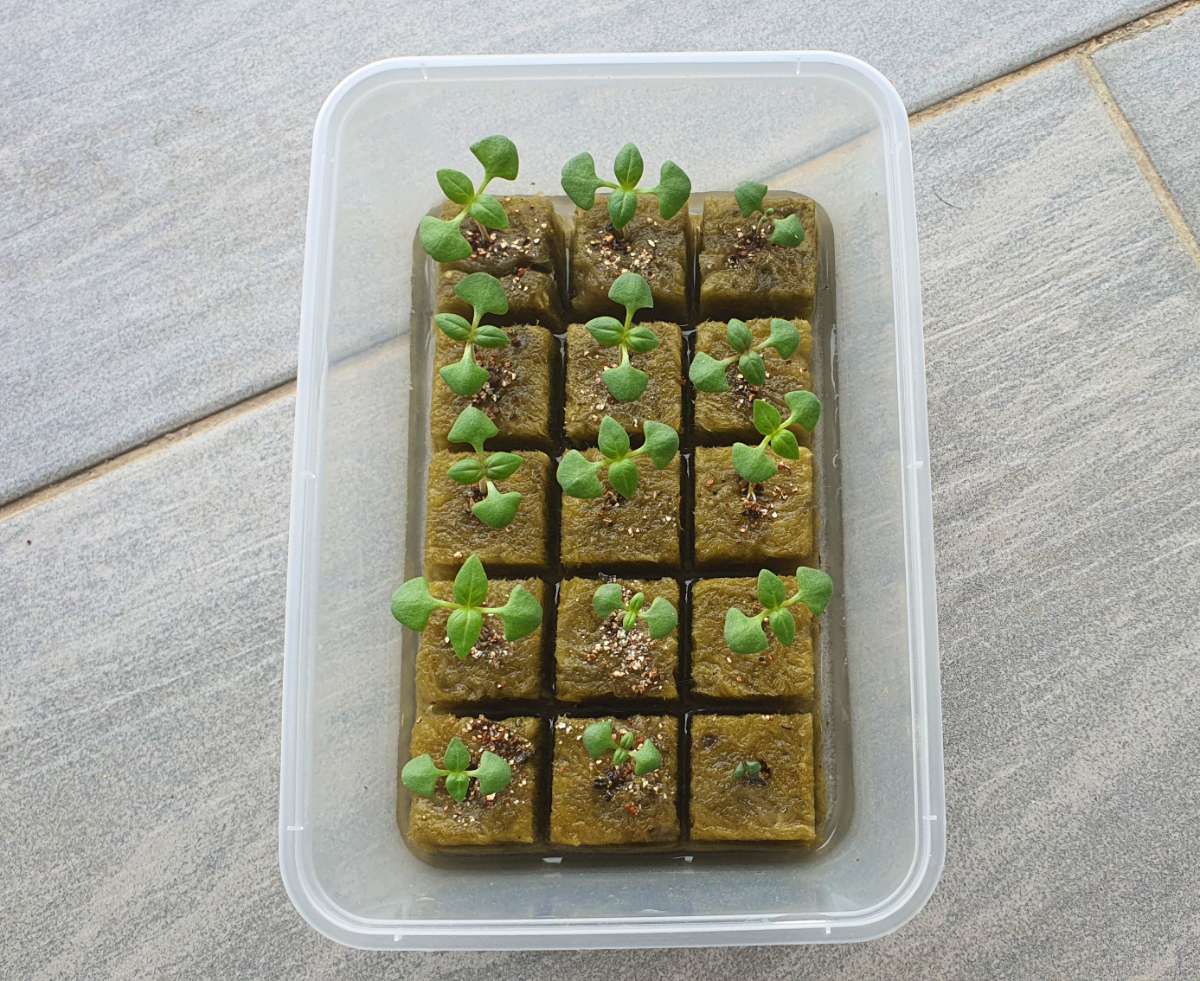
After about 10 to 14 days, once the seedlings are strong enough, they're ready to move into the tower. The real cue I watch for, though, is the roots — once I can see them poking out of the bottom of the rockwool cube, that's my signal that the plant is ready to migrate. That's where the next part comes in.
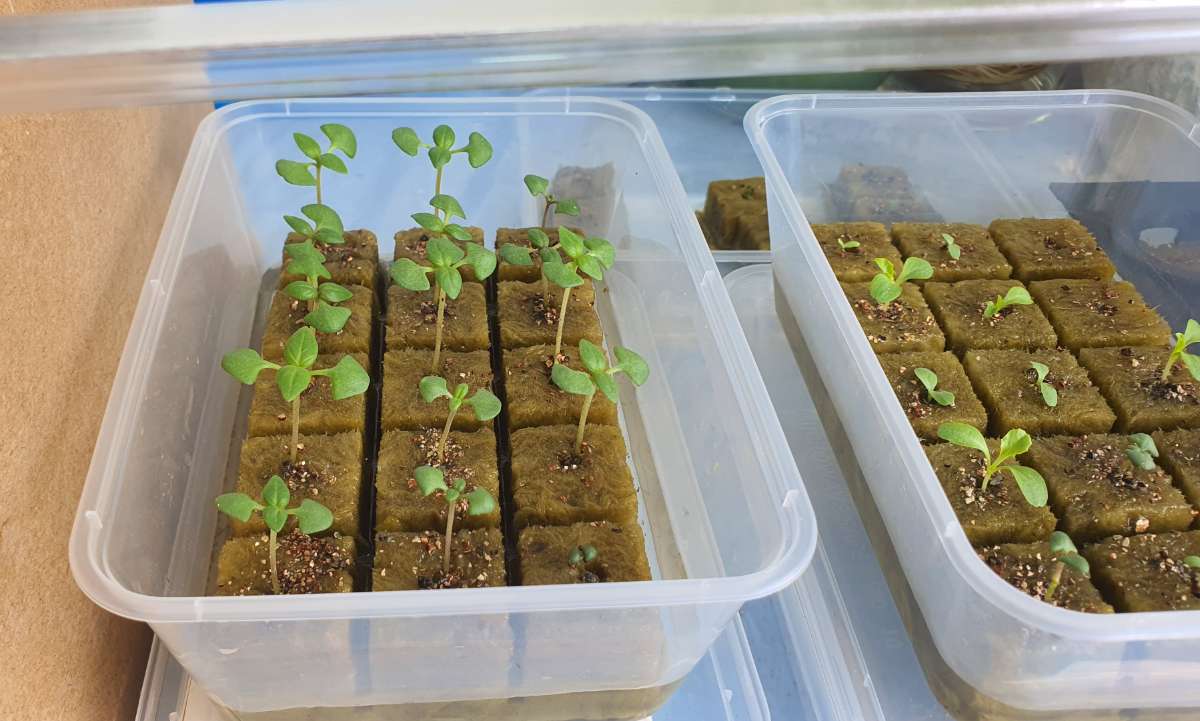
Moving into the tower (transplant day)
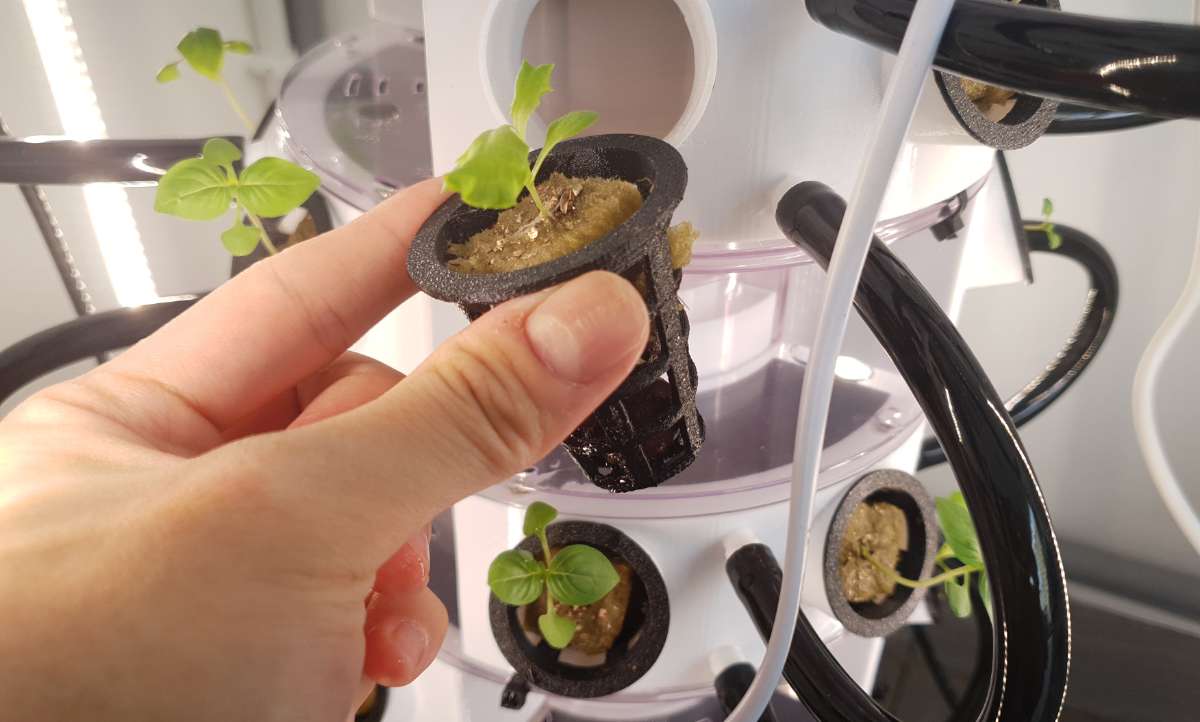
Once the seedlings hit that 10–14 day mark and looked sturdy enough, it was time to graduate them into the tower. Here's the little trick to how I pot them: I drop a few clay balls into the bottom of each TPU net cup first, then tear the rockwool cube free and rest it — seedling and all — right on top of the clay balls. Finally, I seat the cup into a planting hole in the tower.
Why sit the rockwool on top instead of down in the cup? It lifts the cube up just enough that the water pooling inside the container only touches the very bottom of it. So instead of sitting soggy, the plant gets nudged to push its roots down through the clay balls to go and reach the nutrient solution below. It works a lot like the NFT (Nutrient Film Technique), where roots feed off a shallow film of nutrient water rather than being fully submerged — and just like that, the tower goes from empty plastic to a living, breathing wall of green.
Then I fill the bucket, mix in my liquid concentrated nutrient solution so the plants actually get fed, and dial the pH back to 5.5–6. I flip on the pump (hello, Arduino) and the grow lights, and the water starts doing its loop — up to the top, trickling down through every layer, back into the bucket. From here, the plants basically take over.
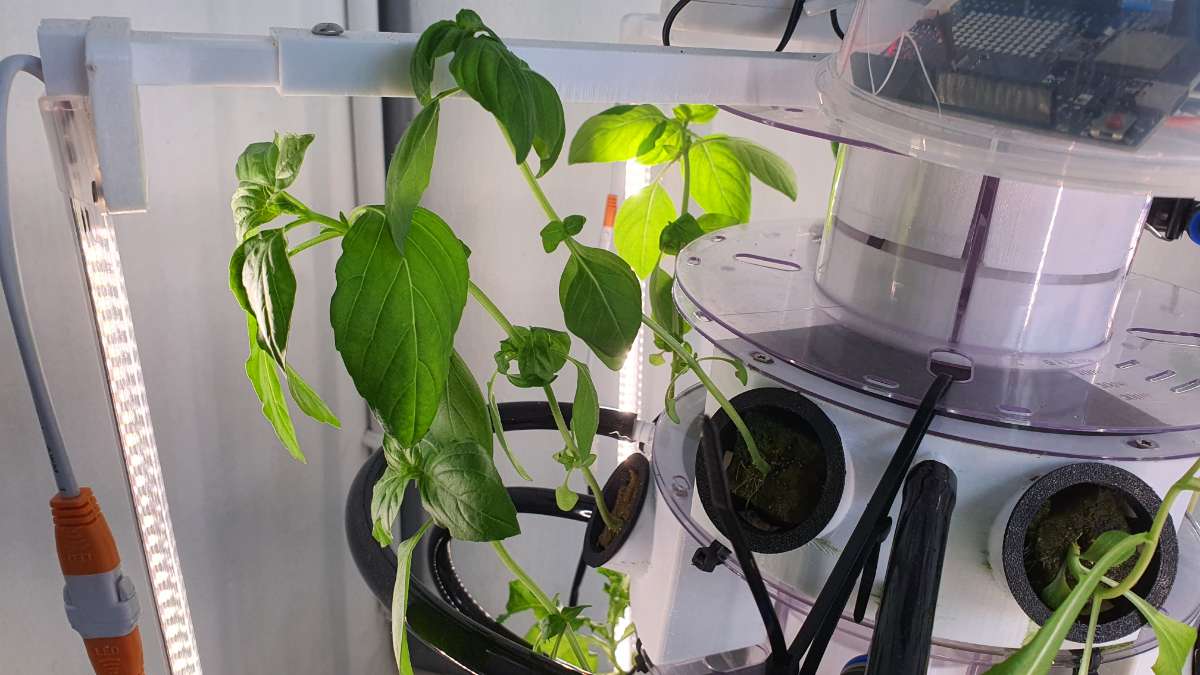
Day 20: First harvest — and basil tea
By around day 20, the basil and lettuce had filled out enough for a first harvest. There's something genuinely satisfying about snipping leaves off a plant you raised from a single seed in a rockwool cube.
Naturally, the first thing I did was make basil tea. It couldn't be easier: grab one or two basil leaves, drop them into a cup of hot water, wait about 10 minutes, and that's it. Beyond tasting fresh and herby, sweet basil brings a couple of nice perks for the body — it's packed with antioxidants that help protect your cells from the free-radical damage of oxidative stress, and studies suggest it may help with blood sugar control (though researchers note more human studies are still needed). Not bad for a drink that started as a seed on my windowsill.
.png)
.png)
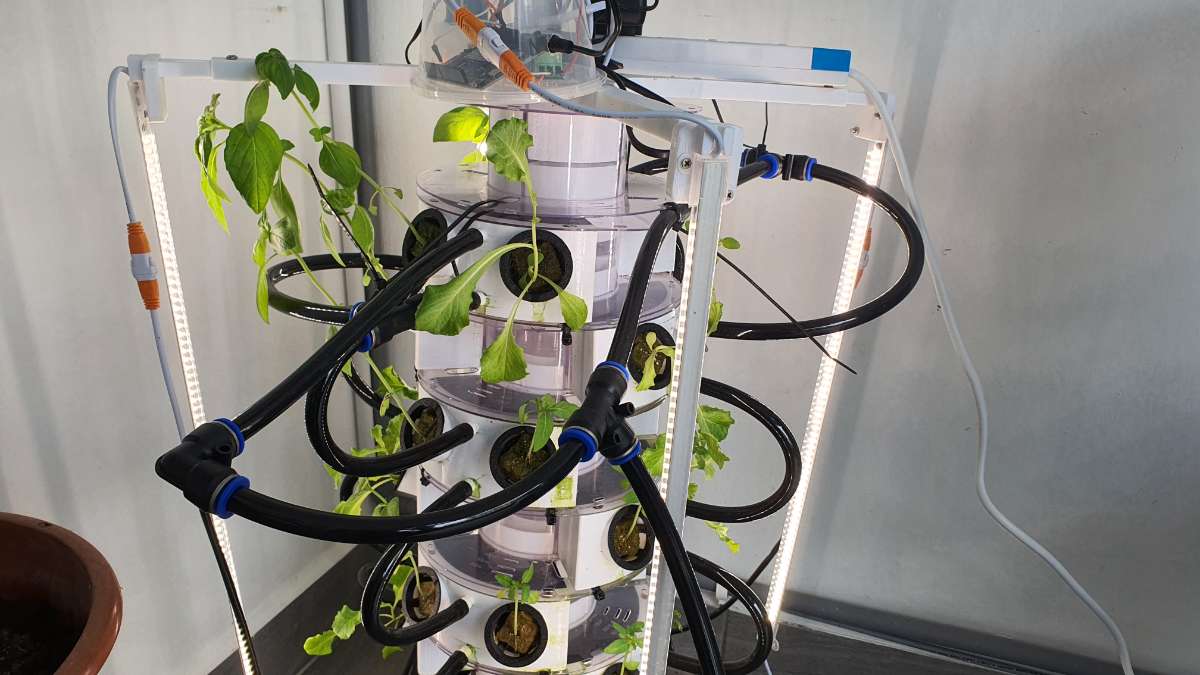
Day 28: And now... it's a jungle
After that first harvest, I mostly just let the tower do its thing. Fast-forward to day 28 and you know what? It's gone a little wild — in the best way. The plants are big, lush, and clearly loving life. What started as a stack of empty spools is now a fully working green tower that feeds me and basically runs itself between refills.
It's not all spotless, though. The tank and the pots have started growing green algae pretty much everywhere. To be fair, that's really common — pretty much every hydroponic tower gets algae sooner or later, since all it needs is a bit of light reaching the nutrient water (and a transparent system like mine just makes it easier). It's mostly cosmetic for now, but I won't leave it forever: as more of the tower greens over, a proper clean is on my to-do list — mainly to keep the algae in check so it doesn't end up inviting diseases that could hurt the plants.
A few honest notes
I won't pretend it's perfect. This is a first prototype, so the outside is a bit of a hose-y mess, and there are definitely things I'll refine in future versions. And the big one worth repeating: my printed parts are built around my specific brand of filament spool — other brands have different dimensions, so if you try this, expect to modify the models and print at your own risk. But for a version one? I'm really happy with how it both looks and works.
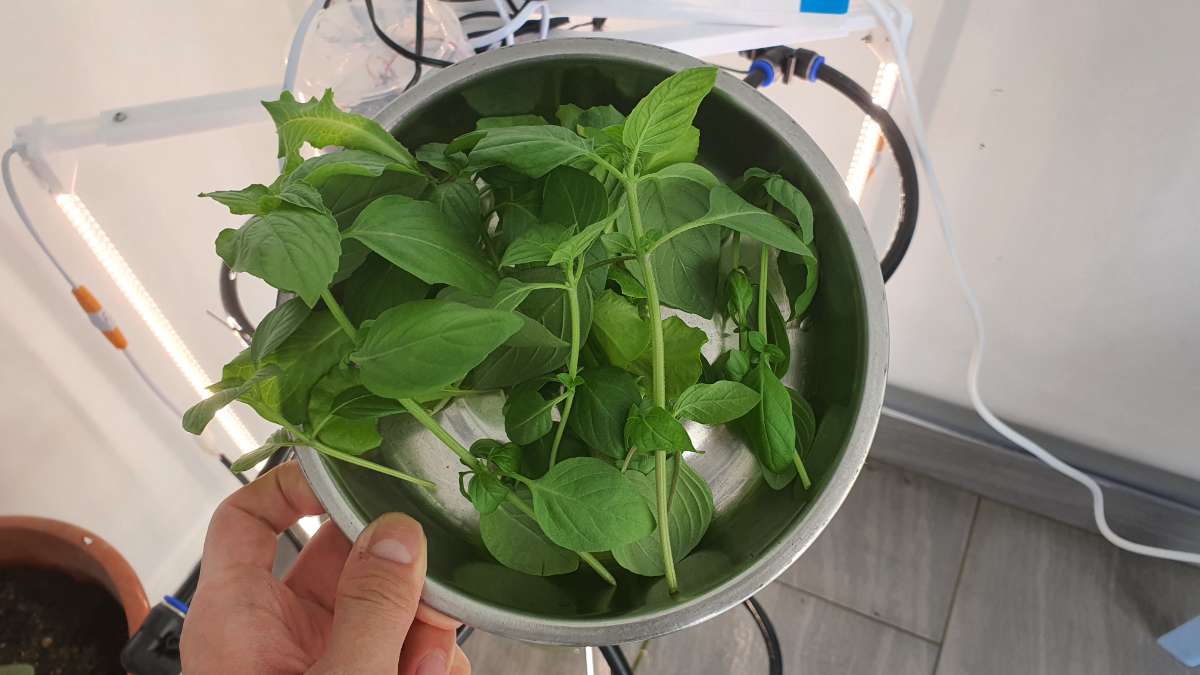
The payoff: a whole bowl of basil and lettuce
And here's the moment that makes all the spool-stacking and hose-wrangling worth it — a real harvest. Not just a couple of leaves for tea this time, but a whole bowl piled high with fresh basil, cut straight from the tower.
This is what "vegetable freedom" looks like in practice: I wander over, snip what I need, and come away with more basil than I know what to do with — pesto, tea, garnish, take your pick. No plastic packaging, no trip to the shop, no sad wilted leaves. Just fresh greens on demand, grown from seed in a tower made of recycled spools.
For a first prototype stitched together from a bin's worth of rescued parts? I'll happily call that a win.
.jpg)
Conclusion
When I started, this was just a pile of empty filament spools I felt bad about throwing away. Now it's a self-watering, light-controlled hydroponic tower growing fresh basil and lettuce in my home — and almost every core part of it is something I rescued from the bin: the recycled filament spools, my childhood water bucket, a forgotten roll of TPU filament, and washed-out takeaway containers. Four pieces of would-be trash, now one living, food-growing system.
That's the whole point I wanted to make with this project: "waste" is often just a resource waiting for a better idea. With a bit of creativity, the stuff we'd normally toss can become something that grows real, edible food — chipping away at plastic waste and inching toward that dream of vegetable freedom, all at the same time. If a stack of empty spools can turn into a salad tower, imagine what else is hiding in your recycling bin.
Thanks for reading — and maybe go look at your recycling bin a little differently.