I've always loved retro handheld consoles, especially the classic Game Boy. In this project, I built my own Game Boy inspired handheld from scratch using an ESP32, a custom PCB, and a 3D-printed enclosure.
The device can emulate several retro gaming systems, including Game Boy, Game Boy Color, NES, Sega Master System, and more. It features a color display, rechargeable battery, USB-C charging, a built-in speaker, etc. all in a pocket sized package.
Picking the Components
The first step was choosing the right components. Since I wanted the console to be roughly the size of a credit card, every component had to be carefully selected to keep the design as compact as possible.
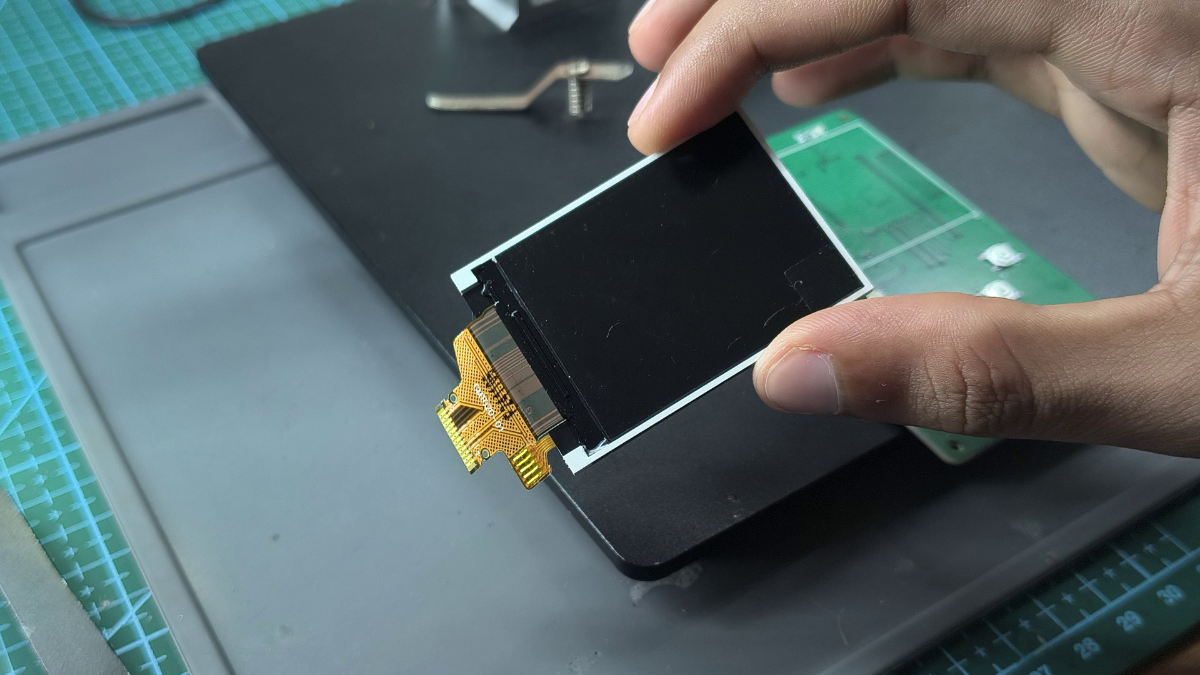
For the display, I chose a 2-inch TFT screen. It offers a good balance between screen size and portability, making it a perfect fit for a credit card-sized handheld.
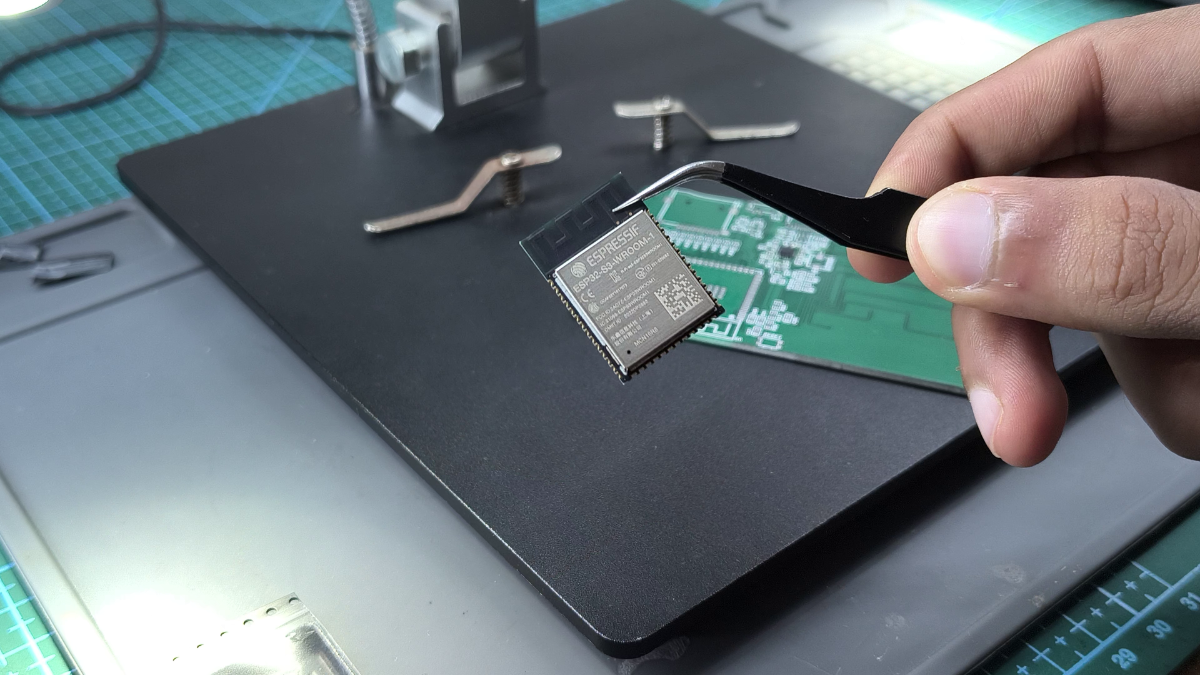
At the heart of the console is the ESP32-S3-N16R8. This microcontroller comes with 16 MB of flash memory and 8 MB of PSRAM, which provides enough processing power and memory to run several retro gaming emulators smoothly.
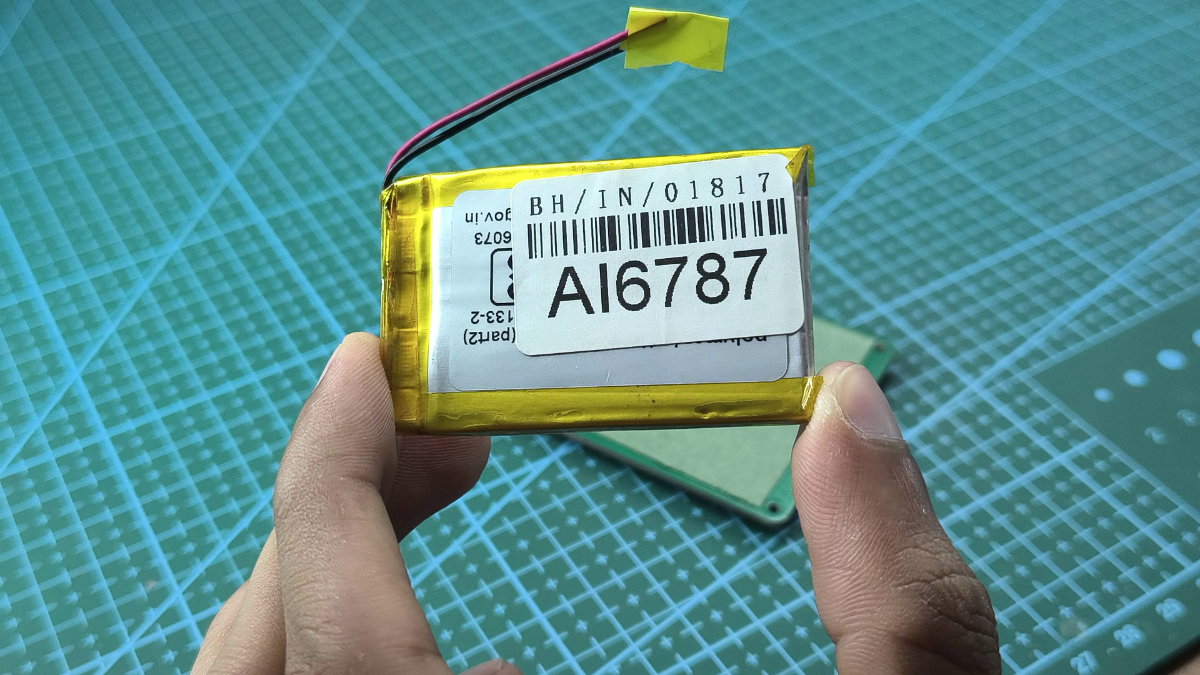
Battery life was also an important consideration. Because the handheld is so small, I wanted to maximize playtime without making the device bulky. For that reason, I selected a 1000 mAh LiPo battery, which offers a good balance between capacity and size.
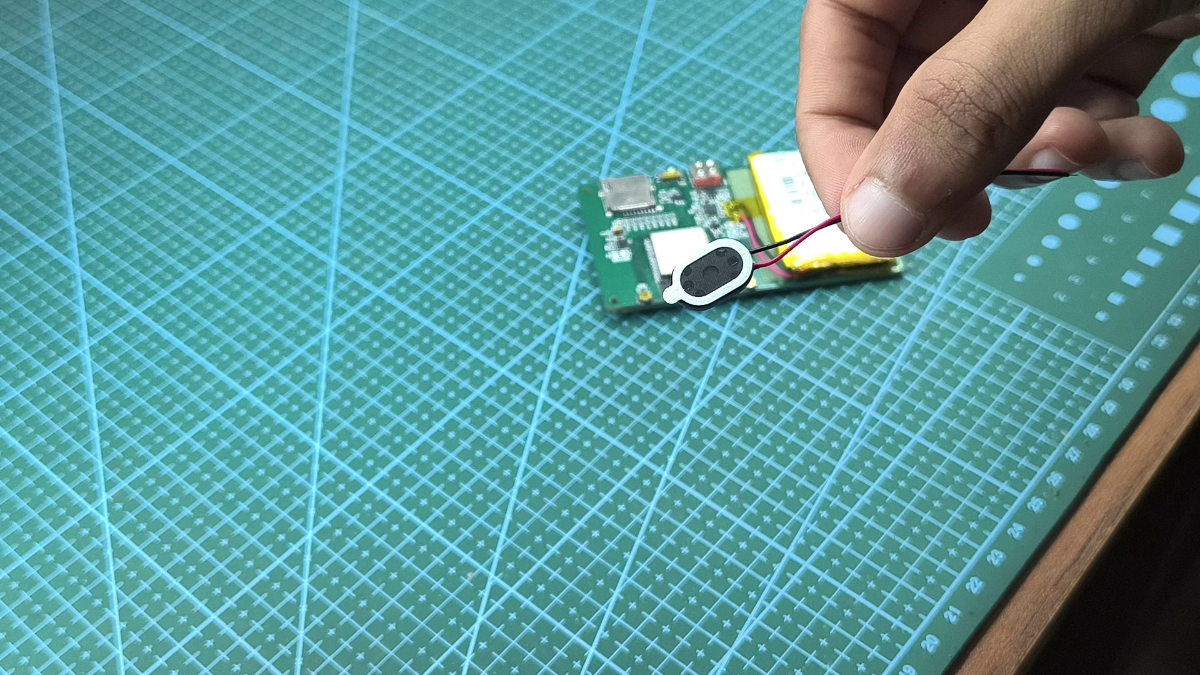
For audio, I used a small 1-watt speaker. While the sound quality isn't amazing, it gets the job done and honestly adds a bit of retro charm to the gaming experience.
Along with these main components, the design also includes the necessary supporting circuitry for power management, charging, controls, audio amp, etc.
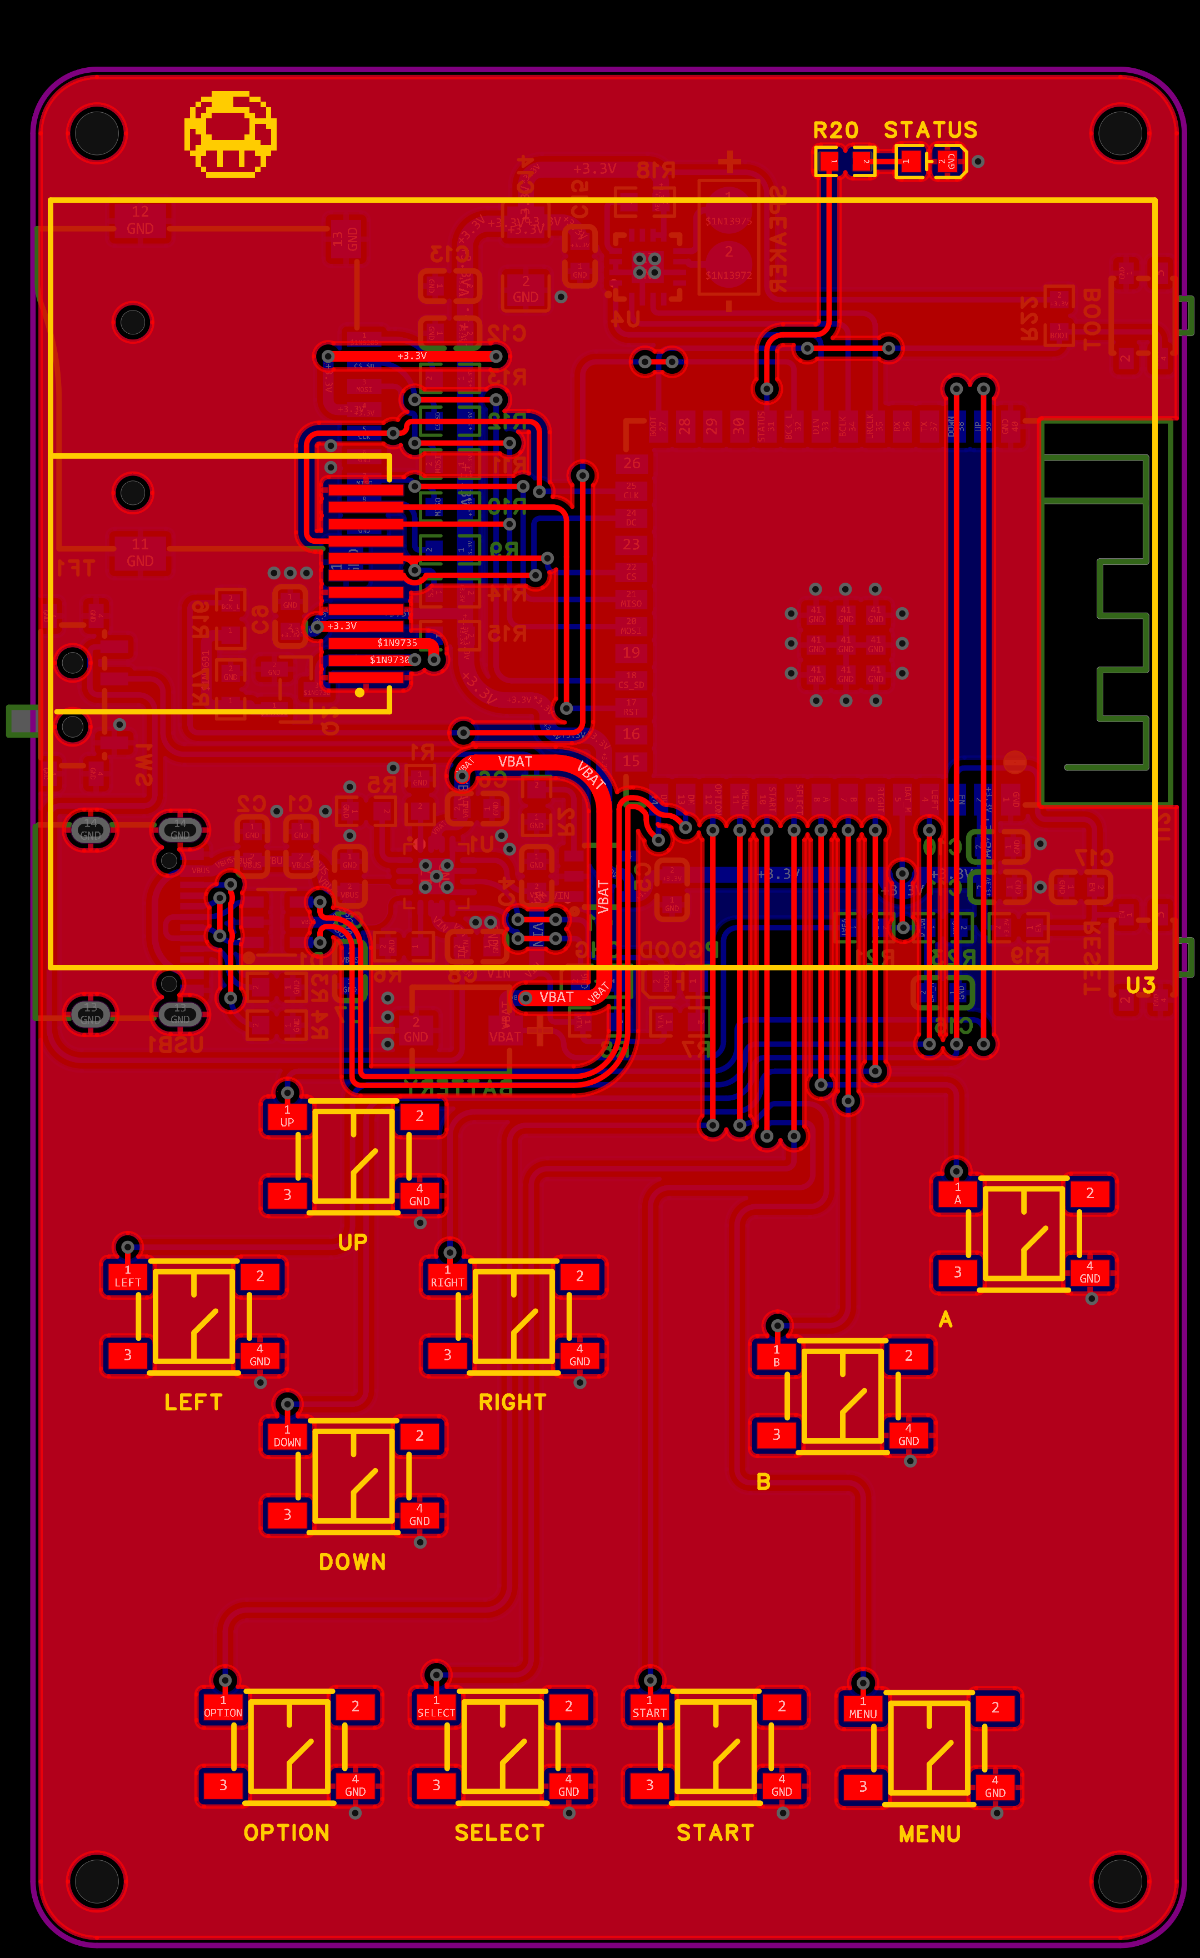
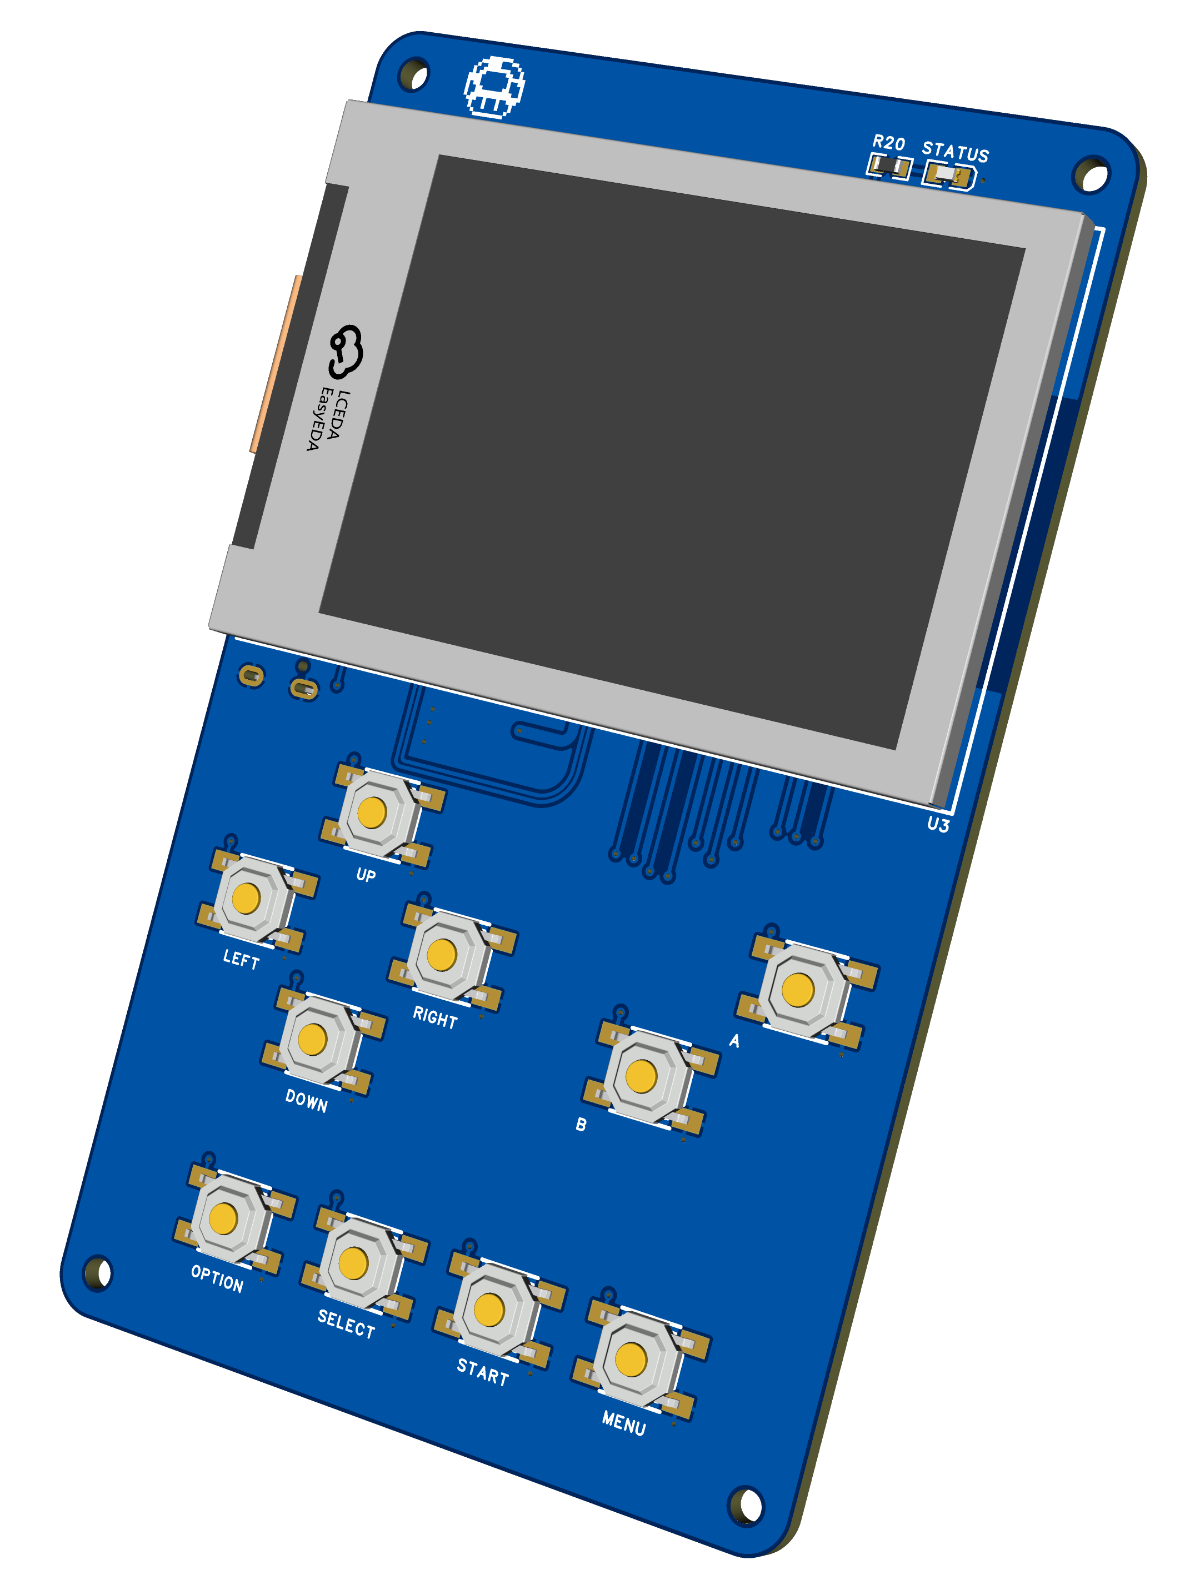
Schematic and PCB Design
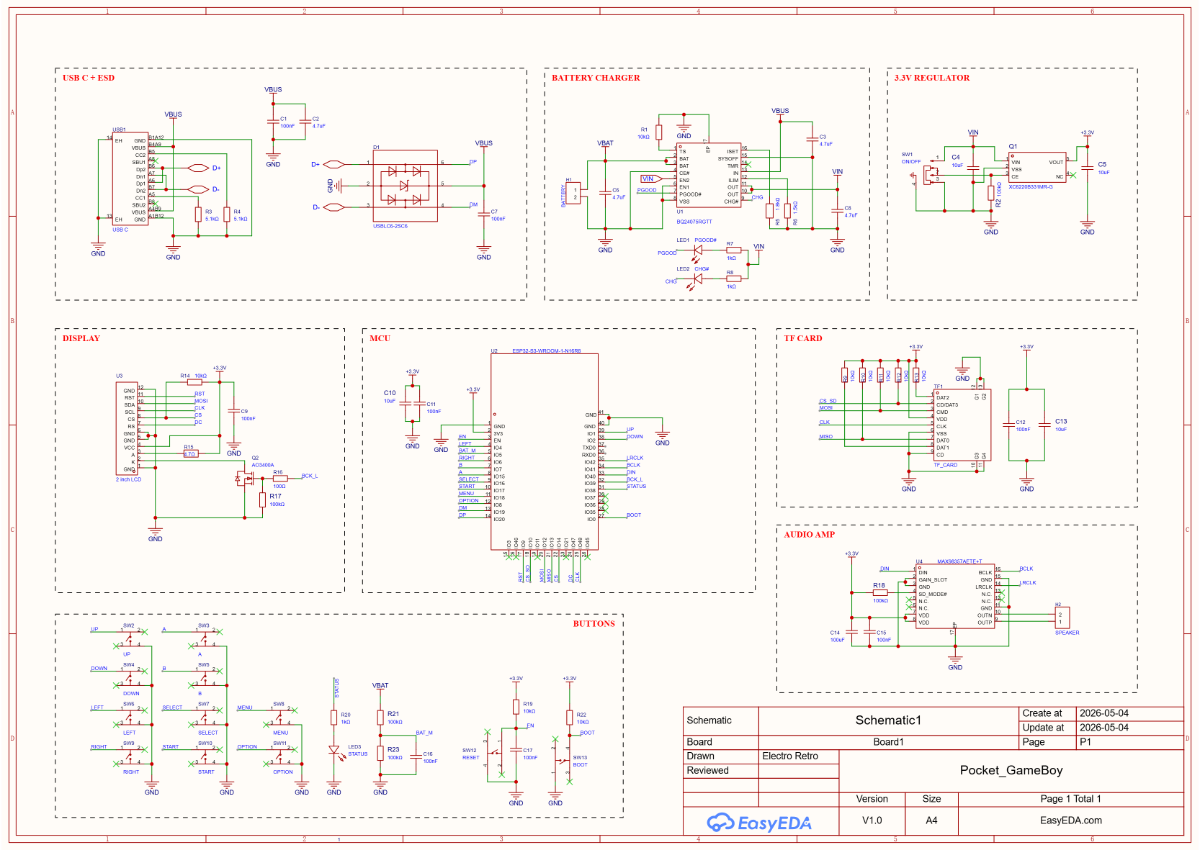
After selecting the components, I created the schematic and connected all the required circuits, including the ESP32, display, battery charging circuit, audio amplifier, and buttons.
Next, I designed the PCB. Since the handheld is very compact, I carefully arranged the components to save space and make routing easier.
Link to schematics and PCB:- https://oshwlab.com/electronics220903/project_hcyoyrdf
Once the layout was finished, I routed all the traces and double-checked the connections to ensure everything was correct. After verifying the design, I generated the manufacturing files and sent the PCB for fabrication.
PCB Arrived
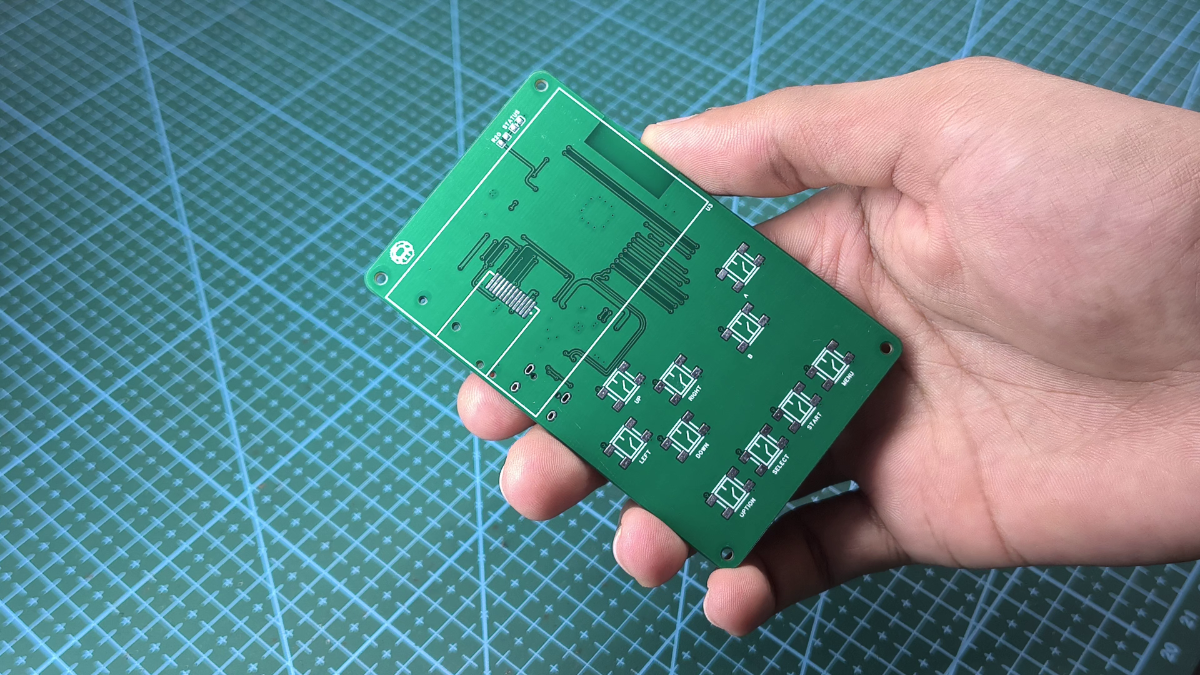
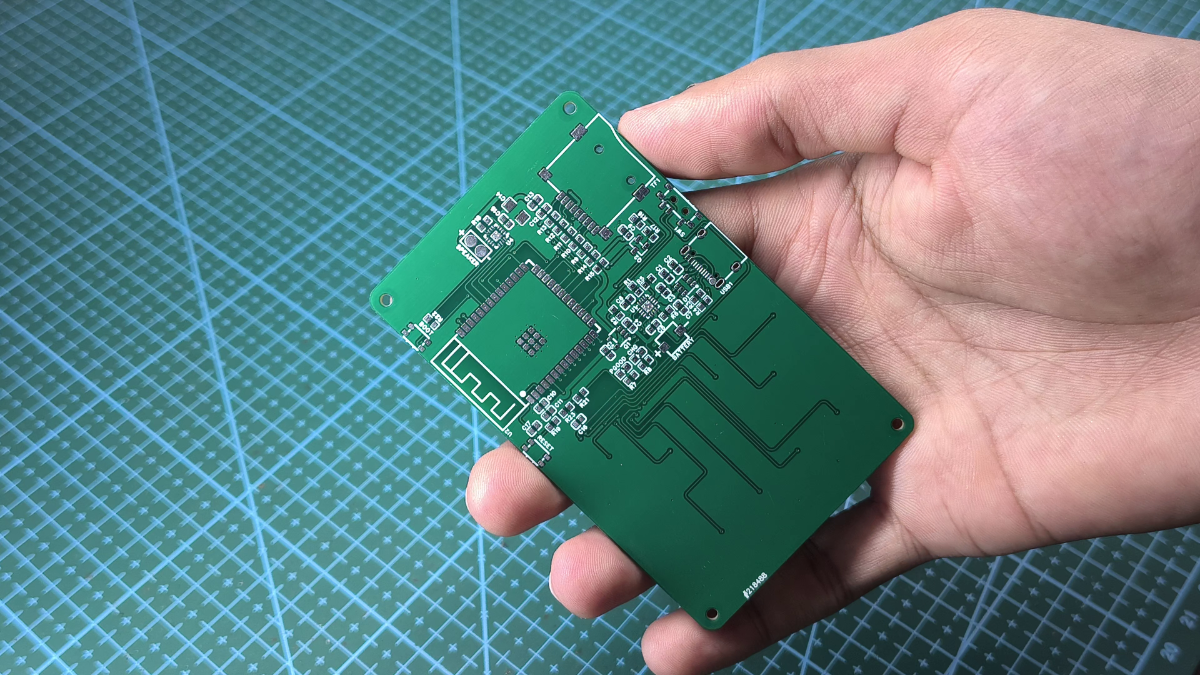
A few days later, the PCBs arrived. Before starting assembly, I carefully inspected the boards to make sure there were no manufacturing defects and that everything looked as expected.
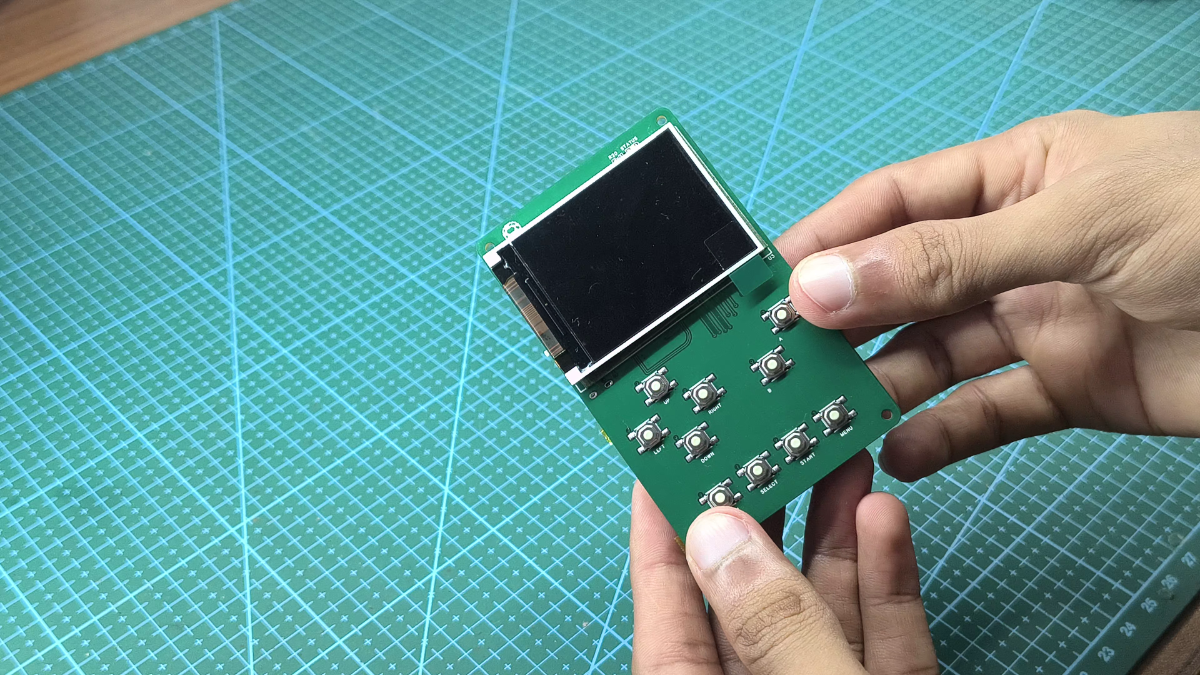
Soldering the Components
With the PCB ready, the next step was assembling the board.
I started by soldering the smaller and more difficult SMD components first. Installing these parts before the larger components makes the assembly process much easier and provides better access to the solder pads.
Most of the components were hand soldered using a soldering iron. However, some parts, such as the ESP32, battery charging IC, and audio amplifier IC, include exposed thermal pads underneath the package. These components are difficult to solder by hand, so I used solder paste and a hot air gun to properly reflow them onto the PCB.
Gluing
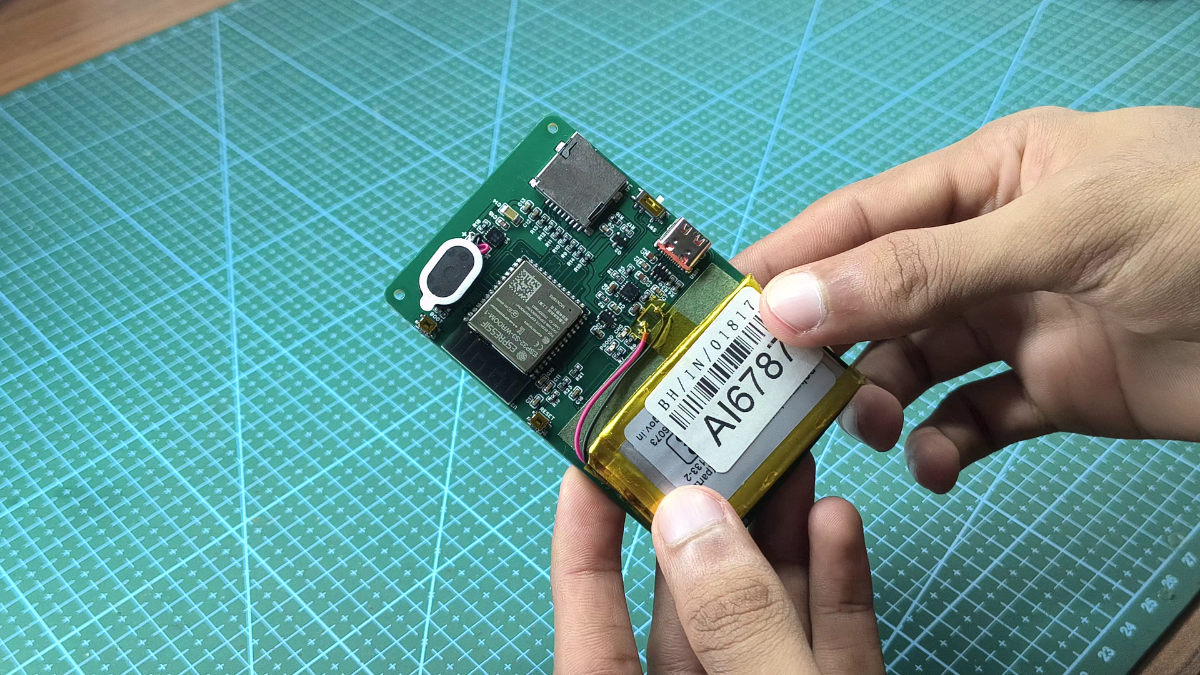
With the soldering out of the way, the next step was securing the remaining hardware. Before gluing anything down, I applied a layer of protective paper over the PCB to act as insulation and prevent any short circuits between the components and the board.
Next, I positioned the display, the LiPo battery, and the micro speaker into place. To secure them, I used a small amount of B-6000 glue
Enclosure Design
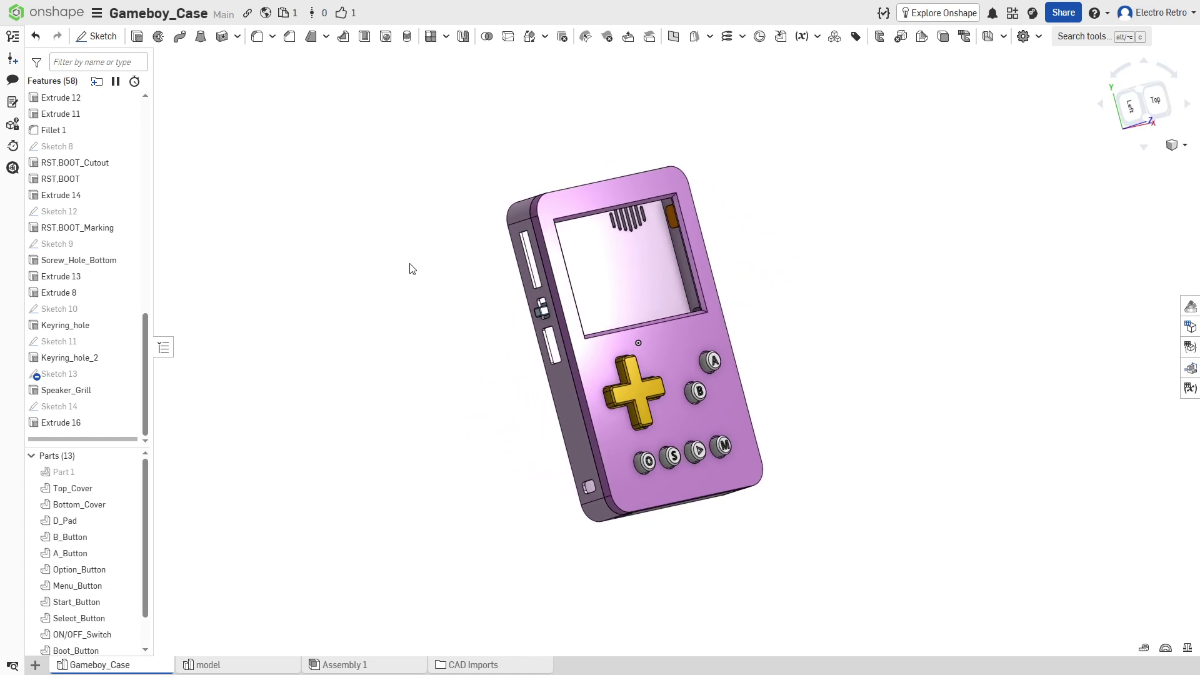
With the PCB assembly complete, it was time to design the enclosure.
Since this project is inspired by the classic Game Boy, I wanted the enclosure to capture some of the look and feel of the original handheld while still remaining compact and pocket-friendly.
Link to the model:- https://cad.onshape.com/documents/5edeb7c0f61b00010b91e00f/w/0045d52b3a879a48235e8608/e/47ea8cde1064eb8c8bd11008
3D Printing the Enclosure
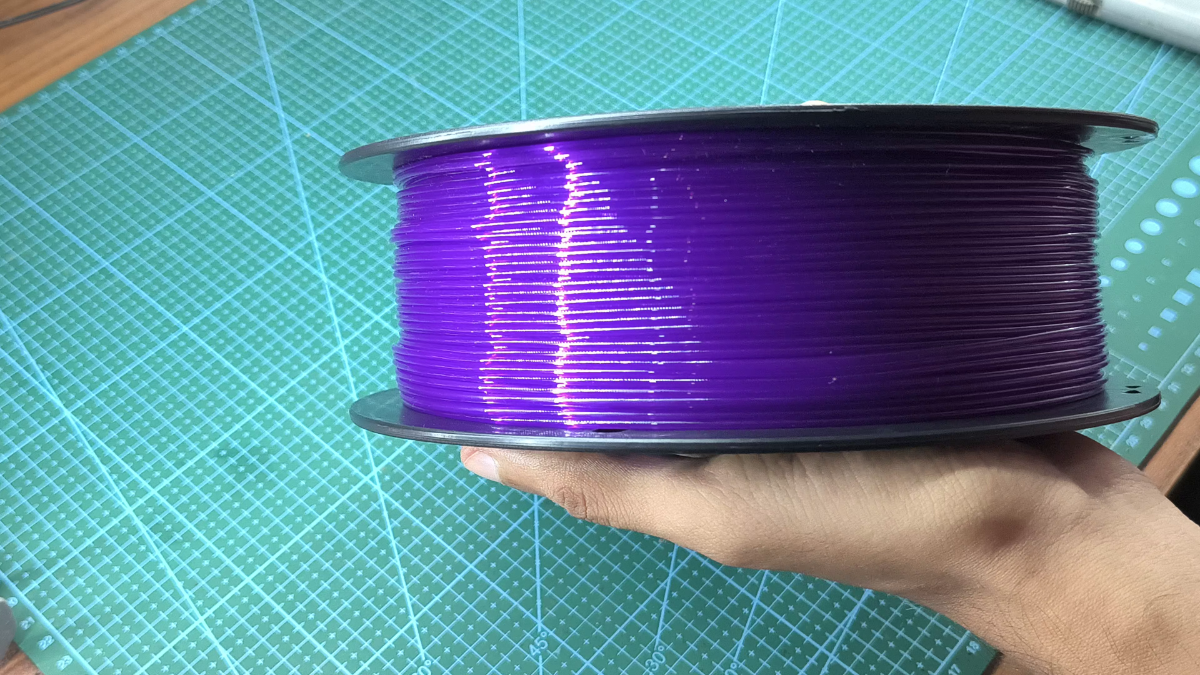
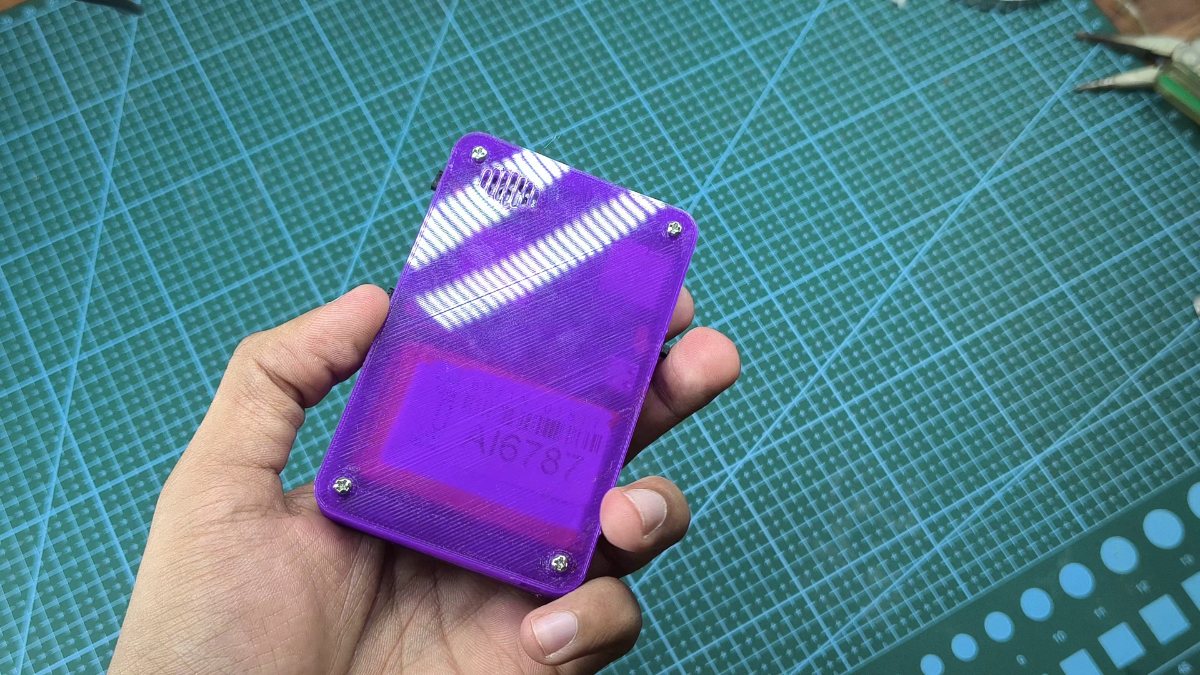
For the enclosure, I chose a translucent purple PETG filament to give the handheld a classic retro look. The transparent purple color is reminiscent of the special edition handheld consoles from the late 1990s and early 2000s.
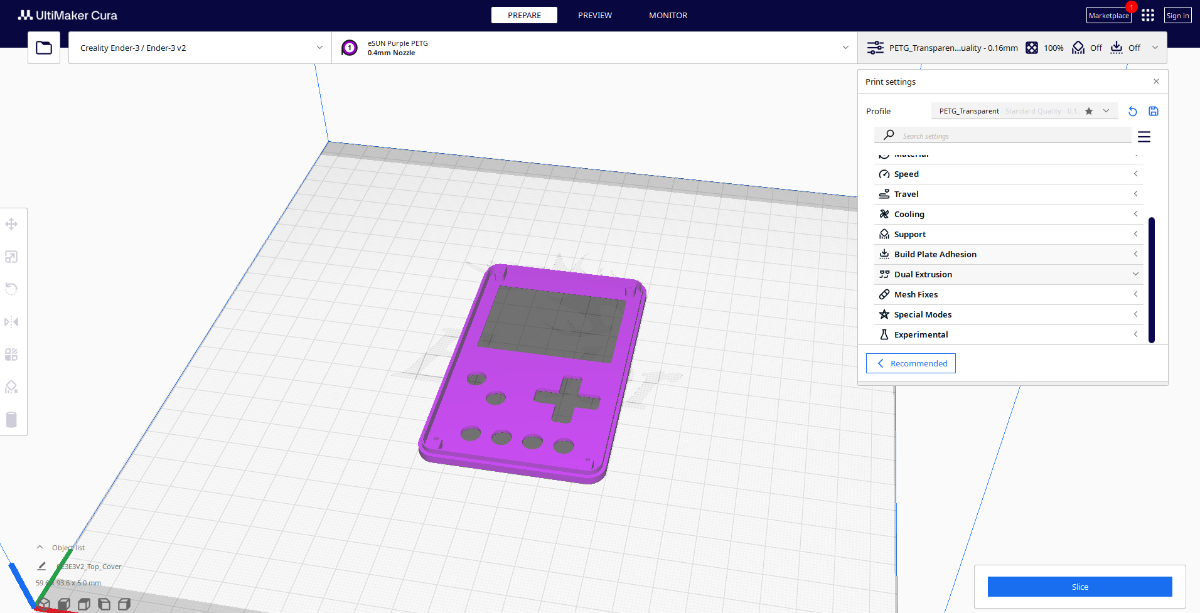
After exporting the STL files, I sliced them in Cura using the following settings:
- Layer Height: 0.2 mm
- Wall Line Count: 1
- Print Thin Walls: Enabled
- Infill: 100%
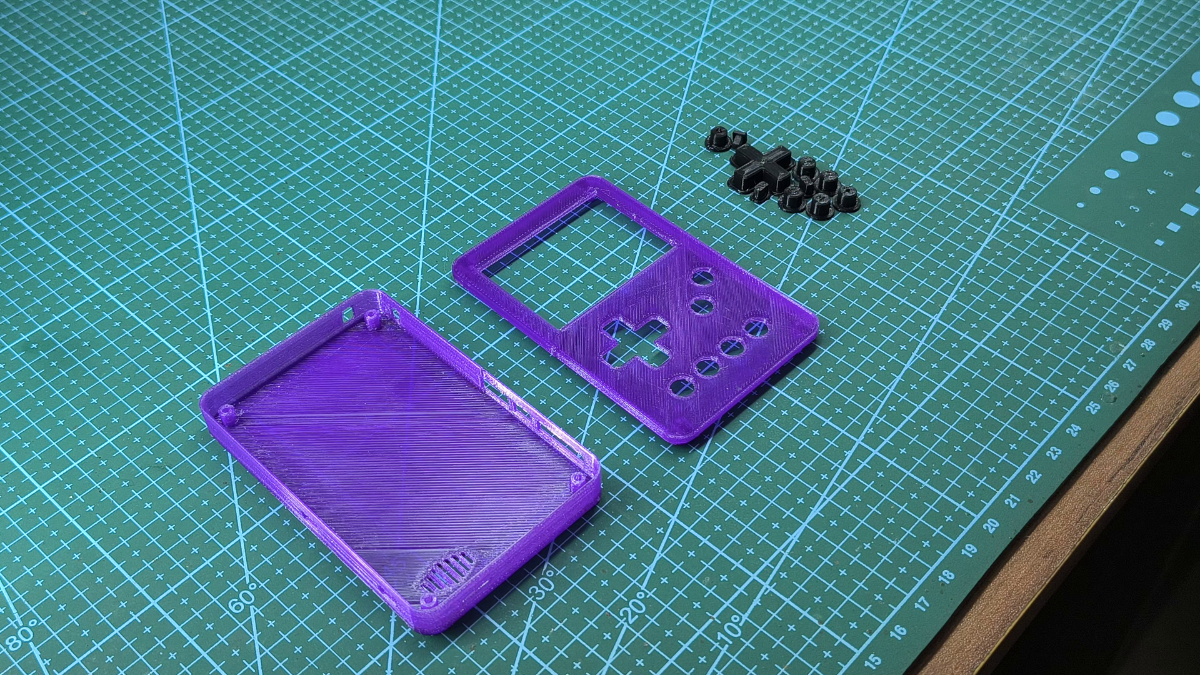
Once the slicing was complete, I loaded the PETG filament into my 3D printer and started the print. After several hours, the enclosure parts were ready.
However, I ran into an unexpected issue during removal. PETG can bond very strongly to a glass build plate, and in my case it adhered so well that it pulled a small chunk of glass out of the bed when I removed the print!
If you're printing PETG on glass, consider using a release layer such as glue stick or hairspray to prevent the filament from bonding too aggressively to the surface.
Final Assembly
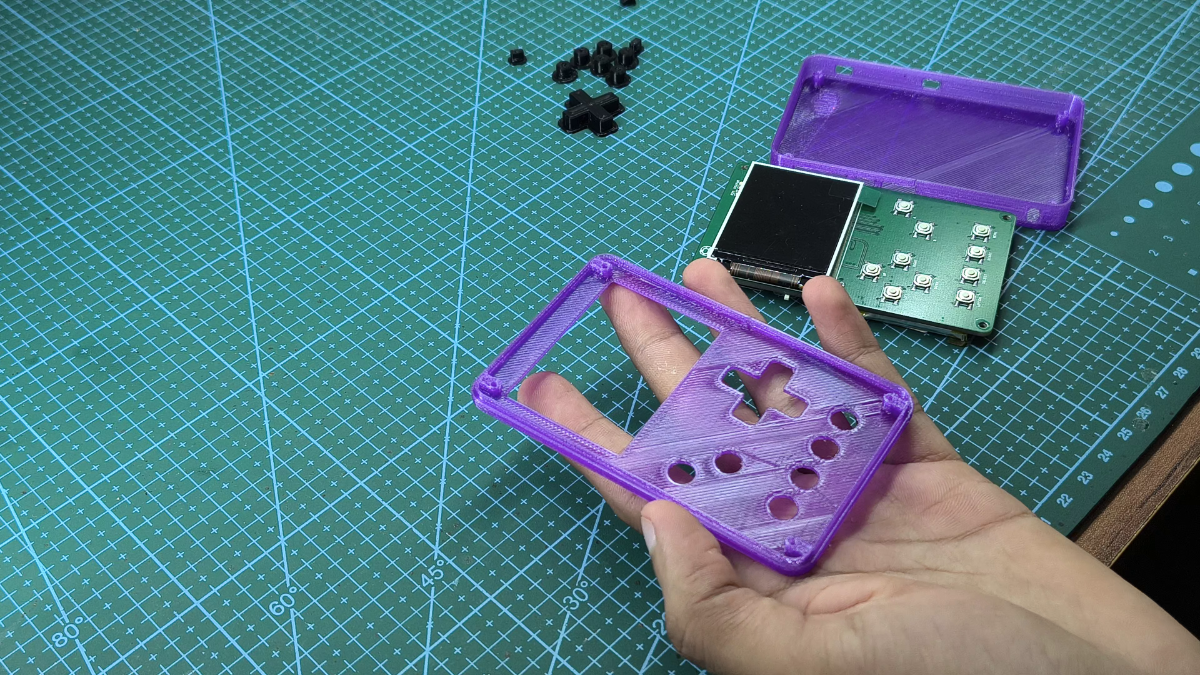
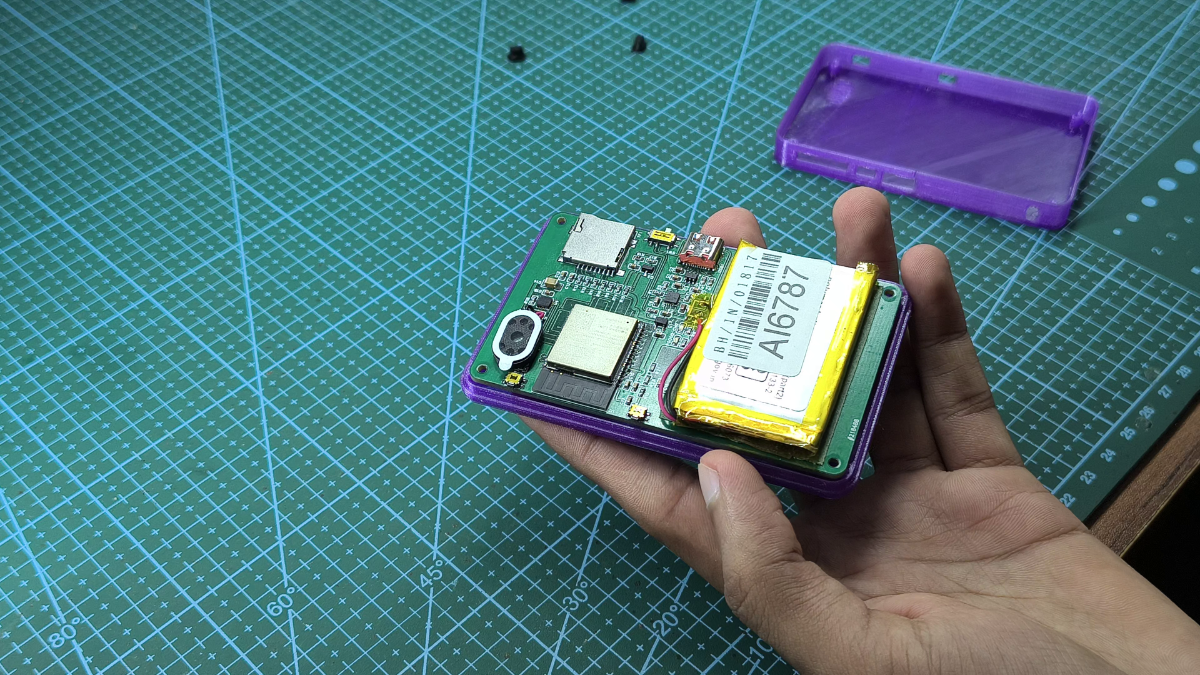
With all the parts prepared, it was finally time to assemble the handheld.
I started by placing the buttons into their respective positions in the front half of the enclosure. Once the buttons were aligned properly, I carefully positioned the assembled PCB inside the case, making sure the display, speaker, and USB-C port lined up with the openings in the enclosure.
Next, I placed the back cover and secured everything together using four M2 × 8 mm screws.
Flashing the Firmware
.png)
.png)
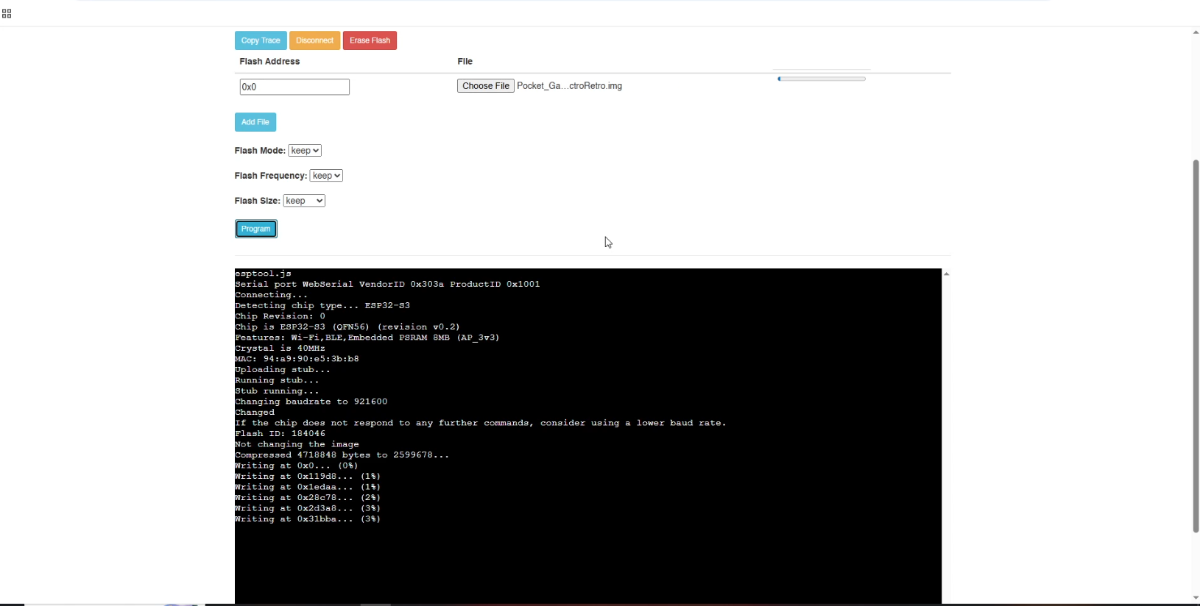
With the hardware complete, the next step was loading the firmware onto the ESP32.
Thankfully, I didn't have to write my own emulator firmware from scratch. Instead, I used Retro-Go, an excellent open source retro gaming firmware for ESP32 based handhelds. The only modifications required were updating the configuration files to match my hardware, then building and compiling the firmware.
To make things easier, I've attached the pre-built firmware image (.img) used for this project. You can simply download it and flash it directly to your console without having to compile anything yourself.
Firmware:- https://drive.google.com/file/d/1_cRGGtqvRDjztOgyG34nEB9xYsTs17zf/view?usp=sharing
For flashing, I'm using an online ESP32 flashing tool.
Entering Flash Mode
Connect the handheld to your computer using a USB-C cable.
Press and hold both the BOOT and RESET buttons.
Release the RESET button first.
Release the BOOT button.
The ESP32 should now be in download (flash) mode.
Flashing the Firmware
Open the online flashing tool.
Click Connect and select the ESP32 device.
Choose the provided firmware image file.
Set the flash address to 0x0.
Click Program and wait for the flashing process to complete.
Once the upload is finished, restart the console. If everything went correctly, the Retro-Go menu should appear on the screen and the handheld will be ready for the next step.
Preparing the SD Card and Adding Games
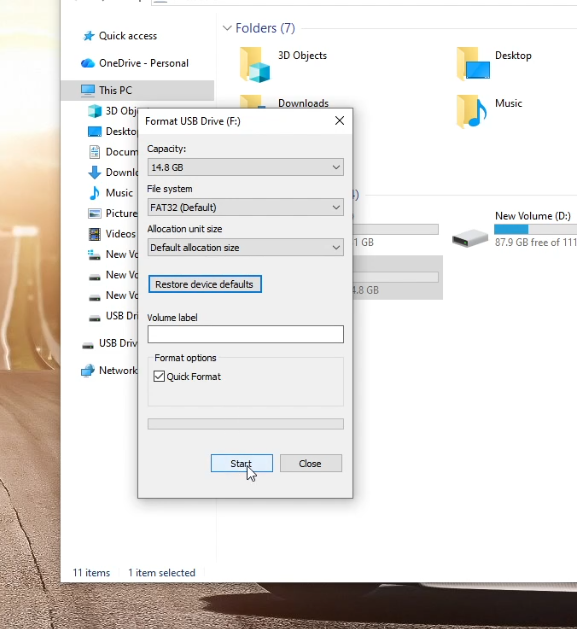
The final step is preparing the SD card and loading your game ROMs.
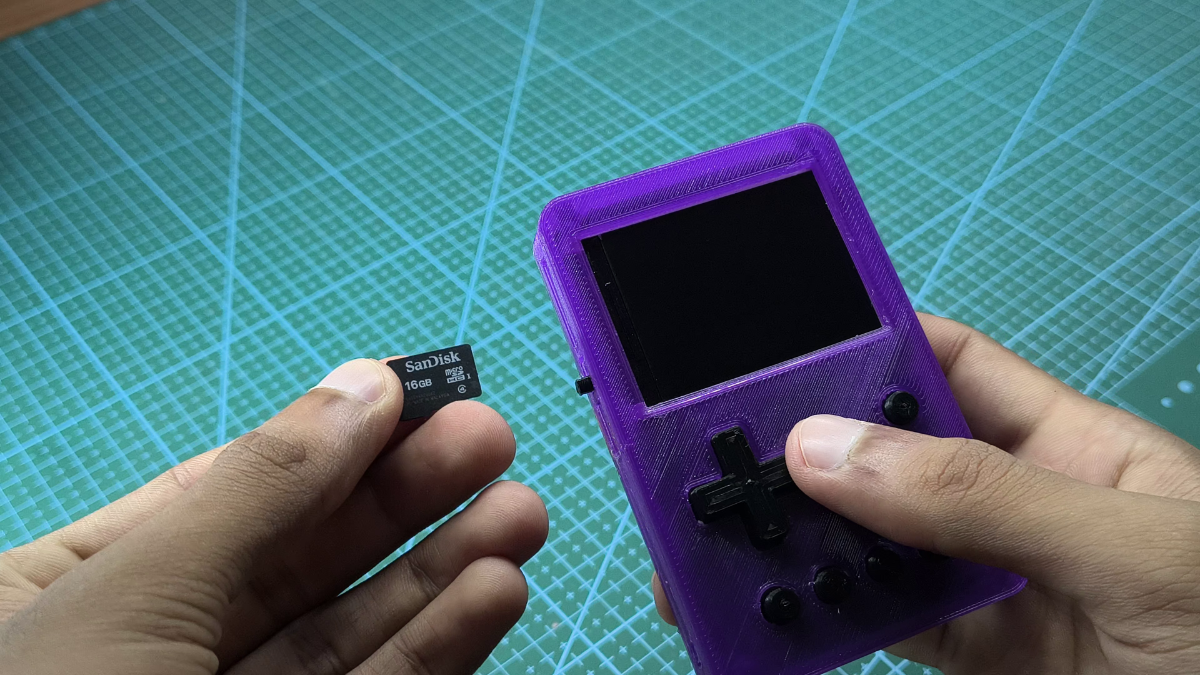
Before inserting the SD card into the handheld, it must be formatted as FAT32. I also found that not every SD card works reliably with the ESP32-S3. For this build, I'm using a SanDisk 16 GB microSD card, which worked without any issues.
Once the card is formatted, insert it into the handheld and power it on. The system should boot normally and initialize the SD card.
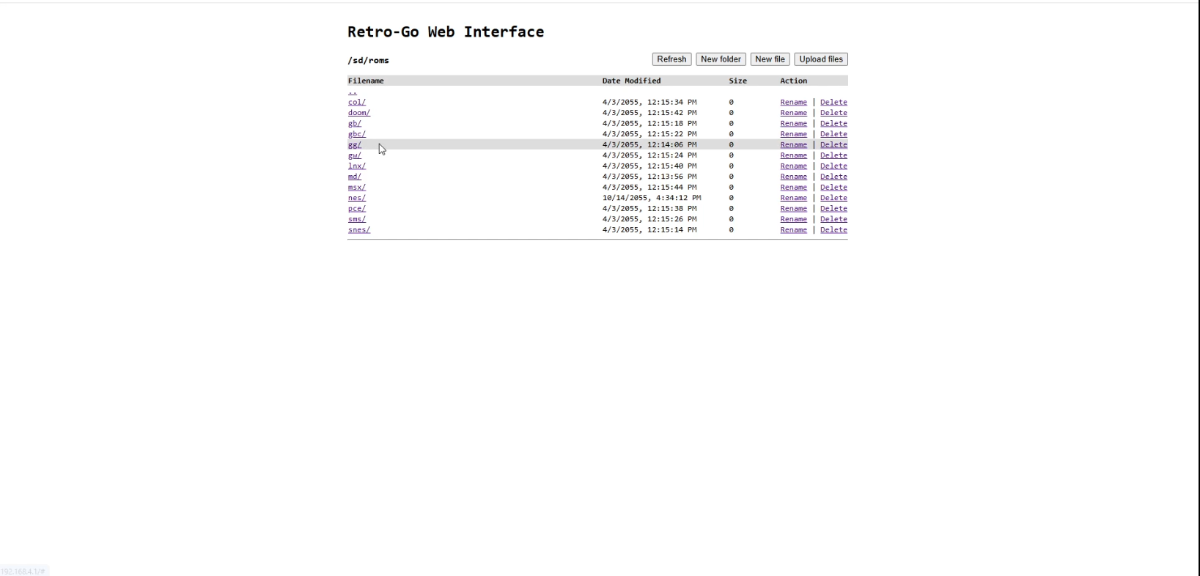
One of the best features of Retro-Go is that you don't need to remove the SD card every time you want to add new games. Instead, you can transfer files wirelessly over Wi-Fi.
Enabling Wi-Fi File Access
- Open the Options menu.
- Navigate to Wi-Fi Options.
- Enable the Wi-Fi Access Point.
- Connect your computer to the Wi-Fi network created by the handheld.
- Open a web browser and enter the IP address displayed on the console screen.
You should now have access to the SD card's file system directly from your browser.
Adding ROM Files
The firmware automatically creates the required folders for each supported gaming system. To create these folders, simply open each console category once from the main menu.
In the file manager, navigate to the ROMs directory and open the folder corresponding to the platform you want to add games for. Then upload your ROM files to the appropriate folder.
Once the upload is complete, return to the main menu and your games should appear automatically, ready to play.
Time to Play!
It's amazing how much retro gaming power can fit into a handheld that's roughly the size of a credit card.
After all the design work, soldering, programming, and assembly, it's incredibly satisfying to finally power on the console and start playing your favorite classic games.