https://www.digikey.in/en/mylists/list/UVFM67HJ8A
Step 1: Collecting Components
I started by gathering all required components:
- Seeed XIAO ESP32S3 / ESP32 board
- MPU6050 vibration/accelerometer sensor
- Breadboard
- Jumper wires
- USB cable
- Laptop with Arduino IDE & Node.js
These were enough to build the full prototype.
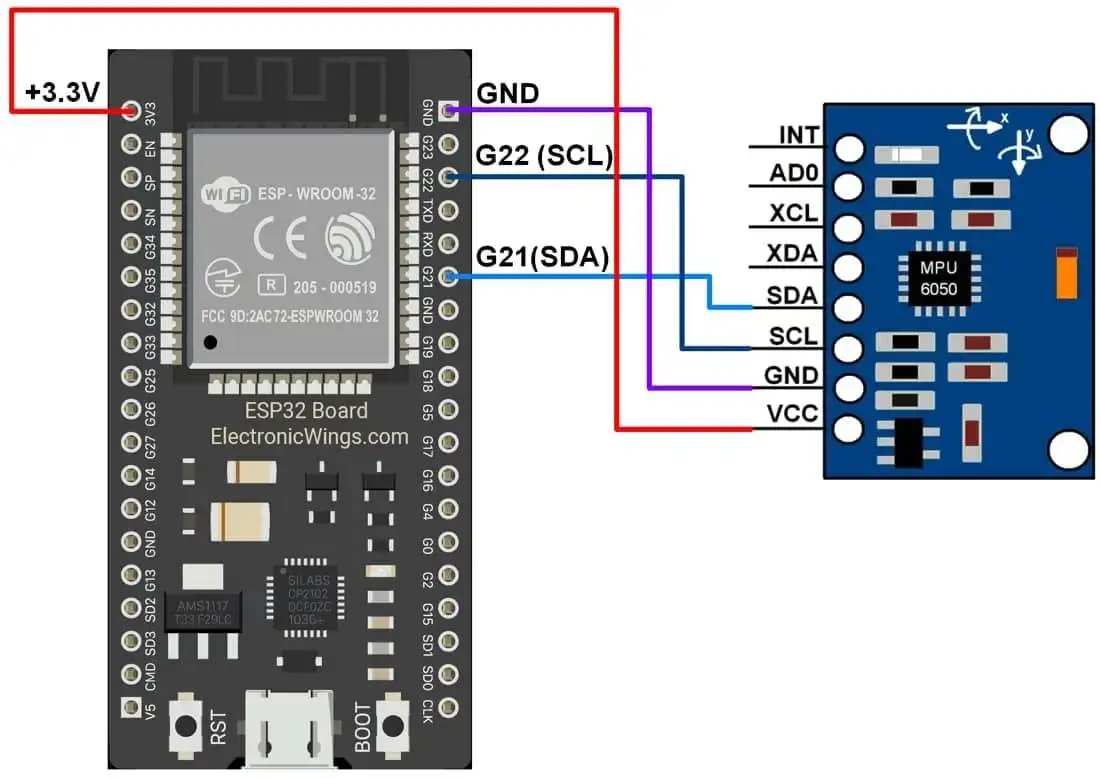
Step 2: Wiring the Sensor
The MPU6050 was connected to the ESP32S3 using the I2C interface:
- VCC → 3.3V
- GND → GND
- SDA → GPIO 21
- SCL → GPIO 22
Step 3: Testing Sensor Readings
I uploaded a simple code in Arduino IDE to read raw accelerometer values from the MPU6050.
When I shook or tapped the sensor, I could see the values change on the Serial Monitor.
This confirmed that:
- Connections were correct
- Sensor was working
- Data was being received properly
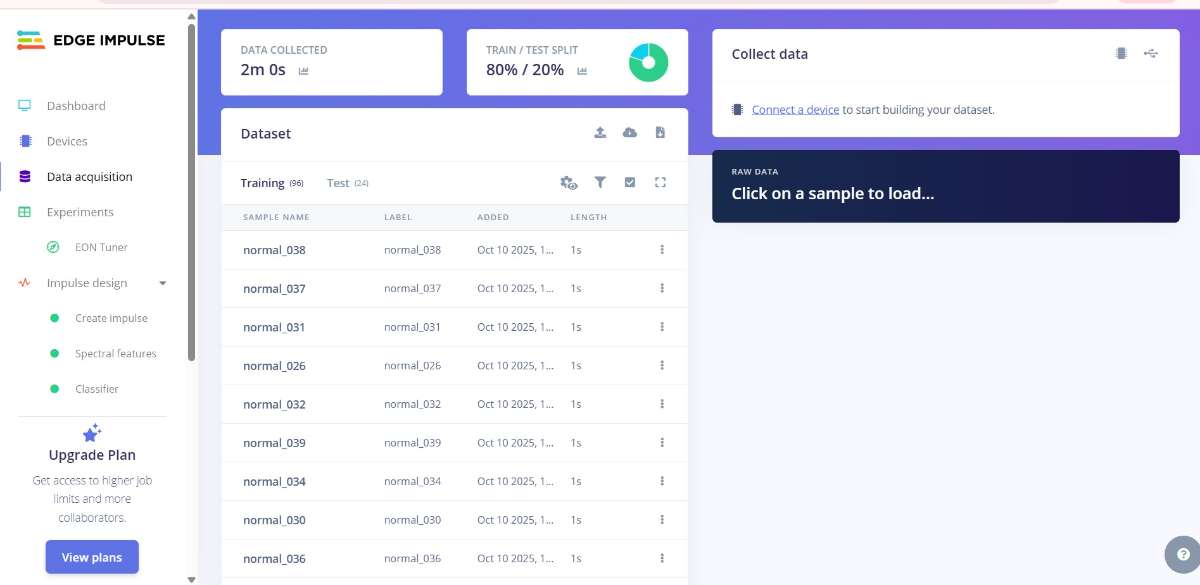
Step 4: Collecting Vibration Data
Next, I collected vibration samples from a motor under different conditions:
- Normal running
- Loose mounting
- Misalignment
- Added load
- High vibration state
I saved these vibration readings as CSV files to use them for training the vibration detection model.
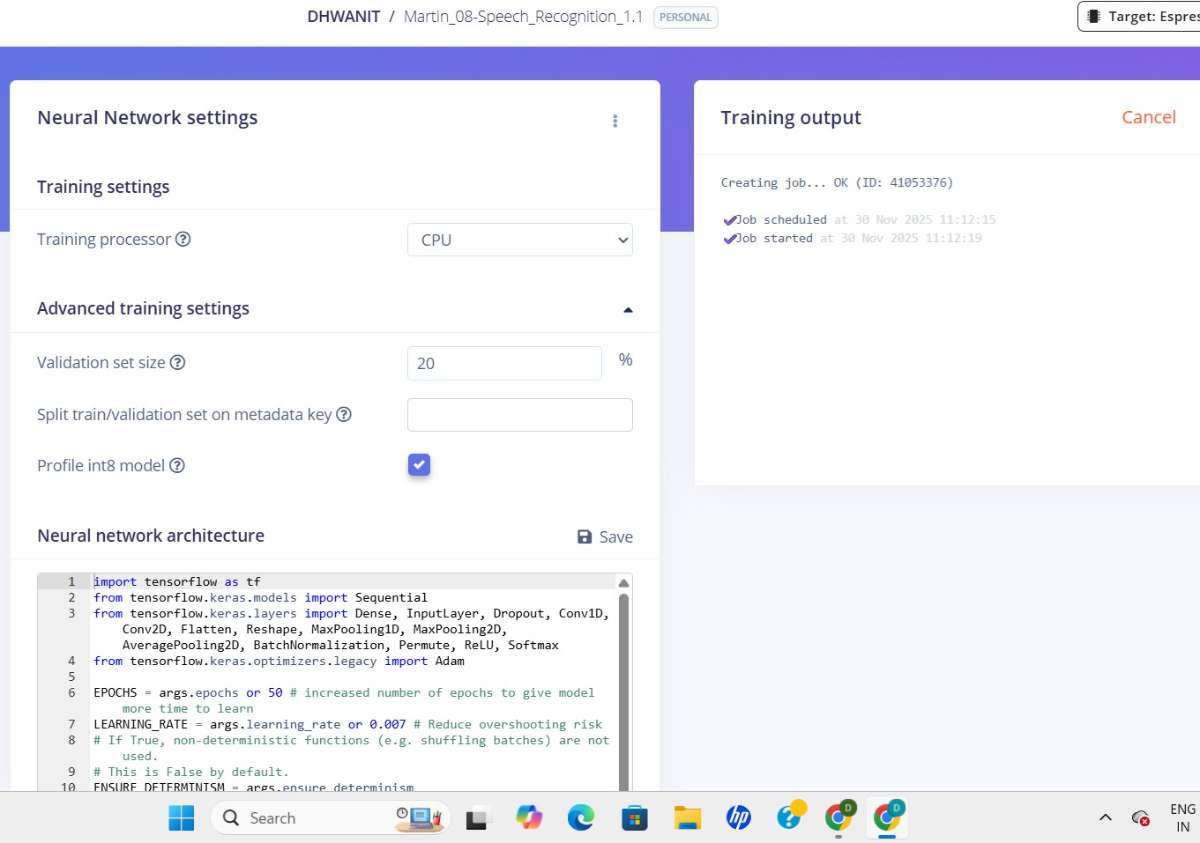
Step 5: Creating the Vibration Model
I processed the collected data and created a lightweight vibration classification model.
I mainly used:
- Time-domain vibration patterns
- Frequency features (FFT)
This model learns the difference between normal and abnormal vibration levels.
Once the model was ready, I exported it so that it could be deployed on the ESP32.
Step 6: Uploading Model to Microcontroller
I added the exported vibration detection model into my ESP32 code.
Now the microcontroller:
- Continuously reads vibration data
- Processes it
- Compares it with the trained model
- Detects abnormal vibration patterns
Whenever an abnormal vibration is detected, the ESP32 sends an alert message to the Node.js dashboard.
Step 7: Building the Real-Time Dashboard
I built a small Node.js server that receives alerts from the ESP32.
It shows:
- Alert message
- Timestamp
- Motor status
- Confidence level
This dashboard updates instantly whenever the ESP32 detects a vibration anomaly.
Step 8: Testing the Complete System
I mounted the sensor on a motor and performed various tests:
- Artificially loosening the screws
- Adding extra weight
- Changing speed
- Running the motor under stress
The system correctly detected abnormal vibration levels every time.
#include <Wire.h>
#include <MPU6050.h>

MPU6050 mpu;

void setup() {
  Serial.begin(115200);
  Wire.begin();               // SDA = 21, SCL = 22 (default for ESP32)
  mpu.begin();
  mpu.calcGyroOffsets();      // Auto-calibration
  delay(2000);

  Serial.println("accX,accY,accZ,gyroX,gyroY,gyroZ");
}

void loop() {
  mpu.update();

  Serial.print(mpu.getAccX()); Serial.print(",");
  Serial.print(mpu.getAccY()); Serial.print(",");
  Serial.print(mpu.getAccZ()); Serial.print(",");

  Serial.print(mpu.getGyroX()); Serial.print(",");
  Serial.print(mpu.getGyroY()); Serial.print(",");
  Serial.println(mpu.getGyroZ());

  delay(20);    // 50 Hz sampling (20 ms)
}
What this code does:
- Reads 6 DOF data (Accel + Gyro)
- Outputs CSV format (compatible with Edge Impulse Data Forwarder)
- Samples at 50 Hz (change
delay()for faster/slower sampling)
Recommended Edge Impulse Impulse Settings (Perfect for Vibration/TinyML)
Sampling Parameters
| Setting | Recommended Value |
|---|---|
| Sampling Frequency | 100 Hz (best for motors) |
| Window Size | 1000 ms (1 second) |
| Window Increase | 200 ms |
Why?
1 second gives enough vibration cycles for FFT, 100 Hz satisfies Nyquist, and 200ms provides overlap for smooth inference.
Add ING a Processing Block
Select Spectral Features (FFT) FOR configure:
FFT Settings:
| Parameter | Value |
|---|---|
| Scale type | Raw |
| FFT length | Power of 2 (512) |
| Filter | None |
| Zero padding | Yes |
| Frequency bands | Auto-split (recommended) |
Additional Statistical Features: RMS, Standard Deviation, Mean, Kurtosis. Skewness, Peak-to-Peak
These features improve anomaly detection significantly.
Learning Block
Choose one:
TinyML Classifier (Best for 2-class: Normal vs Abnormal)
K-means Anomaly Detection
Best for detecting unknown faults.
Model Settings
Learning Rate: 0.005
Epochs: 40–60
Batch Size: 32
Quantization: Int8 Optimized (for ESP32)
(3) Complete Node.js Backend + Frontend
This creates a real-time alert dashboard using Express + Socket.io.
server.js
const express = require("express");
const http = require("http");
const { Server } = require("socket.io");
const path = require("path");

const app = express();
const server = http.createServer(app);
const io = new Server(server);

app.use(express.json());

// Receive alert from ESP32
app.post("/alert", (req, res) => {
  console.log("Incoming Alert:", req.body);
  io.emit("vibration-alert", req.body);
  res.sendStatus(200);
});

// Serve dashboard
app.use(express.static(path.join(__dirname, "public")));

io.on("connection", () => {
  console.log("Dashboard Connected");
});

server.listen(3000, () => {
  console.log("Server running on http://localhost:3000");
});
Dashboard UI
Create a folder named public → Inside it create index.html:<!DOCTYPE html>
<html>
<head>
  <title>Vibration Monitoring Dashboard</title>
  <script src="/socket.io/socket.io.js"></script>
  <style>
    body { font-family: Arial; background:#f4f4f4; padding:20px; }
    .alert-box {
      background:#ffdddd; border-left:5px solid red; padding:15px;
      margin-bottom:10px; border-radius:8px;
    }
  </style>
</head>
<body>

<h2>Real-Time Vibration Alerts</h2>
<div id="alerts"></div>

<script>
  const socket = io();

  socket.on("vibration-alert", (data) => {
    const box = document.createElement("div");
    box.className = "alert-box";
    box.innerHTML = `
      <strong>⚠ Abnormal Vibration Detected!</strong><br>
      Device: ${data.device}<br>
      Confidence: ${data.confidence}<br>
      Time: ${new Date().toLocaleString()}
    `;
    document.getElementById("alerts").prepend(box);
  });
</script>

</body>
</html>
Run
Run these commands:npm init -y
npm install express socket.io
node server.js