
Intelligent Robotic Arm for Precision Handling and Automation
Introduction
This project presents a low-cost intelligent robotic arm designed for precision handling and object manipulation. The system combines a 3D-printed robotic gripper, servo motor actuation, and computer vision-based object detection to identify and grasp fruits automatically. The project demonstrates how affordable hardware and additive manufacturing can be used to create an automated pick-and-place system for educational and industrial applications.
Step 1: Designing the Robotic Gripper
The project started with designing a three-finger adaptive robotic gripper in Autodesk Fusion 360. Each finger was modeled as a series of articulated segments connected through joints, allowing the gripper to conform to objects of different shapes and sizes.
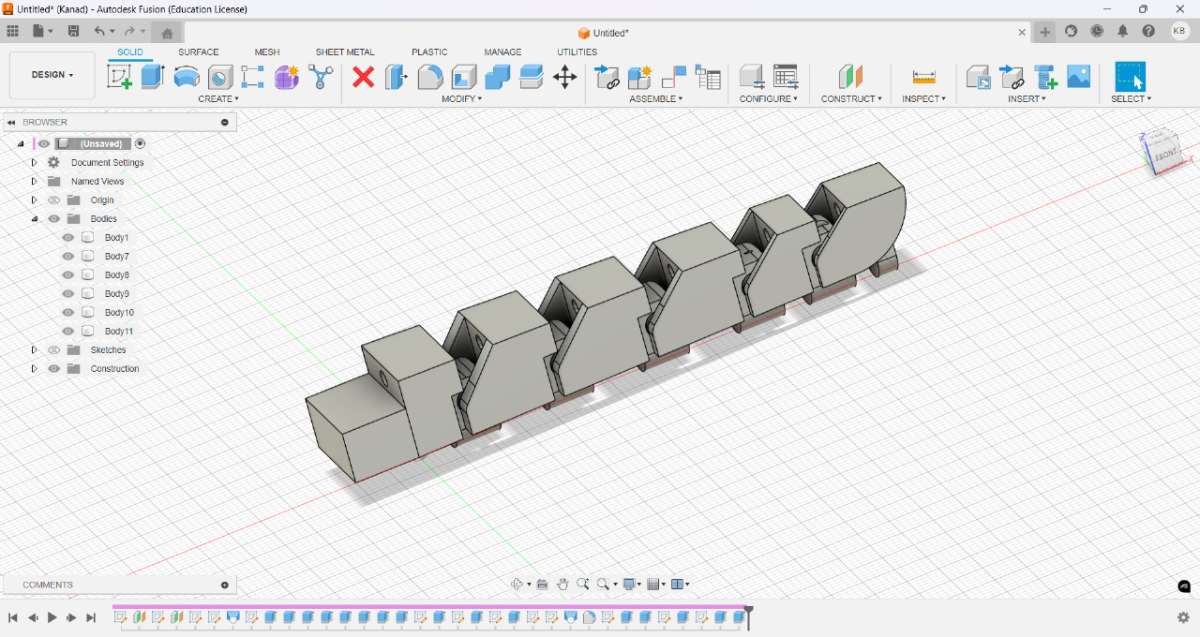
The design was optimized to:
- Provide stable gripping
- Adapt to different fruit sizes
- Be lightweight and easy to manufacture
- Operate using a single servo motor
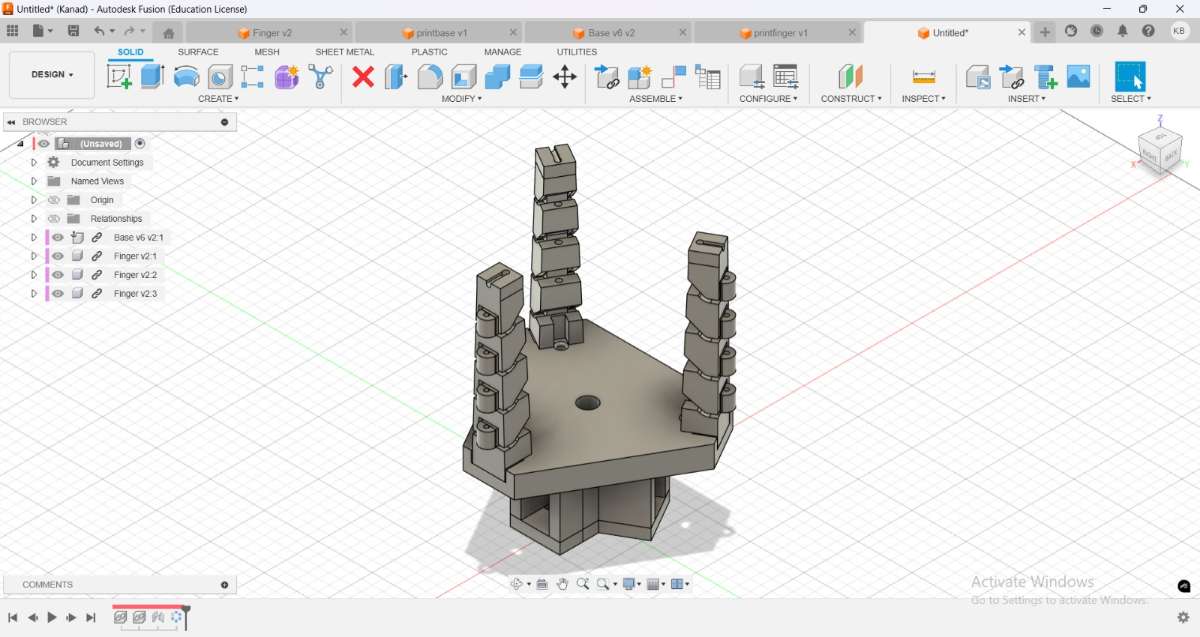
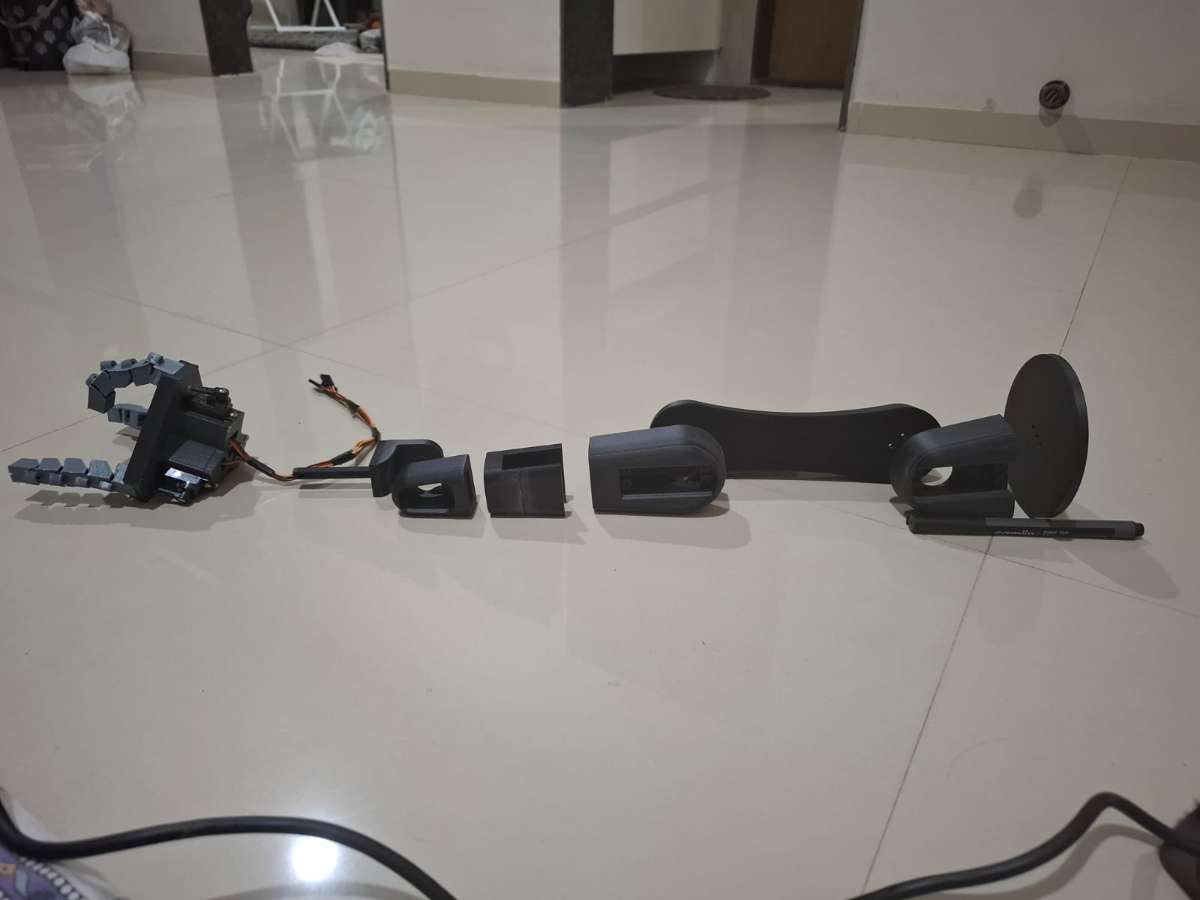
Step 2: Preparing Components for 3D Printing
After completing the CAD model, all parts were separated and prepared for additive manufacturing. The finger segments, base plate, and support structures were arranged for efficient printing.
Image: 3D printed parts on print bed
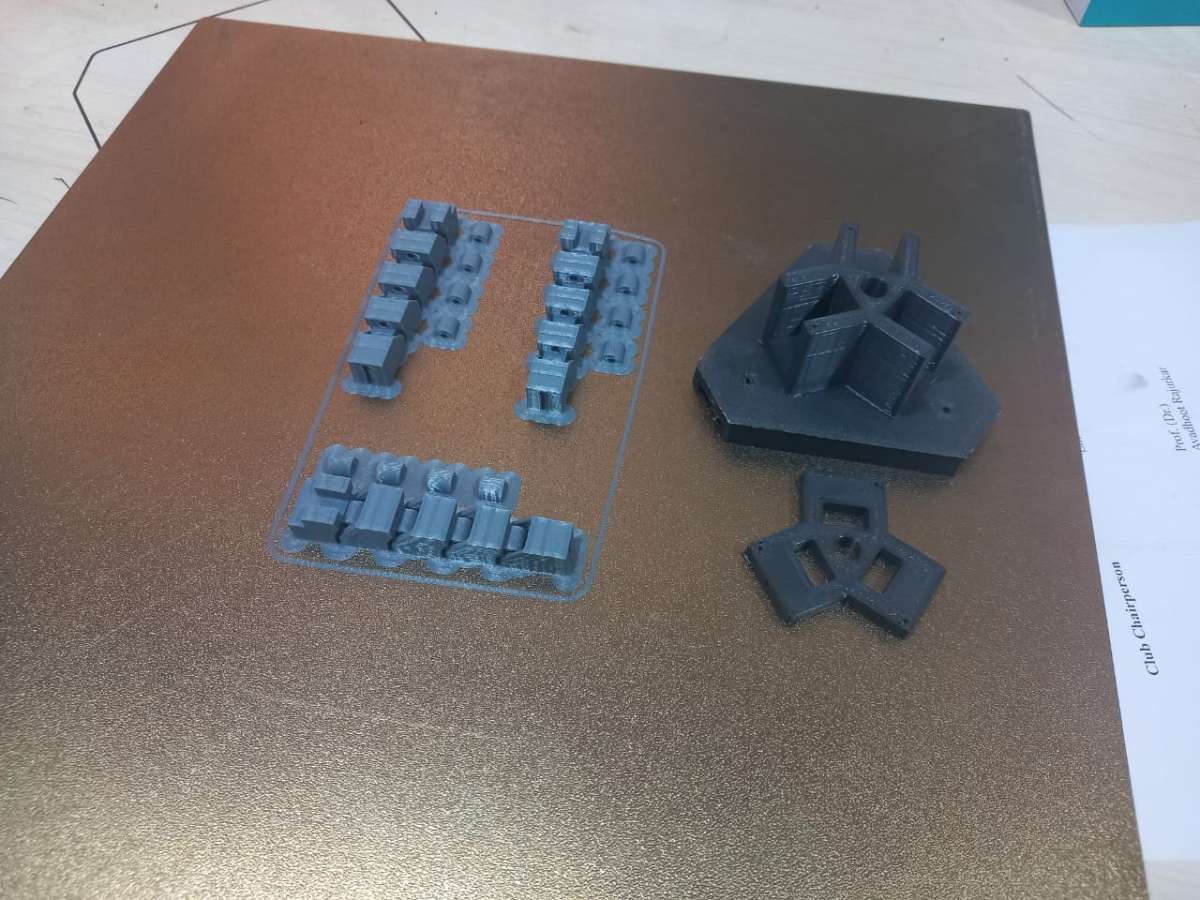
The components were printed using PLA material and later cleaned to remove support structures and improve surface finish.
Step 3: Prototype Development and Testing
Before final assembly, an initial prototype was developed to verify the finger mechanism and gripping motion. The prototype allowed testing of finger articulation and cable-driven actuation.
Add Image: White prototype and assembled prototype comparison
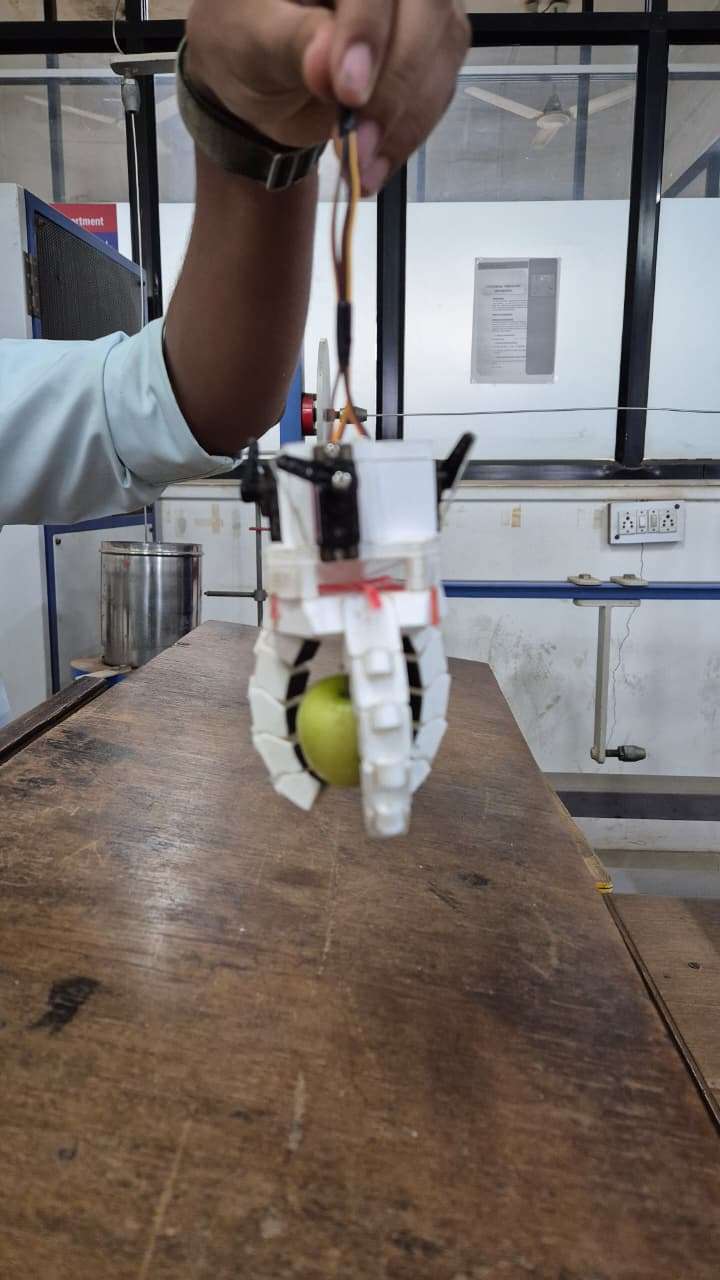
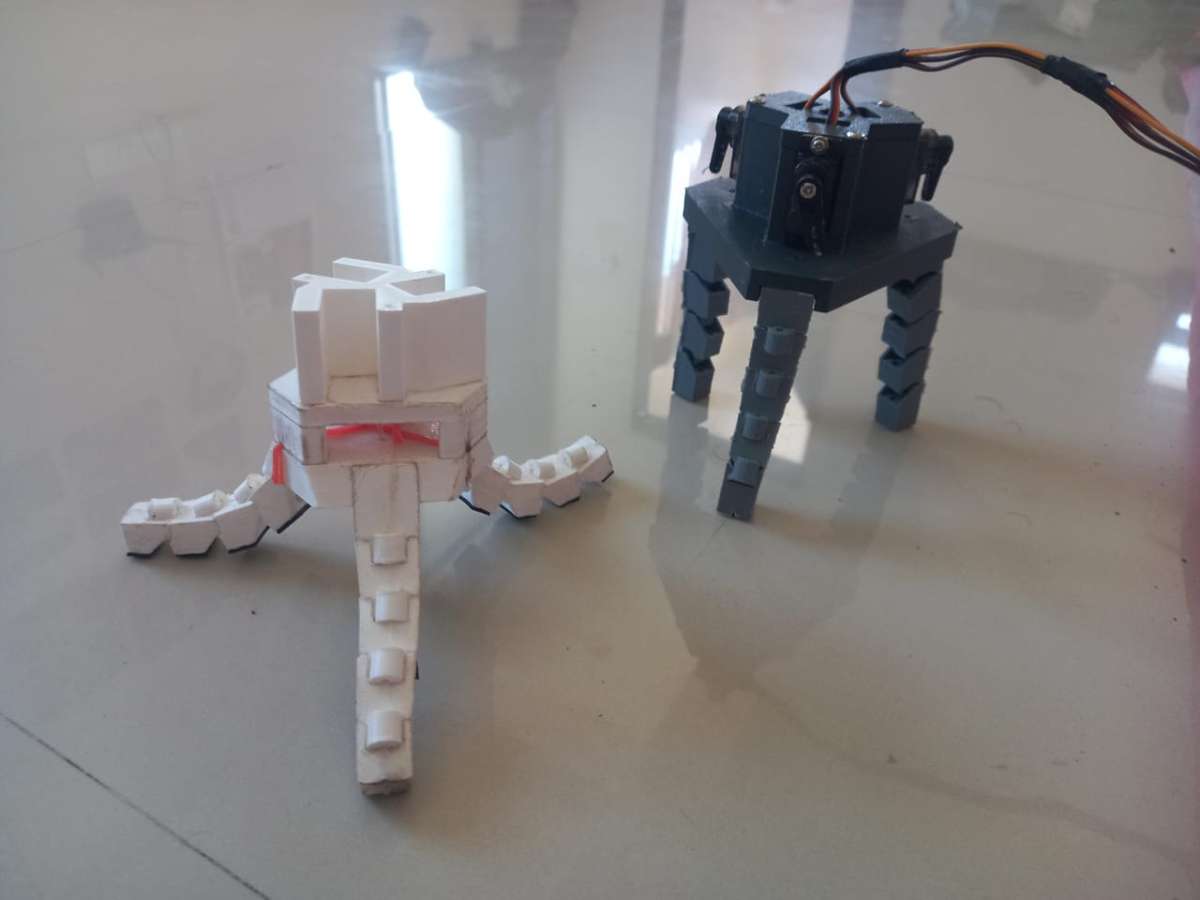
This stage helped identify improvements in finger geometry and gripping force before creating the final version.
Step 4: Final Gripper Assembly
The printed finger segments were assembled onto the gripper base. A servo motor was mounted at the center of the assembly, and the actuation mechanism was connected to all three fingers.
Add Image: Final assembled gripper
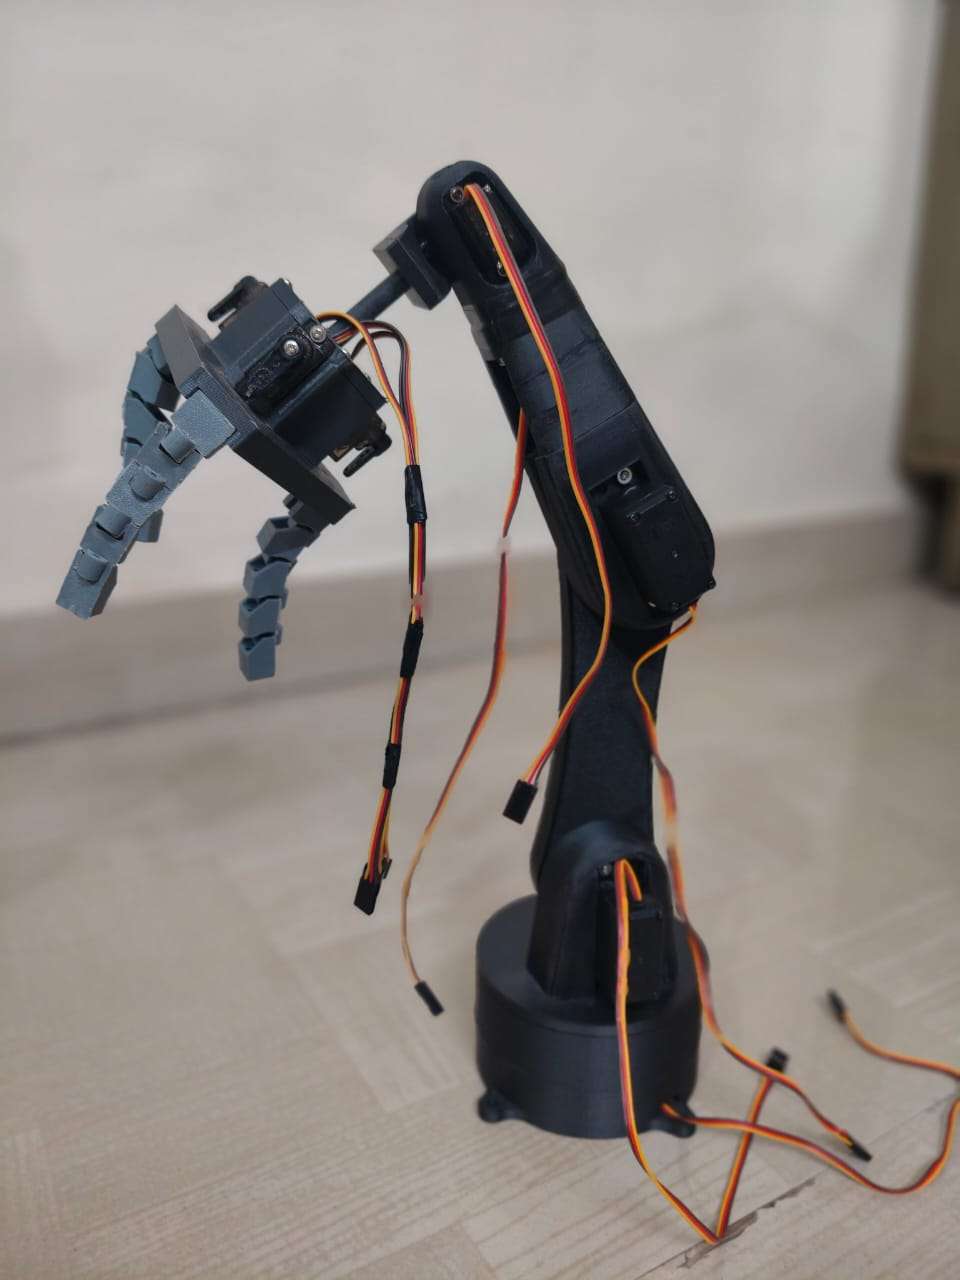
The three-finger arrangement enables stable grasping while distributing force evenly around the object.
Step 5: Integration with Robotic Arm
The gripper was integrated with a robotic arm structure consisting of:
- Base rotation mechanism
- Arm links
- Servo motor joints
- End-effector gripper
The modular design allows easy replacement and maintenance of individual components.
Step 6: Electronics and Control System
The robotic arm was controlled using an ESP8266/Arduino-based system. Multiple servo motors were used to actuate the arm joints and gripper.
Main Components
- ESP8266 NodeMCU
- Servo Motors (MG90S/MG995)
- External Power Supply
- USB Camera
- 3D Printed Robotic Gripper
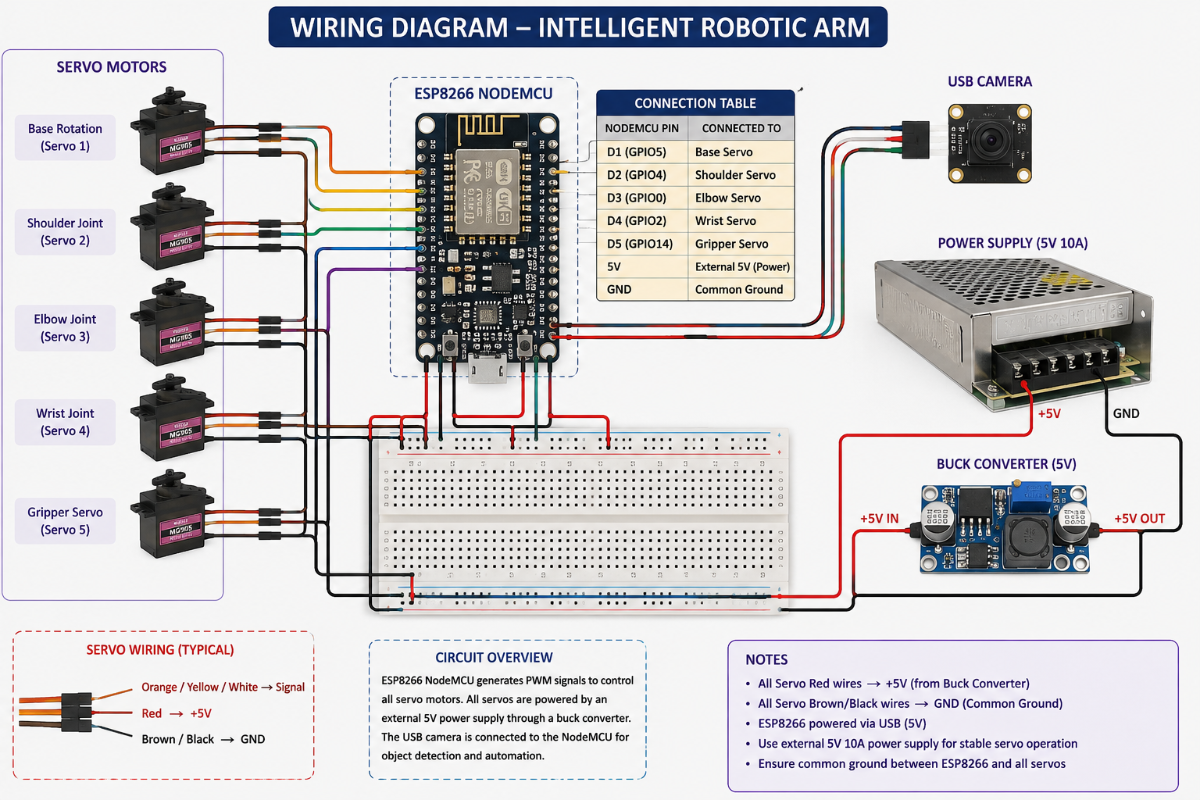
The servo motors receive PWM signals from the controller, allowing accurate control of position and movement.
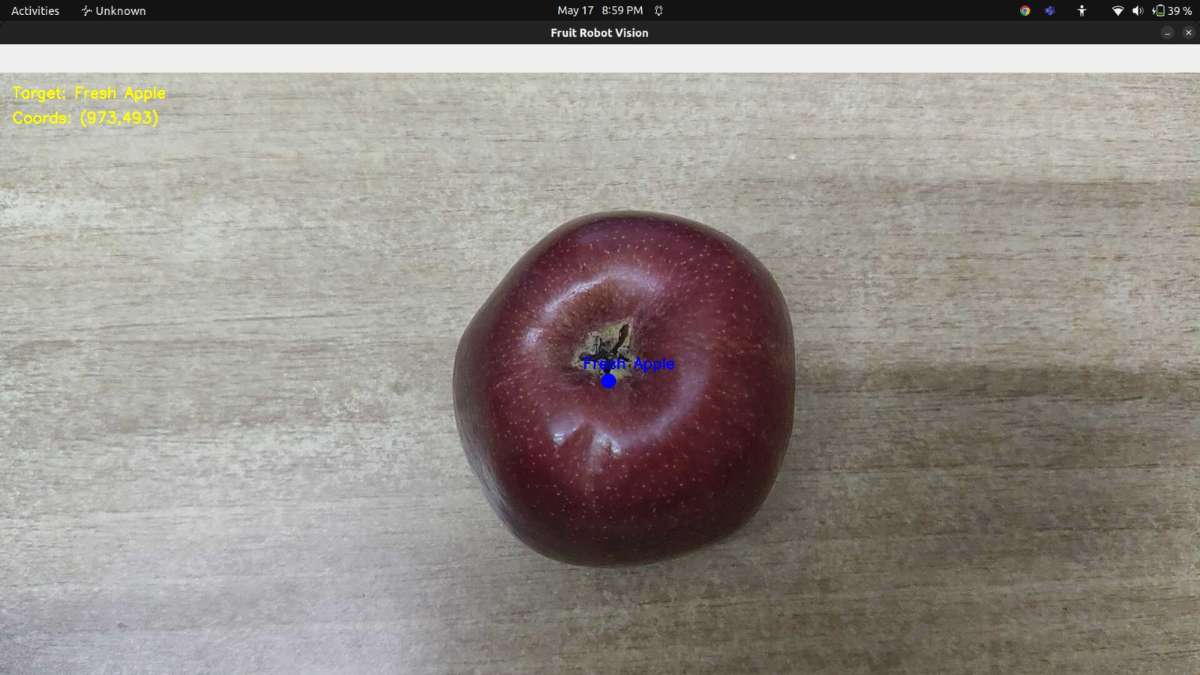
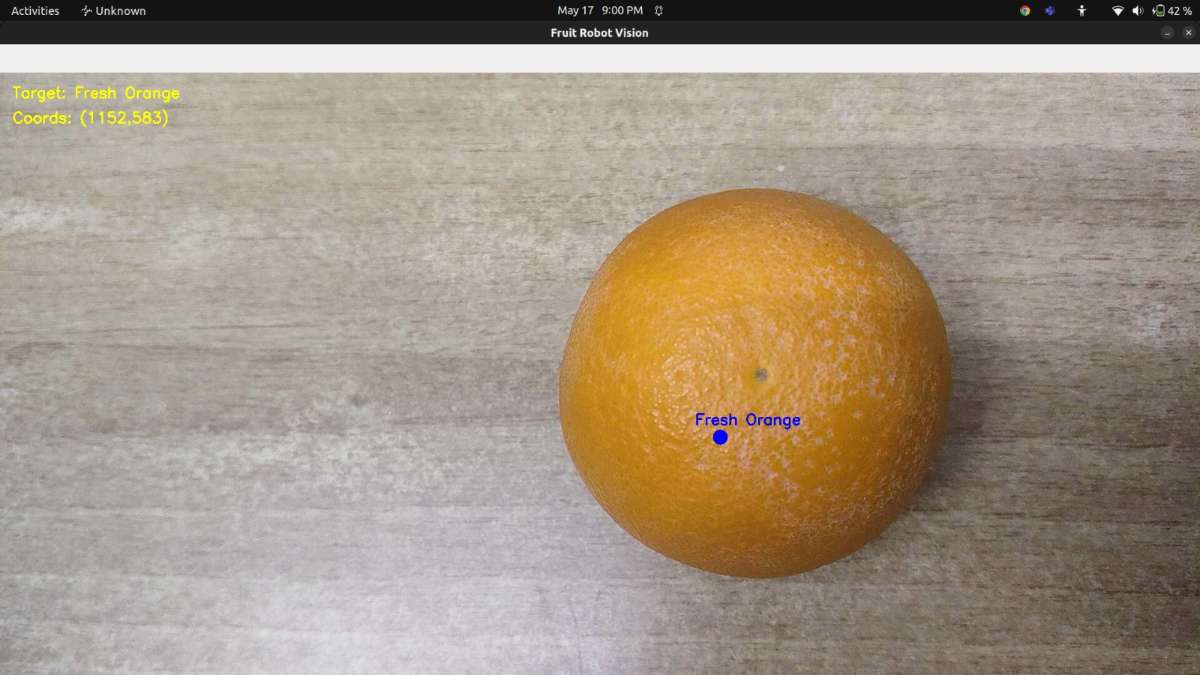
Step 7: Computer Vision-Based Fruit Detection
A camera continuously captures images of the workspace. OpenCV and machine learning-based object detection techniques are used to identify fruits such as apples, oranges, and bananas.
The detected object's coordinates are processed and converted into movement commands for the robotic arm.
The workflow is:
- Capture image from camera
- Detect fruit using computer vision
- Calculate object location
- Generate movement commands
- Move robotic arm to target
- Close gripper and grasp fruit
Transfer fruit to desired location
Step 8: Testing and Validation
The completed gripper was tested using fruits of different sizes. The adaptive finger mechanism successfully wrapped around the object and maintained a secure grip.
The results demonstrated reliable grasping performance while using low-cost hardware and 3D-printed components.
Results
The developed robotic arm successfully:
- Detects fruits using computer vision
- Positions the arm toward the target
- Grasps fruits using a three-finger adaptive gripper
- Performs pick-and-place operations
- Demonstrates low-cost robotic automation
Future Improvements
Future work includes:
- Integration of inverse kinematics for improved accuracy
- Real-time object tracking
- Force sensing for adaptive grip control
- AI-based object classification
- Industrial-scale robotic arm implementation
Conclusion
The Intelligent Robotic Arm for Precision Handling and Automation demonstrates the successful integration of CAD design, additive manufacturing, embedded systems, servo motor control, and computer vision. The project provides an affordable platform for learning robotics and serves as a foundation for future automation and smart manufacturing applications.