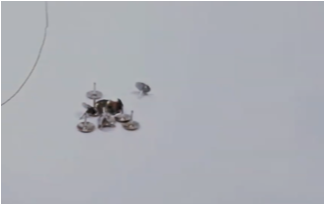
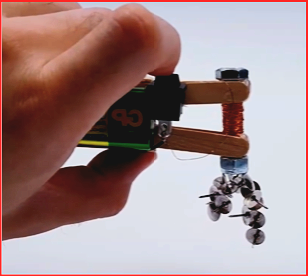
IRON METAL SEGREGATOR from a heap of DEBRIS.
Description :- It is a device which is made using an electromagnet. It perfectly serves the purpose of segregating iron metal parts and all other ferromagnetic metals from debris. Whenever it switched is on , the iron metal components from waste approach towards it due to the force of magnetic attraction.
Factors Affecting The Magnetic Field Strength
- Magnetic Field Strength ∝ number of turns in the winding
- Magnetic Field Strength ∝ the current in the wire.
Maxwell's corkscrew rule states that if a right-handed screw is turned so that it moves forwards in the same direction as the conventional current, its direction of rotation will give the direction of the magnetic field. 
________________________________________
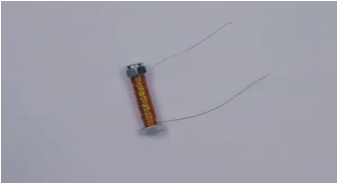
Electromagnet:- It a soft metal core made into a magnet by the passage of electric current through a coil surrounding it.
Some properties of an electromagnet :-
- The magnetic properties are displayed only when current is passed through it.
- It requires a continuous supply of electricity to maintain its magnetic field.
- The poles of this kind of magnet can be altered with the flow of current.
.jpg)
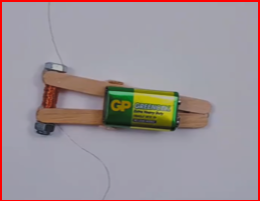
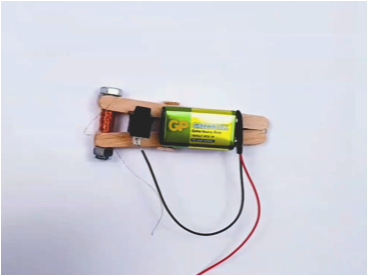
Procedure for making this device:-
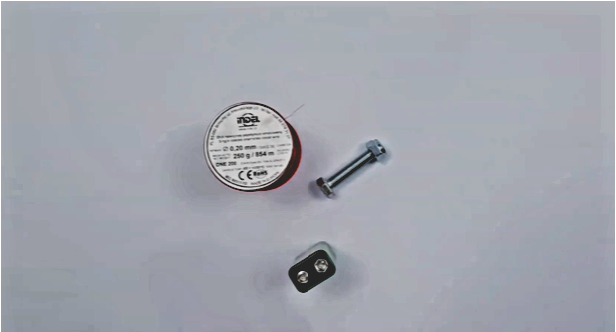
- Take an iron nail and wound insulated copper wire over it.
- Curl it over the nail without leaving gaps.
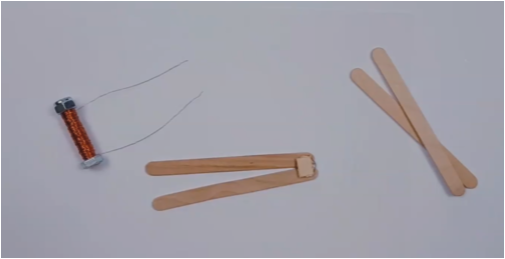
- Make a frame using wooden sticks to hold all components.
- Use a hot glue gun to stick parts.
- Connect end terminals of the solenoid with terminals of 9 volt battery.
- Make sure to attach an on/off switch.
- Test the connections first and then paste all components over the wooden stick frame with the help of glue gun or adhesive.
| Components | Quantity | Approx.Price (In rupees) |
| An iron nail | 1 | 10 |
| Copper wire | 0.5 metre | 15 |
| 9 volt battery | 1 | 10 |
| On/off switch | 1 | 5 |
| Wooden sticks | 10 | 20 |
| Glue sticks | 2 | 16 |
| Wires | 0.25 metre | 10 |
| Total | 86 | |
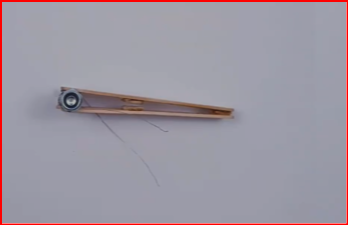
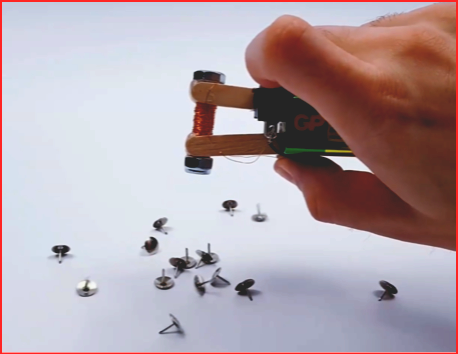
Eureka! The Project is ready.