AgroSage: Smart Soil Monitoring for Modern Farmers
The Challenge
Farmers often lack real-time, actionable soil data. Traditional methods are slow, expensive, and don’t provide immediate insights. Small-scale farmers need an affordable, easy-to-use tool to monitor soil health and make timely decisions.
The Problem:
- No real-time soil data
- Expensive lab testing
- Language barriers
- Limited internet in rural areas
- No actionable recommendations
The Solution:
AgroSage — a mobile app that connects to Bluetooth-enabled soil sensors, works offline, provides AI insights, and supports multiple languages.
Project Goals & End Result
What We Achieved:
- Real-time soil monitoring via Bluetooth
- Offline-first functionality
- AI-powered recommendations
- Multi-language support (English, Hindi, Bengali)
- Cross-platform (iOS & Android)
- Cloud sync for data backup
- Reading history and analytics
End Result:
A production-ready mobile app that helps farmers monitor soil health, get actionable insights, and improve crop yields.
Step-by-Step Build Process:
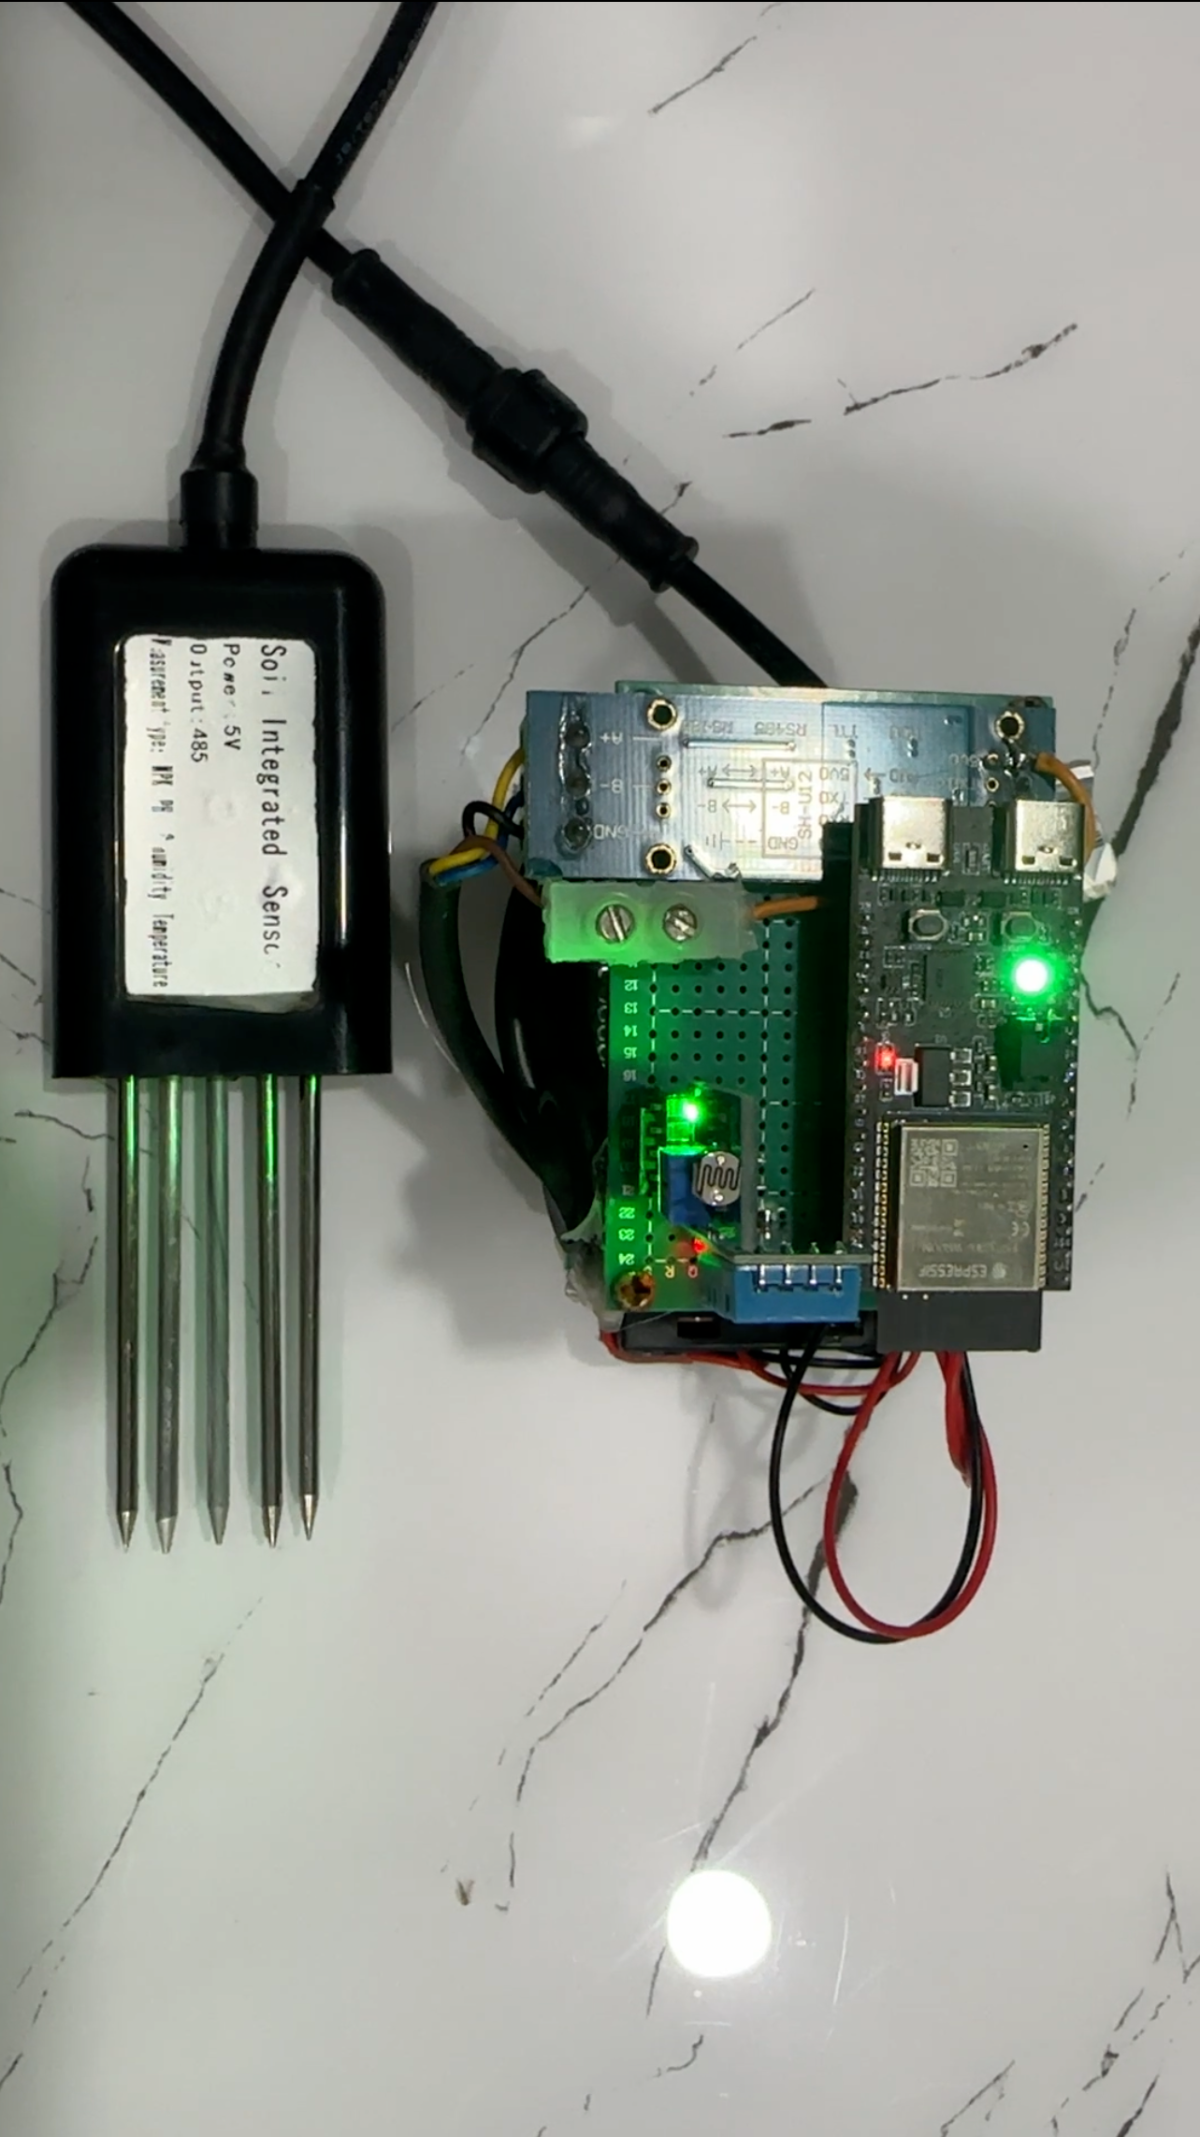
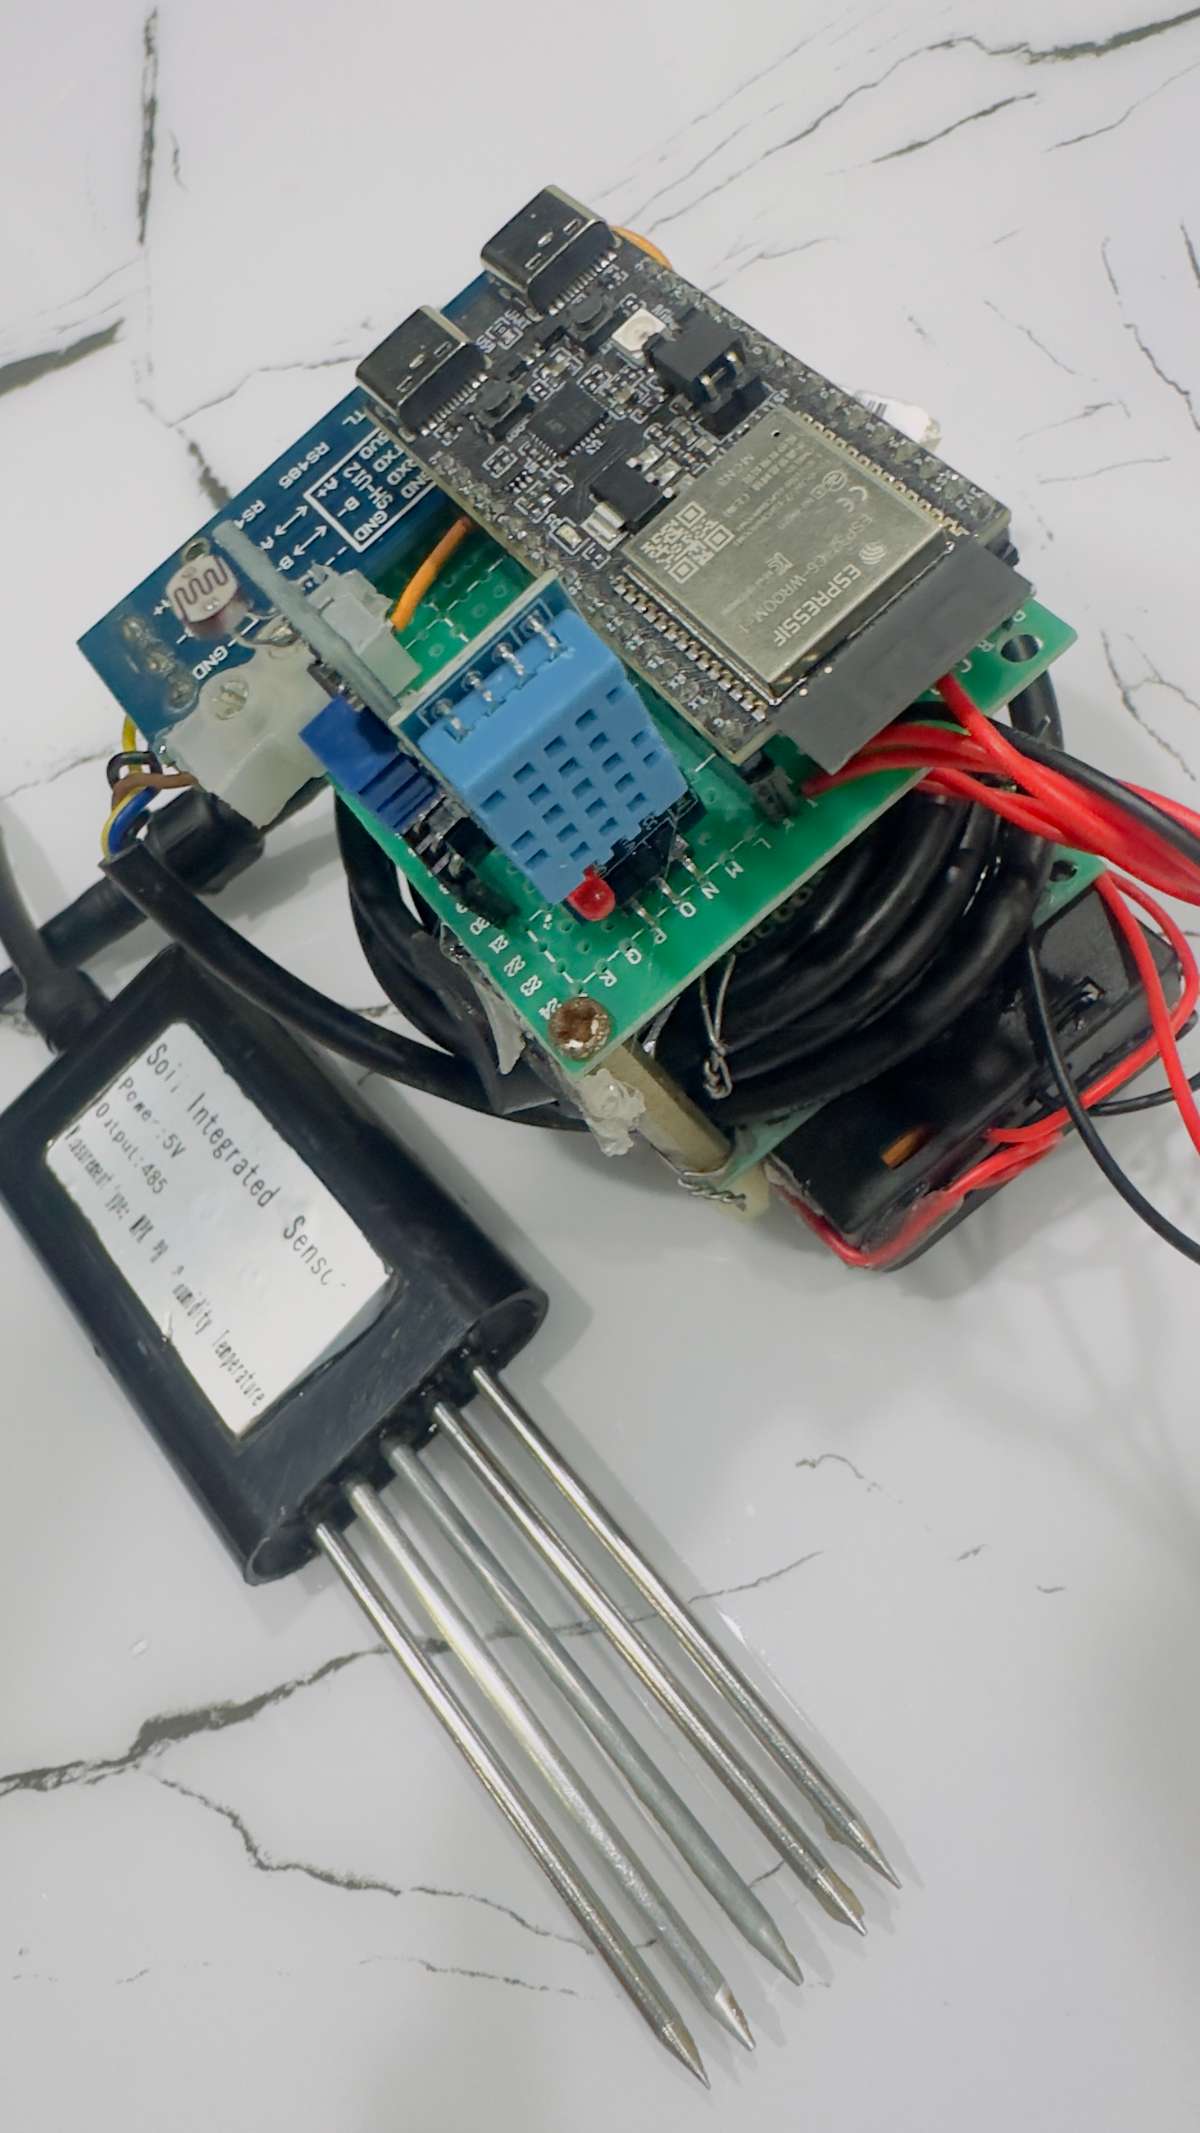
HARDWARE BUILD:
Check for components here - Digikey MyList
Components Requires :
- ESP32-C6-DEVKITC (Espressif Systems)
- DHT 11 Sensor
- LDR Sensor
- NPK 7-1 Sensor
- RS0485 - TTL Converter
- Soldering Iron
Connect the parts with the circuit diagram provided below :-

After that open Arduino IDE,
Choose Board as - ESP32C6 Dev Module
USB CDC on Boot - Enable
And Upload the following Sketch :-
/*
* AgroSage ESP32-C6 BLE Server + RGB Status - Ayan Ghosh
*
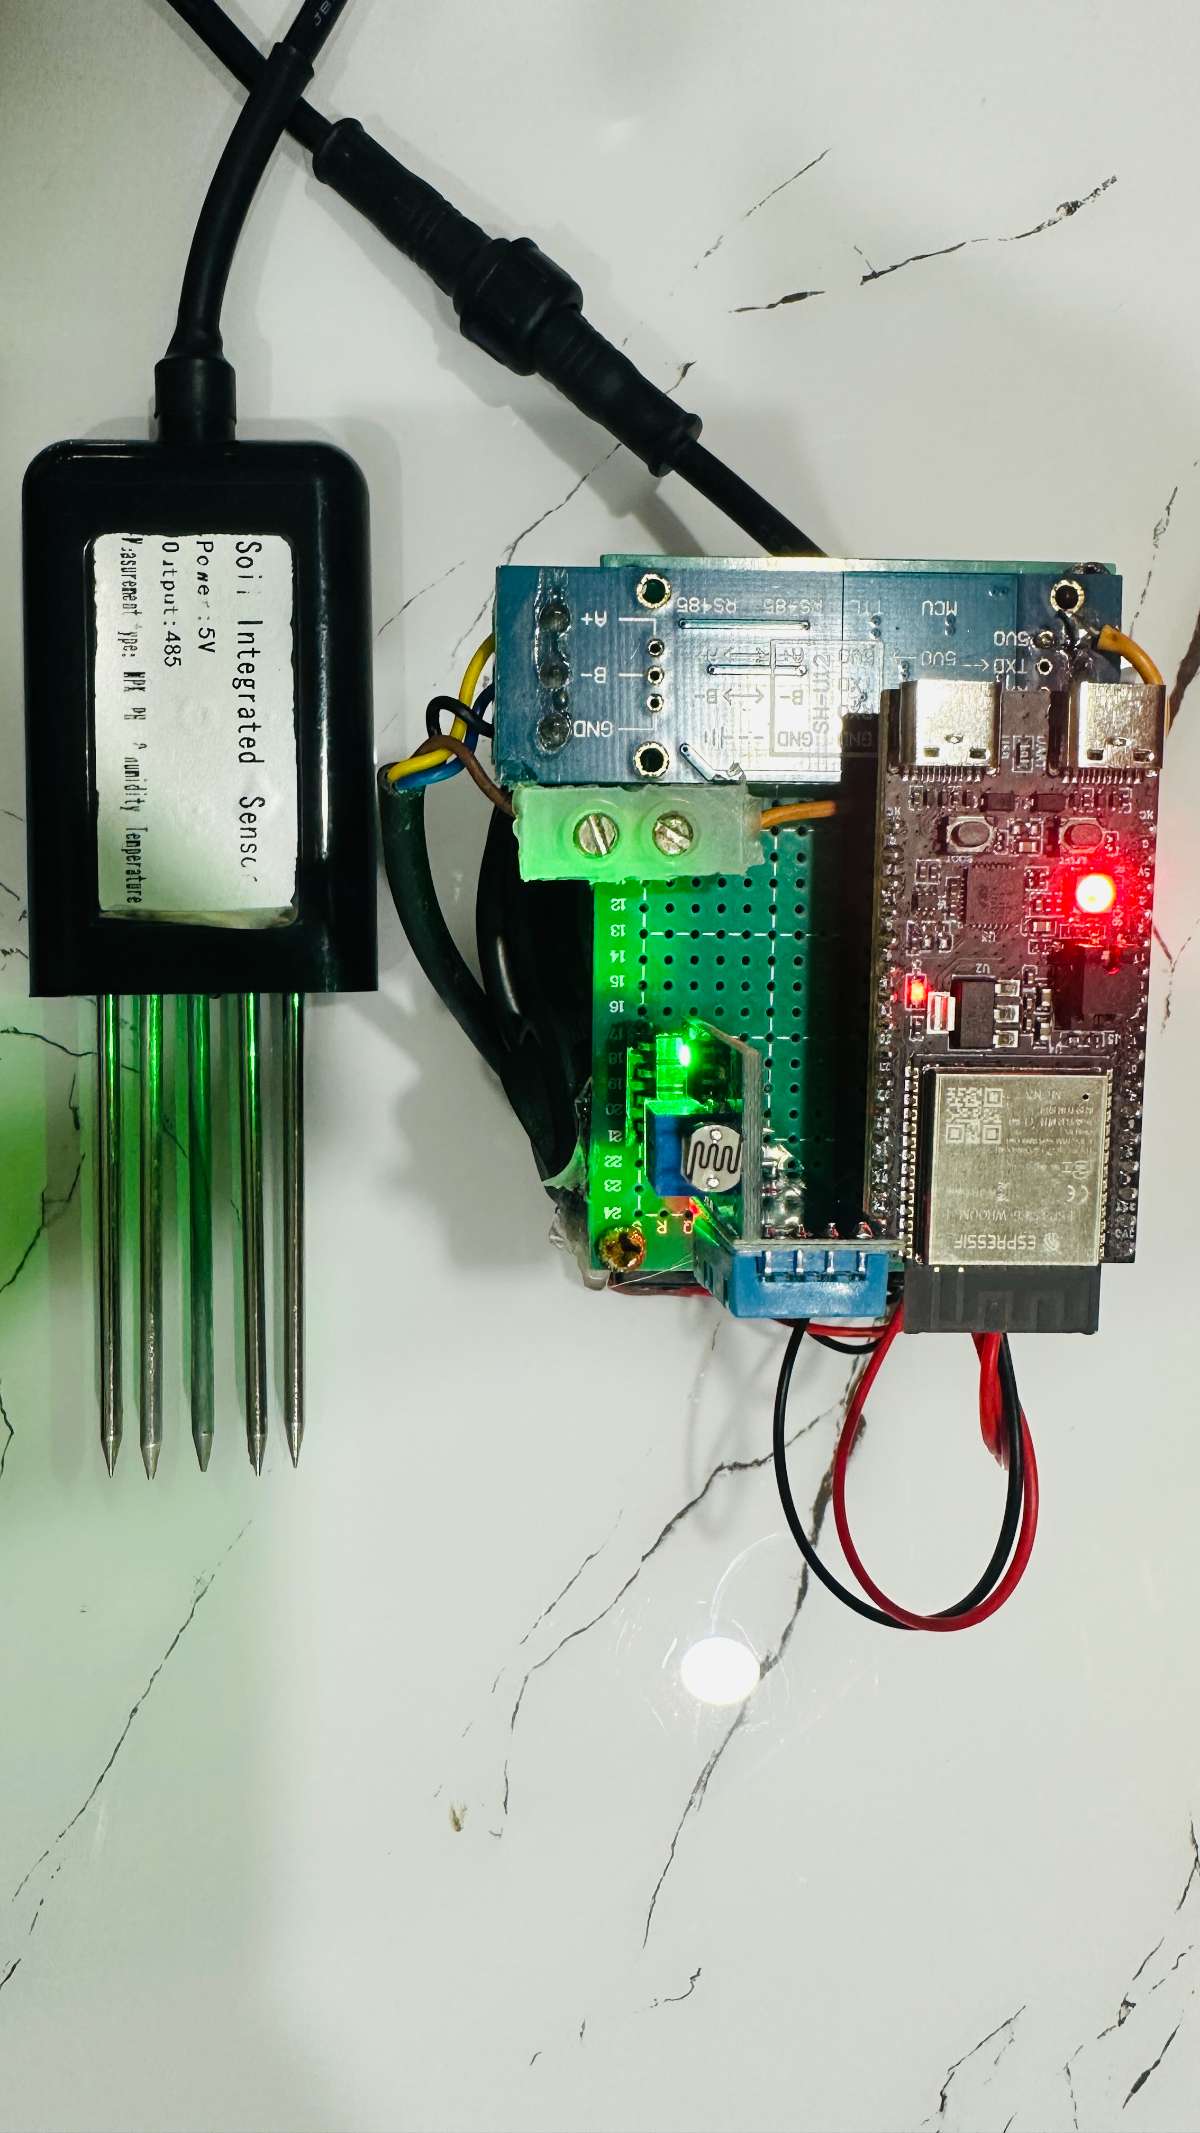
* States (RGB LED on GPIO 8):
* - Bluetooth NOT connected: RED
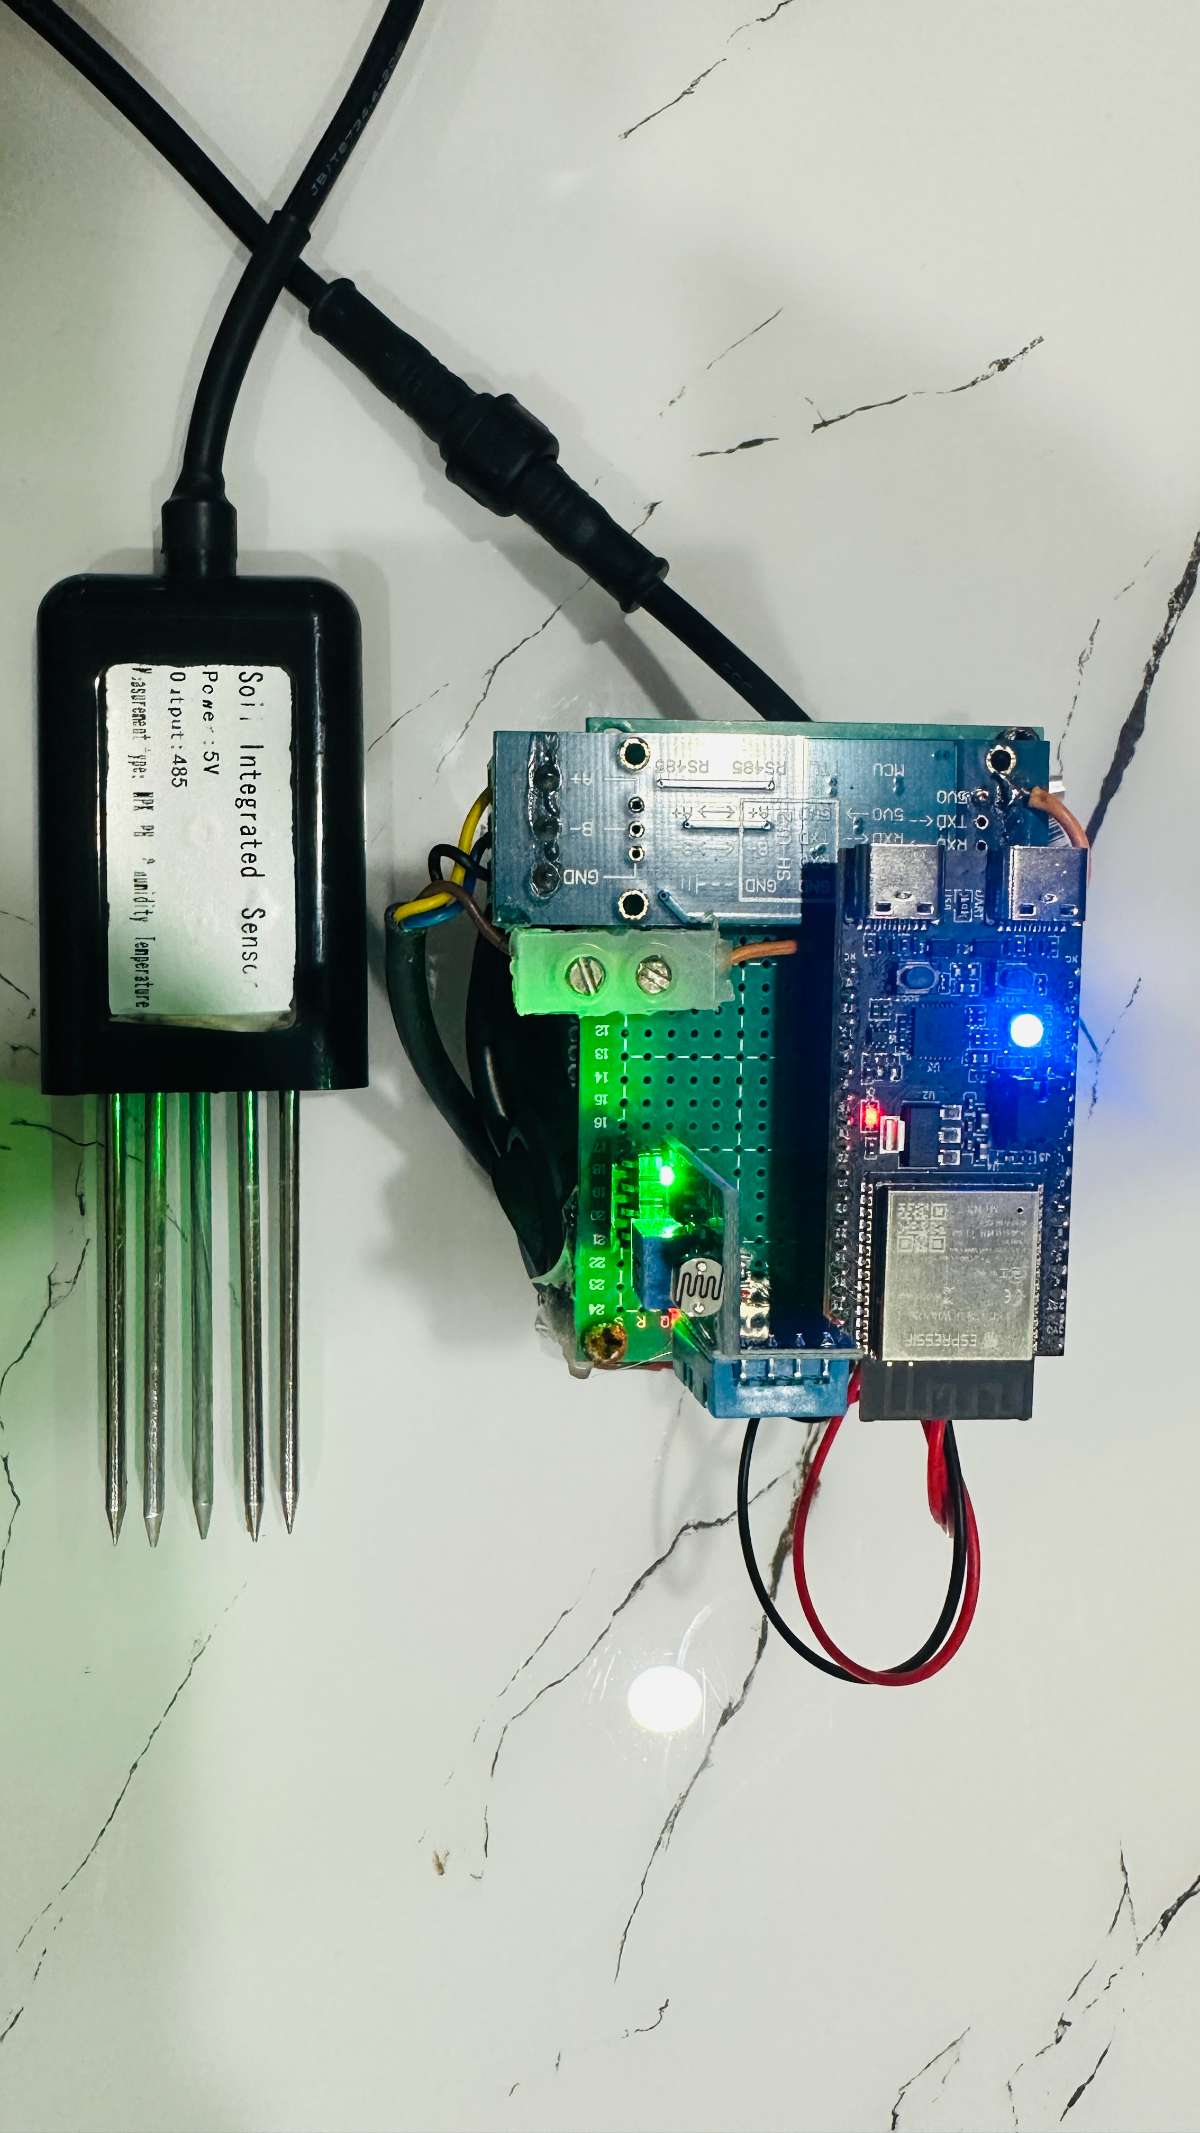
* - Bluetooth connected & IDLE/IN_SOIL: BLUE
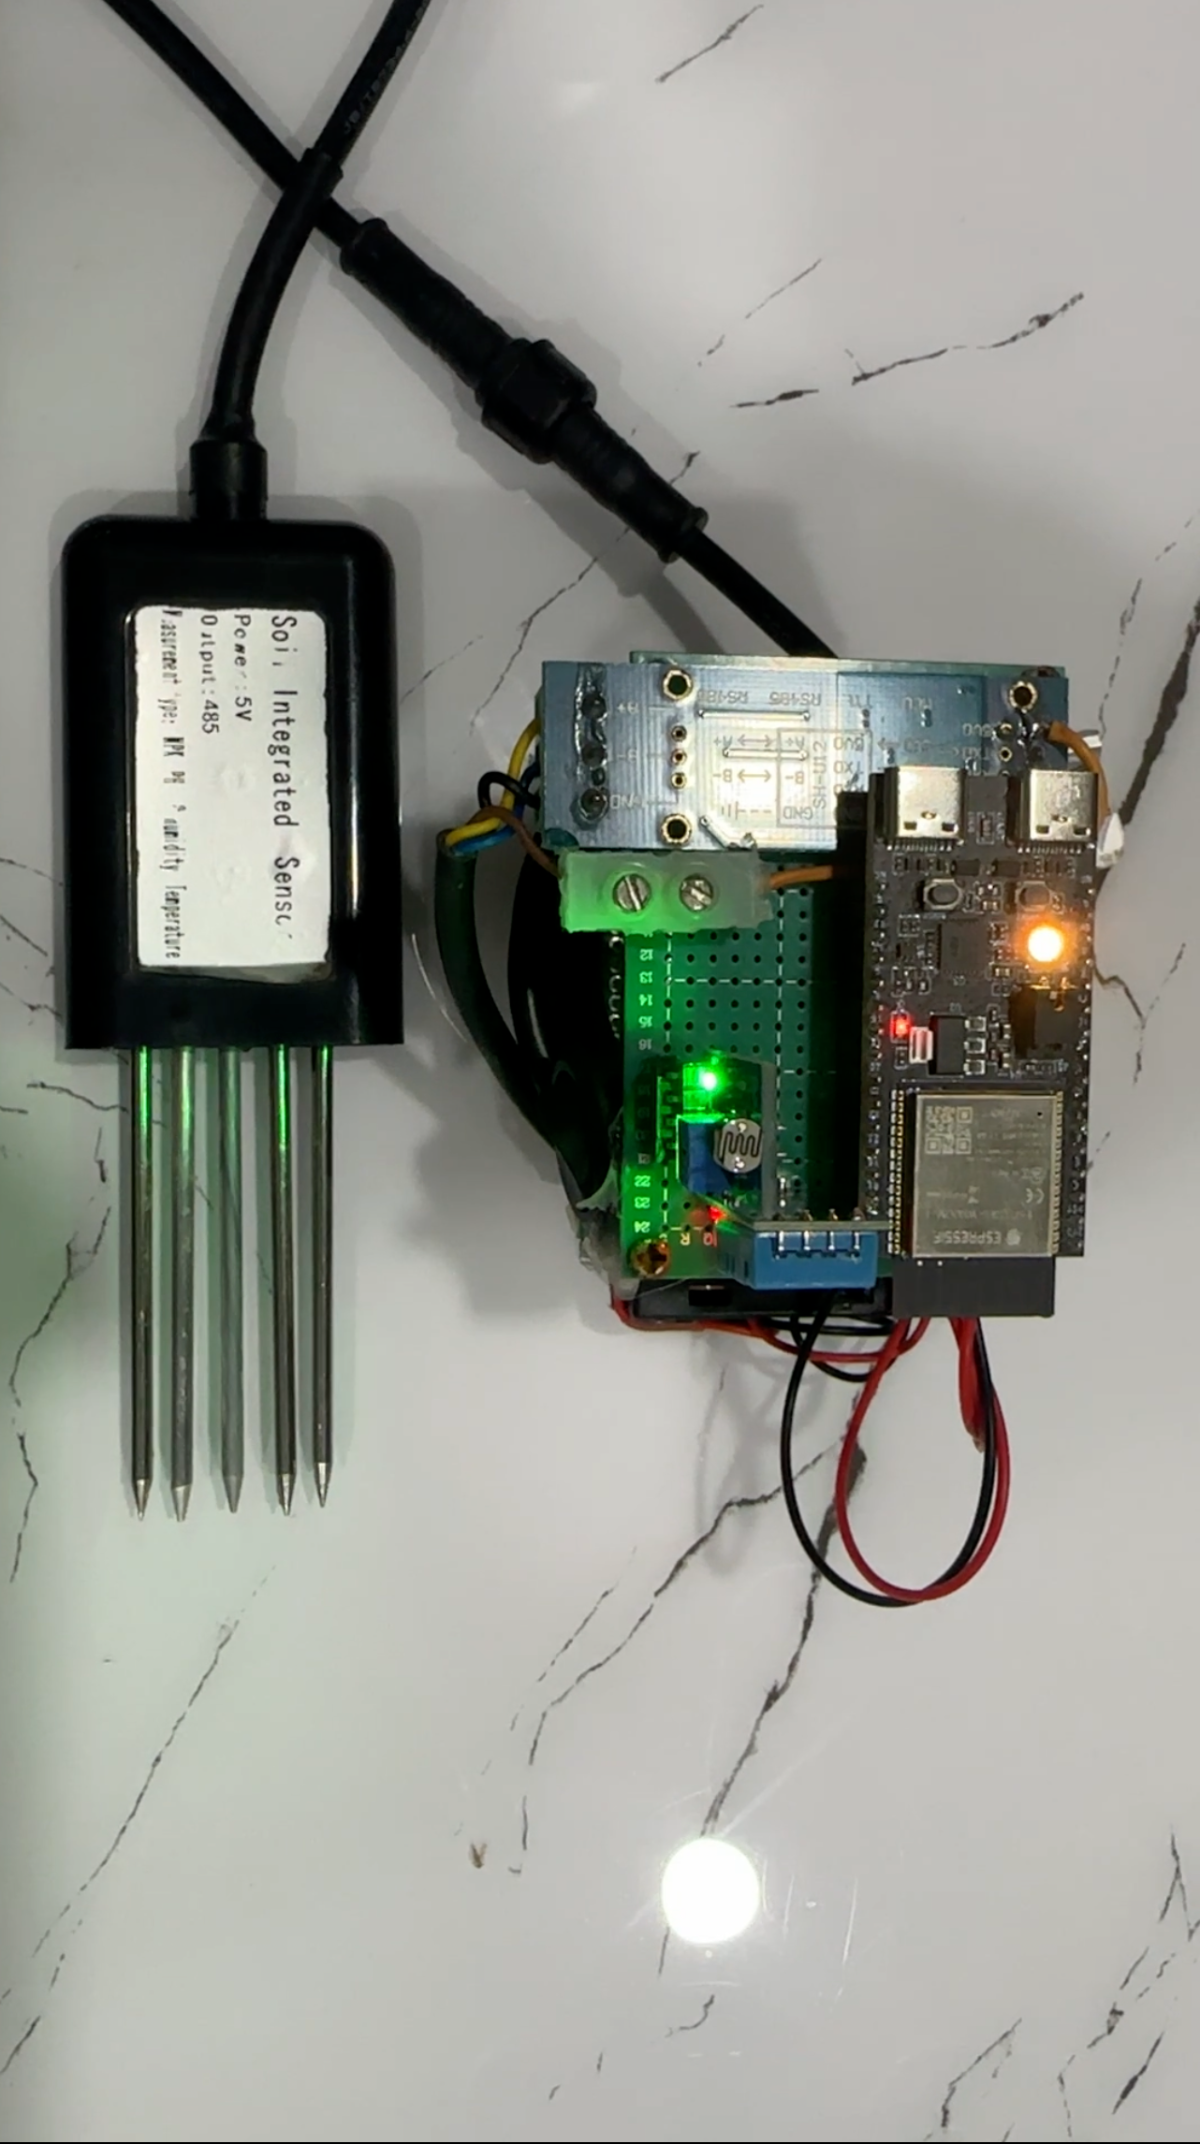
* - MEASURING: YELLOW
* - PROCESSING: PURPLE
* - RESULT_READY: GREEN
* - ERROR_STATE: WHITE
*/
#include <DHT11.h>
#include <BLEDevice.h>
#include <BLEServer.h>
#include <BLEUtils.h>
#include <BLE2902.h>
#include <ArduinoJson.h>
#include <Adafruit_NeoPixel.h>
#include <SoftwareSerial.h>
// BLE Service and Characteristic UUIDs (must match the app)
#define SERVICE_UUID "12345678-1234-5678-1234-56789abc0000"
#define STATUS_CHAR_UUID "12345678-1234-5678-1234-56789abc0001"
#define COMMAND_CHAR_UUID "12345678-1234-5678-1234-56789abc0002"
#define RESULT_CHAR_UUID "12345678-1234-5678-1234-56789abc0003"
// Device name (must start with "AgroSage-")
#define DEVICE_NAME "AgroSage-001"
// Onboard RGB NeoPixel (ESP32-C6-DevKitC)
#define RGB_PIN 8
#define RGB_COUNT 1
// Define the RX and TX pins for Software Serial 2
#define NPK_RX 22
#define NPK_TX 23
const byte temp[] = {0X01,0X03, 0X00,0X12,0X00,0X02,0x64,0x0E};
const byte soil_ph[] = {0x01,0x03, 0x00, 0x06, 0x00, 0x01, 0x64, 0x0B};
const byte ec[] = {0x01,0x03, 0x00, 0x15, 0x00, 0x01, 0x95, 0xCE};
const byte nitro[] = { 0x01, 0x03, 0x00, 0x1E, 0x00, 0x01, 0xE4, 0x0C };
const byte phos[] = { 0x01, 0x03, 0x00, 0x1f, 0x00, 0x01, 0xb5, 0xcc };
const byte pota[] = { 0x01, 0x03, 0x00, 0x20, 0x00, 0x01, 0x85, 0xc0 };
SoftwareSerial mod(NPK_RX,NPK_TX);////// TX AND RX
Adafruit_NeoPixel rgb(RGB_COUNT, RGB_PIN, NEO_GRB + NEO_KHZ800);
// Status states
enum ProbeStatus {
IDLE,
IN_SOIL,
MEASURING,
PROCESSING,
RESULT_READY,
ERROR_STATE
};
// Forward declarations
void setStatus(ProbeStatus status);
void performMeasurement();
void updateLed(); // update LED based on status + connection state
void setLedColor(uint8_t r, uint8_t g, uint8_t b);
const int LDR_PIN = 0; // change if needed
// ADC / Voltage settings
const float VCC = 3.3;
const int ADC_MAX = 4095;
// Voltage divider fixed resistor on the module (likely 10k)
const float R_FIXED = 10000.0; // ohms
// LDR characteristics (tune for accuracy)
const float GAMMA = 0.7; // slope
const float RL10 = 50.0; // kΩ at 10 lux
float humidity_val = 0;
float temperature_val = 0;
DHT11 dht11(20);
// Global variables
BLEServer* pServer = NULL;
BLECharacteristic* pStatusCharacteristic = NULL;
BLECharacteristic* pCommandCharacteristic = NULL;
BLECharacteristic* pResultCharacteristic = NULL;
bool deviceConnected = false;
bool oldDeviceConnected = false;
ProbeStatus currentStatus = IDLE;
// =========================
// Server callbacks
// =========================
class MyServerCallbacks: public BLEServerCallbacks {
void onConnect(BLEServer* pServer) {
deviceConnected = true;
Serial.println("Client connected");
updateLed(); // update LED on connection change
}
void onDisconnect(BLEServer* pServer) {
deviceConnected = false;
Serial.println("Client disconnected");
updateLed(); // update LED on connection change
}
};
// =========================
// Command characteristic callback
// =========================
class CommandCallbacks: public BLECharacteristicCallbacks {
void onWrite(BLECharacteristic *pCharacteristic) {
// On this core getValue() returns an Arduino String
String value = pCharacteristic->getValue();
if (value.length() > 0) {
String command = value;
Serial.println("Received command: " + command);
if (command == "HELLO_V1") {
Serial.println("Handshake received");
setStatus(IDLE);
}
else if (command == "MEASURE_NOW") {
Serial.println("Starting measurement...");
performMeasurement();
}
}
}
};
void setup() {
mod.begin(9600);
Serial.begin(115200);
delay(2000);
Serial.println("\n=== AgroSage ESP32-C6 Starting ===");
// --- RGB LED init ---
rgb.begin();
rgb.setBrightness(60); // 0-255
rgb.show(); // turn off initially
setLedColor(255, 0, 0); // red while booting / not connected
// Initialize BLE
BLEDevice::init(DEVICE_NAME);
// Create BLE Server
pServer = BLEDevice::createServer();
pServer->setCallbacks(new MyServerCallbacks());
// Create BLE Service
BLEService *pService = pServer->createService(SERVICE_UUID);
// Create Status Characteristic (Notify + Read)
pStatusCharacteristic = pService->createCharacteristic(
STATUS_CHAR_UUID,
BLECharacteristic::PROPERTY_READ |
BLECharacteristic::PROPERTY_NOTIFY
);
pStatusCharacteristic->addDescriptor(new BLE2902());
// Create Command Characteristic (Write)
pCommandCharacteristic = pService->createCharacteristic(
COMMAND_CHAR_UUID,
BLECharacteristic::PROPERTY_WRITE |
BLECharacteristic::PROPERTY_WRITE_NR
);
pCommandCharacteristic->setCallbacks(new CommandCallbacks());
// Create Result Characteristic (Notify + Read)
pResultCharacteristic = pService->createCharacteristic(
RESULT_CHAR_UUID,
BLECharacteristic::PROPERTY_READ |
BLECharacteristic::PROPERTY_NOTIFY
);
pResultCharacteristic->addDescriptor(new BLE2902());
// Start the service
pService->start();
// Start advertising
BLEAdvertising *pAdvertising = BLEDevice::getAdvertising();
pAdvertising->addServiceUUID(SERVICE_UUID);
pAdvertising->setScanResponse(true);
pAdvertising->setMinPreferred(0x06);
pAdvertising->setMinPreferred(0x12);
BLEDevice::startAdvertising();
Serial.println("BLE Service started");
Serial.println("Device Name: " + String(DEVICE_NAME));
Serial.println("Waiting for a client connection...");
setStatus(IDLE);
}
void loop() {
// Handle disconnecting
if (!deviceConnected && oldDeviceConnected) {
delay(500);
pServer->startAdvertising();
Serial.println("Start advertising again");
oldDeviceConnected = deviceConnected;
}
// Handle connecting
if (deviceConnected && !oldDeviceConnected) {
oldDeviceConnected = deviceConnected;
}
delay(100);
}
// =========================
// LED helper functions
// =========================
void setLedColor(uint8_t r, uint8_t g, uint8_t b) {
rgb.setPixelColor(0, rgb.Color(r, g, b));
rgb.show();
}
void updateLed() {
// 1. If Bluetooth is not connected → RED
if (!deviceConnected) {
setLedColor(255, 0, 0); // red
return;
}
// 2. If connected: color based on currentStatus
switch (currentStatus) {
case IDLE:
case IN_SOIL:
// Connected but idle / probe in soil → BLUE
setLedColor(0, 0, 255); // blue
break;
case MEASURING:
// Measuring → YELLOW
setLedColor(255, 150, 0); // yellow/orange
break;
case PROCESSING:
// Processing → PURPLE
setLedColor(150, 0, 150); // purple
break;
case RESULT_READY:
// Result ready → GREEN
setLedColor(0, 255, 0); // green
break;
case ERROR_STATE:
// Error → WHITE
setLedColor(255, 255, 255); // white
break;
}
}
// =========================
// Set and notify status
// =========================
void setStatus(ProbeStatus status) {
currentStatus = status;
String statusStr;
switch(status) {
case IDLE:
statusStr = "IDLE";
break;
case IN_SOIL:
statusStr = "IN_SOIL";
break;
case MEASURING:
statusStr = "MEASURING";
break;
case PROCESSING:
statusStr = "PROCESSING";
break;
case RESULT_READY:
statusStr = "RESULT_READY";
break;
case ERROR_STATE:
statusStr = "ERROR";
break;
}
Serial.println("Status: " + statusStr);
// BLE status notify
if (deviceConnected && pStatusCharacteristic != nullptr) {
pStatusCharacteristic->setValue(statusStr.c_str());
pStatusCharacteristic->notify();
}
// Update LED for this status
updateLed();
}
// =========================
// Perform measurement and send results
// =========================
void performMeasurement() {
if (!deviceConnected) {
Serial.println("No client connected, skipping measurement.");
return;
}
// Update status: IN_SOIL
setStatus(IN_SOIL);
delay(1000);
// Update status: MEASURING
setStatus(MEASURING);
delay(2000);
int temperature = 0;
int humidity = 0;
int result = 0;
while (temperature == 0 && humidity == 0) {
result = dht11.readTemperatureHumidity(temperature, humidity);
delay(500); // small delay to avoid rapid retries
}
delay(250);
// Read sensors (simulated values for now)
readSoilMoistureAndTemperature();
delay(250);
float ph = readPH();
delay(250);
float ec = readEC();
delay(250);
float airTemp = (float) temperature;
delay(250);
float airHumidity = (float) humidity;
delay(250);
float light = readLight();
delay(250);
float n = readNitrogen();
delay(250);
float p = readPhosphorus();
delay(250);
float k = readPotassium();
delay(250);
// Update status: PROCESSING
setStatus(PROCESSING);
delay(250);
// Create JSON object
DynamicJsonDocument doc(1024);
doc["ts"] = millis() / 1000;
doc["dev_id"] = DEVICE_NAME;
doc["soil_moist"] = humidity_val;
doc["soil_temp"] = temperature_val;
doc["ph"] = ph;
doc["ec"] = ec;
doc["air_temp"] = airTemp;
doc["air_hum"] = airHumidity;
doc["light"] = light;
doc["n"] = n;
doc["p"] = p;
doc["k"] = k;
// Serialize JSON to string
String jsonString;
serializeJson(doc, jsonString);
Serial.println("Sending result:");
Serial.println(jsonString);
// Send result via BLE
if (deviceConnected && pResultCharacteristic != nullptr) {
pResultCharacteristic->setValue(jsonString.c_str());
pResultCharacteristic->notify();
}
// Update status: RESULT_READY
setStatus(RESULT_READY);
delay(500);
// Return to IDLE
setStatus(IDLE);
}
// ============================================
// SENSOR READING FUNCTIONS (SIMULATED)
// Replace these with actual sensor readings
// ============================================
void readSoilMoistureAndTemperature() {
byte receivedData[9];
delay(10);
if(mod.write(temp,sizeof(temp))==8){
mod.readBytes(receivedData,sizeof(receivedData));
unsigned int humidity = (receivedData[3]<<8|receivedData[4]);
unsigned int tempe = (receivedData[5]<<8|receivedData[6]);
tempe = tempe/10;
humidity = humidity/10;
humidity_val = (float) humidity;
temperature_val = (float) tempe;
}
}
float readPH() {
byte receivedData[9];
delay(10);
if(mod.write(soil_ph,sizeof(soil_ph))==8){
mod.readBytes(receivedData,sizeof(receivedData));
unsigned int ph_val_sensor = (receivedData[3]<<8|receivedData[4]);
return (float) ph_val_sensor/100;
}
}
float readEC() {
byte receivedData[9];
delay(10);
if(mod.write(ec,sizeof(ec))==8){
mod.readBytes(receivedData,sizeof(receivedData));
unsigned int ec_soil = (receivedData[3]<<8|receivedData[4]);
return (float) ec_soil;
}
}
float readNitrogen() {
byte receivedData[9];
delay(10);
if(mod.write(nitro,sizeof(nitro))==8){
mod.readBytes(receivedData,sizeof(receivedData));
unsigned int nitrogetn = (receivedData[3]<<8|receivedData[4]);
return (float) nitrogetn;
}
}
float readPhosphorus() {
byte receivedData[9];
delay(10);
if(mod.write(phos,sizeof(phos))==8){
mod.readBytes(receivedData,sizeof(receivedData));
unsigned int phosphorus = (receivedData[3]<<8|receivedData[4]);
return (float) phosphorus;
}
}
float readPotassium() {
byte receivedData[9];
delay(10);
if(mod.write(pota,sizeof(pota))==8){
mod.readBytes(receivedData,sizeof(receivedData));
unsigned int potassium = (receivedData[3]<<8|receivedData[4]);
return (float) potassium;
}
}
float readLight() {
int adcValue = analogRead(LDR_PIN);
float voltage = adcValue * (VCC / ADC_MAX);
float R_ldr = R_FIXED * (voltage / (VCC - voltage)); // ohms
// Lux approximation
float lux = pow((RL10 * 1000.0 / R_ldr), (1.0 / GAMMA));
return lux;
}
Open the Serial Monitor, Change the baud-rate to 115200 and you will able to see that the system has started it's bluetooth system.
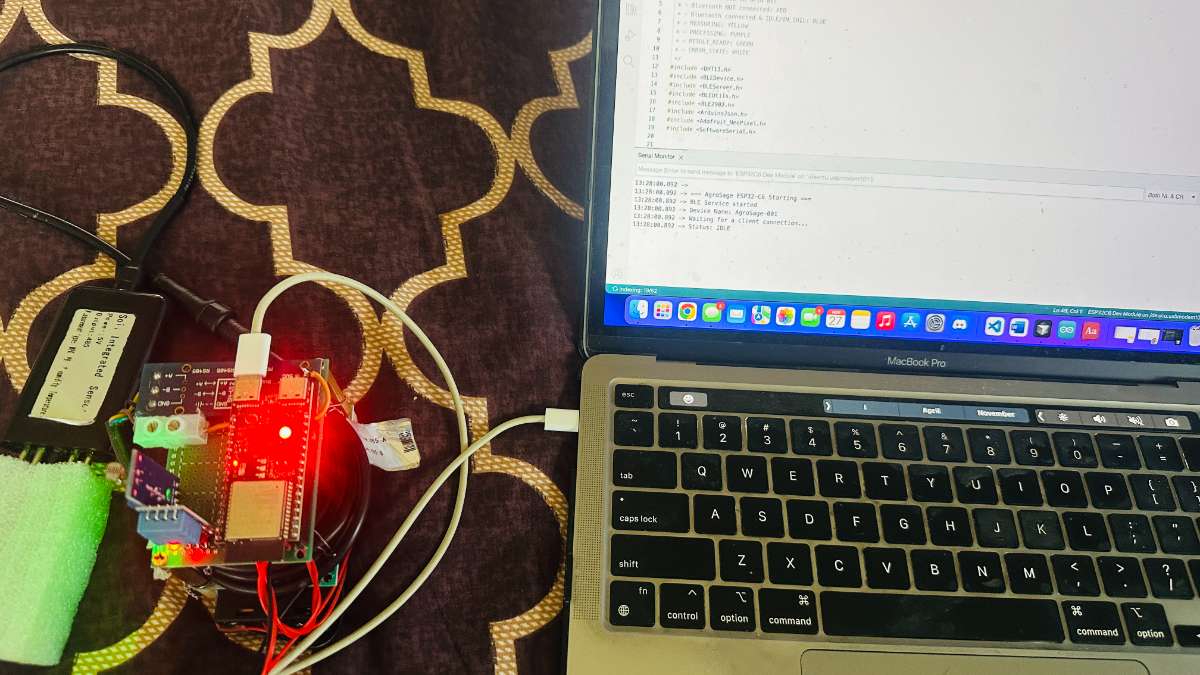
Now we are ready with the Hardware part, lets move ahead with the software part
Software build:
Required Software
- Node.js >= 20.19.4
- npm >= 10.0.0
- Expo CLI (installed via npm or npx)
- EAS CLI (for production builds):
npm install eas-cli --save-dev
Platform-Specific Requirements
iOS Development
- macOS (for iOS builds)
- Xcode 14+ with Command Line Tools
- CocoaPods (installed via
sudo gem install cocoapods) - Apple Developer Account (for device testing and App Store distribution)
Android Development
- Android Studio with Android SDK
- Java Development Kit (JDK) 11+
- Android SDK API level 33+
- Gradle (included with Android Studio)
Hardware Requirements
- iOS: iPhone 6s or later (for ExecuTorch Neural Engine support, iPhone 8+ recommended)
- Android: Android 6.0 (API 23) or later
- Bluetooth: BLE-capable device
Installation
1. Clone the Repository
git clone https://github.com/Ayanghosh-agno/agrosage-main/tree/main cd agrosage-main
2. Install Dependencies
npm install
3. Environment Configuration
Create a .env file in the root directory:
EXPO_PUBLIC_SUPABASE_URL=your_supabase_project_url EXPO_PUBLIC_SUPABASE_ANON_KEY=your_supabase_anon_key
Note: For production builds, these values are hardcoded in the source code. You can also configure them via EAS Secrets:
eas secret:create --scope project --name EXPO_PUBLIC_SUPABASE_URL --value your_url eas secret:create --scope project --name EXPO_PUBLIC_SUPABASE_ANON_KEY --value your_key
4. iOS Dependencies (macOS only)
cd ios pod install cd ..
5. Metro Bundler Configuration
The project includes metro.config.js configured to handle .pte model files. No additional setup needed.
⚙️ Configuration
App Configuration (app.json)
Key configuration options:
- App Name: "AgroSage"
- Version: 1.0.1
- Bundle Identifiers:
- iOS:
com.anonymous.agrosage - Android:
com.anonymous.agrosage
- iOS:
- Icons & Splash: Configured to use
./assets/images/icon.png - Permissions: Bluetooth, Location, Internet
Supabase Setup
- Create Supabase Project
- Visit supabase.com
- Create a new project
- Note your project URL and anon key
Deploy Edge Function
cd supabase/functions/clever-task supabase functions deploy clever-task
- Update Environment Variables
- Add credentials to
.envfile - Or configure via EAS Secrets for production builds
- Add credentials to
ExecuTorch Model Setup
The app includes a pre-trained ExecuTorch model for on-device AI inference. The model is located at:
assets/models/agrosage_insights.pte
To train and export a new model:
- Navigate to
models/python/ - Install Python dependencies:
pip install -r requirements.txt - Train the model:
python train_model.py - Export to ExecuTorch:
python export_executorch.py - Copy the generated
.ptefile toassets/models/
🏃 Running the App
Development Mode
Start the development server:
npm run dev
Run on iOS Simulator/Device:
npm run ios # or npx expo run:ios
Run on Android Emulator/Device:
npm run android # or npx expo run:android
Important Notes:
- BLE functionality requires a development build. Expo Go does not support native BLE modules.
- For first-time setup, run
npx expo prebuildto generate native projects.
Creating a Development Build
iOS:
npx expo run:ios
Android:
npx expo run:android
This will:
- Generate native iOS/Android projects
- Install native dependencies
- Build and launch the app
📦 Building for Production
Using EAS Build (Recommended)
EAS Build is the recommended way to create production builds.
Install EAS CLI (if not already installed)
npm install eas-cli --save-dev
Login to Expo
npx eas login
Configure Build (if not already configured)
npx eas build:configure
Build for iOS
npx eas build --platform ios --profile production
Build for Android
npx eas build --platform android --profile production
Environment Variables for Production
Configure environment variables via EAS Secrets:
eas secret:create --scope project --name EXPO_PUBLIC_SUPABASE_URL --value your_url --type string eas secret:create --scope project --name EXPO_PUBLIC_SUPABASE_ANON_KEY --value your_key --type string
Or add them to eas.json:
{ "build": { "production": { "env": { "EXPO_PUBLIC_SUPABASE_URL": "your_url", "EXPO_PUBLIC_SUPABASE_ANON_KEY": "your_key" } } } }
Local Builds
iOS:
- Run
npx expo prebuild - Open
ios/AgroSage.xcworkspacein Xcode - Select your development team
- Product → Archive (for App Store) or Build (for ad-hoc)
Android:
- Run
npx expo prebuild - Open project in Android Studio
- Build → Generate Signed Bundle / APK
- Follow the signing wizard
📁 Project Structure
agrosage-main/
├── app/                          # Expo Router pages
│   ├── index.tsx                # Home screen (main dashboard)
│   ├── history/                  # Reading history
│   │   ├── index.tsx            # History list view
│   │   └── [id].tsx             # Reading detail view
│   └── settings/                 # Settings
│       └── index.tsx            # Settings screen
├── assets/                       # Static assets
│   ├── images/                   # Images and icons
│   │   └── icon.png             # App icon
│   └── models/                   # AI model files
│       └── agrosage_insights.pte # ExecuTorch model
├── src/
│   ├── api/                      # API clients
│   │   ├── client.ts            # Base API client
│   │   ├── insights.ts          # AI insights API (HTTP + ExecuTorch)
│   │   └── readings.ts           # Readings API
│   ├── ble/                      # Bluetooth functionality
│   │   └── bleClient.ts          # BLE client implementation
│   ├── components/               # Reusable UI components
│   │   ├── InsightsCard.tsx     # AI insights display
│   │   ├── MetricCard.tsx       # Metric display card
│   │   ├── StatusBadge.tsx      # Status indicator
│   │   ├── HealthSummary.tsx    # Data summary component
│   │   └── PrimaryButton.tsx    # Primary action button
│   ├── context/                  # React Context providers
│   │   ├── BLEContext.tsx        # BLE state management
│   │   ├── LanguageContext.tsx   # Language state & translation
│   │   └── ReadingContext.tsx    # Reading state management
│   ├── i18n/                     # Internationalization
│   │   └── translations.ts       # Translation dictionary (EN/HI/BN)
│   ├── services/                 # Utility services
│   │   ├── executorchInsights.ts # ExecuTorch AI service
│   │   ├── onDeviceInsights.ts   # Rule-based fallback
│   │   └── locationService.ts    # GPS location service
│   ├── storage/                  # Local storage
│   │   └── historyStorage.ts     # Reading history persistence
│   └── types/                    # TypeScript definitions
│       └── index.ts              # Type definitions
├── models/                       # AI model training
│   └── python/                   # Python scripts
│       ├── train_model.py        # Model training script
│       ├── export_executorch.py  # ExecuTorch export script
│       └── requirements.txt     # Python dependencies
├── supabase/                     # Supabase configuration
│   └── functions/
│       └── clever-task/          # Edge Function for AI insights
│           └── index.ts          # Function implementation
├── ios/                          # iOS native code
├── android/                      # Android native code
├── app.json                      # Expo configuration
├── package.json                  # Dependencies
├── tsconfig.json                 # TypeScript configuration
├── metro.config.js               # Metro bundler config
└── eas.json                      # EAS build configuration
API & Backend
Supabase Edge Function
The clever-task Edge Function processes sensor data and returns AI insights.
Endpoint: POST /functions/v1/clever-task
Request Body:
{ "sensorData": { "timestamp": 1732105932000, "atmoTemp": 28.5, "humidity": 65.2, "light": 450, "ec": 1.2, "soilTemp": 24.3, "moisture": 38.7, "n": 40.5, "p": 12.3, "k": 30.1, "ph": 6.5 } }
Response Format:
{ "success": true, "recommendations": [ { "type": "practice", "title": "Increase Irrigation", "description": "Soil moisture is below optimal levels...", "priority": "high", "confidence": 85, "actionable": true, "reasoning": "Current soil moisture at 38.7% is below optimal range..." } ], "timestamp": "2024-11-20T12:00:00Z", "source": "watsonx" | "fallback" }
On-Device AI (ExecuTorch)
The app includes an ExecuTorch model for on-device inference on iOS devices:
- Model Format:
.pte(ExecuTorch portable format) - Input: 10 sensor values (moisture, soilTemp, ph, ec, atmoTemp, humidity, light, n, p, k)
- Output: 40-dimensional feature vector representing insight probabilities
- Inference Time: ~2ms on iPhone 14 Pro Max
- Hardware Acceleration: Apple Neural Engine
🌍 Internationalization
AgroSage provides comprehensive multi-language support with offline translation.
Supported Languages
- English (en) - Default
- Hindi (hi) - हिन्दी
- Bengali (bn) - বাংলা
Translation Coverage
- All UI elements and labels
- AI insight titles and descriptions
- Summary messages
- Priority labels (High, Medium, Low)
- Reasoning messages (WHY section)
- Error messages and alerts
- Settings and navigation
Language Selection
- Accessible from Settings screen
- Instant UI update on language change
- Persistent across app restarts
- Automatic re-translation of ExecuTorch insights when language changes
Development
Type Checking
npm run typecheck
Linting
npm run lint
Regenerating Native Code
npx expo prebuild --clean
Debugging
Enable Debug Logs:
- ExecuTorch inference logs are automatically enabled
- BLE connection logs in
bleClient.ts - API request/response logs in
insights.ts
Common Debug Commands:
# Clear Metro bundler cache npx expo start --clear # Reset iOS simulator xcrun simctl erase all # Clear Android build cache cd android && ./gradlew clean && cd ..
Permissions
Android
BLUETOOTH- Connect to BLE devicesBLUETOOTH_SCAN- Scan for BLE devices (Android 12+)BLUETOOTH_CONNECT- Connect to BLE devices (Android 12+)ACCESS_FINE_LOCATION- Required for BLE scanningACCESS_COARSE_LOCATION- Required for BLE scanningINTERNET- Cloud sync and AI insights
iOS
NSBluetoothAlwaysUsageDescription- BLE connectivityNSBluetoothPeripheralUsageDescription- BLE peripheral modeNSLocationWhenInUseUsageDescription- Location for GPS coordinates
🐛 Troubleshooting
BLE Connection Issues
- Device not found: Ensure device name starts with "AgroSage-"
- Connection fails: Check Bluetooth is enabled and device is in range
- Data not received: Verify ESP32 is sending data in correct JSON format
- Fragmented data: App automatically handles fragmented JSON packets
Build Issues
- Metro bundler errors: Run
npx expo start --clear - iOS pod install fails: Update CocoaPods:
sudo gem install cocoapods - Android build fails: Clean build:
cd android && ./gradlew clean - Dependency conflicts: Delete
node_modulesandpackage-lock.json, thennpm install
AI Insights Issues
- ExecuTorch model not loading: Ensure
metro.config.jsincludes.pteinassetExts - Model inference fails: Check model file exists at
assets/models/agrosage_insights.pte - HTTP insights fail: Verify Supabase Edge Function is deployed and
.envhas correct credentials - Network errors: Check internet connection and Supabase project status
Language/Translation Issues
- Translations not updating: Restart the app after changing language
- Missing translations: Check
src/i18n/translations.tsfor all required keys
App Screenshots :-
- App Opening Page
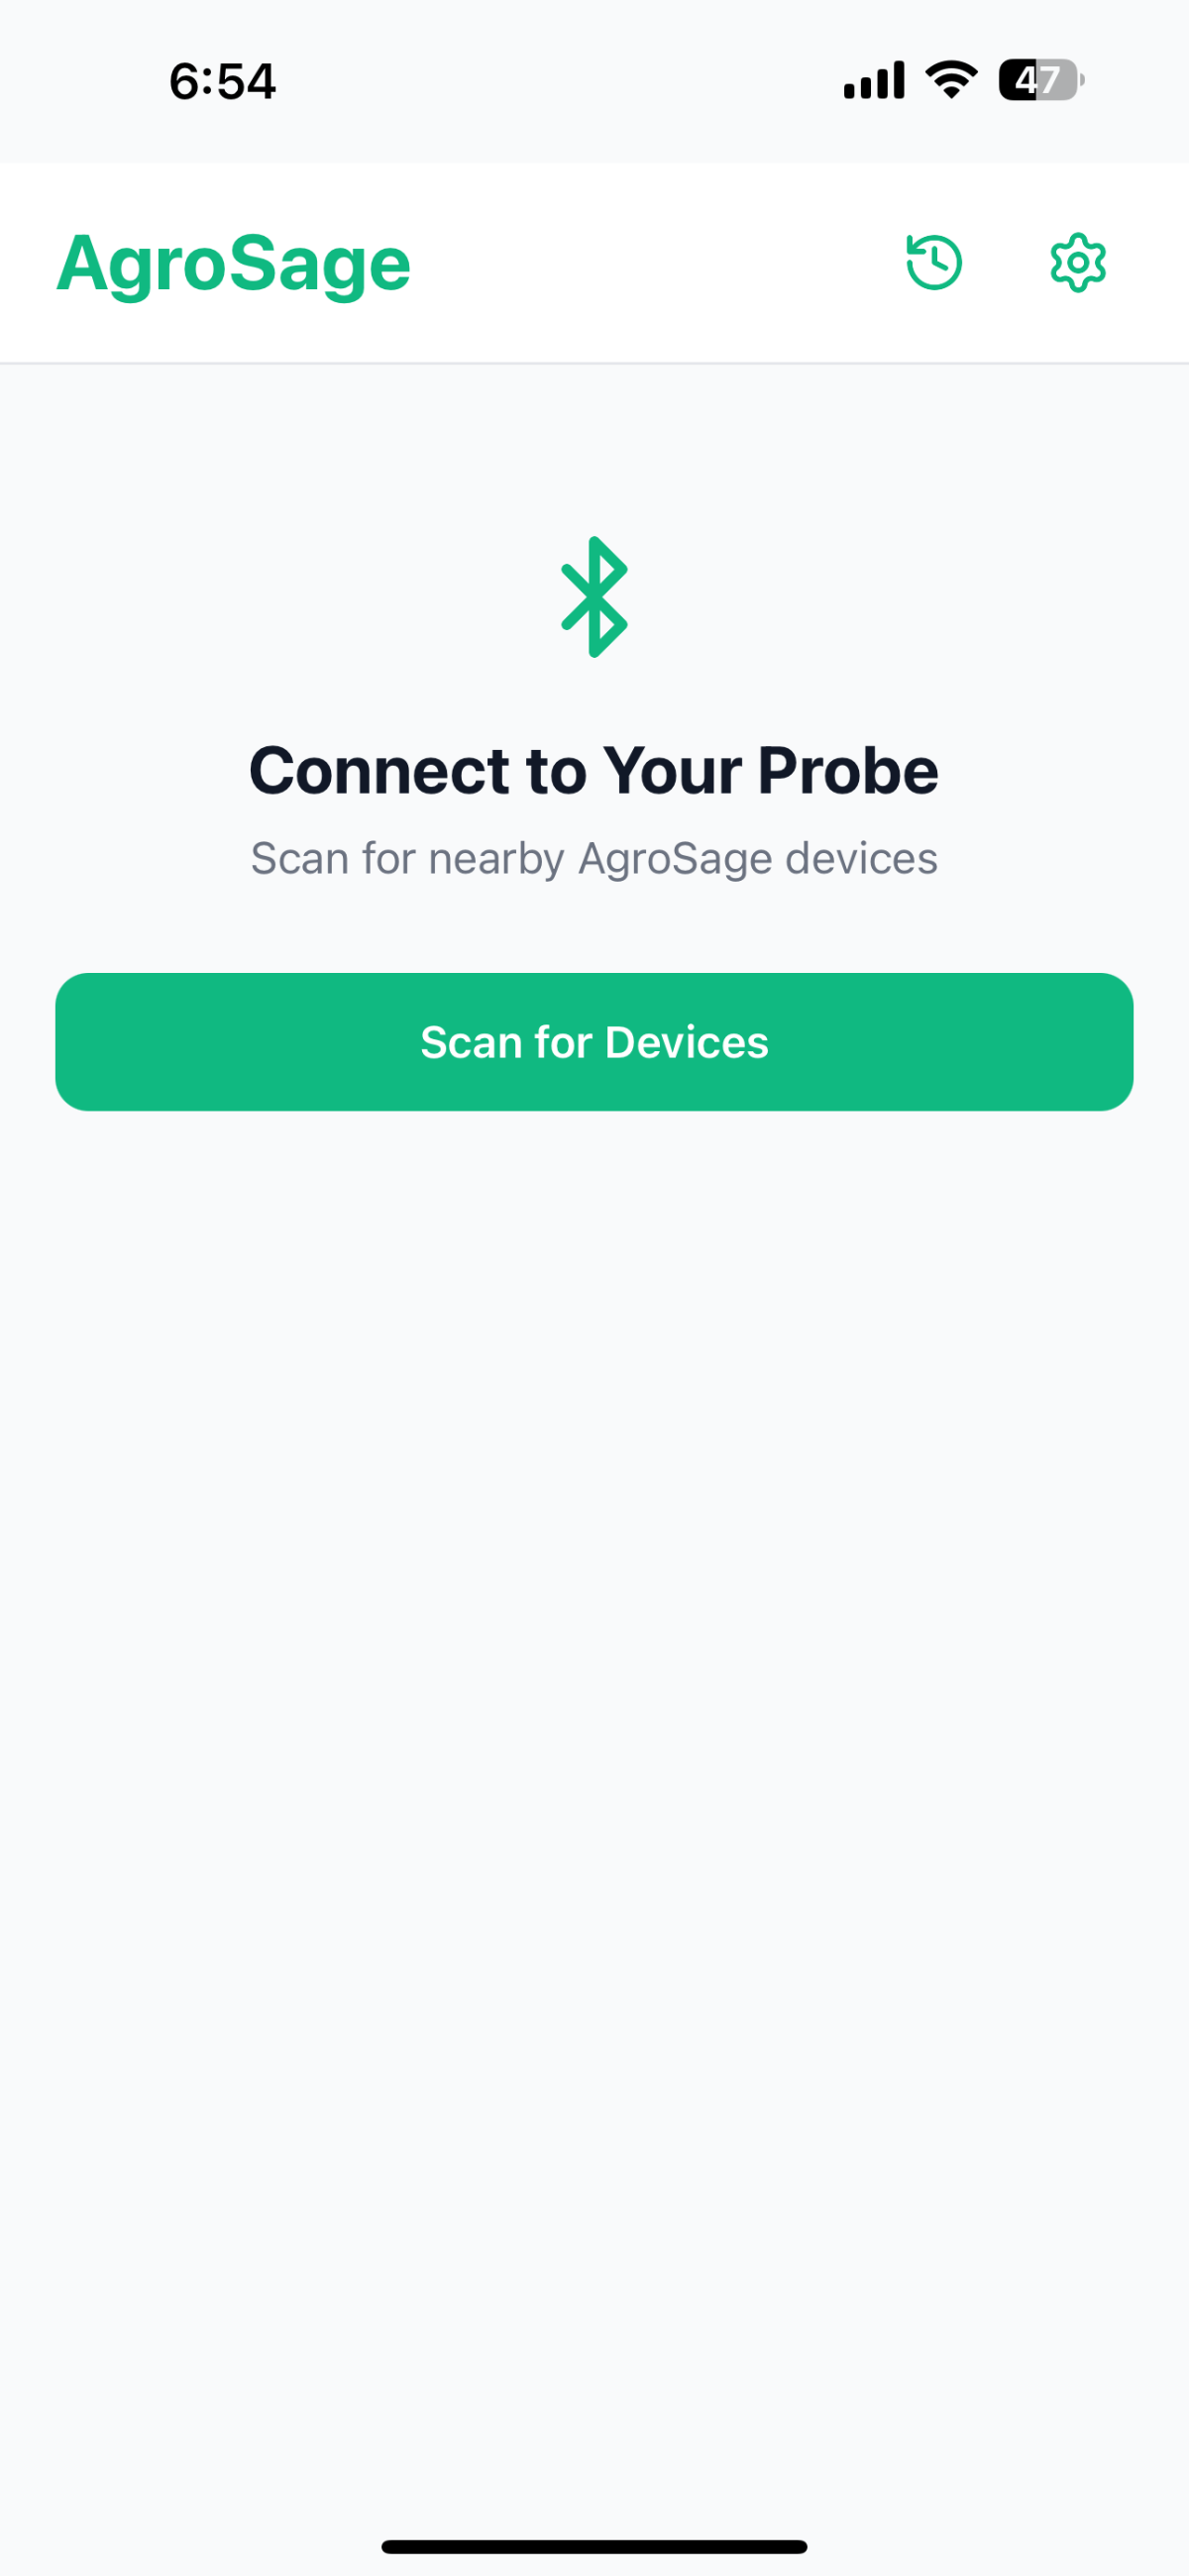
- Device searching page
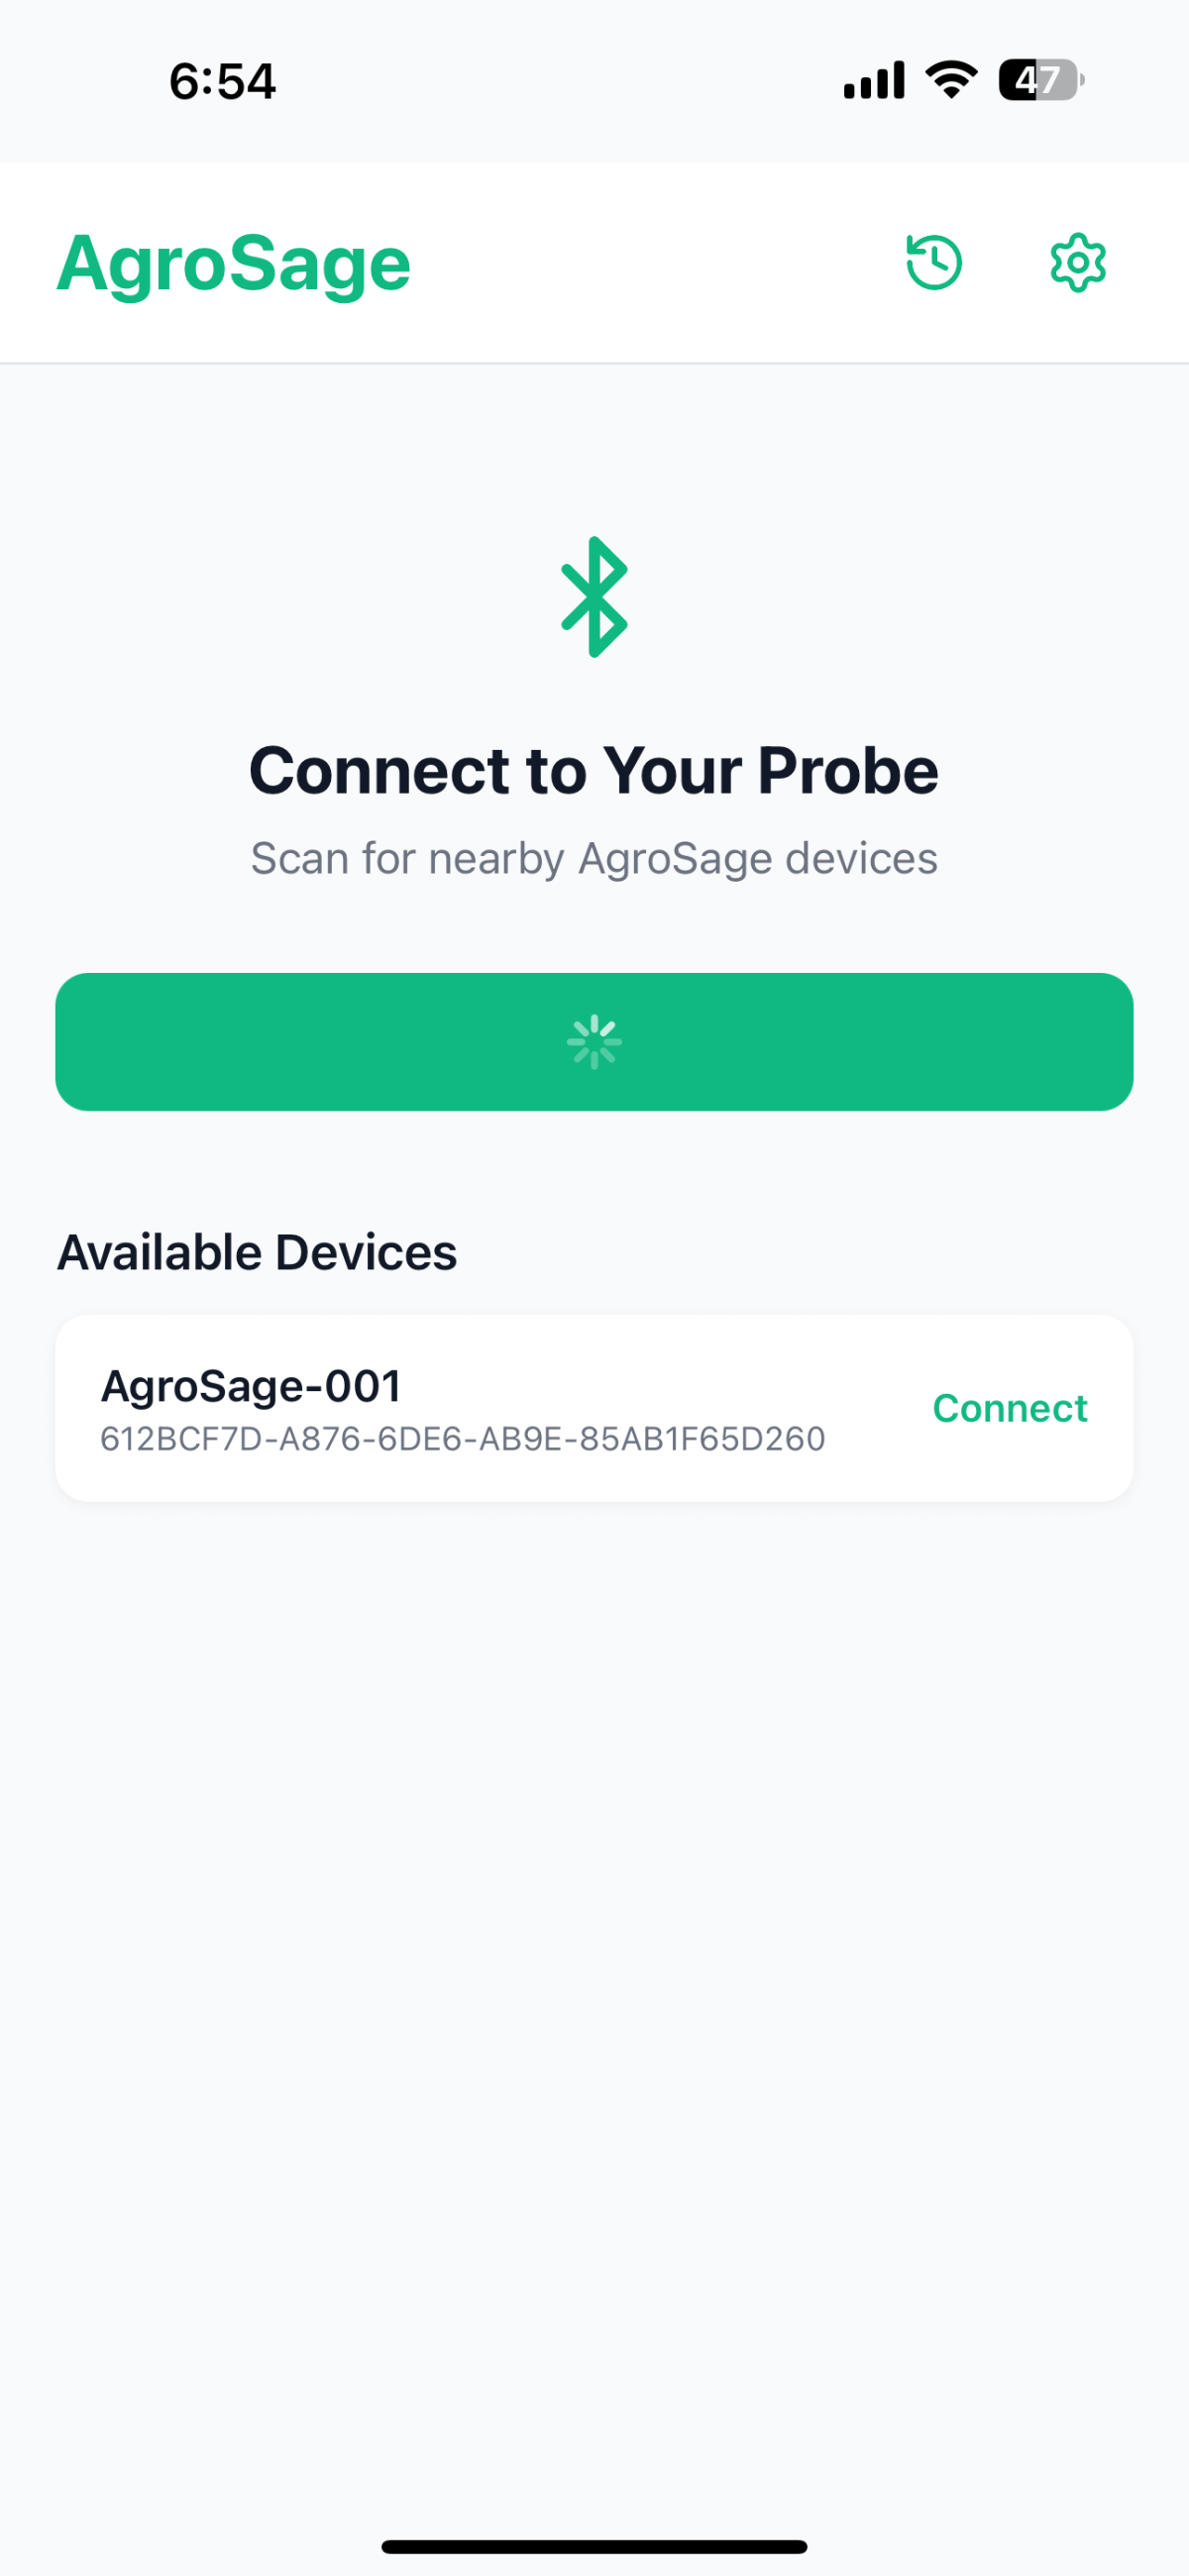
- List of Agrosage device
- Connect Device with Measure Now button

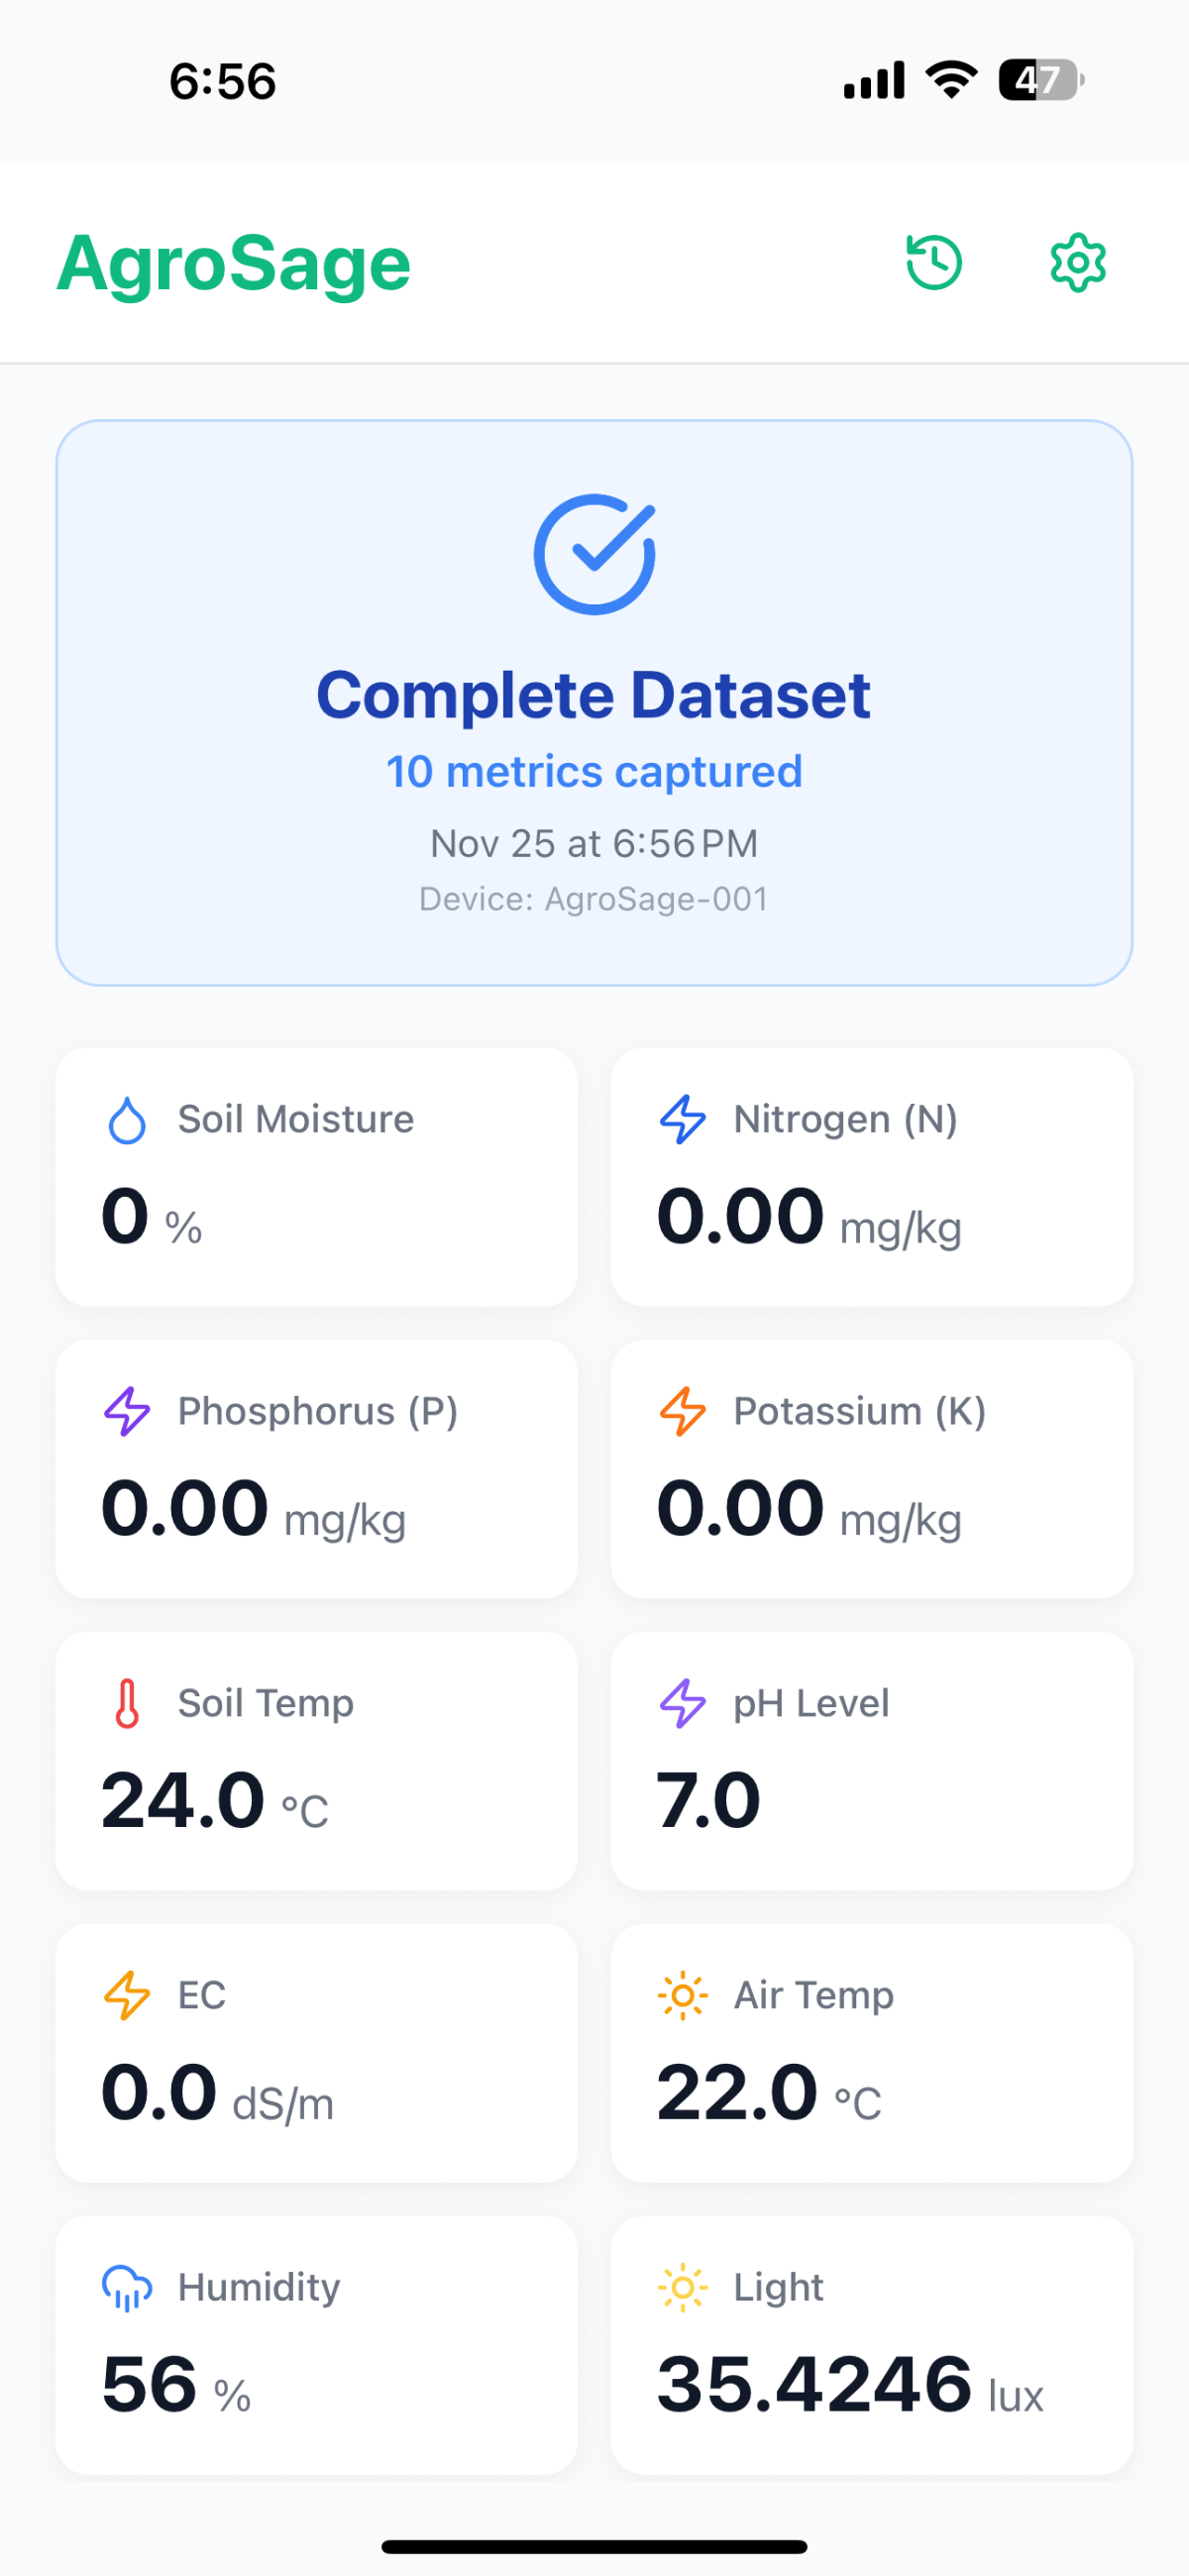
- Soil and Environment Insights upon clicking button
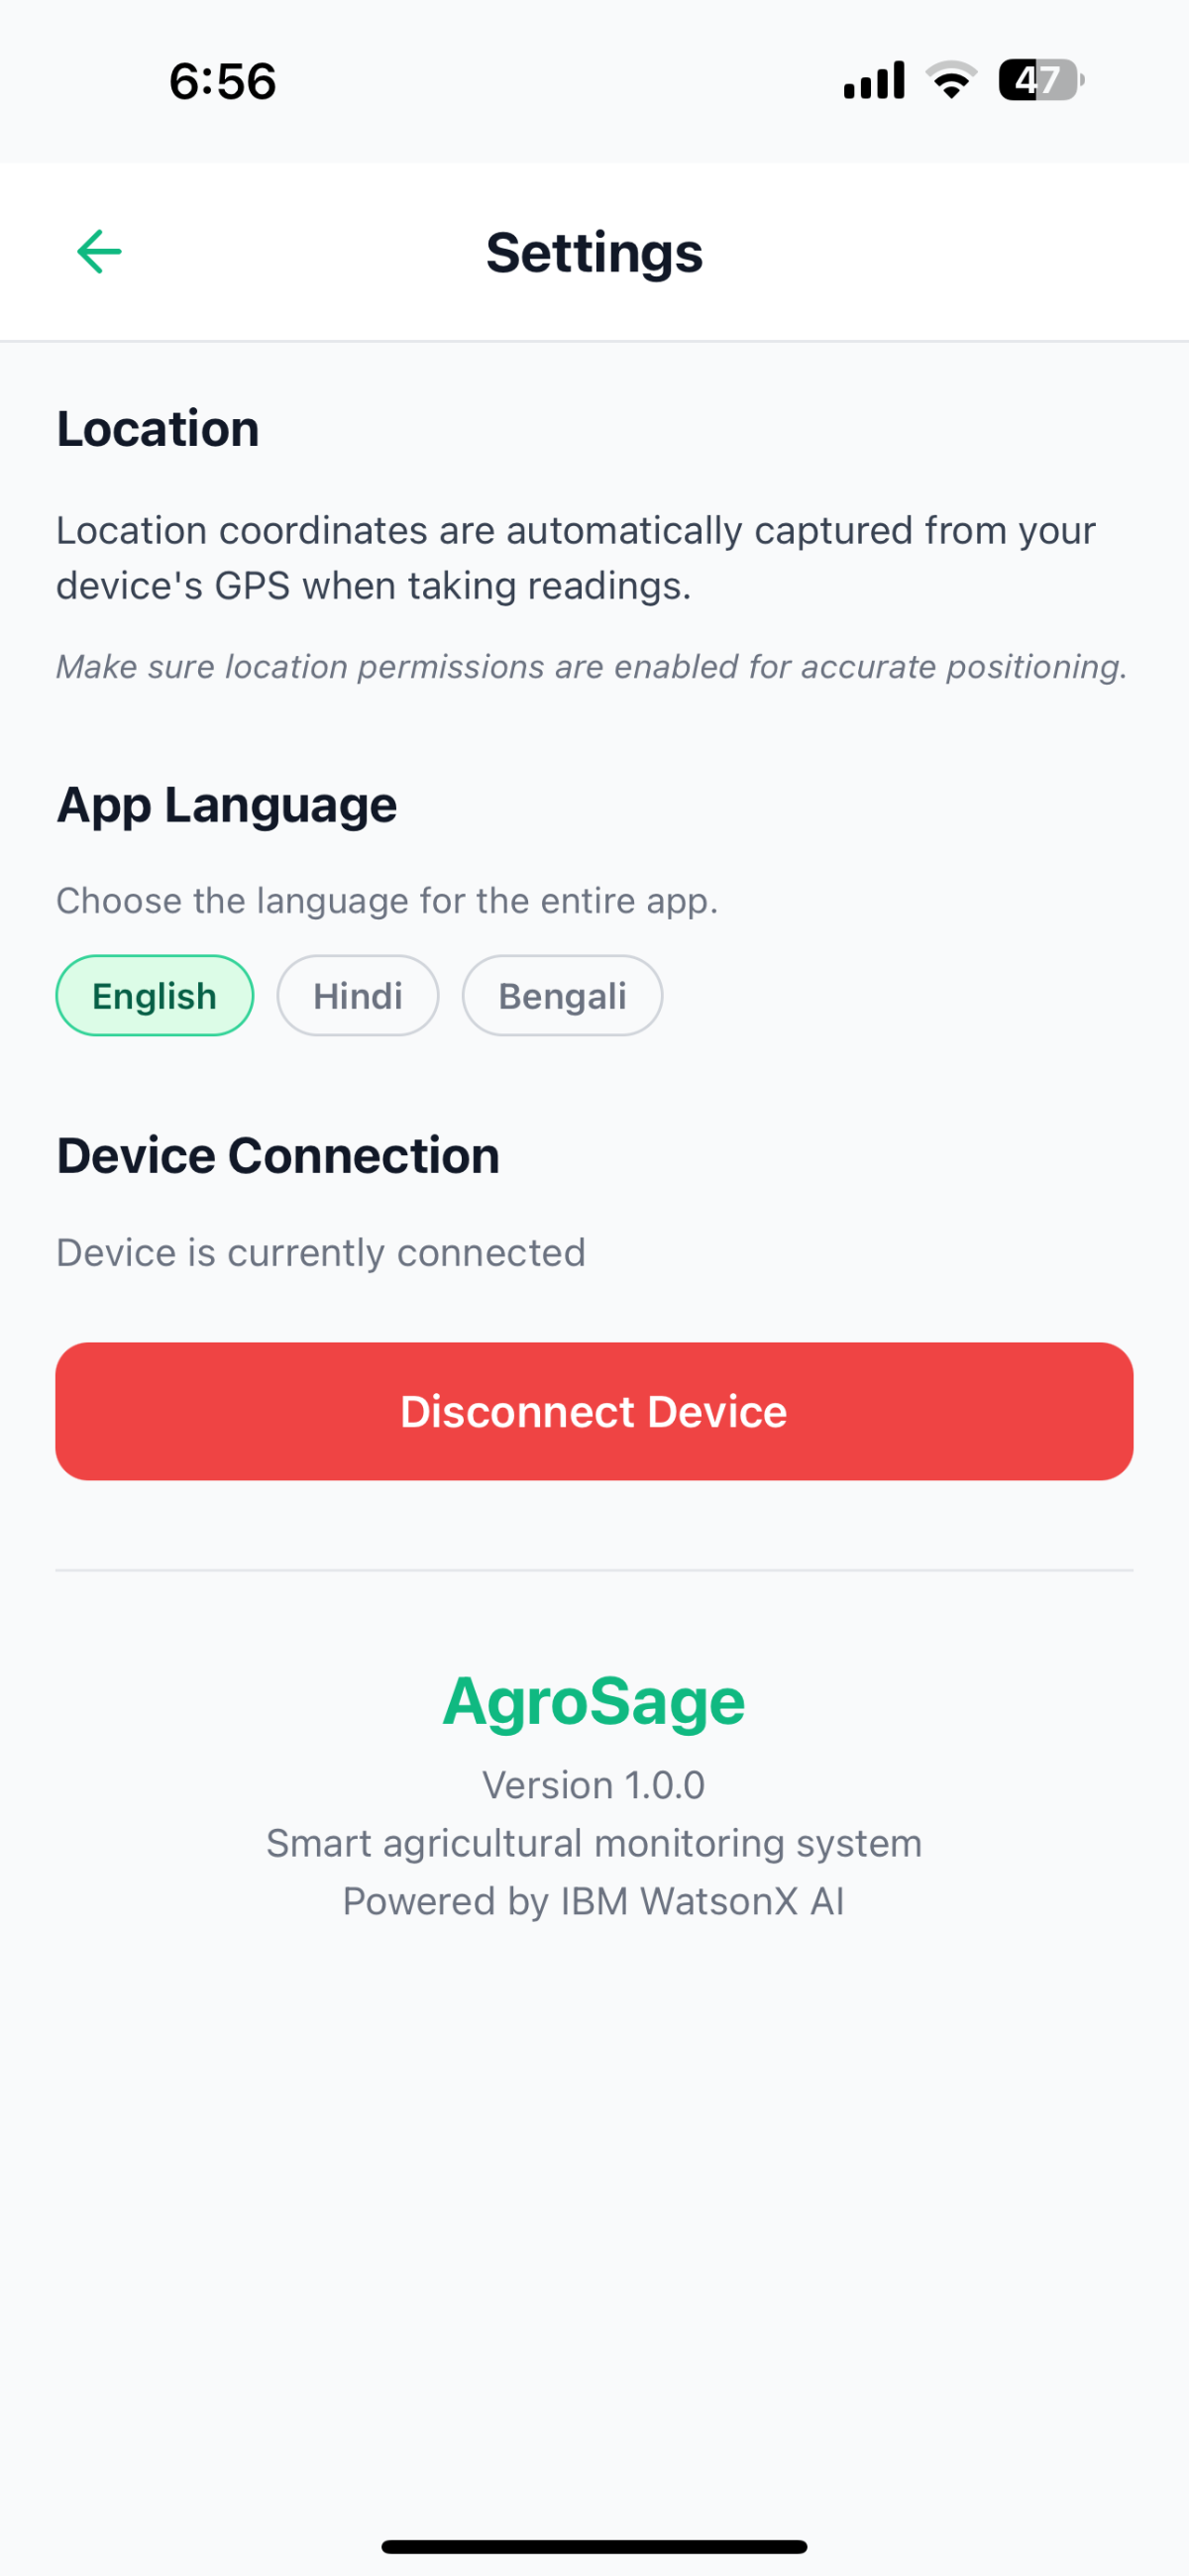
- Setting Page
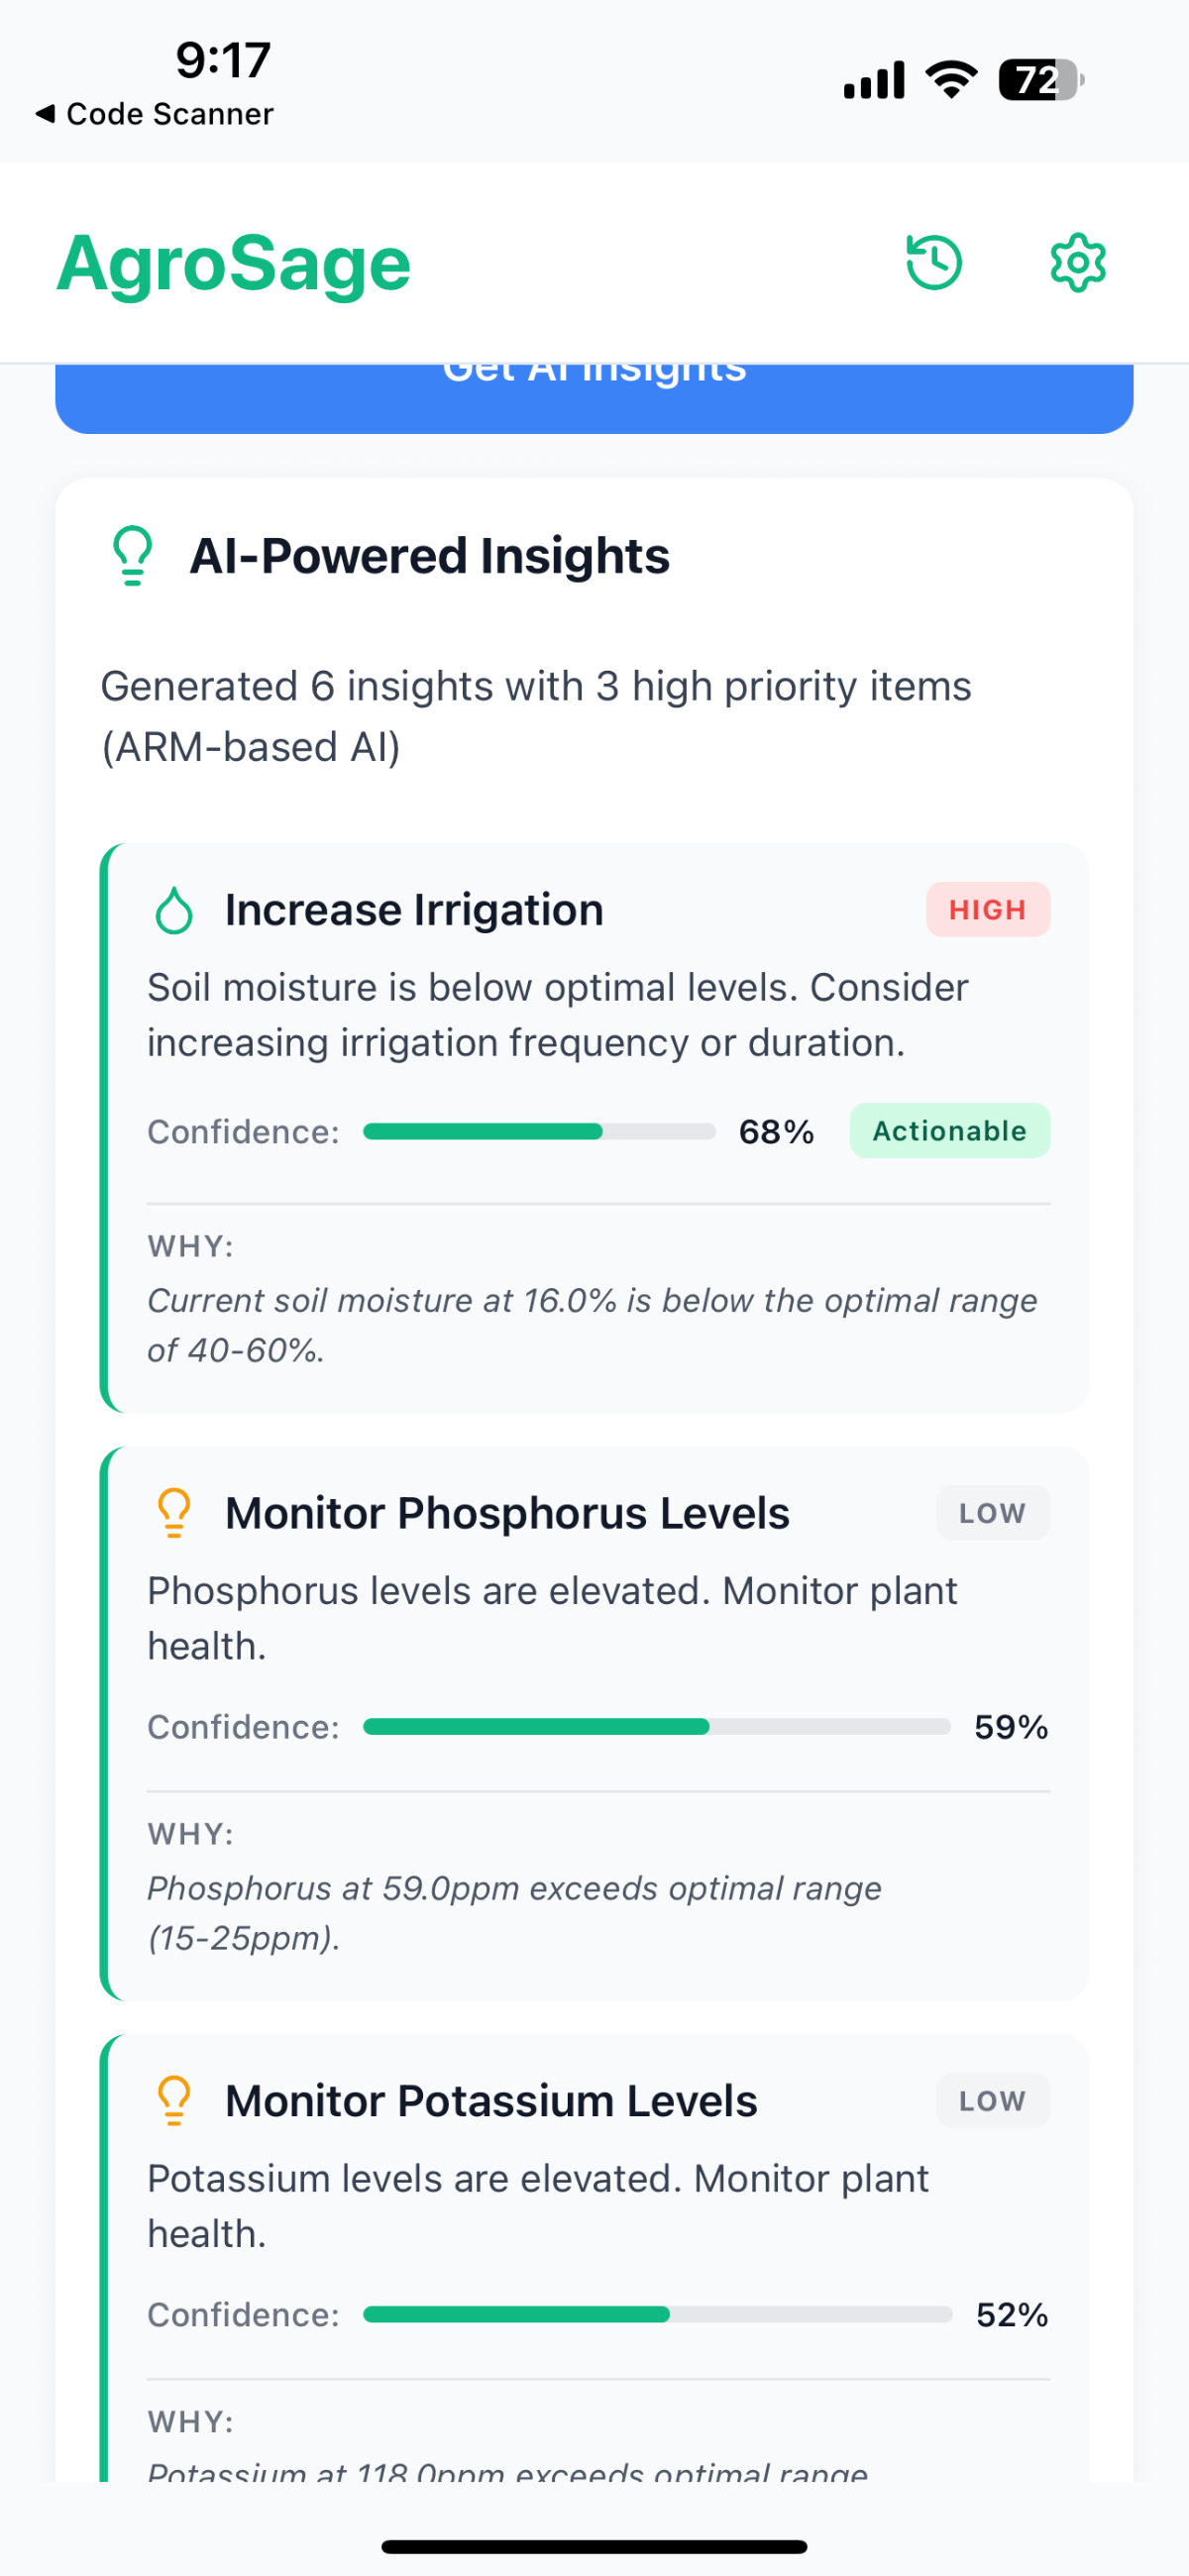
- AI Insights using ARM AI with trained model
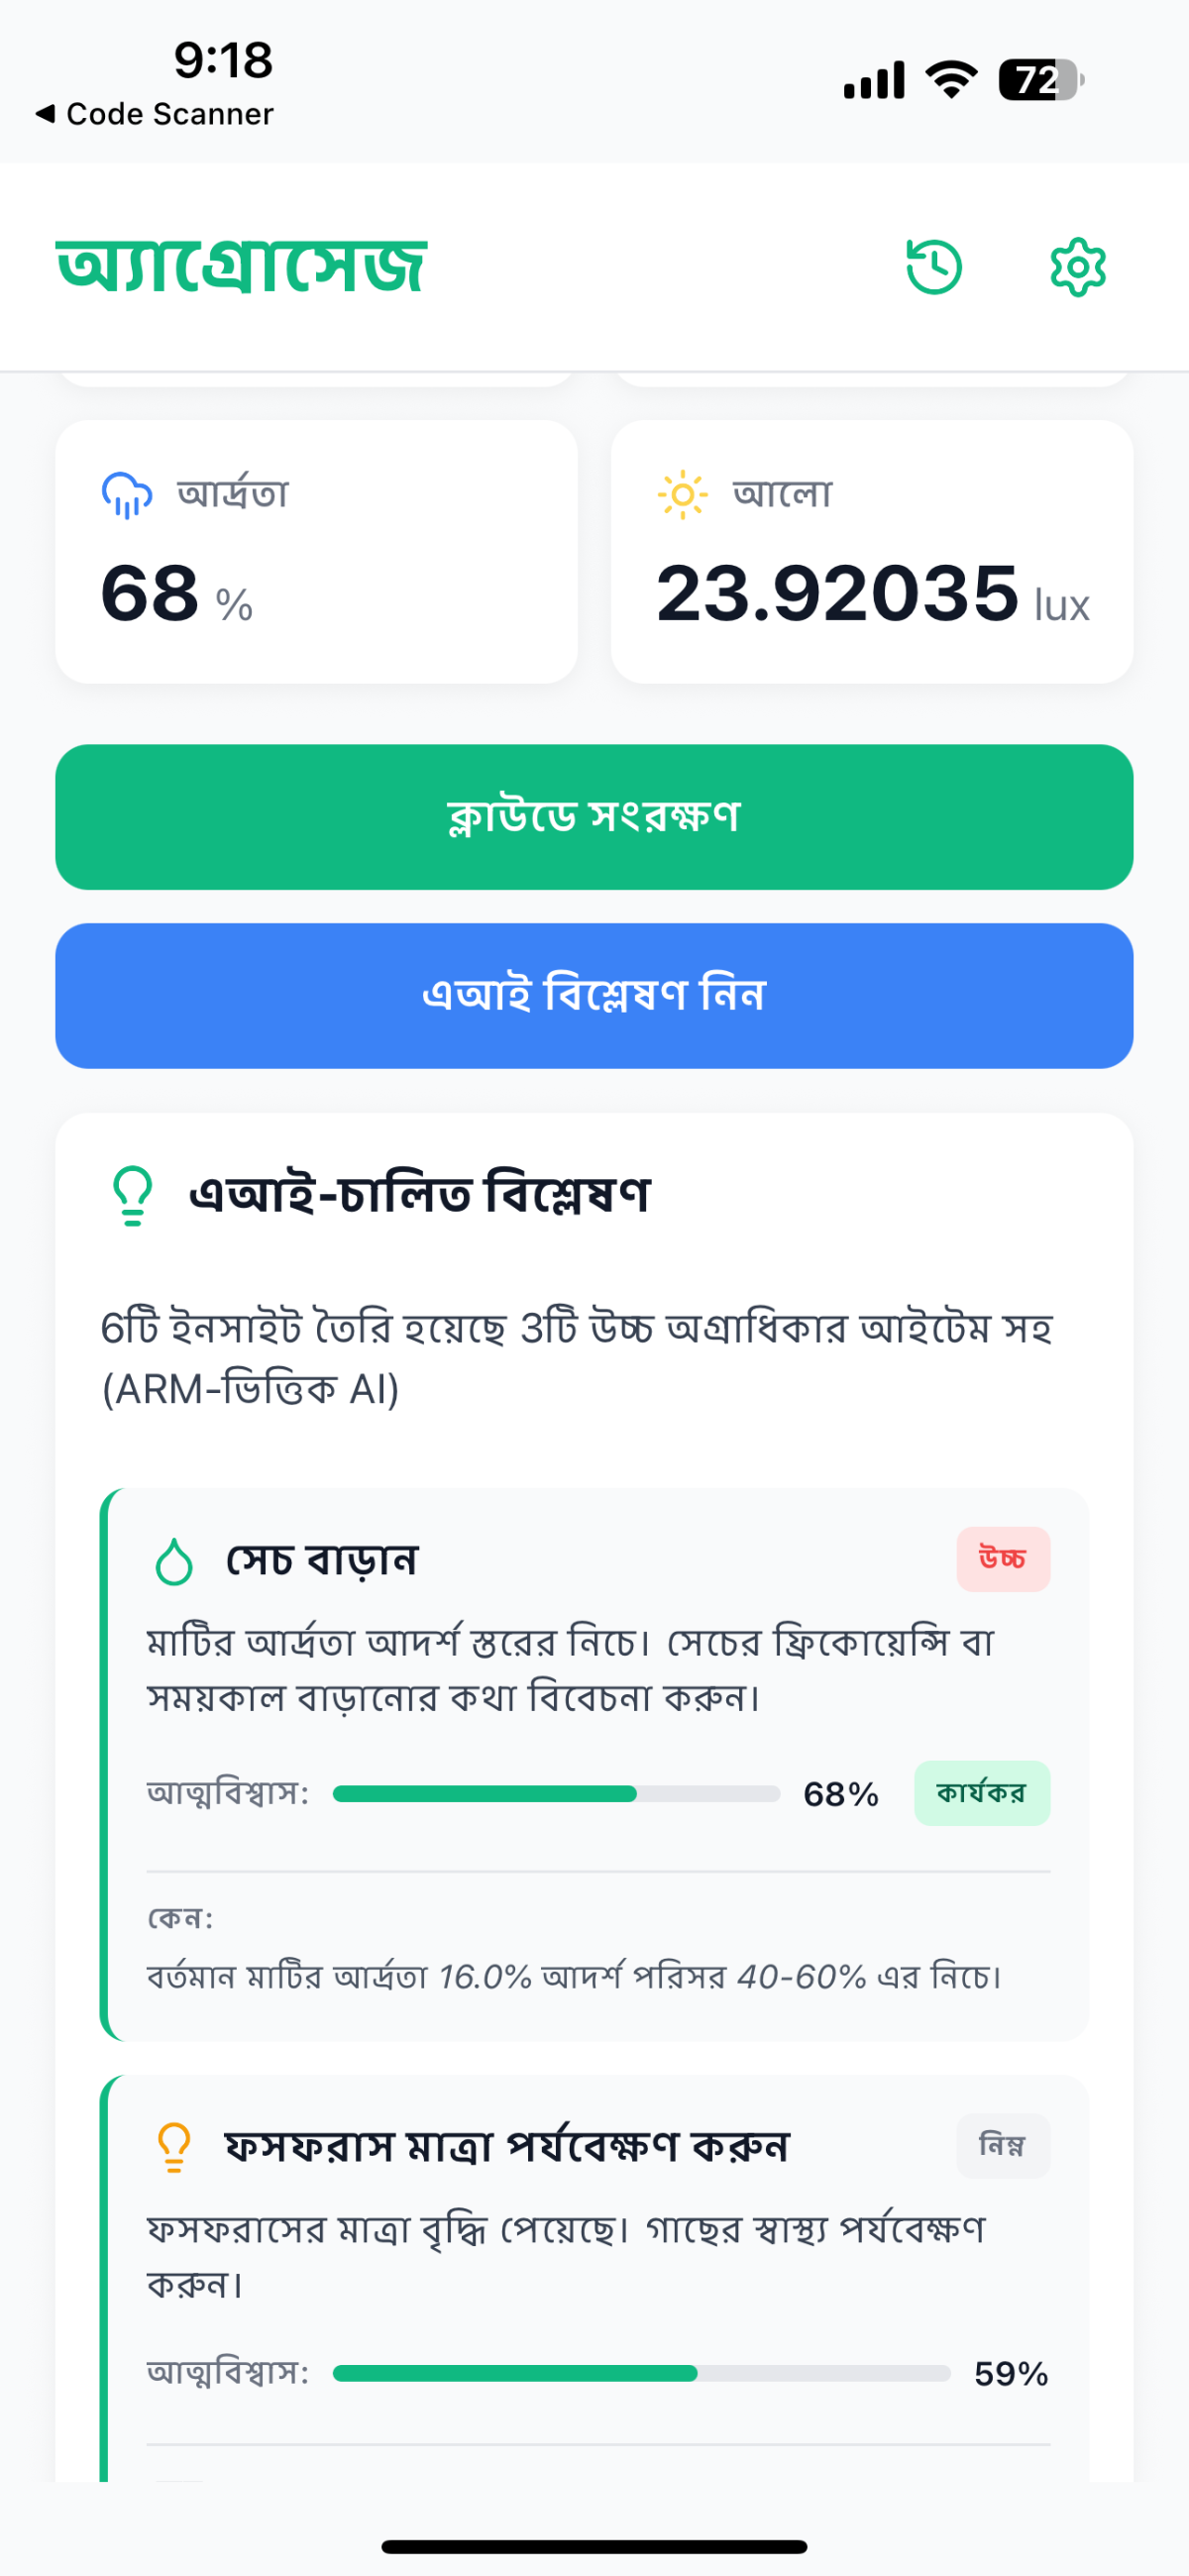
- Multi-Lingual Capability
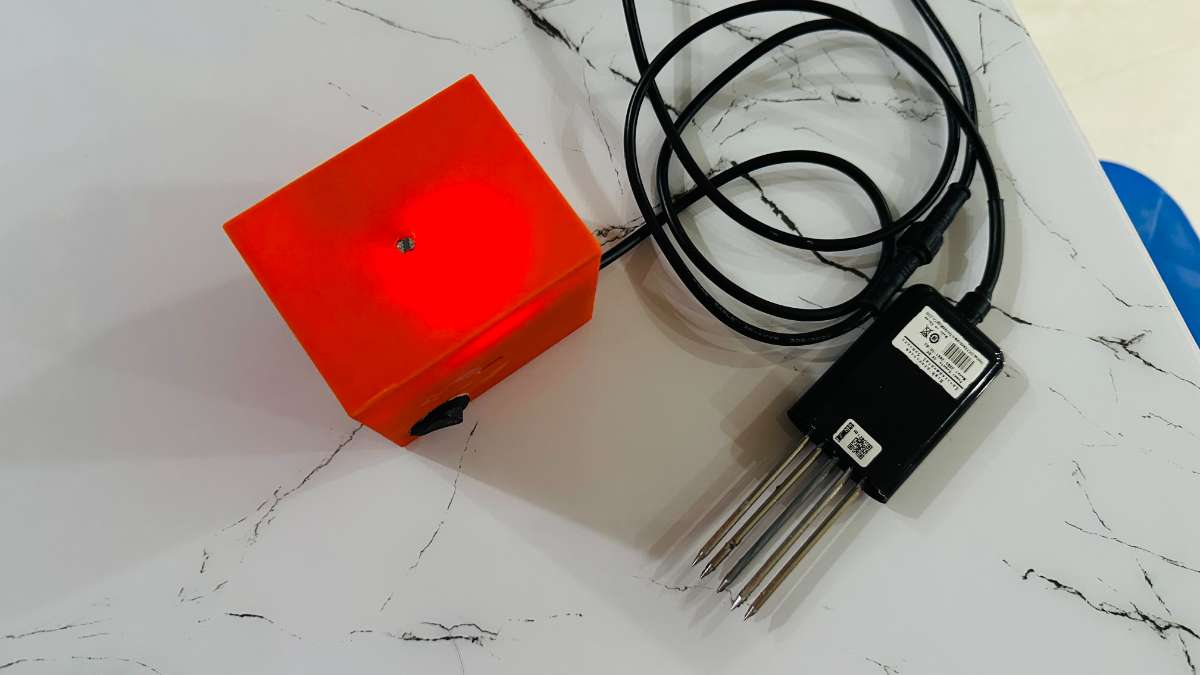
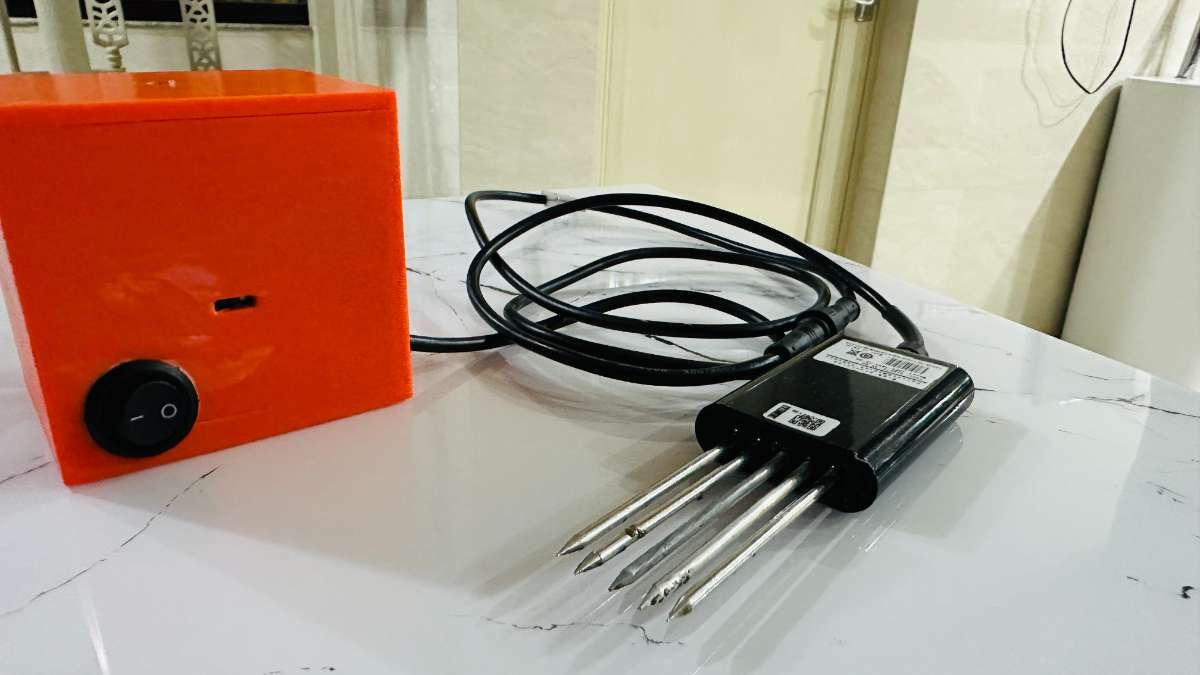
HARDWARE RGB INDICATION :
- Device Ready to connect with mobile
- Device connected with mobile and ready to measure
- Device measuring soil data
- Measuring Done
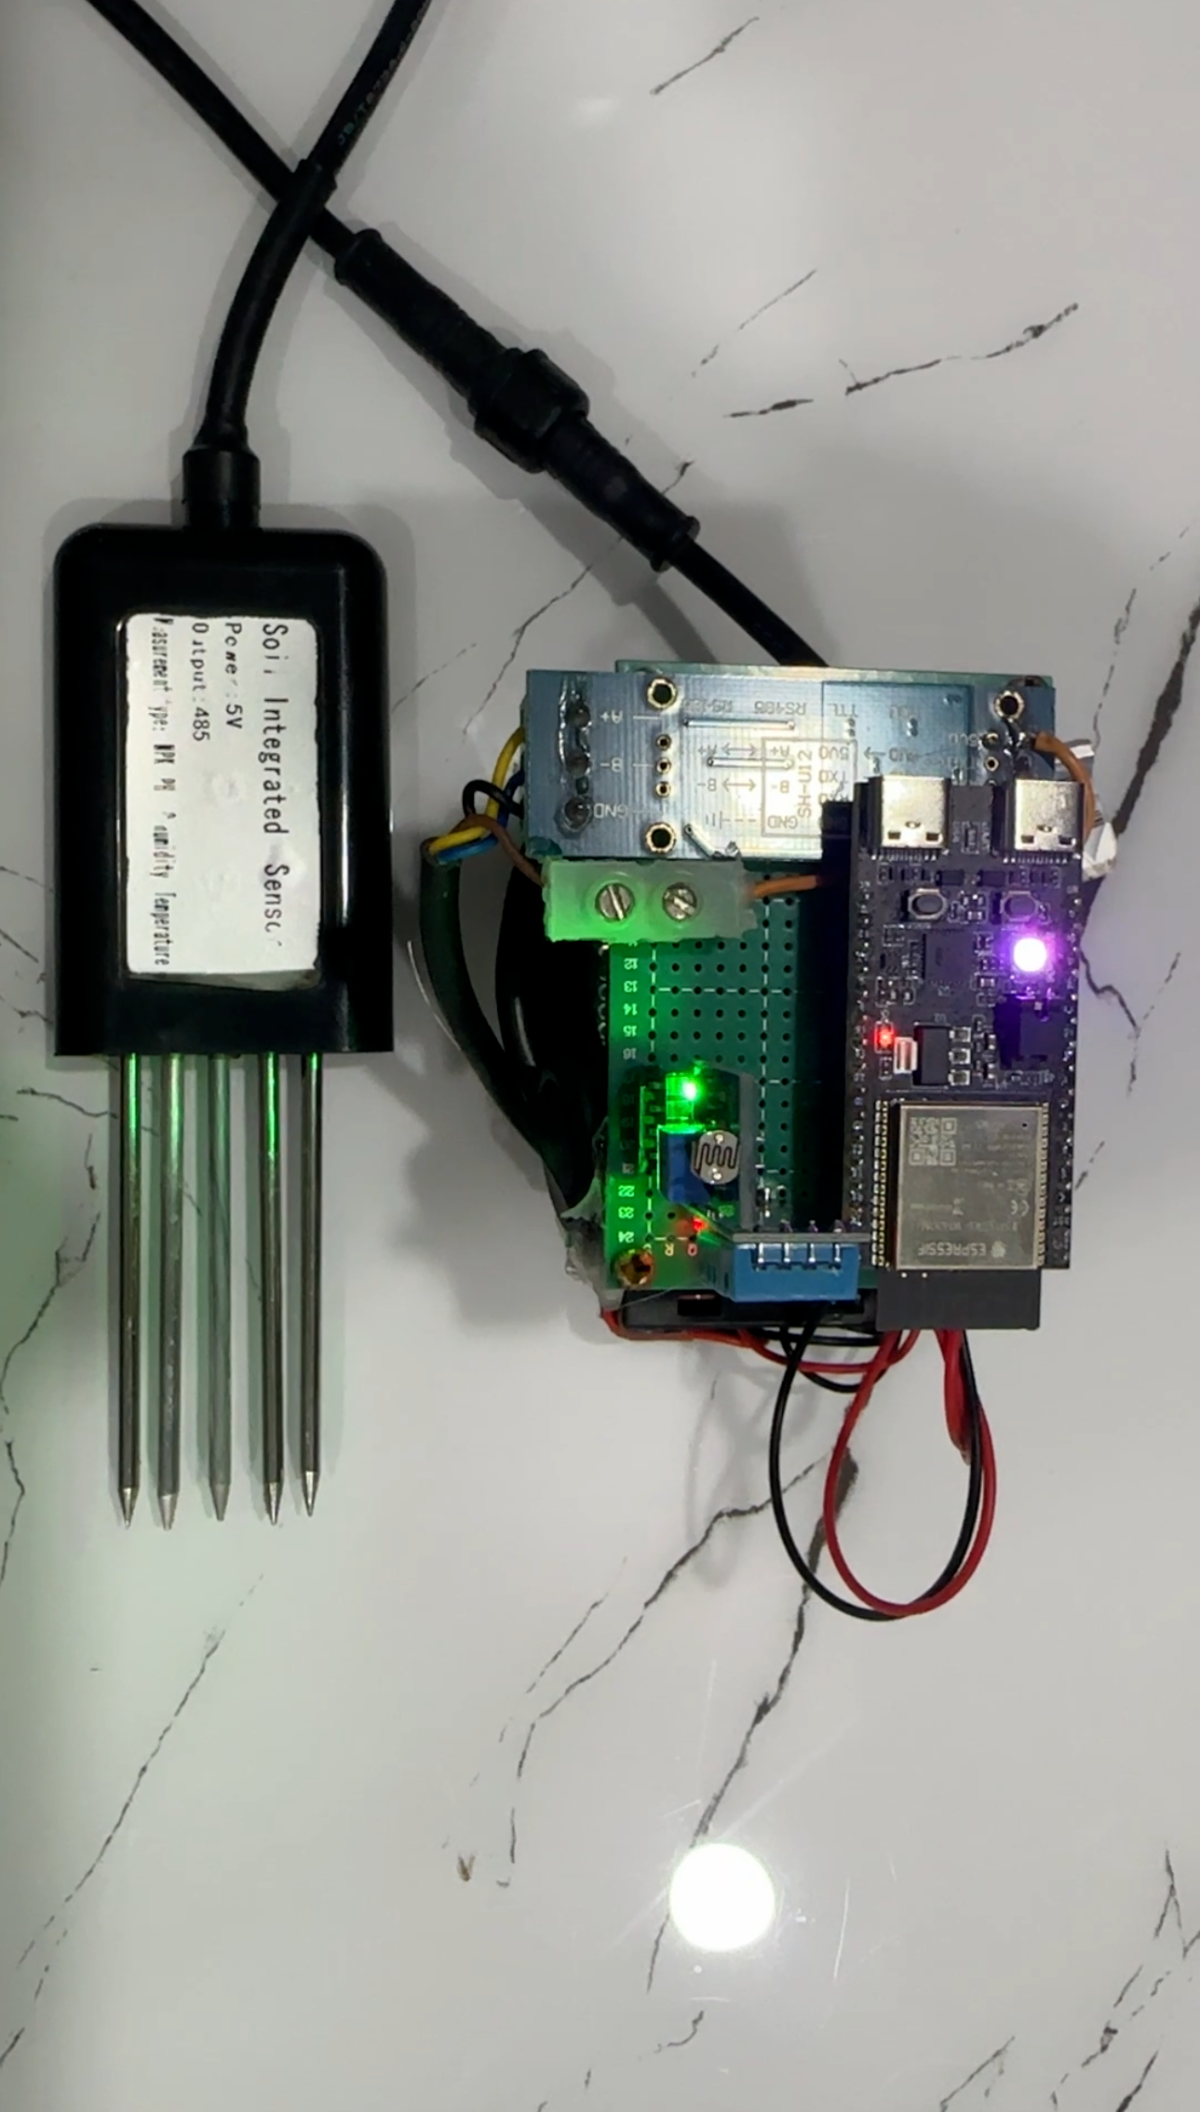
- Sending to the app