Topic Chosen: Community Development
Project statement: To design a toy car which automatically moves when we pour water into it with the help of transistor as a switch.
Abstract: The electricity is conducted when water is present which in turn turns on the transistor to produce a constant current to the DC motor which then brings in the motion of the car. This car is designed fully for entertainment purposes and not for commercial use.
Challenge identification:
To emphasize the importance of water drinking to kids
There is a study saying that children present today do not drink enough water and as a result, there exists many diseases among children. There were proposed many books and stories to emphasize the importance of water to children but they don’t hear that. As a result, all the strategies implemented goes waste. So it is very essential to educate the growing children about the importance of water. So there is a need for creative solutions to educate the children.
Criteria:
- The toy car designed should stop after some time and should not work for the full duration since the battery would be drained.
- The circuit shall be tested using a breadboard and can be altered later on.
- The circuit can be made into a final product with PCB.
Constraints:
- The overall circuit should be at optimal rate
- The circuit should not give an electrical shock to the users
- The outer model should be realistic to the children
- All components should be insulated and kept away from water
- The components used should work for a longer time
Ideating towards a solution:
So we can create a toy car using electronic principles to educate the importance of drinking water to children. The toy car will get power and move only if we provide water to it. So this simple toy car will create an impact in the young minds about the importance of water themselves. So they will start drinking water then onwards.
This toy car can be designed using transistors which provide power to the DC motor only when there is a current flow from the input side where water is present.
This simple electronic design using two cascaded NPN transistors can be used to turn on the circuitry. This creative and simple design will be having a great impact on the minds of the children.
Idea generation:
The core circuit design consists of two NPN transistors which are operated in switching mode. The circuit is made to turn on only when water is present. This voltage to run a DC motor can only be produced by the transistor acting as a switch. Else there may be huge power dissipation from the battery due to the high resistance of the water. This project can be implemented to produce some good thoughts about drinking and saving water for the younger generation.
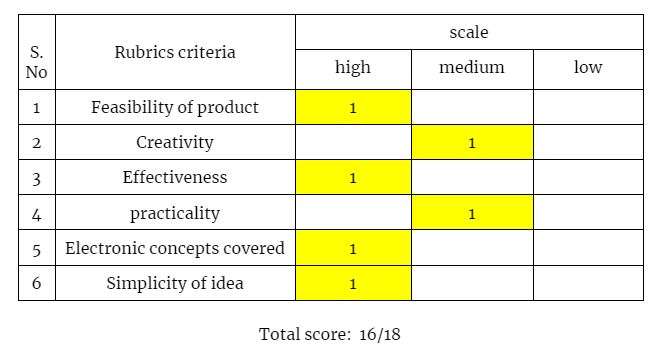
Feasibility Analysis Check:
Implementation
Building up of Circuit:
- Use two transistors in fixed bias configuration to make the transistor to work as a switch.
- Include the water's resistance in the circuit at the base terminal of the first transistor.
- Leave a two terminal wires that should be placed in the water
- Cascade the two transistors such that the collector of 1st transistor is connected to base of 2nd transistor.
- Connect the power supply to the collector terminals of both transistors.
- Connect the ULN 2003 IC chip to the output of the circuit (ie. the collector terminal of 2nd transistor)
- Refer the datasheet for connection pins of ULN 2003 to connect the power supply,ground terminals in the circuit, input to ULN 2003 (here: collector terminal of the 2nd transistor), output (here: to DC motor).
- Connect the negative terminal of DC motor to output terminal of ULN 2003 and connect positive terminal of DC motor to power supply.
Working of Circuit:
The main idea of this project is to work the transistor as a switch to turn on the motor when water is present.
The LT spice can be used to construct a design and simulate the design if it is correctly working. The aim is to construct a transistor as a switch. So at first to make the transistor on, when the current enters through it we should make use of two transistors cascaded.
Let us consider the first transistor alone. If the current is flowing in the base terminal then it turns on the transistor and all the current flows through the transistor and finally drops into the ground. If we connect the output now we won't get a voltage across the collector-emitter terminal. So when we connect another transistor from the collector terminal of the first transistor, we can change their response. So when water is present it allows flow of current and the current flows through the base terminal of the first transistor, then it produces 0 Volts at the output of the first transistor. Now this in turn makes the base terminal of 2nd transistor as 0 volt, so as a result, it acts as an open switch. So the power supply voltage is available to the DC motor at this time.
To check the impact in presence of real water, I have added a resistor in the circuit which imitates the characteristics of water. I have changed that resistance value and noted down the output voltage whether it was having an impact. But surprisingly I got the output voltage a constant one even though the resistance of the water was changing. Below here is the diagram of my circuit.

The below graph shows the generation of output voltage at various values of resistances of water.
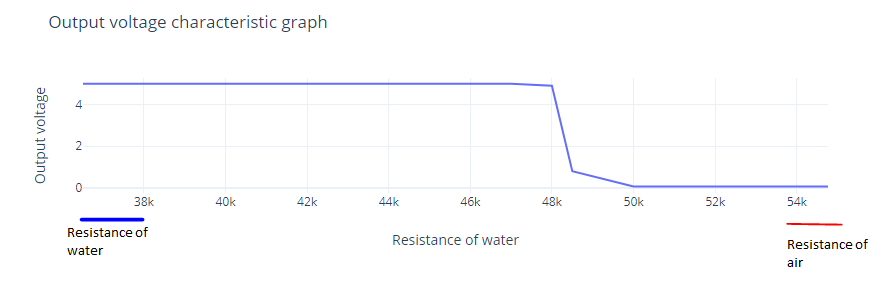
From this graph we can infer that the output voltage is present at a lower value of resistance that it is the resistance of water approximately. Whereas at higher resistances that it is the resistance of air, the output voltage is not present and it suddenly falls to 0 volts at higher resistances.
Purchasing:
- BC547 - 2 x 2 = Rs. 4
- DC motor - Rs. 50
- Resistors - Rs. 10
- Battery - Rs. 20
- PCB Board - Rs. 35
- Accessories and other expenses - Rs. 50
Approximate cost: Rs. 169
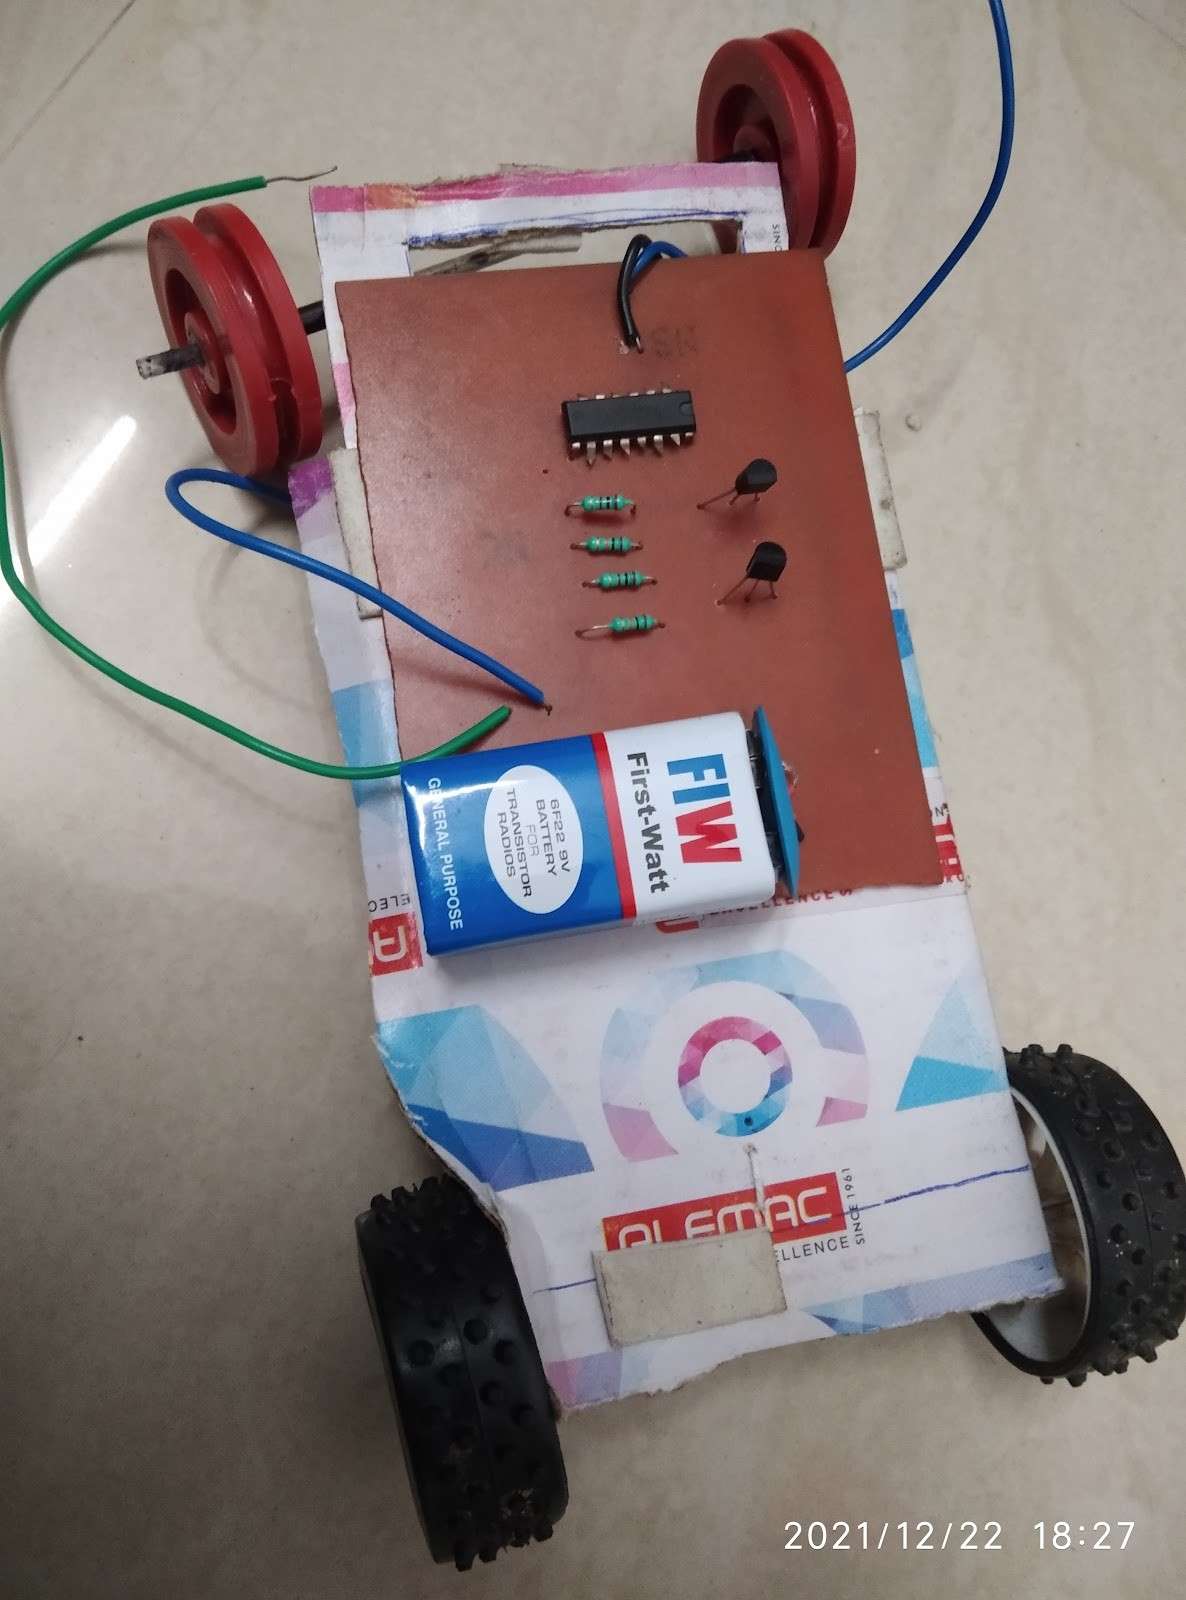
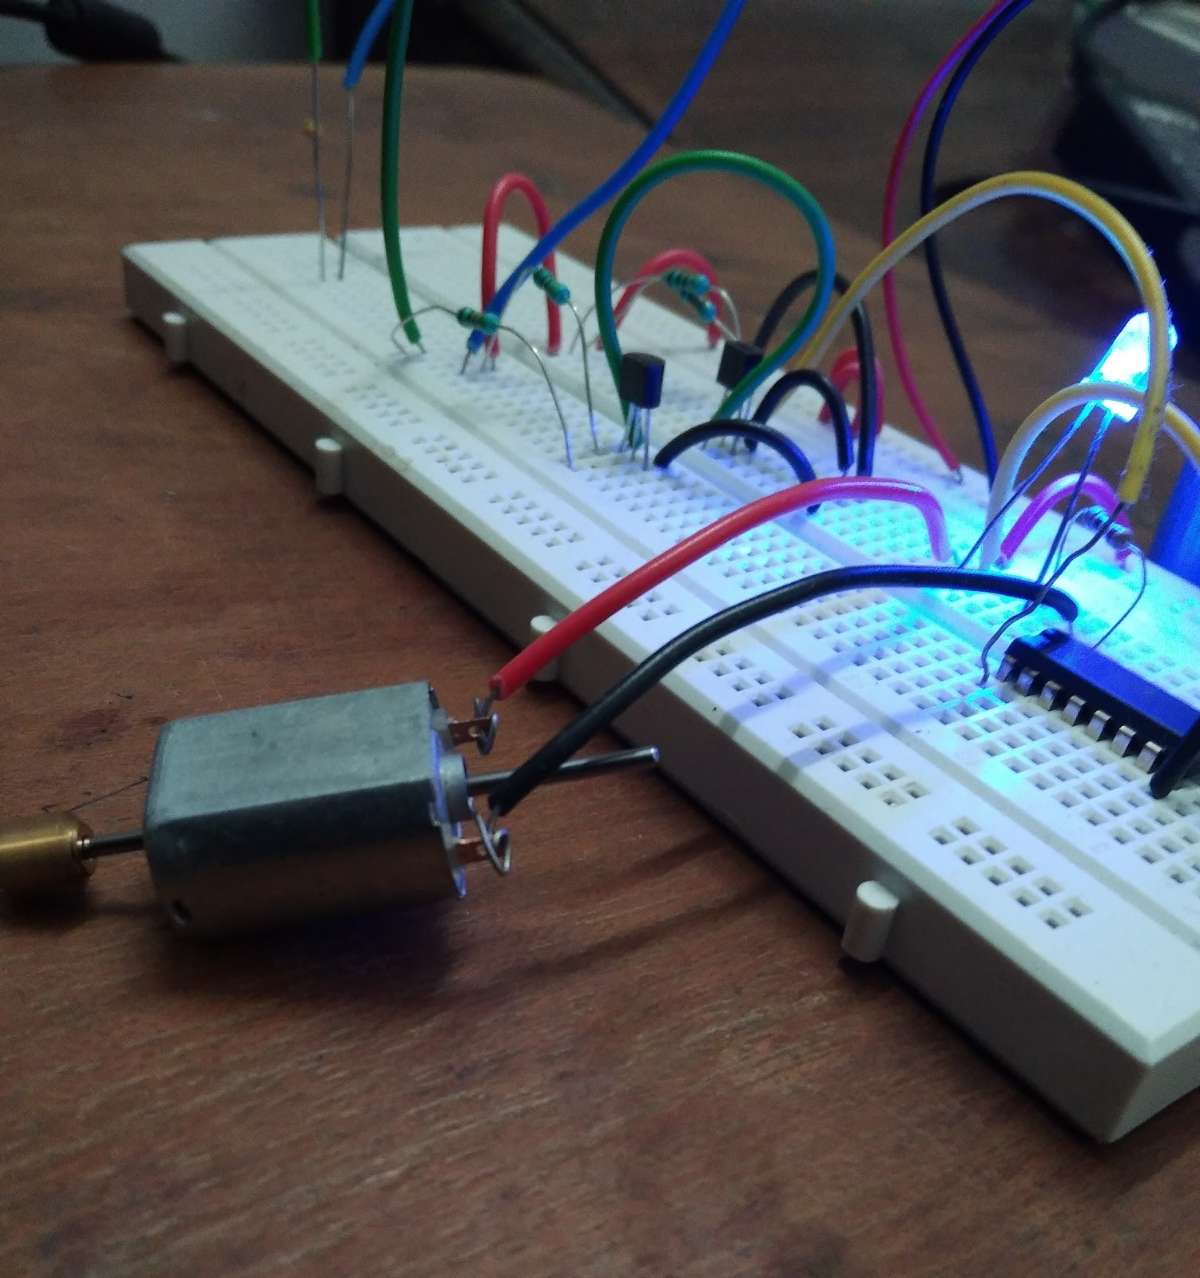
The prototype for the circuit diagram is started by connecting all the components as per the circuit diagram. The circuit is built as per the circuit diagram. Using a multimeter the nodal voltages are calculated. The voltages calculated with the help of LT spice coincided with the prototype voltages. The below shown diagrams are the prototype for my project
.png)
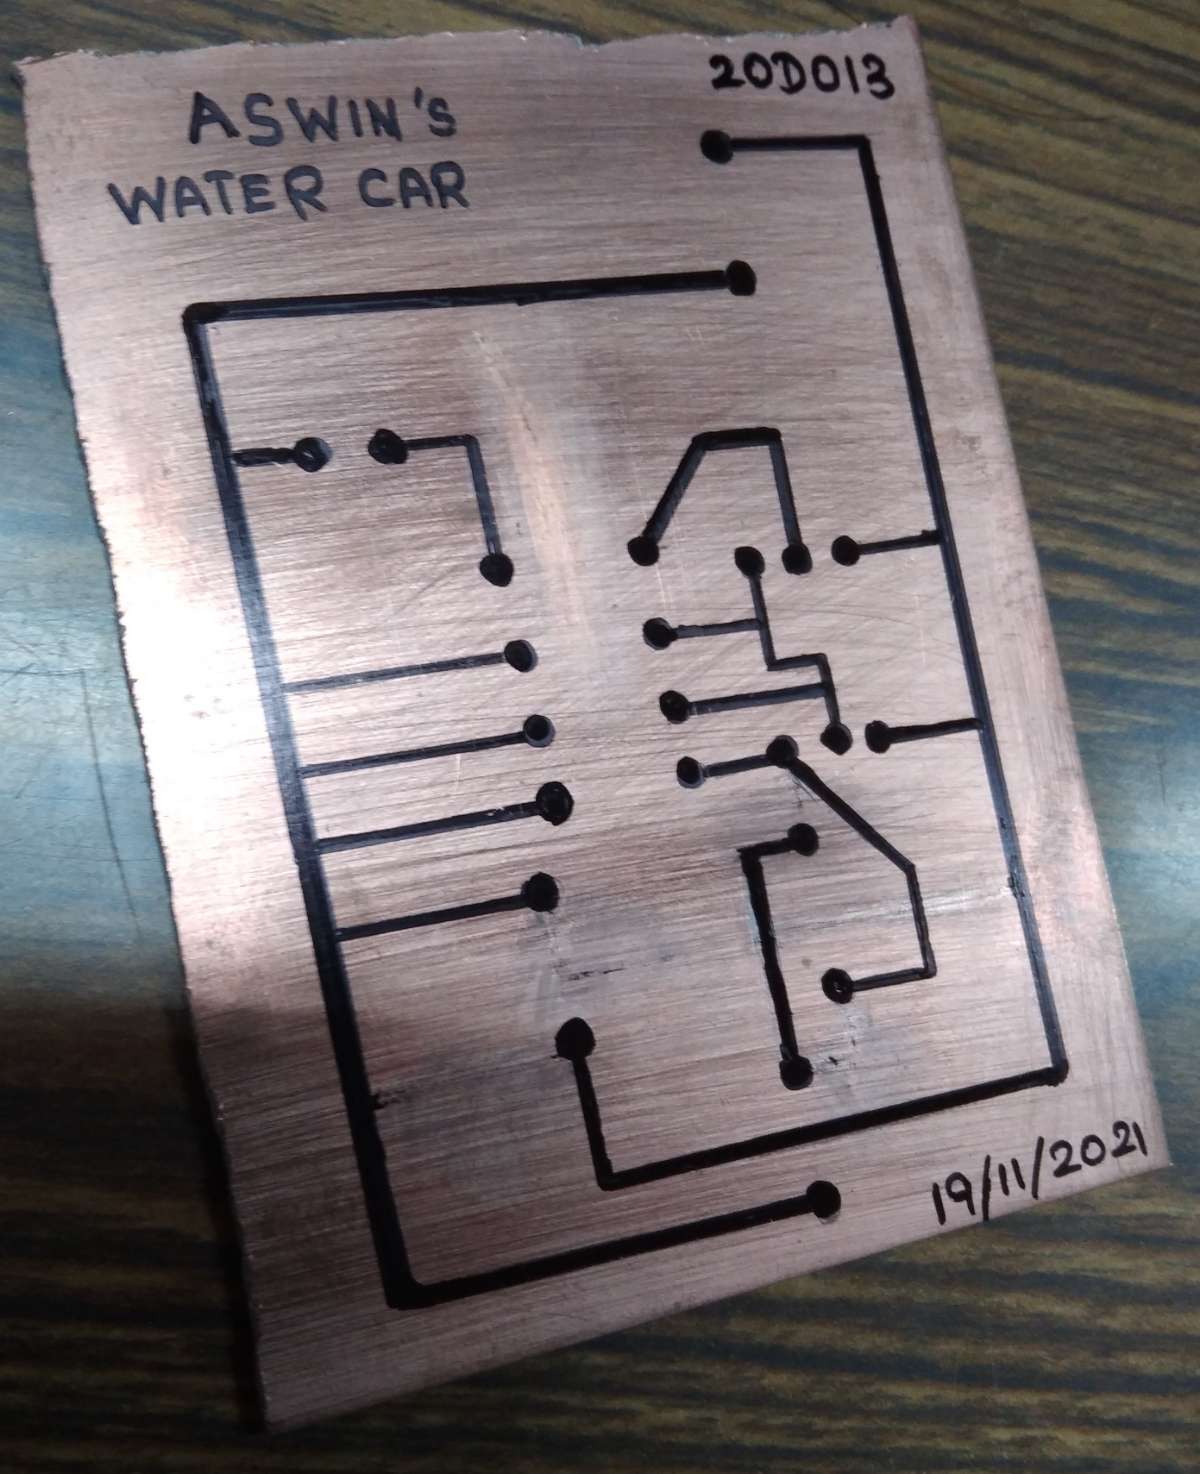
Conversion of prototype into PCB:
- To make the process of fabrication easier, draw the wiring connections with a permanent marker instead of using software
- And then etch the board with FeCl3 solution.
- Then start drilling the PCB.
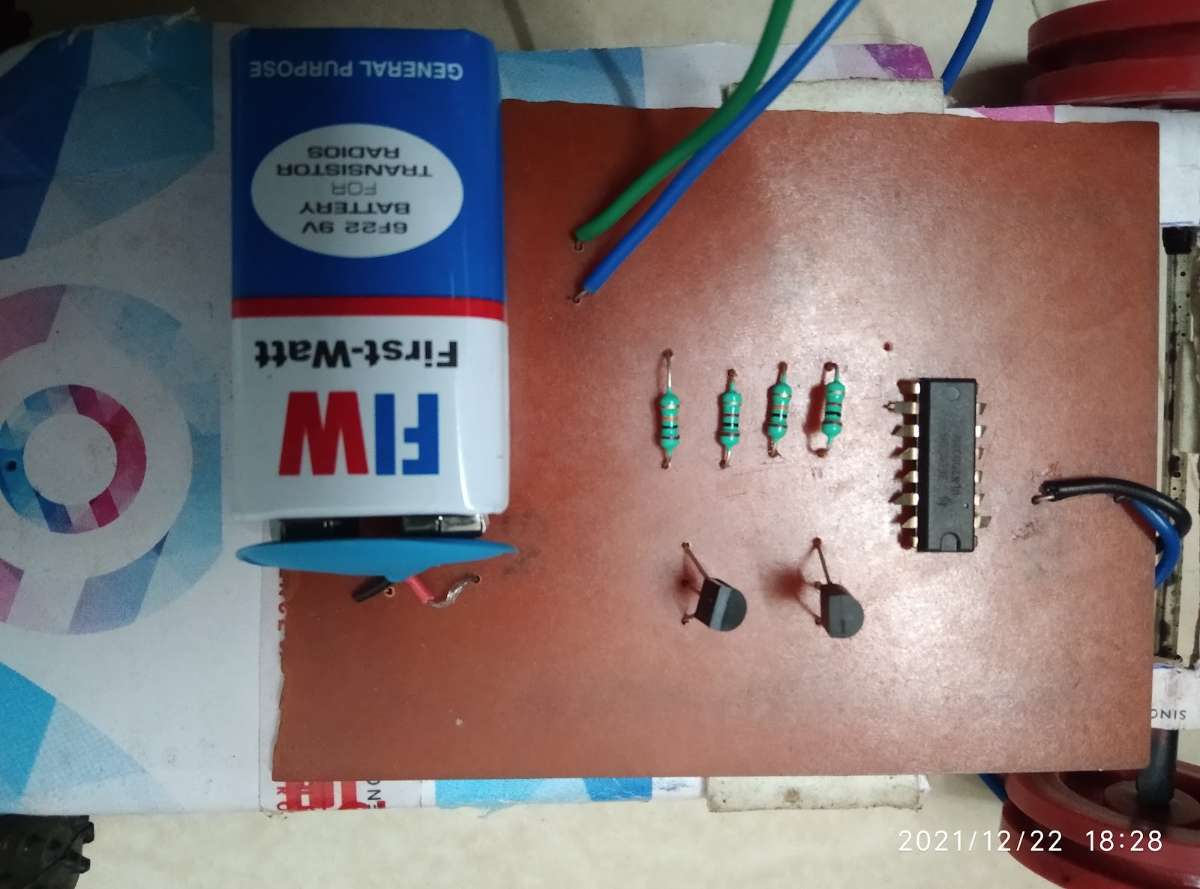
- Finally, solder all the components in their appropriate positions.
- Place the PCB in the cardboard meant for the car.
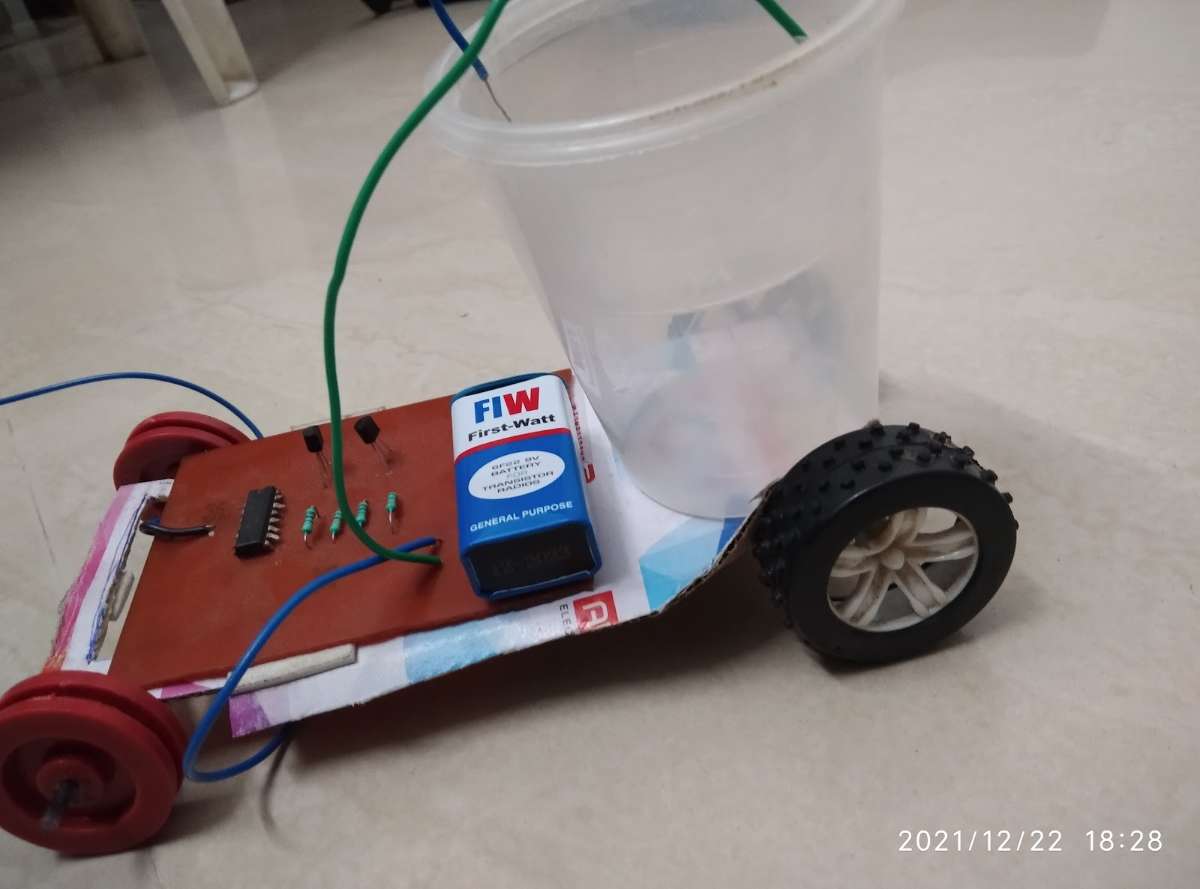
- Attach a cup to hold water. Connect the wires from the PCB to the cup to make contact with water.
- Connect the tires to the DC motor to make the car run.

Final product: