Fully Autonomous Emergency Medical Drone

Published May 17, 2024
 7 hours to build
 Intermediate

This drone delivers medicines to the patient very fast in emergency. We can easily send this drone up to a distance of 5 kilometers.

display image

Components Used

A2212 1000 KV BLDC Brushless DC Motor.
This BLDC motor is specially made for drones. Also, these motors consume less power and run faster than normal motors.
1
SimonK 30A BLDC ESC Electronic Speed Controller.
It controls the speed of motors.
1
Radiolink CrossFlight Flight Controller.
This is the programmable brain of the drone and we can program it and it controls the entire drone.
1
HD Propellers 8045(8X4.5)
We can't fly drones with this.
1
NEO-M8N GPS Module with Compass
Through this we fly the drone absolutely stable. And with this we can also fly autonomously.
1
11.1V 2200mAh 40C 3S Lithium Polymer Battery Pack
It is used to power the entire drone
1
Flysky FS-i6S 2.4GHz 10CH AFHDS 2A RC Transmitter With FS-iA10B 10CH Receiver
It controls the entire drone. And moves the drone left right and up and down
1
Description

STEP 1: First you have to build the frame of the drone.
STEP 2: After that the motors have to be assembled in the frame.
STEP 3: After installing the motors, you have to install ESC (Electronic Speed ​​Controller) in the drone.
STEP 4: After installing the ESC you have to install flight control.

NOTE-: You can use the flight controller as per your use and budget.
STEP 5: After installing the flight controller, you have to connect the signal wires of the ESC to pin numbers 1,2,3,4 of the flight controller.
STEP 6: You have to connect the receiver with the flight controller.

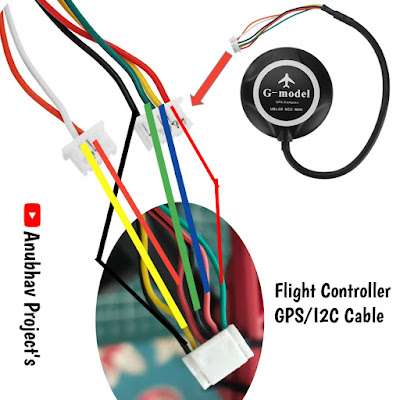
STEP 7: After installing the receiver, connect the M8N GPS to the GPS port on the flight controller.

STEP 8: After assembling all the components you have to install the landing gear

STEP 9: After building the entire drone, you have to program the entire drone with mission planner software and you can program it as per your requirement.

STEP 10: After programming you have to connect the battery.

STEP 11: Congratulations, you have successfully built your drone.

MY DRONE MAKING VIDEO -: 


MY PROGRAMING VIDEO -: 

GPS CONNECTION-:


Codes

Downloads

GPS Connection Digram Download
Crossflight circuit Download
ESC Circuit Download
Configuration Download
Programing Download
Comments
Ad