
Introduction:
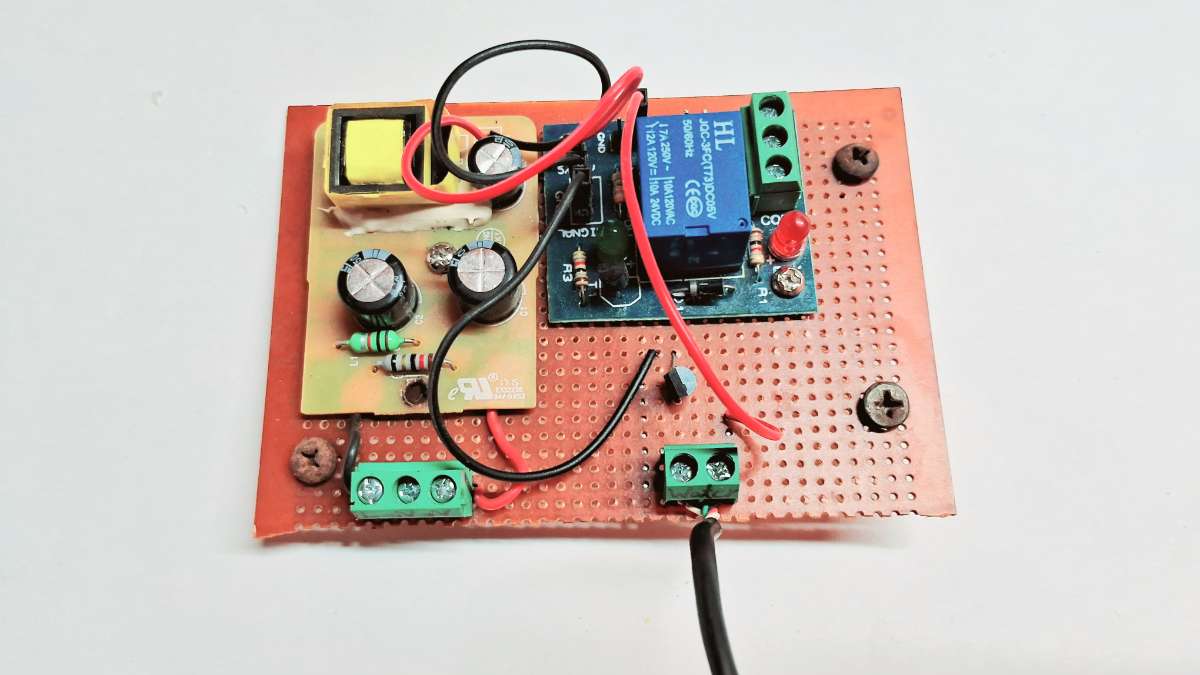
Creating an automatic water cooler pump using a PCB device with components like a relay module, 5V power supply module, BC547 transistor, and water level sensor involves several key steps and considerations:
Project Description:
Components Needed:
Relay Module: To control the higher voltage and current required by the water pump.
5V Power Supply Module: Provides the necessary power for the circuit operation.
BC547 Transistor: Acts as a switch to control the relay based on the signal from the water level sensor.
Water Level Sensor: Detects the presence of water in the cooler tank to decide when to activate or deactivate the pump.
Circuit Design:
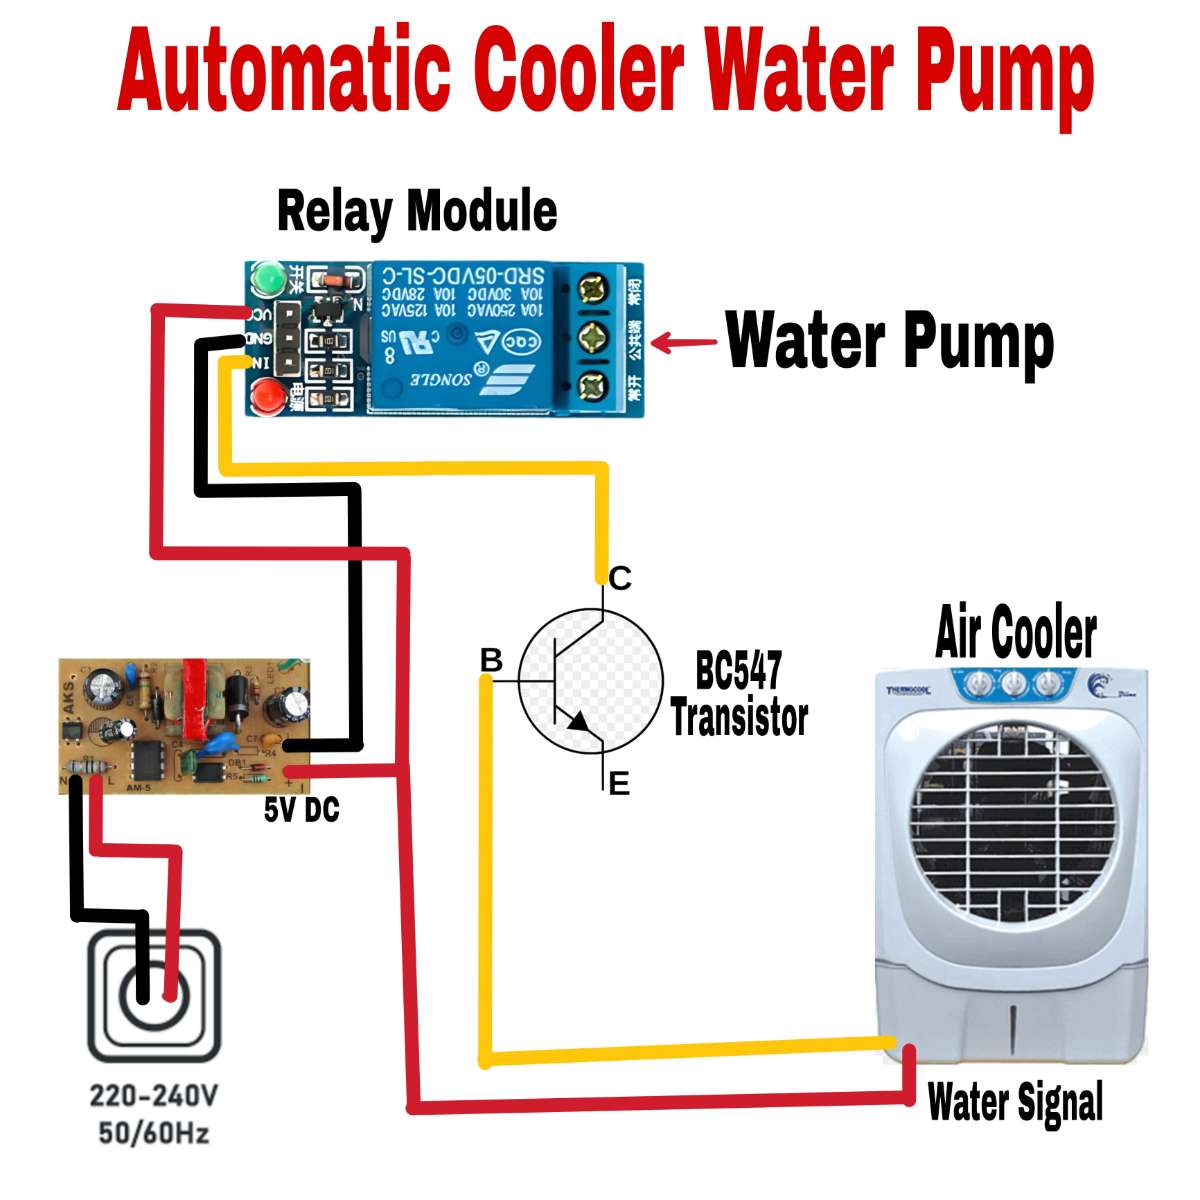
Working:
Power Supply: Ensure the 5V power supply module is capable of providing sufficient current for both the logic circuitry and the relay coil.
Transistor Control: Use the BC547 transistor as a low-power switch controlled by the water level sensor. When the water level is below a certain threshold (indicating the need for water), the sensor triggers the transistor to turn on.
Relay Operation: The transistor's activation triggers the relay module, which in turn switches the higher voltage (typically 220V or 110V, depending on your region) required by the water pump.
Safety Considerations: Implement appropriate safety measures such as fuses, proper grounding, and insulation to prevent electrical hazards.
Project Working Video:-
Sensor Integration:
Positioning: Place the water level sensor at a suitable height in the cooler tank to accurately detect when water levels drop below a specified point.
Sensor Output: Ensure the sensor provides a reliable signal (usually a change in resistance or voltage) that can effectively drive the transistor switch.
Testing and Calibration:
Initial Setup: Connect all components on the PCB according to the circuit diagram.
Testing: Power up the circuit and simulate different water levels to verify the pump activation and deactivation sequence.
Calibration: Fine-tune the sensor position and threshold settings to optimize the pump's operation for efficiency and reliability.
Deployment and Operation:
Mounting: Secure the PCB and components inside the cooler housing, ensuring they are protected from moisture and mechanical damage.

Monitoring: Regularly check the system for any signs of wear or malfunction, particularly focusing on sensor reliability and pump performance.
Maintenance: Periodically clean the sensor and check connections to maintain consistent operation.
Advantages:-
- Save Electricity
- Save Water Pump life
Conclusion:
By assembling and integrating these components effectively, you can create a reliable automatic cooler water pump system that enhances convenience and efficiency by ensuring the cooler always has an adequate water supply without manual intervention. This project not only showcases practical electronics skills but also addresses a common household need for automated water management in coolers.